Crochet Class 9: How to Weave in Crochet Ends Like a Pro!
You've spent hours working on your crochet project, carefully forming each stitch with love. Now comes the moment that makes or breaks your creation - weaving in those loose ends. I'll show you how to finish your work so securely that no tail will ever work its way free.
The Right Tools Make All the Difference
A sharp-tipped chenille needle has become my secret weapon for weaving. The size 14 needles glide through yarn fibers without splitting them. If you prefer blunt tips, those work too - the key is finding what feels natural in your hand. Keep both types in your crochet toolkit.
Before threading, check your tail length. It should stretch at least twice your needle's height. Anything shorter becomes frustrating to work with. When in doubt, leave more - you can always trim excess later.

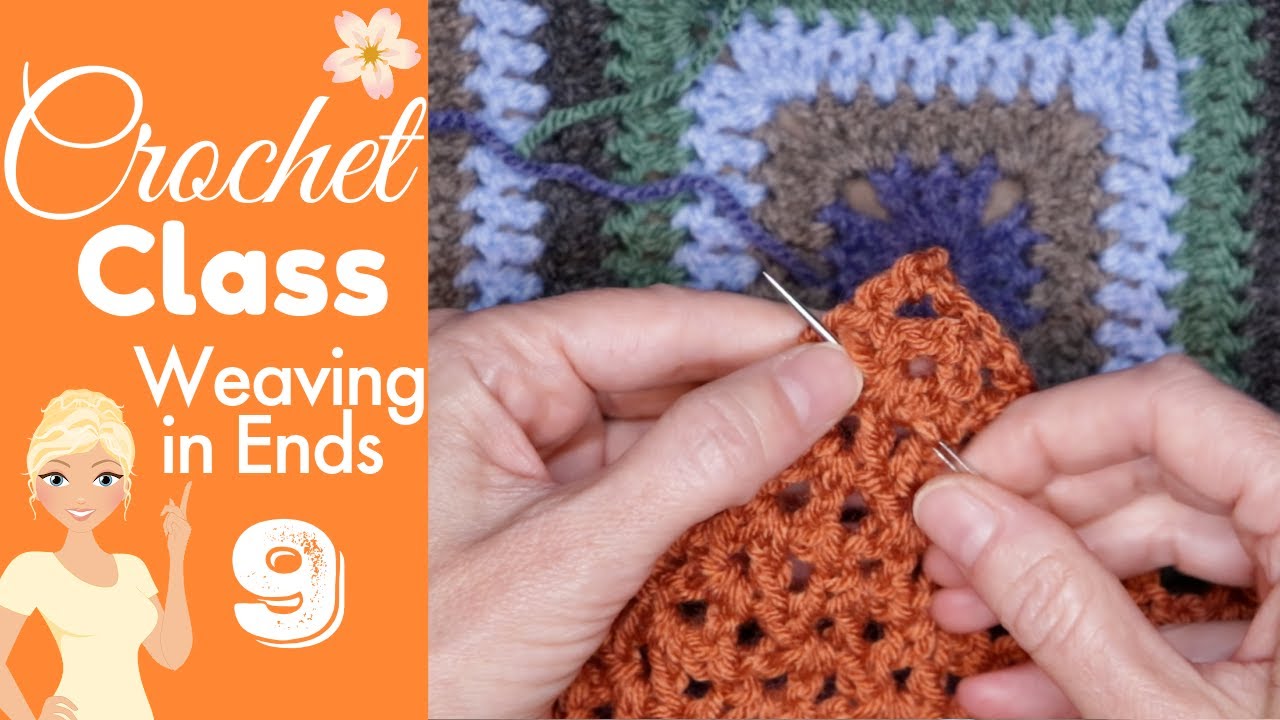
Mastering Solid Fabric Finishes
The golden rule? Work away from edges. I guide my needle straight down through the middle of a stitch, using my finger underneath to check positioning. Pull the yarn through with gentle tension - too tight distorts your perfect stitches.
Here's my professional technique:
-
Weave horizontally through several stitches
-
Reverse direction without retracing your path
-
Change angles to create friction points
-
Repeat this back-and-forth pattern three times
Watch how the yarn behaves as you work. A slight give when you stretch the fabric shows ideal tension. For stubborn short tails, use the needle's eye to coax yarn through tight spots rather than the point.
Lacy Pattern Adaptations
Openwork crochet requires different tactics. Look for clusters where multiple stitches of the same color meet - these make perfect anchor points. I weave tails beneath existing stitches rather than through them to maintain delicate laciness.
Corners offer natural weaving paths. Follow the yarn's outline along the turn, securing tails with those same trusted back-and-forth motions. The key is matching your weaving path to the basic crochet techniques used in your project.
Pro Tips I've Learned Through Experience
Always match your needle thread color to surrounding stitches - this hides ends better than magic. For colorwork projects, weave each tail into its corresponding color section. When working with variegated yarns, choose the dominant color in that area.
Washing tests your work. If ends peek through after blocking, lightly tug surrounding stitches to redistribute the yarn. For absolute security on wearables, split thick tails and weave each ply separately.

Take Your Skills Further
Once you've mastered basic weaving, explore advanced securing methods like the duplicate stitch technique. It creates invisible finishes for lightweight projects where bulk matters most.
Remember - beautiful crochet deserves beautiful finishes. With these techniques, your ends will stay put through years of use and washing. Now go weave with confidence, knowing your hard work will remain as perfect as the day you completed it.
Weaving in crochet ends may seem like a small step, but it’s the final touch that elevates your work from homemade to professional. With the right tools, technique, and attention to detail, you can ensure your project stays secure and looks polished for years. Whether you're working on solid fabrics, delicate lace, or colorful designs, mastering this skill will give you confidence in every finish.
Take the time to weave with care—your hard work deserves it. Now that you know the secrets, your crochet will not only be beautiful but also built to last. Happy crocheting!
FAQs
1. Why do I need to weave in my crochet ends?
Weaving in ends secures your stitches, stops your project from unraveling, and gives a neat, finished look. Skipping this step can cause your hard work to come undone over time.
2. What’s the best needle for weaving in ends?
A sharp tip needle is good for dense fabrics, while a blunt tip is better for looser stitches to avoid splitting the yarn. Choose the needle that feels comfortable and fits your yarn weight.
3. How long should my yarn tail be for weaving in?
Aim for a tail at least twice as long as your needle. This length gives you enough yarn to work back and forth and secure it properly.
4. Can I use a crochet hook instead of a needle?
Yes! Use a crochet hook to pull your yarn tail through nearby stitches. This can be especially helpful for bulky projects or when the tail is too short for a needle.
5. How do I keep my woven ends from coming loose?
Weave the yarn in back and forth at least three times and avoid the edges of your work. Make sure not to pull too tightly or leave it too loose.
6. Should I knot my yarn when weaving in ends?
Knots can make your work bulky and sometimes come undone over washing. If you must use a knot, hide it within your stitches and keep it discreet.
7. What’s the best way to weave in ends on lace or openwork?
Choose the densest area to weave in, match yarn colors closely, and follow the path of existing stitches to hide the tail.
8. What do I do if my yarn tail is too short?
Thread the short end through the needle’s eye or use the eye to push it through stitches. If needed, try weaving in a different direction.
Christa Patel is the creator behind The Secret Yarnery, a popular crochet resource for beginners and experienced makers. With decades of crochet experience, Christa is known for her clear instructions, supportive teaching style, and passion for helping others learn. Her YouTube channel, The Secret Yarnery, features easy-to-follow tutorials, creative patterns, and tips for mastering new skills.
Based in Nairobi, Kenya, Christa shares her love of crochet with a global audience. She believes in making crochet accessible, fun, and relaxing for everyone. Whether you're picking up a hook for the first time or sharpening your skills, Christa’s tutorials and friendly community will inspire your next crochet project.
Find more from Christa on YouTube, Instagram, and The Secret Yarnery website.
About the Author
With a passion for crafting easy, beginner-friendly tutorials and patterns, Christa inspires crafters of all skill levels to unleash their creativity worldwide. She encourages yarn lovers to connect, create, and crochet a world filled with beautiful handmade treasures!
Crochet Class 9: How to Weave in Crochet Ends Like a Pro!