Crochet Shoulder Shrug Tutorial - Easy, Stylish Step by Step Pattern!
Learn how to crochet a simple yet stylish Crochet Shoulder Shrug with this easy-to-follow guide, inspired by Christa's tutorial at The Secret Yarnery! Perfect for adding a touch of warmth and elegance to any outfit. Christa's detailed video tutorial walks you through each step, making this project accessible for crocheters with some experience under their belts.
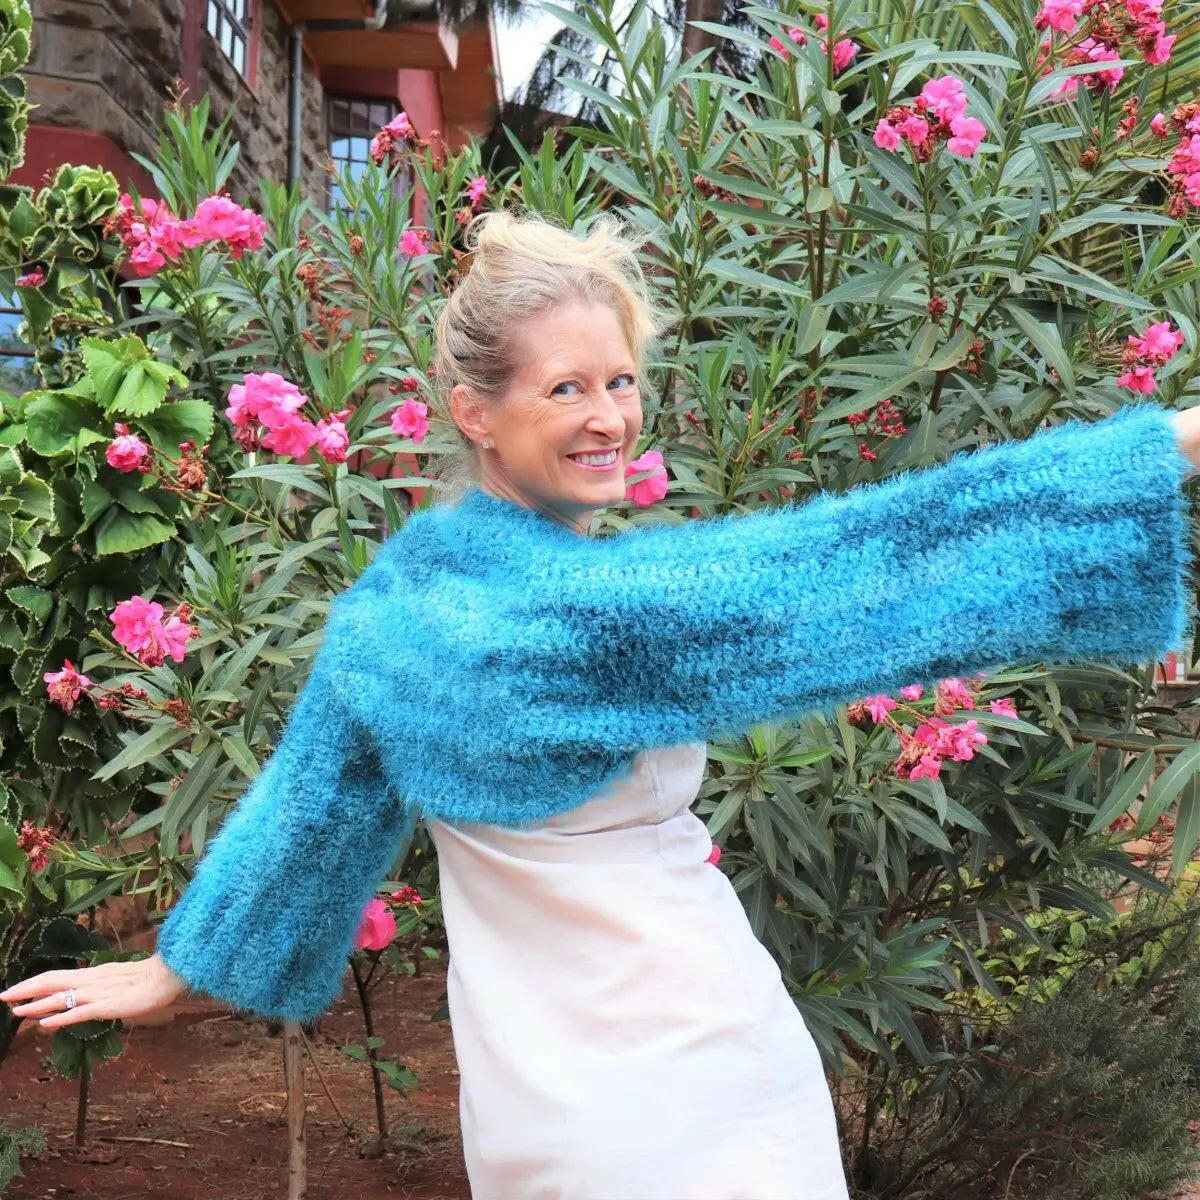
Project Overview: The Easiest Fancy Shrug
Have you ever wanted to create something that looks intricate but is surprisingly simple to make? This Crochet Shoulder Shrug is the answer! It's basically a rectangle, making it a fantastic project for confident beginners looking to expand their skills. The use of a textured yarn adds visual interest, creating a "fancy" look without requiring complicated stitches. This shrug is perfect for layering over sundresses, tank tops, or even long-sleeved shirts, allowing you to extend your wardrobe into the cooler seasons.
What are the benefits of this project?
- Easy Construction: The rectangular shape makes it simple to crochet.
- Textured Look: The yarn does all the work to create a visually appealing piece.
- Customizable Size: Easily adjust the length and width to fit your body perfectly.
- Great for Stash Yarn: Use up those interesting yarns you've been hoarding!
- Versatile: Wear it as a shrug, a shawl, or even a scarf.
Materials You'll Need
Before you start, gather your materials. Having everything on hand will make the process smoother and more enjoyable.
-
Yarn:
- Christa used Polar Eyelash yarn, which is similar to Polar Soft. You can find similar yarns on icar.com.
- However, the beauty of this project is that any yarn will work!
- Consider using soft yarns like cotton or other blends that feel comfortable against your skin.
- Bulky or Worsted Weight yarns are ideal for achieving a similar texture and drape.
- Quantity: Christa used two 50g balls (100m each) of the Polar Eyelash yarn. Keep in mind that you may need more or less depending on the yarn you choose and the size you make.
-
Crochet Hooks:
- A larger 7mm hook for the foundation chain. This helps create a looser chain that won't curl up.
- A smaller 6mm hook for the rest of the project.
- If you're using different yarn, always refer to the yarn label for the recommended hook size.
-
Other Supplies:
- Scissors for cutting yarn.
- A darning needle for weaving in the ends.
- Stitch markers to help you keep track of your stitch counts, especially when working with textured yarn.

Gauge and Sizing
How do you determine the right size for your shrug? It's all about customization!
To determine the length of your foundation chain, measure from one wrist all the way up across your shoulders, down to the other wrist. This will give you the overall length of the shrug.
Keep in mind that crochet tends to stretch, especially with wear. Christa recommends accounting for this stretching – the finished piece will likely stretch about 2 inches per sleeve. For example, her initial measurement was 54 inches, but she reduced it to 52 inches to compensate for the anticipated stretching.
The width of the shrug is determined by how many rows you crochet. Christa's shrug was 16 inches wide. You can adjust this to your liking, depending on how much coverage you want.
Getting Started: The Foundation Chain
Let's get started with the foundation chain – the very base of your shrug!
-
Creating the Slip Knot:
- Make sure your working yarn is over your hand.
- Create a loop and pull the yarn through to make a slip knot.
- Don't pull the slip knot too tight, especially when working with a textured yarn like the Polar Eyelash.
- Place the slip knot on your larger hook (7mm in this case).
-
Chain Stitching:
- To easily keep track of your stitch counts, chain in sets of 10.
- Christa chained 10, then placed a stitch marker on the loop under the hook to mark the 10th chain.
- Continue chaining in sets of 10, marking each set with a stitch marker.
- While chaining, make sure to maintain a loose tension. Tight chains can make the first row of double crochet difficult.
- Christa needed 120 chains in total (approximately 51 inches) for her project.
-
Why use a larger hook for the chain?
- Using a larger hook for the foundation chain helps prevent it from curling up too tightly.
- It provides a looser base for the first row of double crochet, making it easier to work into the chain stitches.
The First Row: Working into the Chain
This is often the trickiest part of any crochet project, but don't worry, we'll get through it together!
-
Switching Hooks:
- Remove the larger hook (7mm) from the foundation chain.
- Replace it with the smaller hook (6mm).
-
Preparing for Double Crochet:
- Chain 1 (this chain does not count as a stitch).
- Wrap the yarn around the hook.
- Skip the first chain stitch.
-
Double Crocheting into the Chain:
- Working into the chain can be a bit tricky, especially with textured yarn, so take your time and be patient.
- Look closely for the "V" shapes that indicate each stitch. These Vs can be small, especially with fuzzy yarn, so don't be afraid to use your fingers to feel for them.
- Wrap the yarn around the hook and insert the hook into the chain stitch.
- Pull up a loop, wrap the yarn around the hook again, and pull through two loops.
- Wrap the yarn around the hook once more and pull through the remaining two loops. This completes your first double crochet stitch!
- Continue making one double crochet into each chain stitch across the entire row.
-
Tips for Working with Textured Yarn:
- Don't worry if you only catch one strand of the chain stitch. With this type of yarn, it's more about getting the stitch in there.
- Focus on getting the yarn securely onto your hook, rather than just going into the fuzz.
- If you lose your place, wiggle your fingers along the chain to feel where you've already placed stitches.
-
Checking Your Work:
- After the first 10 stitches (between stitch markers), pause and count to make sure you have the correct number.
- If you're off by a stitch or two, don't fret! Simply add or skip a stitch as needed – the textured yarn is very forgiving and will hide small imperfections.

Rows 2 and Beyond: Easy Double Crochet
Here's where the magic happens – and where the project gets much easier!
-
Turning:
- At the end of each row, chain 2 and turn your work. This chain 2 counts as your first double crochet stitch of the next row.
- To help you keep track of the last stitch on the return row, place a stitch marker in the second chain of your turning chain.
-
Working Between the Posts:
- Instead of working into the individual stitches, work into the spaces between the double crochet posts from the previous row.
- This technique simplifies the project significantly, making it much faster and more enjoyable.
- Wrap the yarn around the hook.
- Insert the hook into the space between the posts.
- Pull up a loop, wrap the yarn around the hook again, and pull through two loops.
- Wrap the yarn around the hook once more and pull through the remaining two loops.
- Continue repeating this pattern across the entire row.
-
Tips for Maintaining Straight Edges:
- Be extra careful at the end of each row to ensure you maintain the same number of stitches. It's easy to accidentally add or drop a stitch at the edge, which can cause your rectangle to become uneven.
- Pay close attention to your turning chains to ensure they're included in your stitch count. Remember, that chain 2 counts as a stitch!
-
Dealing with Mistakes:
- If you accidentally skip a space, simply add an extra double crochet stitch in the next row to compensate.
- If you accidentally make two double crochet stitches in one space, skip a space in the next row.
- Again, the textured yarn will help to conceal these small imperfections.
Joining a New Ball of Yarn
Running out of yarn? No problem! Here's how to seamlessly join a new ball.
-
Magic Knot (Optional):
- If you're familiar with the magic knot technique, you can use it to join new yarn. However, Christa advises caution, noting that this particular yarn isn't ideal for magic knots.
- If you choose to use a magic knot, make sure to keep the knot loose on both sides before tightening it.
-
The Safe Method:
- Start your double crochet stitch in the next space as usual.
- Leave the last step unfinished (you should have two loops on the hook).
- Grab your new yarn, make a loop, and finish the stitch with the new yarn.
- Drop the tail of the old yarn and hold both tails down against the back of your work.
- Continue crocheting with the new yarn, effectively securing the tails as you go.
- After a few stitches, weave in the ends for a more secure and cleaner finish.
Determining the Width of Your Shrug
Keep crocheting rows until your shrug reaches the desired width. Christa made her shrug 16 inches wide, but feel free to adjust this to your preference.
To test the width, fold the rectangle in half and check to see if it comfortably fits your arm. This will give you an idea of how the shrug will fit when worn.

Preparing to Sew the Sleeves
You're almost there! Now it's time to prepare for sewing the sleeves.
Once you've reached the desired width, cut a long tail of yarn (about three times the length of your anticipated sleeve seam).
Chain 1 to secure the yarn.
Pull the long tail through the loop and snug it down tightly.
Lay the rectangle flat and carefully fold it in half, making sure to align the edges as precisely as possible.
If needed, use stitch markers to hold the edges together, which will keep everything in place while you sew.
Sewing the Sleeves: Whip Stitch Method
Let's sew those sleeves together!
-
Threading the Needle:
- Use a darning needle with a large eye that's easy to thread.
- Christa recommends Clover bent tip needles, noting that they go into the yarn easily and the yarn doesn't fall out.
-
Securing the Yarn:
- Poke the needle through the opposite side on the opposite end of the sleeve.
- Make sure to catch a strand of yarn, not just the fuzz, to create a secure hold.
-
Whip Stitching:
- Insert the needle through both layers of fabric, working from one side to the other.
- Bring the needle up and over the edge, creating a loop around the seam.
- Maintain a consistent direction for each stitch (for example, always going away from you and then towards you). This will create a neater, more uniform seam.
- Avoid pulling the stitches too tight, as this can cinch up the fabric and distort the shape of the sleeve.
- Every few stitches, give the seam a little tug to check the tension and ensure it remains even.
-
Determining the Sleeve Length:
- The exact length of the seam depends on your arm length, the length of the shrug, and your body shape.
- Christa sewed her sleeves up about 16 inches.
- Try on the shrug to see if the sleeve length is comfortable and adjust as needed.
Finishing the Second Sleeve
To ensure both sleeves are the same size, lay the shrug flat again, aligning the unsewn edges of the second sleeve.
Use stitch markers to mark the same distance on the second sleeve as the sewn seam on the first sleeve.
Pin the second sleeve together using stitch markers to hold it in place while you sew.
Try on the shrug again to double-check the fit. Make any necessary adjustments before sewing.
If you're happy with the fit, sew the second sleeve using the same whip stitch method as before.
To help you remember where to stop sewing, use a red stitch marker at the end of the seam to mark the stopping point.
Final Touches and Weaving in Ends
You've done it! Now for those final touches that will give your shrug a professional finish.
Once both sleeves are sewn, try on the shrug one last time to make sure you absolutely love it!
Make a small knot to secure the seam and prevent it from unraveling.
Using the darning needle, carefully weave in all the loose ends. This is an important step that will keep your project looking beautiful for years to come.
Trim any excess yarn.

Enjoy Your New Crochet Shoulder Shrug!
Congratulations on completing your new Crochet Shoulder Shrug! Wear it with pride and enjoy the warmth and style it adds to your outfits. And be sure to share your finished project with The Secret Yarnery community. I'd love to see your unique creations!
Before you start, do you know the basics of crochet?
If you are brand new to crochet, it might be good to know what you are getting into before you start this project. Here are some basics:
- Slip Knot: The first loop on your hook, starting every project.
- Chain Stitch (ch): Forms the foundation for many projects.
- Single Crochet (sc): A basic stitch, creates a dense fabric.
- Double Crochet (dc): A taller stitch, works up faster. This is the primary stitch for this project.
- Increasing: Making more stitches to widen a piece.
- Decreasing: Reducing the number of stitches to narrow a piece.
- Gauge: The number of stitches and rows per inch, important for sizing.
- Weaving in Ends: Securing loose yarn ends to neaten your work.
More Crochet Resources from The Secret Yarnery
Want to learn more? The Secret Yarnery has resources for you.
- Written Pattern: Access the written pattern for this shoulder shrug here.
- Right-Handed Tutorial: Watch the right-handed video tutorial on YouTube.
- Left-Handed Tutorial: Watch the left-handed video tutorial on YouTube.
- The Secret Yarnery Website: Find more patterns and resources on the website.
- Newsletter: Subscribe to the newsletter for updates and exclusive content.
- Left Handed Tutorials: Access all of Christa's left handed tutorials here.
- Behind the Scenes: Go behind the scenes with Christa here.
- Buy me a Coffee! Support Christa here.
- Join! Become a member here.
Choosing the Right Yarn for Your Project
The type of yarn you choose can dramatically impact the final look and feel of your Crochet Shoulder Shrug. Here's a breakdown to help you select the perfect yarn:
-
Fiber Content:
- Wool: Offers warmth, durability, and excellent stitch definition. Ideal for cozy, cold-weather shrugs.
- Cotton: Soft, breathable, and easy to care for, making it perfect for warmer climates or those with sensitive skin.
- Acrylic: An inexpensive and versatile option available in a wide array of colors. It's a good choice for beginners and budget-friendly projects.
- Blends: Combine the best qualities of different fibers. For instance, a wool-acrylic blend provides warmth and durability with added softness and affordability.
-
Yarn Weight:
- Lace: Very fine yarn, best suited for delicate and intricate projects.
- Fingering: Lightweight yarn, commonly used for socks and shawls.
- DK (Double Knit): A versatile yarn weight suitable for a wide range of projects.
- Worsted: A medium-weight yarn and a popular choice for beginners due to its ease of handling and clear stitch definition.
- Bulky: Thick yarn that works up quickly, ideal for warm and cozy items like the Crochet Shoulder Shrug.
- Super Bulky: An extra-thick yarn that's great for very quick projects and creating a chunky, textured look.
-
Texture:
- Smooth: Creates a clean, even fabric, perfect for showcasing stitch patterns.
- Textured: Adds visual interest and depth to your project. The Polar Eyelash yarn used in this tutorial is a great example of a textured yarn.
- Variegated: Changes color along the strand, creating a unique and eye-catching look.
Understanding Crochet Hook Sizes
Crochet hook sizes are typically indicated in millimeters (mm) or as letter/number combinations (e.g., B/1, H/8). The size of the hook you use will affect the gauge of your project.
Using a larger hook will create a looser fabric with more drape, while a smaller hook will create a tighter, denser fabric. Always check the yarn label for the recommended hook size and adjust as needed to achieve the desired gauge.
It's often a good idea to crochet a gauge swatch before starting your project. This will allow you to see how your chosen yarn and hook size work together and determine if you need to adjust your hook size to meet the pattern's gauge requirements. This is also discussed in this blog post.
Essential Crochet Tools and Accessories
To make your crocheting experience as smooth and enjoyable as possible, be sure to have these essential tools and accessories on hand:
- Stitch Markers: These handy little tools help you keep track of stitch counts, mark important places in your pattern, and prevent mistakes.
- Scissors: A sharp pair of scissors is essential for cutting yarn.
- Darning Needle: A darning needle with a large eye is used for weaving in ends and seaming projects together.
- Measuring Tape: A measuring tape is crucial for checking the size of your project and ensuring it meets the pattern's specifications.
- Row Counter: A row counter helps you keep track of the number of rows you've crocheted, especially useful for more complex patterns.
- Blocking Board and Pins: A blocking board and pins are used for shaping and finishing your projects, giving them a professional look.
- Yarn Bowl: A yarn bowl keeps your yarn from rolling away while you're working, preventing tangles and frustration.
- Ergonomic Crochet Hooks: If you crochet frequently or for extended periods, ergonomic crochet hooks can help reduce hand fatigue and make crocheting more comfortable.
Tips for Working with Textured Yarns
Working with textured yarns can be a fun way to add visual interest to your projects. Here are a few tips to keep in mind when using textured yarns like the Polar Eyelash yarn:
- Choose Simple Stitches: Let the texture of the yarn be the star of the show! Simple stitches like double crochet work best with textured yarns.
- Work in Good Lighting: It can be harder to see your stitches with textured yarn, so make sure you have plenty of light.
- Use Your Fingers to Feel the Stitches: If you can't see the stitches clearly, use your fingers to guide you and feel for the spaces between the stitches.
- Don't Worry About Perfection: Textured yarns are very forgiving and can hide small imperfections, so don't stress if your stitches aren't perfectly even.
- Take Breaks: Working with textured yarn can be more tiring on your hands, so take frequent breaks to stretch and relax your hands.
- Practice: The more you work with textured yarns, the easier it will become to see and feel the stitches.

Common Crochet Mistakes and How to Avoid Them
Even experienced crocheters make mistakes from time to time! Here are some common crochet mistakes and how to avoid them:
-
Incorrect Tension: Too tight or too loose tension can affect the gauge and appearance of your project.
- Solution: Practice maintaining consistent tension. Try to relax your hands and let the yarn flow smoothly.
-
Miscounting Stitches: Miscounting stitches can lead to uneven edges and incorrect sizing.
- Solution: Use stitch markers to mark the beginning and end of each row and count your stitches regularly.
-
Dropping Stitches: Dropping stitches creates holes or gaps in your fabric.
- Solution: Pay close attention to your hook and make sure you're catching all the loops when you pull through the yarn.
-
Forgetting to Chain at the End of a Row: Forgetting to chain at the end of a row can result in a slanted edge.
- Solution: Always chain the correct number of stitches at the end of each row before turning.
-
Using the Wrong Hook Size: Using the wrong hook size can affect the gauge and drape of your project.
- Solution: Check the yarn label and do a gauge swatch to ensure you're using the correct hook size for your chosen yarn and pattern.
-
Not Weaving in Ends Securely: Failing to weave in ends securely can cause your project to unravel over time.
- Solution: Weave in ends carefully and securely, using a darning needle to thread the yarn through several stitches on the wrong side of your work.
Blocking Your Finished Crochet Project
Blocking is a finishing technique that helps to shape and smooth your crochet project, improving its drape and appearance.
-
What is Blocking?
- Blocking involves wetting or steaming your finished crochet project and then pinning it to a flat surface until it dries. This process helps to relax the fibers and set the shape of the project.
-
Methods of Blocking:
- Wet Blocking: Soak your project in lukewarm water with a mild detergent, gently squeeze out the excess water, and lay it flat on a blocking board. Pin the project to the desired shape and let it dry completely.
- Steam Blocking: Lay your project flat on a padded surface and use a steam iron to gently steam the fabric, being careful not to touch the iron directly to the yarn. Pin the project to the desired shape and let it cool completely.
- Spray Blocking: Lay your project flat and spray it with water until damp. Pin the project to the desired shape and let it dry completely.
-
Tools for Blocking:
- Blocking board
- Blocking pins
- Spray bottle or steamer
Caring for Your Crochet Shrug
To keep your Crochet Shoulder Shrug looking its best, follow these care instructions:
- Follow the care instructions on the yarn label.
- Hand washing is often the best option for delicate crochet projects.
- If machine washing, use a gentle cycle and a mild detergent.
- Lay flat to dry to prevent stretching.
- Avoid using bleach or fabric softener.
- Store your shrug in a cool, dry place, away from direct sunlight.
Styling Ideas for Your Shoulder Shrug
The Crochet Shoulder Shrug is a versatile accessory that can be styled in many different ways. Here are a few ideas to get you started:
- Wear it over a sundress for a touch of warmth on cool evenings.
- Pair it with a tank top and jeans for a casual and stylish look.
- Drape it over your shoulders as a shawl for added elegance and warmth.
- Use it as a scarf to keep your neck warm on chilly days.
- Experiment with different colors and textures to create a unique and personalized look.
More Crochet Patterns You Might Enjoy
Interested in more fun crochet projects? Check out some of these other patterns from The Secret Yarnery: Easy Crochet Projects for Beginners: Start Today!
Join The Secret Yarnery Community
Stay connected with The Secret Yarnery and fellow crochet enthusiasts!
- Subscribe to the YouTube Channel: Don't forget to subscribe to The Secret Yarnery for more tutorials, podcasts, and live chats.
- Follow on Instagram: Connect with Christa on Instagram.
- Join the Facebook Group: Join The Secret Yarner Crochet Community on Facebook.
- Like the Facebook Page: Like The Secret Yarner Facebook page.
Thank You for Crocheting With Us!
Thank you for following along with this tutorial and creating your own cozy Crochet Shoulder Shrug. I hope you enjoyed the process and learned something new along the way!
If you have any questions or feedback, please don't hesitate to share them in the comments below. And be sure to share photos of your finished projects on social media using the hashtag #SecretYarnery. I can't wait to see what you create!
FAQs
What skill level is required for this Crochet Shoulder Shrug project?
This project is perfect for confident beginners or those with some crochet experience. The shrug uses simple stitches like double crochet, making it accessible and easy to follow.
Can I use a different type of yarn?
Yes! The project is versatile and works with most types of yarn. While Christa used Polar Eyelash yarn, you can experiment with cotton, wool, acrylic, or blends. Just remember to match your hook size to the yarn weight you choose.
How do I measure for the proper size?
The overall length of your shrug matches the measurement from one wrist, across your shoulders, to the other wrist. For width, you can crochet more or fewer rows depending on the coverage you prefer.
What if my foundation chain is too tight or curls up?
Using a larger hook for the foundation chain (e.g., 7mm) helps prevent curling and ensures a looser, more flexible starting edge.
How do I fix mistakes in my stitches?
If you skip a stitch, add one in the next row. If you add extra stitches, skip one in the next row. The textured yarn is very forgiving and hides small errors!
Can I adjust the length or width of the shrug?
Absolutely! Customize your shrug by altering the length of the foundation chain or the number of rows you crochet. Keep in mind the natural stretch of the fabric when making adjustments.
How do I join new yarn when the current yarn runs out?
You can use the "Safe Method" of joining yarn by finishing your double crochet with the new yarn and weaving in the tails. Avoid tension issues by securing the ends well.
What should I do if the stitches are hard to see with textured yarn?
Work in good lighting and use your fingers to feel for the stitches. Mark every 10 stitches with a marker to maintain accuracy.
How do I ensure my edges stay straight?
Pay special attention to the beginning and end of each row. Use a stitch marker in your turning chains to avoid losing or gaining stitches accidentally.
Christa Patel is the creative force behind The Secret Yarnery, a vibrant and welcoming community for crochet enthusiasts of all skill levels. Based in Nairobi, Kenya, Christa has transformed her love for yarn into a full-fledged platform where she inspires crafters worldwide.
Through her engaging YouTube channel, detailed tutorials, and practical crochet patterns, Christa breaks down complex projects into clear, easy-to-follow steps. Her teaching style makes even intricate designs approachable, empowering crocheters to expand their skills and craft beautiful items.
In addition to her crochet expertise, Christa is a passionate advocate for creativity, self-expression, and the joys of handmade crafts. Whether you're a total beginner or a seasoned pro, Christa's tutorials and community are rich resources for anyone looking to master the art of crochet.
Discover more of Christa's creations and join her thriving community on the Secret Yarnery website, YouTube channel, or social media platforms. You can also show your appreciation by supporting her work through memberships or a “Buy Me a Coffee” contribution!
About the Author
With a passion for crafting easy, beginner-friendly tutorials and patterns, Christa inspires crafters of all skill levels to unleash their creativity worldwide. She encourages yarn lovers to connect, create, and crochet a world filled with beautiful handmade treasures!
Crochet Shoulder Shrug Tutorial - Easy, Stylish Step by Step Pattern!