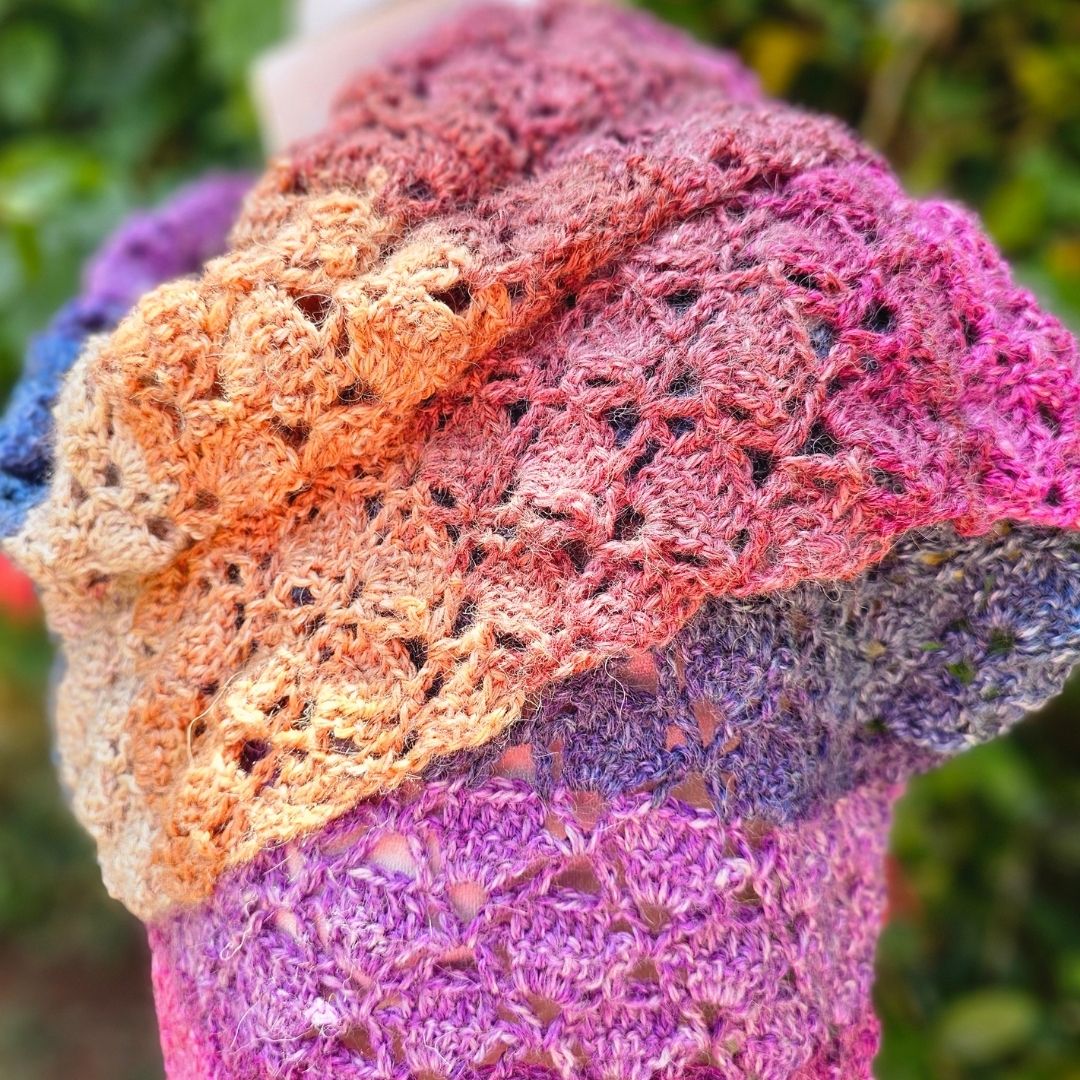
Treat Yourself Crochet: Self-Care Projects & Ideas for 2025
Picture this. You sit down, grab your hook, and sink your hands into soft yarn. Your shoulders drop. Your brain slows down. That feeling? That is treat yourself crochet. It...
Read more
Black Friday Blowout: Crochet Pattern Bundles From Podcast 175
This Black Friday, I am bundling my most popular crochet patterns into big savings packs for blanket lovers, scarf makers, and hat-and-scarf set fans. In Crochet Podcast Episode 175, I...
Read more
How to Read Crochet Patterns Like a Pro| Beginner Guide 2025
Learning to read crochet patterns does not have to feel confusing or scary. In this beginner-friendly guide, you will learn the basic parts of a pattern, what common abbreviations mean,...
Read more
How I Turn Crochet Into a Profitable Side Hustle in 2025
Crochet is more than a cozy hobby; it can also help pay for groceries, bills, or your next yarn haul. In this guide, I walk you through how to turn...
Read more
Tech in Crochet: Apps, Smart Hooks & Digital Tools That Help
If you have ever lost your place in a pattern or spent 10 minutes counting rows on a blanket, you already know why a little tech can help. Crochet is...
Read more
Best Christmas Yarn Colors 2025 for a Magical Cozy Aesthetic
Picture this. A soft throw over the couch, twinkling lights on the tree, stockings lined up, and every stitch glowing in cozy Christmas colors. All of it made by you,...
Read more
Easy Deluxe Crochet Santa Hat With Simple Acrylic Yarn
Learn how to crochet a DELUXE Santa Hat using simple worsted weight acrylic yarn you already have at home. In this step by step tutorial, I show you how to...
Read more
The Absolute Best Way to Organize Your Crochet Yarn Collection!
Ever look at your yarn and think, “What on earth is going on in here?” In this room tour, I walk you through exactly how I organize my crochet yarn...
Read more
Crochet Christmas Traditions: Family Ideas Projects 2025
Turn yarn, a hook, and a quiet evening into Christmas traditions your family will treasure for years. Learn simple crochet ideas for ornaments, stockings, memory blankets, and giving projects that...
Read more
Christmas Crochet Trends 2025: Cozy, Modern & Quick Patterns
Christmas crochet in 2025 is cozy, colorful, and quick. Think chunky stockings on the mantel, squishy throws on the couch, and tiny ornaments you can finish in an evening while...
Read more
Easiest Christmas Tree Skirt Pattern for Beginners
Add a handmade touch of Christmas magic under your tree with the easiest crochet tree skirt pattern I’ve ever made. This beginner-friendly tutorial uses simple double crochets, clear repeats, and...
Read more
Crochet Christmas Presents 2025: Modern and Made to Be Used
Crochet Christmas presents in 2025 are soft, modern, and made to be loved. Think plush textures, calm neutrals, and quick makes that look boutique without the stress. Start with the...
Read more
How to Set Up a Cozy, Organized Craft Room for Cheap!
Turn your messy craft corner into a cozy, organized spot you’ll love using every day. In this guide, I show you how to choose the right location, set up comfy...
Read more
Crochet Christmas Wreath (Beginner-Friendly, Fast, and Festive)
Make a cozy Crochet Christmas Wreath in one evening. This beginner-friendly project wraps an embroidery hoop, then adds soft, leafy loops with simple chains. Work with three strands for fast...
Read more
Crochet Stitches: Guide to Texture, Drape, and Style 2025
Switch the stitch, change the fabric. From plush texture to airy drape, the right stitch turns simple yarn into standout makes. This guide shows what each stitch looks like, how...
Read more
Northern Diamond Square Crochet Granny Square – Step-by-Step
Discover how to crochet the bold and beautiful Northern Diamond Square, a modern twist on the classic granny square! In this easy-to-follow guide, you'll learn which materials work best, how...
Read more
Easy Crochet Coaster Pattern for Beginners (Step-by-Step Tutorial)
Make this Easy Crochet Coaster before your coffee cools. I’ll show you step-by-step how to start the center ring, work simple rounds, and add a tidy picot edge. Perfect for...
Read more
Crochet Slippers: Cute, Cozy, and Durable Gift Ideas 2025
Cold floors, warm feet, happy heart. Crochet slippers are the quick win your hooks have been waiting for. In this guide, you’ll find the easiest beginner patterns, smart sizing tips,...
Read more
Prettiest Crochet Leg Warmers for Fall and Winter 2025
Soft light, cool air, and crochet that feels like poetry. Texture catches the eye, color sets the mood, and every stitch whispers a story. From sleek ribs to sculptural cables...
Read more
Types of Crochet Hooks: Comfort, Speed, Neat Stitches 2025
Crochet hooks may look simple, but small changes in size, shape, and material can transform your stitches and comfort. This guide explains hook parts, US and metric sizes, and how...
Read more
Ergonomic Crochet Hooks: Ease, Control & Even Stitches 2025
Sore hands after a few rows? You’re not alone. Ergonomic crochet hooks can ease wrist pain, soften your grip, and keep stitches even, so you can crochet longer with less...
Read more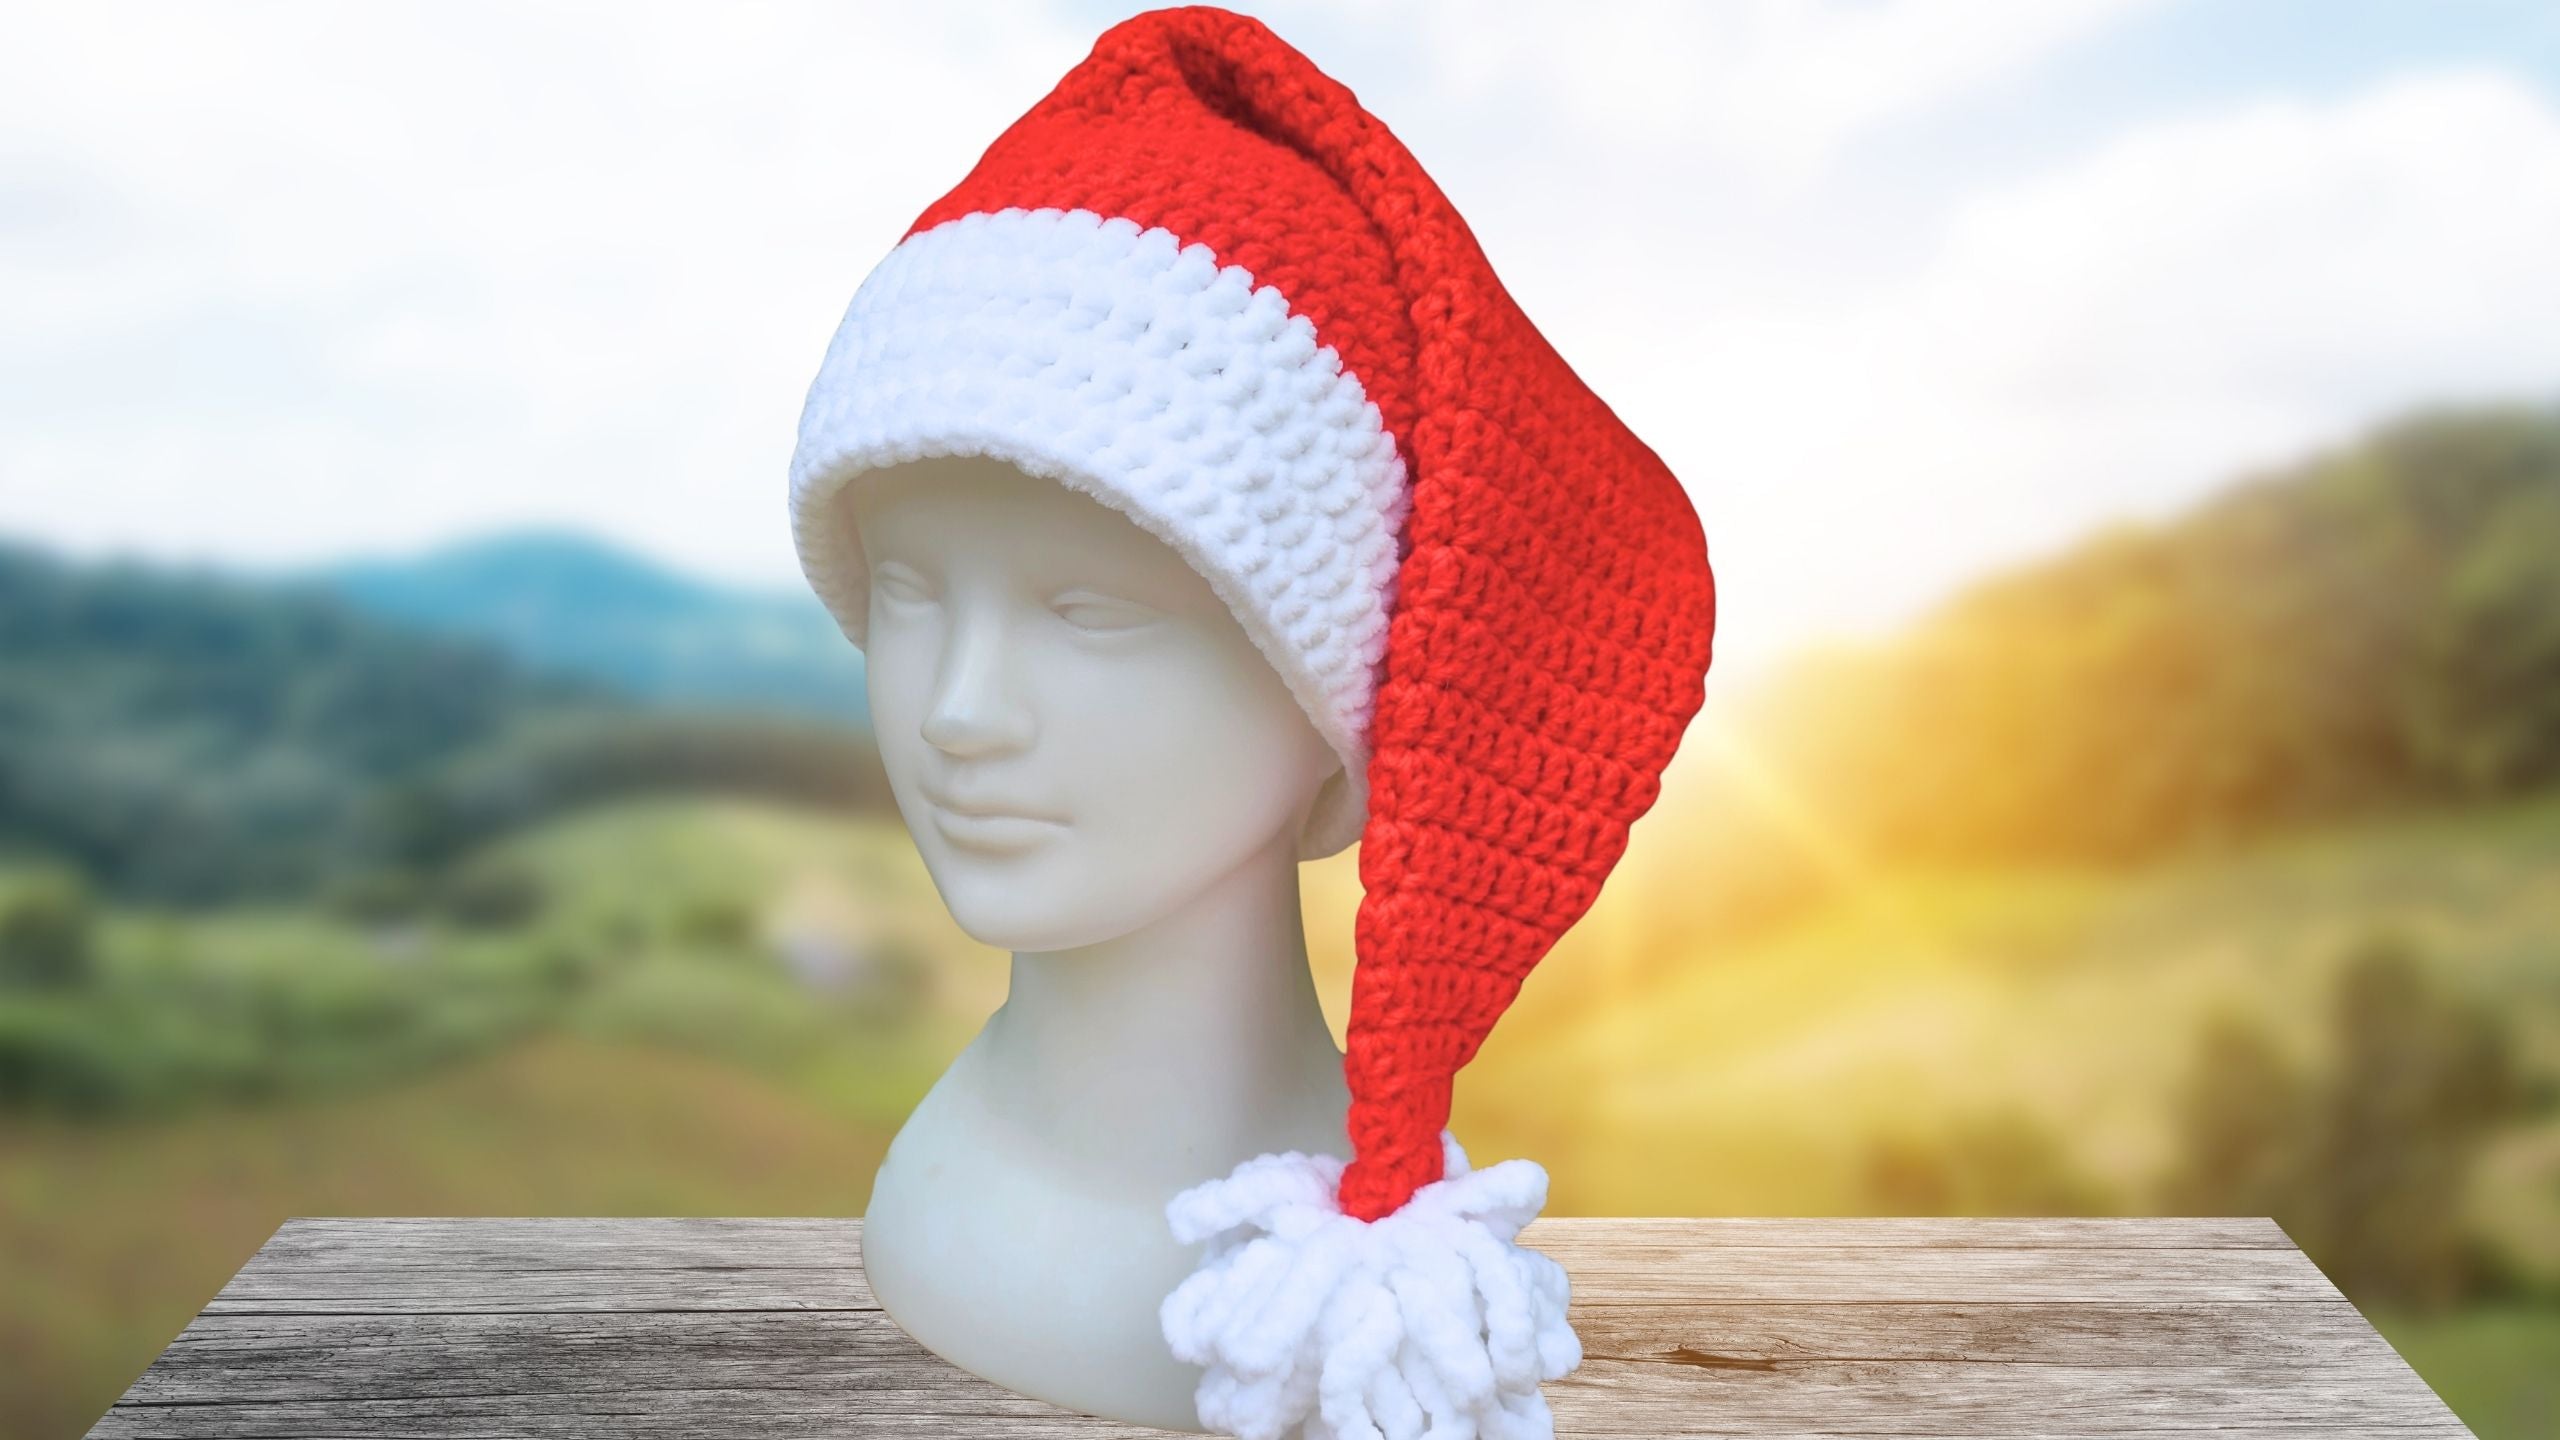
How To Crochet a Santa Hat in Minutes! Easy Beginner Pattern
Make holiday magic in minutes with this Easy Crochet Santa Hat. The pattern uses simple stitches, a smooth spiral, and staggered decreases for a clean taper. Add a plush white...
Read more
Crochet For Every Season: Must Have for Fall & Winter 2025
Ready for your coziest makes yet? Discover the best seasonal crochet projects for fall and winter 2025, with quick wins, texture-rich details, and a simple plan to stay on track....
Read more
Crochet Hats Pattern: Fit, Flatter, and Finish Fast 2025
Looking for crochet hats patterns you can actually finish this weekend? Start with clear, beginner-friendly videos, patterns and make a hat that fits, flatters, and feels cozy. You will find...
Read more