How to Crochet a C2C Rectangle: Perfect for Beginners
Crochet is a relaxing and creative hobby, and the Corner-to-Corner (C2C) technique is one of the most versatile patterns you can learn. Today, I’ll guide you through the steps to crochet your very own C2C rectangle. Whether you're just starting out or have been crocheting for years, this tutorial will break down everything into easy-to-follow steps and give you the confidence to take your crochet projects to the next level.
Ready to dive in? Watch the video below for a full step-by-step guide:
What You'll Need
Before we get started, gather your materials. Here's what I recommend using for this project:
- Yarn: Any worsted weight acrylic yarn will work perfectly. Pick your favorite colors or use leftover scraps for a fun, colorful rectangle.
- Hook: A 6mm crochet hook is a great option for this technique.
- Stitch Markers: These will help keep your rows organized. Don't have any? A piece of contrasting yarn or even a paperclip will do the trick!
If you're not sure how to choose the right yarn for your project, check out the C2C crochet blanket guide.

How to Get Started
The C2C rectangle works by combining two simple techniques: increasing and decreasing. If you can do these, you've already got the skills to make something amazing! Let’s start by turning a triangle into a rectangle:
Step 1: Increase on One Side, Decrease on the Other
To begin, crochet the triangle base for your rectangle. Here’s how:
- Use your yarn and hook to make your first row of blocks.
- Add a "grow marker" (use the green marker or a piece of yarn) at the top edge where you’ll increase.
- Place your "stop marker" (red or contrasting yarn) where you’ll start decreasing.
One side grows while the other stops, creating that perfect rectangular shape. This method keeps everything organized and ensures you always know where you are in the pattern.
Want the details of increasing and decreasing? The Ultimate C2C Masterclass covers these techniques in-depth.

Step 2: Add Colors or Stripes
Changing yarn colors is simple and adds personality to your project. To change colors, finish the last two loops of your current stitch with the new yarn. Drop the old tail and start your next row with the new color. Pro tip: Keep your ends long enough to weave in—this ensures a polished finish!
If you want patterned designs, explore the Written Patterns Tagged "C2C" for cropping tips and inspiration.
The Rectangle Math Formula
How do you know how many rows to crochet? Use the rectangle math formula!
- Count the number of blocks along the narrow side of your triangle.
- Divide that number by three.
- The result equals the number of rows you need to crochet to build out your rectangle sides.
For example, if you have 12 blocks in the triangle, divide by three. This gives 4 rows on each side to make it proportional.
Simple math, but it works like magic every time!

Creating the Perfect Edges
Want those edges to be neat and tidy? Use slip stitches to smooth the sides as you work. Slip stitch into the first chain space and along the block’s edge for a flawless finish. Chain three before starting rows to avoid confusion when picking the project back up.
Take it to the next level by finishing with a decorative border! If you're curious to learn more about edging, The Secret Yarnery's collection of tips can be found in the Ultimate C2C Masterclass.
Common Questions While Crocheting C2C Rectangles
- What if my stitches feel loose? Tug gently on the yarn ends to tighten up blocks.
- How do I remember where to increase or decrease? Trust your markers—green means go (grow), red means stop!
- Can I use a smaller or larger hook? Absolutely! Just work with proportions to ensure your rectangle looks balanced.
If you’re looking for tips on managing yarn changes or picking patterns, check out Easy Crochet Projects for Beginners.

Conclusion
Congratulations! You’ve mastered the art of crocheting a C2C rectangle. This simple yet effective technique opens up endless possibilities for projects—you can make scarves, blankets, or even pillow covers!
If you're ready to explore even more C2C patterns, visit the Patterns Section at The Secret Yarnery, where you'll find inspiration for your next masterpiece.
Happy crocheting, and don’t forget to share your C2C rectangles with me! Feel free to explore my Gingham Crochet Corner-to-Corner Blanket for your next step in the C2C journey. Keep those hooks moving, and stay inspired!
Left Handed?
FAQs
1. What is Corner-to-Corner (C2C) crochet?
C2C is a crochet method where you start working a project from one corner and build it diagonally in rows of blocks, creating a pixelated or grid-like pattern. It's ideal for blankets, scarves, and other items that can use graphic designs.
2. Can I use other yarn weights for a C2C rectangle?
Yes! You can use any yarn weight, but keep in mind that it will impact the size and texture of your project. Pair your yarn with an appropriate hook size (usually listed on the yarn label) for the best result.
3. What’s the easiest way to keep track of increases and decreases?
Using markers is the simplest method. A green or bright-colored marker can signify the increasing side ("grow"), and a red or distinct marker can indicate the decreasing side ("stop"). This helps avoid confusion as your project grows.
4. How do I keep my edges straight?
Use slip stitches as part of your edge work and be consistent with chaining at the beginning of each block. This technique creates smooth edges and a professional finish.
5. How do I change colors in a C2C pattern?
To switch colors, finish your last two loops with the new yarn color. Drop the old yarn, leaving a tail for weaving, and continue with the next color. This ensures neat transitions without loose ends.
6. Can I use a C2C rectangle for larger projects?
Absolutely! Scale your C2C rectangle to fit blankets, rugs, or even garments. Just increase the number of rows in proportion to your project's intended size.
7. How do I fix mistakes or count rows in C2C crochet?
Mark each row as you finish using stitch markers or contrasting yarn. If an error occurs, unravel the stitches back to the mistake and redo the section. Keeping your work organized reduces the chance of errors.
8. Why is my rectangle looking uneven?
Uneven edges often stem from skipped chain spaces or inconsistent tension. Double-check that you are increasing and decreasing at the correct spots and maintain even tension throughout your work.
9. How long does it take to crochet a C2C rectangle?
The time varies based on experience and project size. A smaller rectangle might take a few hours, while larger projects like blankets can take weeks. Work at your own pace!
10. Can I use the C2C technique for patterns or images?
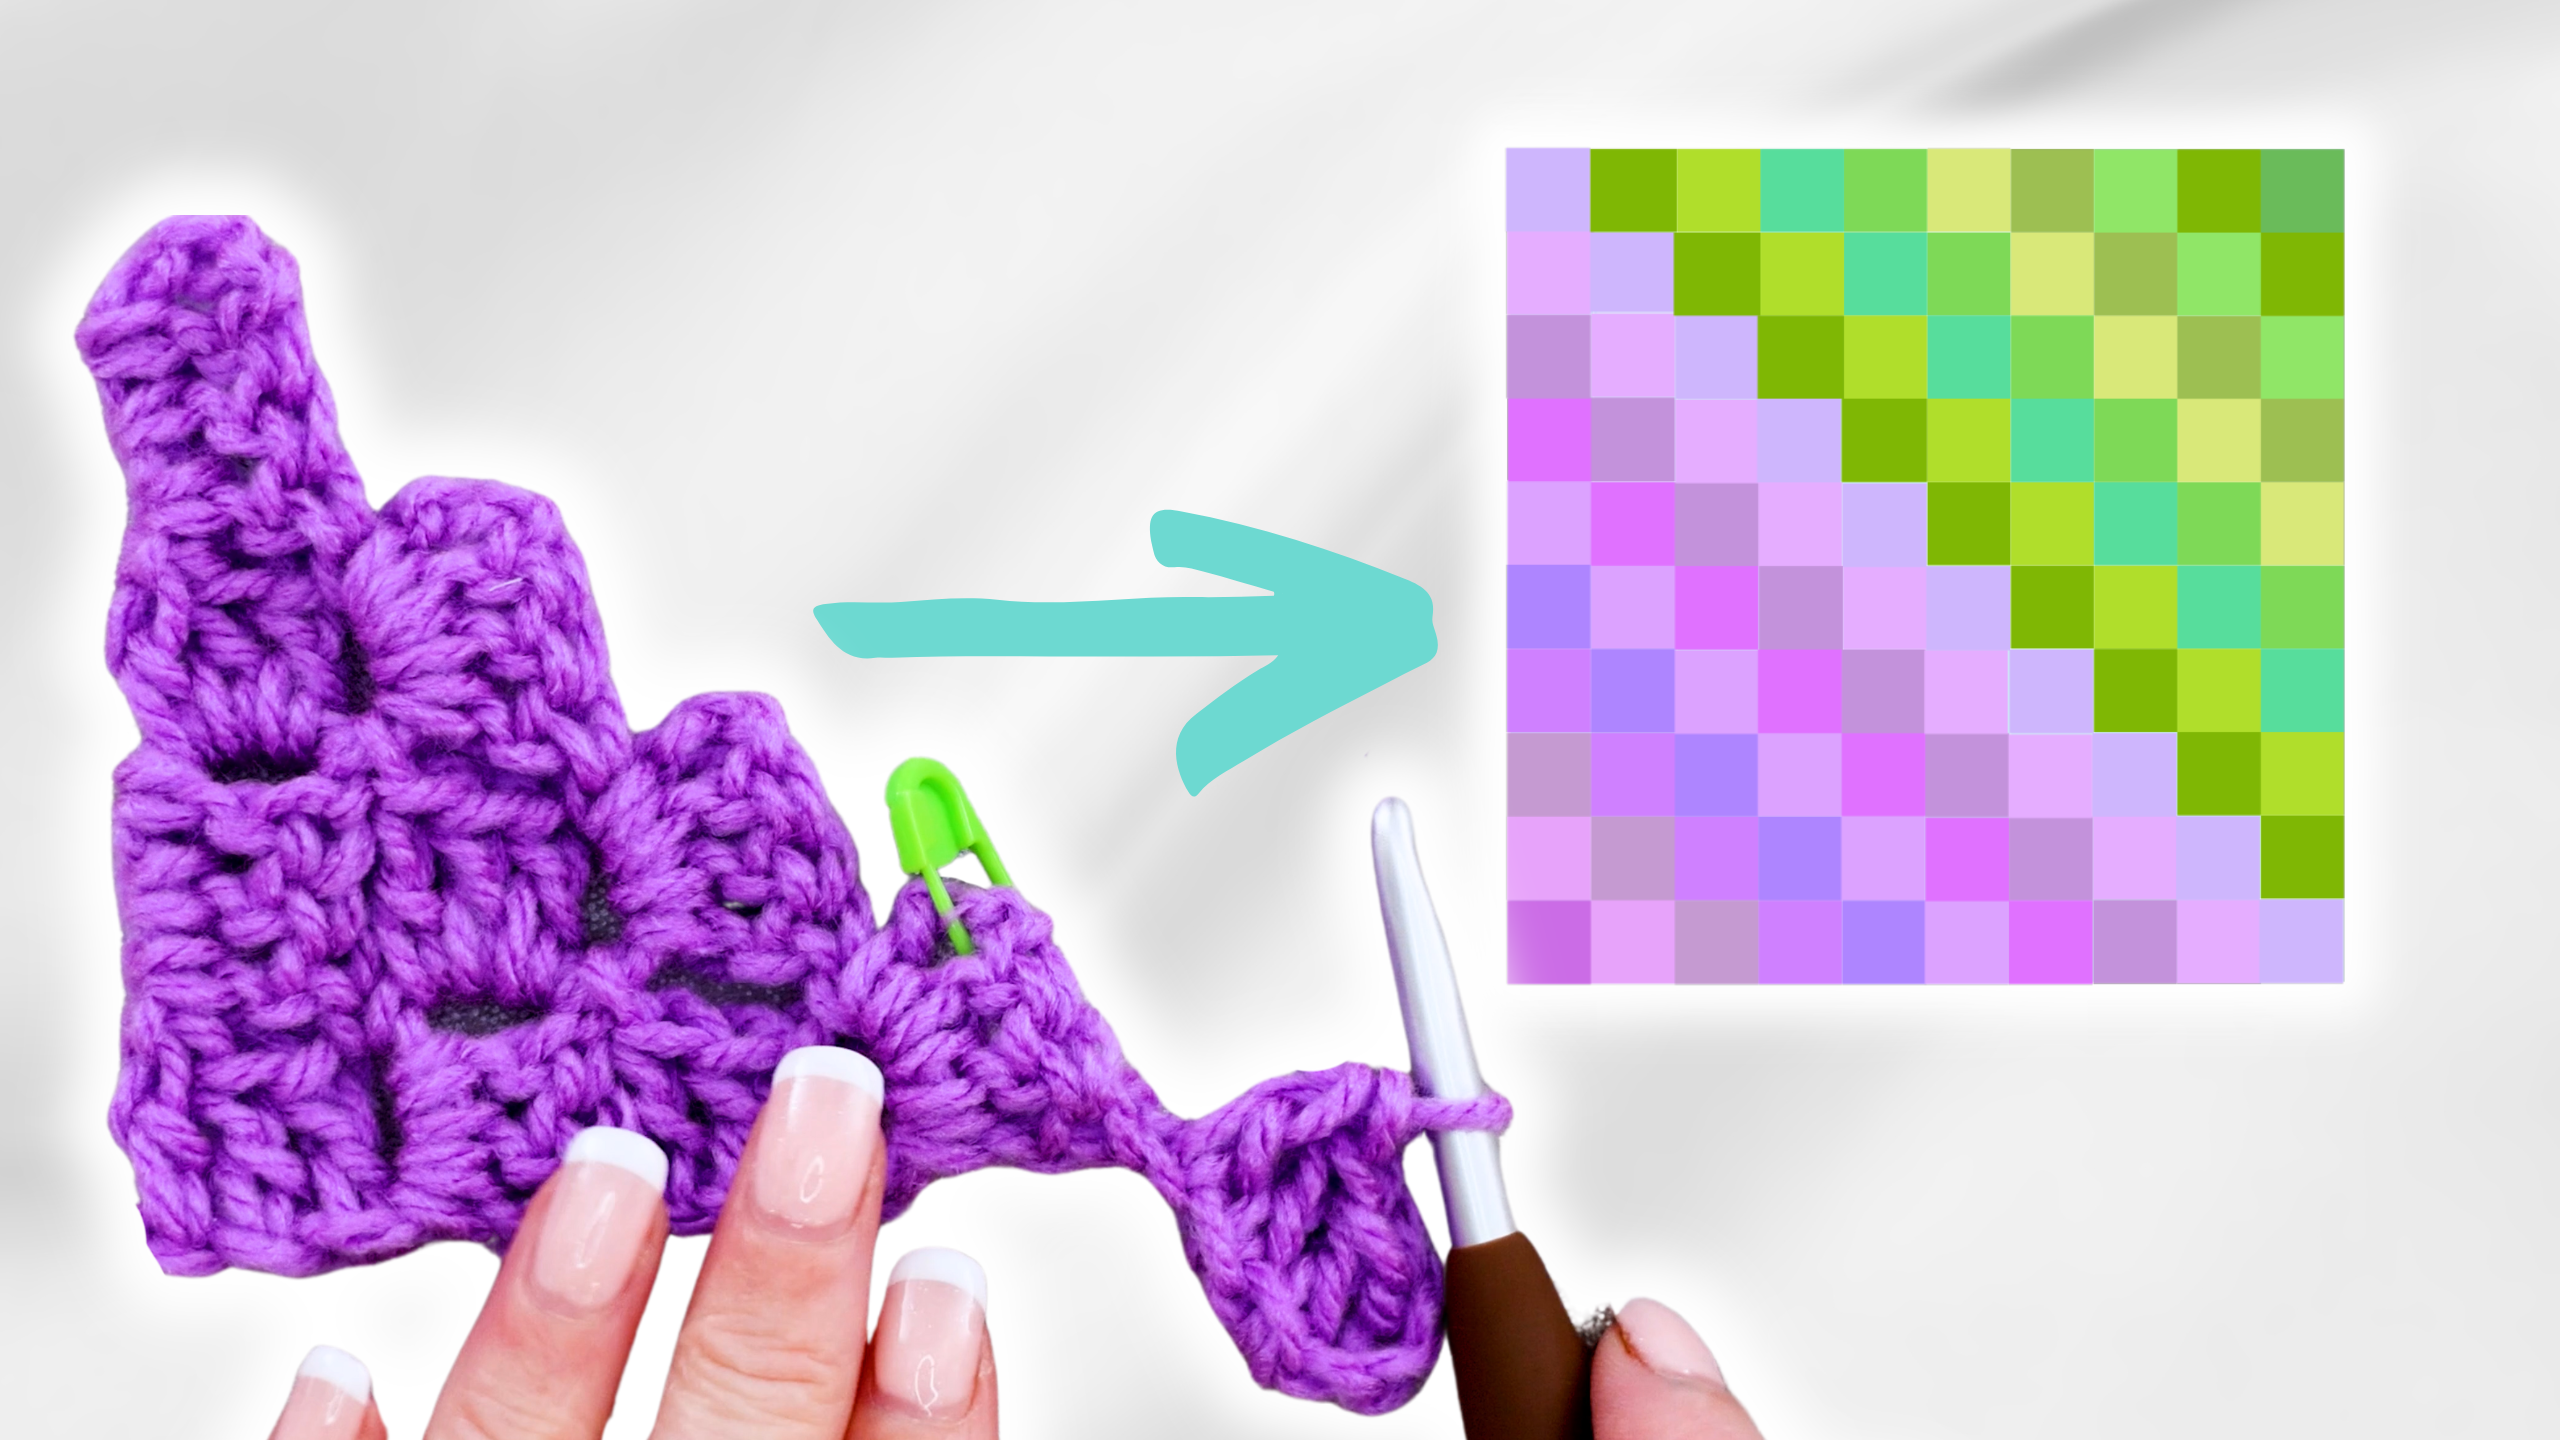
Yes! The C2C method is perfect for creating graphic designs or pictures. Use a pixelated chart for guidance, and assign colors to each square (or block) to bring your design to life.
![]()
Christa Patel is a passionate crochet expert, teacher, and founder of The Secret Yarnery. With over 15 years of experience in crafting and designing, Christa specializes in creating easy-to-follow crochet tutorials that inspire both beginners and seasoned crafters. Her mission is to demystify crochet techniques like C2C and make them accessible to everyone.
Through her popular YouTube channel and detailed patterns, Christa empowers crafters to explore their creativity while building confidence in their skills. When she’s not designing crochet patterns or hosting online workshops, Christa enjoys experimenting with vibrant yarns, sharing tips with the crochet community, and spreading the joy of handmade creations.
Stay connected with Christa for more inspiration, tips, and tutorials:
Whether you're crafting your firt project or adding to your portfolio of crochet masterpieces, Christa’s expertise ensures you’ll have the guidance you need!
About the Author
With a passion for crafting easy, beginner-friendly tutorials and patterns, Christa inspires crafters of all skill levels to unleash their creativity worldwide. She encourages yarn lovers to connect, create, and crochet a world filled with beautiful handmade treasures!
How to Crochet a C2C Rectangle: Perfect for Beginners