In a world where the phrase "dumpster fire" has become the perfect metaphor for chaotic situations, why not embrace the humor with a crafty twist? This dumpster fire crochet pattern lets you create a tangible, adorable version of the internet's favorite disaster metaphor. Whether it's a quirky desk accessory, a gift for someone going through a rough patch, or just a fun conversation starter, this project combines humor with crafting skills in the best possible way.
Get Your Free Dumpster Fire Crochet Pattern
Want to skip ahead? Download the complete pattern with printable instructions to follow along at your own pace.
Download Free PatternThe Dumpster Fire Phenomenon: Why It's the Perfect Crochet Project
The "dumpster fire" metaphor emerged as internet slang around 2016, quickly becoming shorthand for any chaotic, disastrous, or out-of-control situation. It's visual, it's evocative, and it perfectly captures that feeling when everything seems to be going wrong in spectacular fashion.

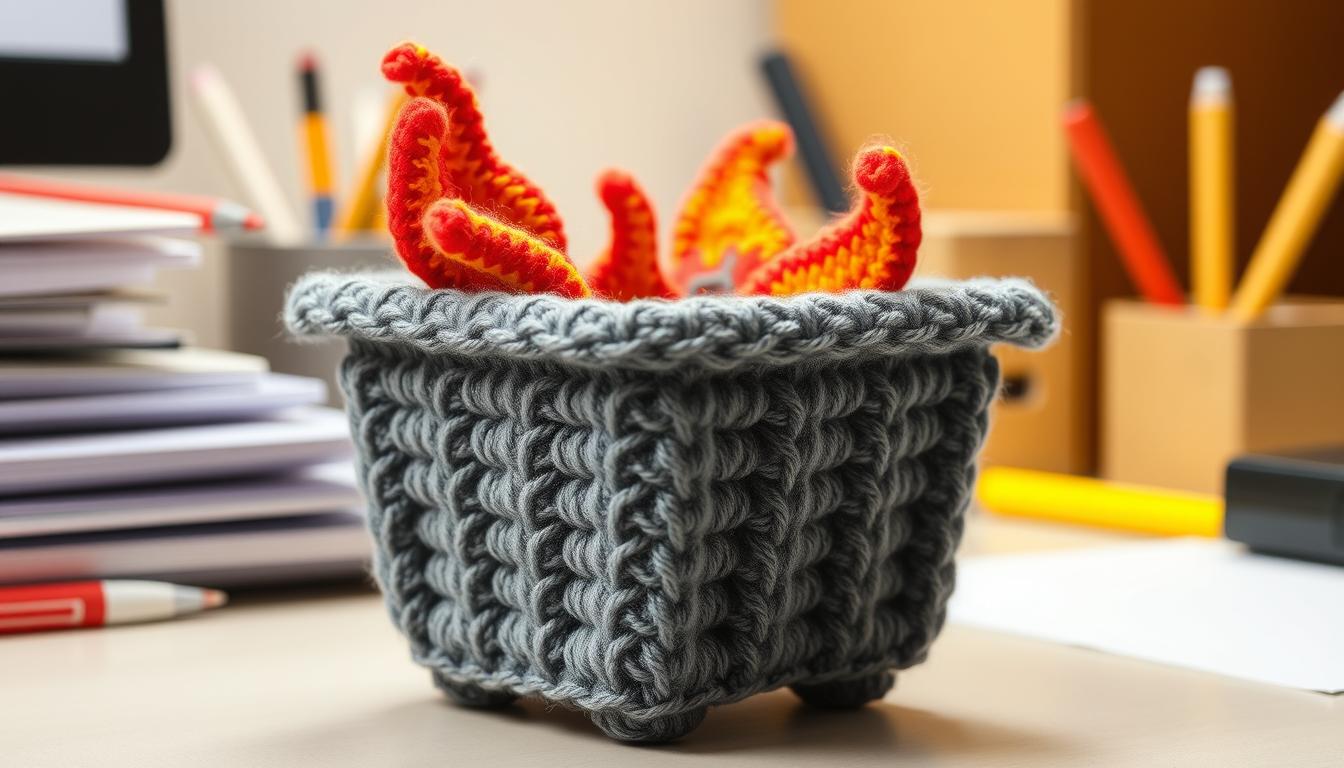
Your finished dumpster fire crochet will make a perfect desk companion for those challenging days
Creating a crocheted version transforms this symbol of chaos into something cute and controllable. There's something wonderfully ironic about taking hours to carefully craft a representation of disaster. It's crafting therapy at its finest!
Materials You'll Need

Gather all your materials before starting your dumpster fire project
Essential Supplies
-
Yarn: Worsted weight (size 4)
- Gray or silver (for dumpster) - 50g
- Orange, red, and yellow (for flames) - 25g each
- Optional: Black for smoke effects - 15g
- Crochet Hook: Size G/6 (4.0mm) or size needed for gauge
-
Notions:
- Stuffing (polyester fiberfill)
- Yarn needle
- Stitch markers
- Scissors
- Optional: Felt scraps for embellishments
"I've found that cotton yarn works wonderfully for this project as it holds its shape well and gives the dumpster a nice sturdy feel. The project works up in about one hour and is perfect for those with some crochet experience."
Gauge and Finished Size
Gauge: 7 sc and 8 rows = 4" [10 cm]
Finished Size: Approximately 3" wide x 3" deep x 4" tall (including flames)
Pro Tip: Don't stress too much about gauge for this project. A slightly larger or smaller dumpster fire is still a dumpster fire!
Crochet Abbreviations
| Abbreviation | Meaning |
| ch | chain |
| sc | single crochet |
| hdc | half double crochet |
| dc | double crochet |
| st(s) | stitch(es) |
| sl st | slip stitch |
| rnd | round |
Step-by-Step Instructions
Note: This pattern uses US crochet terminology. The dumpster fire is worked in separate pieces (dumpster base, sides, lid, and flames) that are assembled at the end.
Part 1: Crocheting the Dumpster Base

The completed dumpster base forms the foundation of your project
- Start with the base: With gray yarn, ch 21.
- Row 1: Sc in 2nd ch from hook and in each ch across. (20 sc)
- Rows 2-12: Ch 1, turn. Sc in each st across. (20 sc)
- Do not fasten off as you'll continue working to create the sides.
Pro Tip: Use stitch markers to keep track of the beginning of each round when working on the sides of the dumpster.
Part 2: Creating the Dumpster Sides

Working in the round to create the sides of your dumpster
- Round 1: Working around the entire rectangle, sc evenly around all sides of the base, working 3 sc in each corner. Join with sl st to first sc.
- Rounds 2-6: Ch 1, sc in each st around. Join with sl st to first sc.
- Round 7: Ch 1, sc in front loop only of each st around. Do not join.
- Round 8: Working in the remaining back loops from Round 6, sc in back loop only around. Join with sl st to first sc.
- Rounds 9-10: Ch 1, sc in each st around. Join with sl st to first sc.
- Fasten off, leaving a long tail for sewing.
Part 3: Crafting the Dumpster Lid

The lid will be partially attached to create an open dumpster effect
- Row 1: With gray yarn, ch 21. Sc in 2nd ch from hook and in each ch across. (20 sc)
- Rows 2-13: Ch 1, turn. Sc in each st across. (20 sc)
- Fasten off, leaving a long tail for sewing.
- Attach the lid: Sew one long edge of the lid to the back edge of the dumpster, leaving the front and sides unattached so it can open.
Part 4: Creating the Flames

The layered flames bring your dumpster fire to life
Base Flames (Orange)
- With orange yarn, ch 21.
- Row 1: Sc in 2nd ch from hook and in each ch across. (20 sc)
- Rows 2-8: Ch 1, turn. Sc in each st across. (20 sc)
- Fasten off.
Middle Flames (Red)
- With red yarn, ch 18.
- Row 1: Sc in 2nd ch from hook and in each ch across. (17 sc)
- Rows 2-7: Ch 1, turn. Sc in each st across. (17 sc)
- Fasten off.
Top Flames (Yellow)
- With yellow yarn, ch 15.
- Row 1: Sc in 2nd ch from hook and in each ch across. (14 sc)
- Rows 2-6: Ch 1, turn. Sc in each st across. (14 sc)
- Fasten off.

Stack and attach the flames to create a layered effect
Optional Smoke Effect
- With black yarn, create several 6-8" strands.
- Unravel the plies and brush them out to create a fluffy, smoke-like texture.
- Attach to the top of the flames.
Creative Variation: For a more textured flame effect, try using a combination of stitches like hdc and dc in the flame rows, or experiment with bobble stitches for a 3D effect!
Assembling Your Dumpster Fire

Follow these steps to bring all the pieces together
- Stuff the dumpster: Before closing completely, fill the dumpster with polyester fiberfill.
- Attach the flames: Stack the flame pieces (orange on bottom, then red, then yellow on top). Sew them together along one short edge.
- Insert the flames: Place the flames inside the dumpster, with the sewn edge at the bottom. Sew the flames to the inside of the dumpster along the front edge.
- Add details: For an extra touch, you can embroider "2020" or another year/phrase on the side of the dumpster.
- Optional smoke: If using the smoke effect, attach the brushed-out black yarn strands to the top of the flames.

Adding embroidered details personalizes your dumpster fire
Creative Variations and Pro Tips
Size Adjustments
To create a larger dumpster fire, use bulky yarn and a larger hook. For a tiny version, try thread crochet with a small steel hook.

Color Variations
Try a blue dumpster for a corporate look, or green for an environmental theme. Experiment with different flame colors for magical effects!

Embellishments
Add googly eyes for a character look, or tiny crocheted trash items spilling out for extra humor. Attach a keychain ring to make it portable!

"The beauty of this dumpster fire pattern is its versatility. I've made them as ornaments, desk accessories, and even as gag gifts for friends going through tough times. They always bring a smile!"
Troubleshooting Common Issues
My dumpster won't stand up straight. What went wrong?
This usually happens if the base isn't firm enough. Try adding a piece of cardboard cut to size inside the bottom of the dumpster, or use a stiffer yarn for the base. You can also add a few small weights (like pebbles in a small bag) at the bottom of the stuffing.
My flames look floppy instead of standing up. How can I fix this?
For more structured flames, try using a slightly smaller hook for the flame sections to create a tighter fabric. You can also lightly spray the completed flames with starch or fabric stiffener to help them hold their shape.
How can I make my dumpster fire look more realistic?
For added realism, try using a metallic gray yarn for the dumpster. You can also add texture by working some rows in back loop only. For the flames, using yarns with different textures (like a fuzzy yarn for the yellow flames) can create more dimension.
Show Off Your Dumpster Fire Project!

Creative interpretations of the dumpster fire pattern from crafters around the world
We'd love to see your finished dumpster fire crochet projects! Each one takes on a personality of its own, and the creative variations are endless. Share your creation on social media using the hashtag #DumpsterFireCrafts or #CrochetDumpsterFire to join our community of crafty humor enthusiasts.
Embrace the Chaos with Your Handmade Dumpster Fire

Your finished dumpster fire: a perfect symbol of controlled chaos
Congratulations on creating your very own crocheted dumpster fire! This whimsical project is more than just a cute decoration—it's a humorous acknowledgment that sometimes life gets messy, and that's okay. Your handcrafted dumpster fire serves as a reminder that we can find humor even in challenging situations.
Whether it sits on your desk as a conversation starter, adorns your bookshelf as a quirky accent, or becomes a thoughtful gift for someone who appreciates offbeat humor, your dumpster fire crochet creation is sure to bring smiles wherever it goes.
Remember to download the printable pattern to keep in your crafting collection, and don't forget to share your creation with our community using #DumpsterFireCrafts. Happy crocheting, and may your real-life dumpster fires be few and your crafted ones be many!
Ready for More Creative Projects?
Download our free dumpster fire pattern and check out our other unique crochet designs!
Get Free PatternAbout the Author
With a passion for crafting easy, beginner-friendly tutorials and patterns, Christa inspires crafters of all skill levels to unleash their creativity worldwide. She encourages yarn lovers to connect, create, and crochet a world filled with beautiful handmade treasures!
How to Crochet a Playful Dumpster Fire: A Whimsical Pattern for Crafters