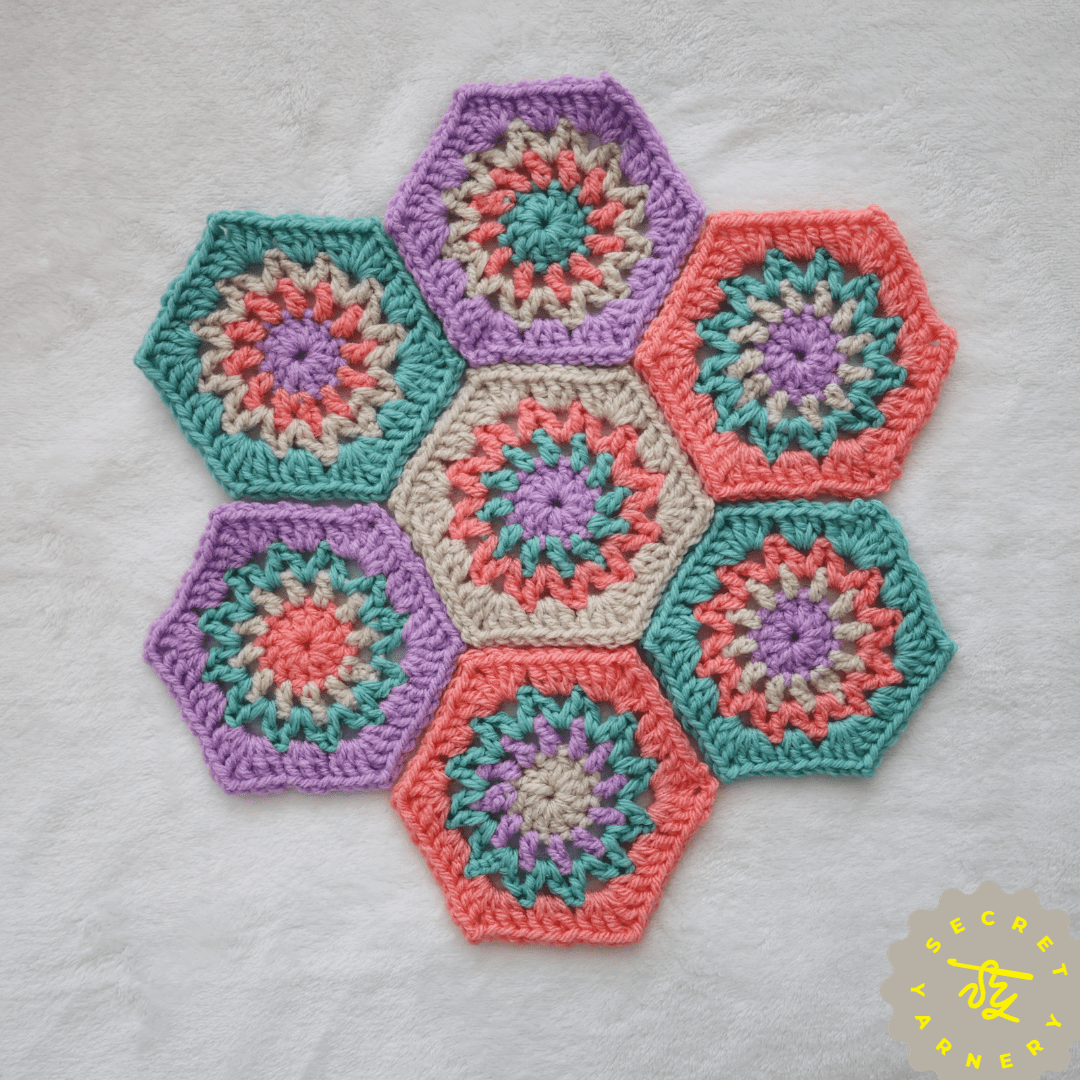
How to Crochet an Easy Zig Zag Hexagon for Blankets, Decor, and More!
Are you looking for a fun and easy crochet project to use up your yarn stash? The Zig Zag Hexagon pattern is a quick, beginner-friendly design that combines simplicity with elegance. It’s perfect for creating blankets, cushion covers, or even standalone decorative pieces. Let’s dive into the step-by-step process and bring this beautiful pattern to life!
Why You’ll Love This Pattern
The Zig Zag Hexagon is not only easy crochet but also versatile. It’s designed to be lightweight and lacy, making it ideal for various projects. You can customize the colors to suit your decor or mix and match to make a vibrant, eye-catching design. This hexagon is also a fantastic stash buster—you’ll only need small scraps of yarn for each one!
For written instructions, you can find all of my patterns, including this one, in simple, easy-to-read formats at Secret Yarnery.

What You’ll Need
To get started, gather a few basic materials:
- Your choice of yarn (four different colors work great, but feel free to experiment!)
- Crochet hook—use the size recommended on your yarn label. In this tutorial, I used a 5mm hook.
- Scissors
- A needle for sewing in your ends
This tutorial uses Ice Yarns Favorite, a yarn labeled as worsted weight but with a texture closer to DK weight. Feel free to substitute with similar types!
Looking for more easy crochet ideas? Check out some beginner-friendly patterns at Easy Crochet Projects for Beginners.

Step-by-Step Instructions
Round One: Starting Out
Begin with the center of your hexagon. You can use either a magic ring or a chain-3 method—whatever feels most comfortable. Here’s how:
- Chain 3 and slip stitch into the first chain to form a ring.
- Chain 1, then work 11 double crochets into the center of the ring, going over the tail for a clean finish.
- Slip stitch into the first double crochet to join the round, chain 1, and secure your yarn.
Pro Tip: If your starting ring feels loose, tighten it by threading the tail through the bottom stitches and pulling gently
Round Two: Adding Texture
Switch to your second color. Insert your hook into the first stitch (not the join) of round one and follow these steps:
- Attach the yarn and chain 3 to begin.
- Work one double crochet and chain 1 into each stitch around.
- When you reach the join, make two stitches for an even finish.
- Slip stitch to the top of the chain and secure your yarn by cutting, pulling through, and snugging it down.
Need more inspiration for pattern adjustments or color changes? Visit Written Patterns Tagged “Changing Colors”.

Round Three: Creating the Zig Zag Look
For this round, you’ll enhance the zig-zag effect by adding V-stitches:
- Attach a new color in any chain space.
- Chain 3, then work one double crochet, chain 1, and another double crochet into the same space.
- Repeat this V-stitch pattern into each space around.
- Join and secure the yarn as before.
As you work, you’ll see the zig-zag edges taking shape!
Round Four: Shaping the Hexagon
Here comes the magic—turning your circle into a hexagon:
- Insert your hook into any V-stitch space and attach a new color.
- Chain 2, then work a corner by doing three double crochets, chaining two, and adding three more double crochets in the same space.
- For sides, simply work three double crochets into each space.
- Alternate corners and sides until you complete the round, then join and secure.
Pro Tip: When sewing in tails, cinch loose starting chains for a seamless, polished look.
Want to explore more advanced stitch techniques? Don’t miss Crochet Perfect Circles – Easy, Beginner-Friendly Pattern.

Finish It Off
After completing your hexagons, you can join them together right away or use single crochet to attach them later. Either way, the result is a stunning zig-zag design that’s sure to impress. If you’re interested in joining as you go, check out the video tutorial linked above for tips.
Conclusion
That’s it! Your very own Zig Zag Hexagon is complete. Whether you’re crafting a cozy blanket or a simple coaster, this crochet project is the perfect way to combine elegance and fun. Remember, practice makes perfect, and small projects like these are a great way to refine your skills.
Looking for more creative crochet ideas? Visit Easy Crochet Patterns for Beginners to find your next project.
Happy crocheting, and as always, stay hooked!
FAQs
1. How long does it take to make a single Zig Zag Hexagon?
It depends on your skill level and the yarn you use. For beginners, it might take around 30–45 minutes. Experienced crocheters can complete one in about 20 minutes.
2. Can I use other yarn weights for this pattern?
Yes. While the tutorial uses worsted/DK weight yarn, you can try other yarn weights. Just ensure you adjust the hook size accordingly. Thicker yarn creates larger hexagons, while thinner yarn makes smaller ones.
3. What’s the best way to join the hexagons together?
You can join them using slip stitch, single crochet, or join-as-you-go techniques. Each method offers a different look, so choose the one that fits your project.
4. How do I keep the hexagon flat?
Ensure that your tension is consistent throughout the project. If it curls or puckers, consider changing your hook size or loosening/tightening your stitches.
5. Can I mix brands or types of yarn?
Yes, but it’s best to use yarns of similar weight and texture for even results.
6. How do I change colors cleanly while crocheting?
When switching colors, finish the last stitch of the old color with the new yarn. This creates a seamless transition and a neater look.
7. Can I make these hexagons bigger?
Absolutely! Add more rounds, maintaining the same increase pattern. Keep in mind that the larger the hexagon, the more yarn you’ll need.
8. What’s the best way to weave in my ends for a clean finish?
Use a yarn needle to thread the ends back and forth through the stitches on the back of your hexagon. Trim any excess yarn after ensuring it’s secure.
9. What are some creative uses for Zig Zag Hexagons?
They’re versatile! Use them to make blankets, cushions, coasters, table runners, tote bags, or even curtains.
10. Do I need to block the finished hexagons?
Blocking can help even out edges and define the shape, especially if your tension varied. However, it’s optional for most projects.
![]()
Christa Patel is a passionate crochet designer, craft blogger, and founder of The Secret Yarnery. Known for her beginner-friendly patterns and detailed tutorials, Christa aims to make crocheting accessible and fun for everyone. Through her blog, YouTube channel, and pattern store, she shares creative projects, tips, and techniques that inspire both new and seasoned crafters.
Christa specializes in crafting elegant designs with a focus on simplicity. Her love for colorful, functional pieces shines through in her work. Beyond crochet, she’s a strong advocate for sustainable crafting and encourages using leftover yarn stash for creative projects.
When Christa isn’t crocheting, you’ll find her teaching workshops, connecting with the crochet community, or dreaming up her next innovative design. Follow her journey and explore more of her patterns at Secret Yarnery or on her popular YouTube channel.
About the Author
With a passion for crafting easy, beginner-friendly tutorials and patterns, Christa inspires crafters of all skill levels to unleash their creativity worldwide. She encourages yarn lovers to connect, create, and crochet a world filled with beautiful handmade treasures!
How to Crochet an Easy Zig Zag Hexagon for Blankets, Decor, and More!