Beginner's Guide: Crochet Perfect Circles Without the Magic Ring!
Crocheting circles without using a magic ring might seem daunting at first, but it’s actually a simple technique that’s perfect for beginners. This method is a lifesaver for those who struggle with the tightness or fiddly nature of the magic ring, offering a practical and stress-free way to start round crochet projects. Whether you’re looking to create smooth circles for hats, coasters, or blankets, learning this alternative method will give you more control over your stitches and your project’s outcome.
What is Crochet and Why Circles are Special
Crochet is more than just pulling yarn through loops—it's a creative outlet that transforms simple stitches into beautiful, functional pieces. From cozy blankets to intricate doilies, the versatility of crochet is what makes it so beloved by crafters worldwide. Circles hold a special place in crochet because they are the building blocks of many popular projects like hats, coasters, and even mandalas. Let’s break down some basics to understand why.
Understanding Basic Crochet Stitches
To crochet a circle, you’ll need a solid grasp of some foundational stitches. Mastering these will set you up to create smooth, even rounds.
- Chain stitch (ch): This is the starting point for many crochet projects. Think of it as the backbone of your work—it’s how you create a flexible foundation.
- Slip stitch (sl st): This stitch might be small but it’s powerful. Use it to join rounds seamlessly or tighten up gaps between stitches.
- Double crochet (dc): Perfect for adding height to your stitches, double crochet is a staple when working on circle patterns.
If you're just getting started and need more guidance, check out Crochet 101: A Beginner's Guide to Mastering the Craft for a detailed look at essential stitches.
Why Skip the Magic Ring
The magic ring is often touted as the best starting technique for crochet circles, but for beginners, it can be tricky and frustrating. Why? Here are some challenges you might face:
- Control of Yarn Tension: With the magic ring, maintaining the right tension can feel like juggling—it takes precision that comes with practice.
- Risk of Unraveling: If not pulled and secured just right, the ring could come loose, leaving your work at risk of falling apart.
- Fiddly Nature: The steps required to form the ring are small and intricate, which may be overwhelming for someone still learning the basics.
For many beginners, starting with a simple chain and slip stitch foundation is a game-changer. It’s less intimidating and allows you to focus on getting your stitches even. As an alternative to the magic ring, you can crochet into the first chain you make. It won’t close as tightly, but it’s more forgiving and easier to manipulate.
If you’ve been struggling with the magic ring, you’re not alone. A great resource is this Red Heart Yarns post, which highlights its potential pitfalls and provides alternatives for a more secure start.
By exploring simpler techniques first, you’ll gain the confidence to tackle more advanced methods later. Plus, you’ll open the door to creating perfectly rounded projects without the stress!
Tools and Materials You'll Need
Starting a crochet project is much easier when you’re equipped with the right tools. Whether you’re brand new or revisiting your skills, the materials you choose impact your flow and the final result. Let’s break down what you’ll need to crochet circles without a magic ring and why.
Choosing the Right Yarn and Hook
Selecting the correct yarn and crochet hook is crucial for any project. Not all yarns and hooks are created equal, so you’ll want to pair them thoughtfully based on your pattern and desired texture.

Here are some helpful tips for choosing yarn and hooks:
- Match Yarn Weight to Hook Size: Most yarns come with a label suggesting the ideal hook size. For beginners, it’s a good idea to start with medium-weight yarn and a 5mm (H-8) hook. This pairing feels more natural in hand and makes it easier to see your stitches.
- Consider Texture and Fiber: Acrylic yarns are affordable and beginner-friendly, while cotton yarn gives a firmer structure to your projects. Stay away from fuzzy or novelty yarns until you’re more experienced.
- Practice Makes Perfect: If your stitches feel too tight, try a larger hook. If they feel too loose, go smaller. It’s all about balance and comfort.
To dive deeper into the types of hooks and yarn you can experiment with, check out Crochet 101: A Beginner's Guide to Mastering the Craft. This resource provides a solid foundation for material selection.
Optional Accessories for Crocheting Circles
While a hook and yarn are the essentials, a few extra tools can make your crochet experience more enjoyable and organized.
- Stitch Markers: These are tiny, clip-like tools that help you keep track of your starting point in a round. This is especially helpful when working on circular patterns, as it’s easy to lose track of where one round ends and another begins. A good set of stitch markers can save you time and frustration.
- Sharp Scissors: A small pair of scissors is a must-have for snipping yarn cleanly while finishing off your projects. Dull scissors can lead to frayed ends that unravel.
Your crochet kit can grow with you as you develop your skills, but starting simple is still effective. Websites like 5 Must-Have Crochet Materials for Beginners highlight beginner-friendly tools to make this process smooth and enjoyable.
The right tools make all the difference in your crafting journey, ensuring that every project—whether big or small—gets off to the best possible start.

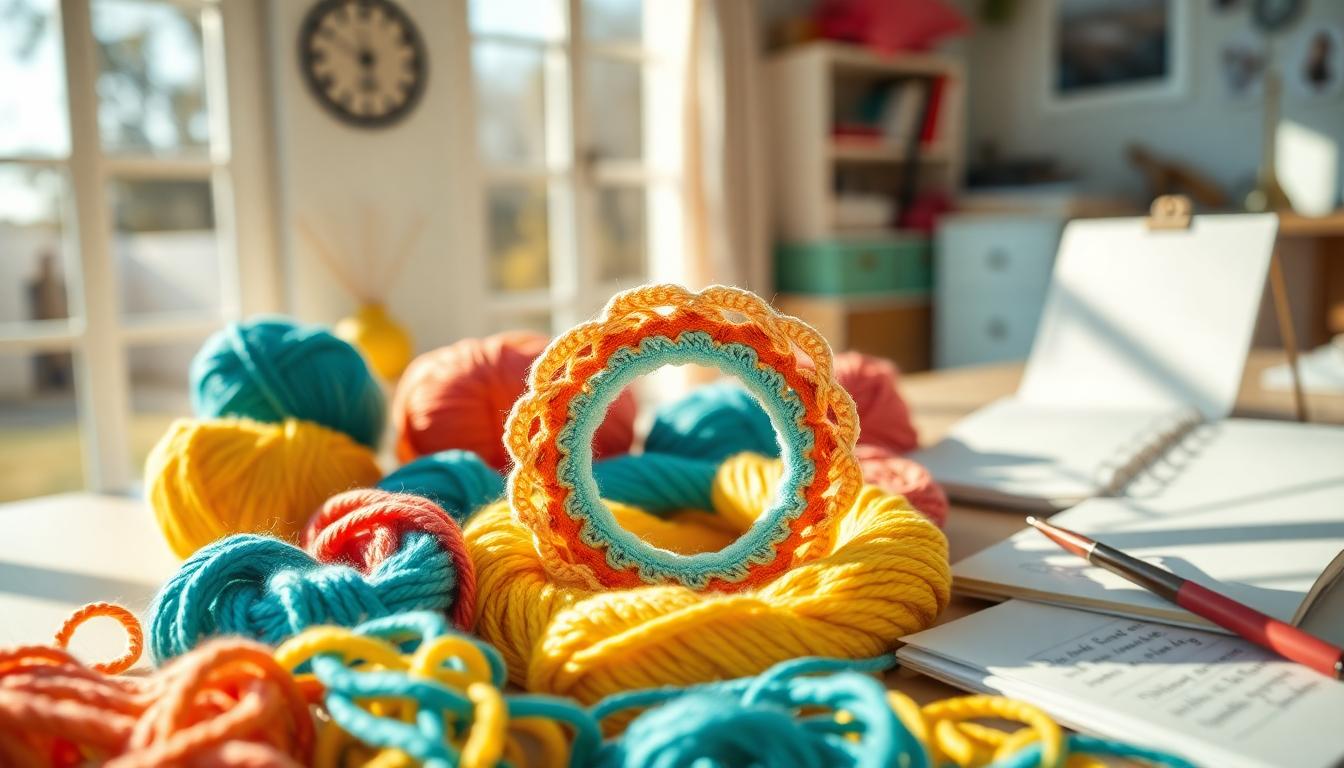
Techniques for Crocheting Circles Without the Magic Ring
Crocheting a circle without using the magic ring is an approachable alternative that opens up the world of crocheting in the round, especially for beginners. This technique provides a structured, easy-to-follow method that eliminates the frustration of the sometimes tricky magic ring. Let’s walk through the steps to create seamless and symmetrical circles.
Starting with a Chain Circle
The foundation of a crochet circle begins with a series of chain stitches that are joined into a loop. This method is beginner-friendly and offers a stable base for building rounds.
- Create a Foundation Chain: Start by making a slip knot on your hook, then chain 4 stitches (or more, depending on your desired loop size).
- Join with a Slip Stitch: Insert your hook into the first chain, yarn over, and pull through to form a loop. This completes your chain circle.
- Chain to Start: Once the circle is formed, chain the required number of stitches (usually 1 or 2) to begin your first round.
This process results in a small opening in the center that's easy to manage. For more details on creating chains, check out How to Crochet a Perfect Circle 🔵 Crochet Circle for Beginners.
Building Rounds with Increased Stitches
Growing your circle evenly depends on proper stitch increases. This ensures that your circle remains flat without curling or puckering.
- The Basic Rule: Increase the number of stitches in each round by the same amount you started with. For example, if your first round has 6 stitches, increase by 6 in the second round (12 total), and so forth.
-
Work Strategically:
- In Round 1, crochet all your stitches into the chain circle.
- In Round 2, work 2 stitches into each stitch from the previous round.
- For each subsequent round, space your increases evenly. For example, in Round 3, alternate between 1 single crochet and 2 single crochets in the same stitch.
These consistent increases give your project symmetry. Tools like stitch markers can help you keep track of your beginning and ending stitches in each round.

Common Mistakes and How to Avoid Them
Even seasoned crocheters can encounter challenges when crocheting in the round. Here are some common errors and how to address them:
- Uneven Edges: If your circle isn't lying flat, you might be adding too few or too many increases. Stick to the rule of consistent increases, and your circles will stay flat.
- Large Center Hole: A large center might form if your chain circle is too loose. Start with a tighter chain or make fewer chain stitches for a smaller loop.
- Losing Track of Rounds: Without stitch markers, it’s easy to lose your place. Use a marker to pinpoint the start of each round for better accuracy.
- Curling or Ruffling: Curling happens when there aren’t enough stitches, while ruffling occurs if there are too many. Adjust your stitch count to correct the issue.
For an in-depth guide on alternatives to the magic ring, you can explore the helpful article Alternative to the Magic Ring which breaks down the process into simple steps.

By tackling these common pitfalls, you’ll master crocheting circles without the magic ring in no time. Don’t forget to look through options like the Perfect Circles – Easy Crochet Pattern for Flawless Rounds for inspiration and guidance as you refine your skills.
Practical Applications for Crochet Circles
Crochet circles are versatile and can be the foundation for a variety of functional and decorative projects. Whether you're making simple coasters for your coffee table or taking your skills up a notch by turning circles into squares for unique designs, the possibilities are endless. Each project allows you to experiment with colors, textures, and patterns, breathing creativity into your crochet journey.
Simple Coaster Project for Beginners
A crochet circle coaster is not only a practical item but also a great way to practice your circular crochet skills as a beginner. Here’s a straightforward pattern to get started.

Materials Needed:
- Medium-weight cotton yarn
- 5mm (H-8) crochet hook
- Scissors
- Stitch markers (optional)
Pattern:
- Foundation: Start with a slip knot and chain 4. Join the chain into a loop with a slip stitch.
- Round 1: Chain 2 (counts as the first double crochet). Work 11 double crochets into the loop. Join with a slip stitch to the top of the chain 2. (12 stitches total)
- Round 2: Chain 2. Work 2 double crochets in each stitch around. Join with a slip stitch. (24 stitches total)
- Round 3: Chain 2. 1 double crochet in the first stitch, 2 double crochets in the next stitch. Repeat from * to * around. Join with a slip stitch. (36 stitches total)
- Finishing: Fasten off and weave in any loose ends.
Not only is this project quick and rewarding, but it also makes for a thoughtful handmade gift. You can explore more similar ideas with the Perfect Circles Pattern, which helps you master creating perfectly symmetrical circles.
Turning Circles into Squares for Unique Designs
If you'd like to explore a creative twist on crochet circles, learning how to transform them into squares can add a modern and unique touch to your projects. This intermediate technique is perfect for blankets, pillows, and even intricate wall hangings.
Here’s how it works: After crocheting your circle, you strategically add stitches at four evenly spaced points around the edge to “square off” the shape while maintaining symmetry. This is achieved by using increases and changing your stitch pattern.
For a more detailed guide, check out Making Circles into Squares. This comprehensive pattern provides tips and tricks for perfecting this technique, making it accessible even for those new to crochet squares.
Both of these projects showcase the potential of crochet circles beyond basic uses. Whether you're keeping it simple or venturing into more complex designs, the versatility of circles can inspire an endless array of creative masterpieces.

Tips for Perfect Crochet Circles
Creating flawless crochet circles is both an art and a skill that becomes more enjoyable with practice. Whether you’re making coasters, hats, or blankets, a few thoughtful techniques can take your circular projects from good to great. Let’s delve into three essential aspects for crafting perfect crochet circles.
Maintaining Consistent Tension
One of the most common struggles in crochet is uneven tension. Loose or tight stitches can make your circle look warped or bumpy. The key? Consistency is queen.
- Relax Your Grip: Try not to hold your yarn too tightly. A relaxed grip allows for more even stitches and reduces wrist strain.
- Find Your Rhythm: Work at a comfortable, even pace. Stopping and starting frequently can result in inconsistent stitches.
- Check Your Work: After completing each round, gently smooth your circle out with your fingers to spot any irregularities.
If you're new to crochet, it’s normal for your tension to fluctuate. With more projects under your belt, your hands will naturally find a steady rhythm. For more insights, check this detailed guide: How to Crochet a Perfect Circle 🔵 Crochet Circle for Beginners.
Counting Stitches Accurately
Losing track of stitches can quickly derail your project, causing uneven growth or misshapen rounds. A slipped stitch here or an accidental increase there, and suddenly your circle is anything but circular!
- Use Stitch Markers: Place a marker in the first stitch of each round. It’s an easy way to know where one round ends and the next begins.
- Count as You Go: Don’t wait until you’ve finished the round to count; do it stitch by stitch or every few stitches.
- Follow the Pattern Closely: Pay attention to the number of increases in each round and ensure they are spaced evenly.
A misplaced stitch can throw off the entire shape of your circle. Tools like stitch markers or row counters can make a big difference in keeping your work on track. For additional tricks to achieve symmetrical circles, check out The Secret Crochet Circle Formula (and how to tweak it).

Blocking Your Circle for a Flawless Finish
Blocking is a step often skipped by beginners, but it’s a secret weapon for giving your projects a polished, professional look. If your circle edges seem uneven or slightly curly, blocking will become your new best friend.
- What is Blocking? This process involves gently stretching your crochet piece to the desired shape and securing it in place while it dries.
-
How to Do It:
- Lightly mist your work with water using a spray bottle.
- Pin it down onto a foam board or a thick towel, making sure the edges are even all the way around.
- Let it air dry completely before removing the pins.
Blocking not only smooths out irregularities but also improves stitch definition, making your project look crisp and polished. If you’re working on a more intricate design like a blanket, review the Frankly Circles Blanket Tutorial for step-by-step guidance.
Mastering these tips will elevate your crochet skills and ensure your circles are picture-perfect every time.
Further Resources and Learning Opportunities
As a beginner, finding the right resources to support your crochet journey can make all the difference. Whether you're looking to dive deeper into specific techniques or simply need inspiration for your next project, there are countless tools and communities available to help you grow your skills. Let's explore some of the best ways to expand your knowledge and keep your crochet projects enjoyable.
Online Tutorials and Videos
For those who prefer a visual guide, online tutorials and videos are an invaluable resource. Platforms like YouTube offer step-by-step demonstrations, helping you grasp complex techniques with ease. For example, you can explore the How to Crochet Perfect Circles tutorial by Secret Yarnery, which is a perfect introduction for beginners who struggle with the magic ring.
Blogs and Articles for Inspiration
Crochet blogs are treasure troves of patterns, tips, and community insights. For example, the Secret Yarnery blog features posts like Beat Boredom Fast: Fun and Easy Crochet Projects for All Levels, which is filled with project ideas that will inspire and challenge your creativity. Regularly checking blogs can keep you updated on new trends and techniques.
Crochet Communities and Forums
Getting involved in online crochet communities is a fantastic way to learn and share experiences. Platforms like Reddit, for instance, have active threads such as Learn to Crochet With Free, Online Resources, which are filled with suggestions for free patterns and tutorials shared by fellow crocheters.
Beyond forums, you can join crochet groups on social media or even attend virtual workshops. These spaces often host question-and-answer sections, pattern swaps, and beginner support that make crocheting a more interactive experience.

Books and Guides
Books remain one of the most reliable resources for anyone learning to crochet. A great option to consider is the comprehensive beginner's guide featured on Daisy Farm Crafts, which delves into basic stitches and tools, giving you a solid foundation.
For more structured learning, crochet guidebooks and eBooks provide step-by-step instructions. Look for books that combine tutorials with practical applications, so you can directly apply what you’ve learned to real projects.
Local Workshops and Classes
Nothing beats hands-on learning, and local workshops or crochet classes can be a game-changer. Check community centers, craft stores, or libraries for group lessons tailored for beginners. If you're more comfortable learning at home, virtual classes are just as effective—some even offer one-on-one sessions for personalized guidance.
By engaging with these resources and communities, you'll not only improve your skills but also enjoy the camaraderie of others who share your passion for crochet. The opportunities for learning are endless and accessible; all it takes is a little exploration to find what works for you.
Conclusion
Mastering crochet circles without a magic ring empowers you to embrace creativity without the intimidation of tricky techniques. This beginner-friendly approach opens doors to crafting beautiful projects while giving you confidence in your skills. By focusing on proper tools, consistent tension, and reliable techniques, your circles can lay the groundwork for hats, coasters, or even elaborate blankets.
The journey continues as you experiment with new patterns and learn more advanced ideas. For inspiration and tips, explore How to Crochet for Beginners. And remember—every stitch is a step towards mastering the art. What will you create next? Share your stories and let your imagination shine.
FAQ
1. What is a Magic Ring in Crochet?
A magic ring (or adjustable loop) is a crochet technique used to create a tight, closed center at the beginning of a circular project. It involves making a loop of yarn, securing it with a stitch, and then working stitches into the loop. This method allows you to adjust the ring to eliminate any center hole. However, beginners often find it tricky to execute.
2. Why Should I Avoid the Magic Ring as a Beginner?
While the magic ring creates a neat and seamless center, it can be challenging for beginners due to the difficulty of maintaining tension and handling the yarn loop. It requires a certain level of control and practice. Using alternatives, like starting with a chain circle, is easier and allows you to focus more on the basics.
3. What Can I Make with Crochet Circles?
Crochet circles are extremely versatile. Here are some popular projects:
- Coasters
- Hats
- Mandalas
- Granny squares (when paired with techniques to turn circles into squares)
- Decorative wall art
- Blankets made up of joined circles
4. How Do I Keep My Circle Flat While Crocheting?
To keep your circle flat:
- Increase stitches evenly in each round based on your starting count.
- Follow the common increase rule (e.g., add the same number of increases as the initial stitch count per round).
- Use consistent tension across all stitches.
- Regularly smooth out your work to identify bumps or irregularities early on.
5. What if My Circle Starts Curling or Ruffling?
- Curling: This typically happens if you haven't added enough increases. Go back and add more evenly.
- Ruffling: This occurs if you've added too many increases. Redo the round with fewer increases or adjust your stitch spacing.
6. Can I Replace the Magic Ring in Any Pattern?
Yes, the magic ring can be replaced in most patterns. Instead of starting with a magic ring, you can create a foundation chain (usually 4-6 chains), join it into a loop with a slip stitch, and work your stitches into the loop.
7. Are There Advanced Techniques for Crocheting Circles?
Yes, advanced techniques include:
- Creating seamless transitions between rounds with invisible joins.
- Using color changes to add designs or patterns.
- Transforming your circles into granny squares or other shapes for complex projects.
8. What Yarn and Hook Are Best for Beginners?
For beginners, medium-weight yarn (size 4) and a 5mm (H-8) crochet hook are highly recommended. This combination is easy to handle and helps you clearly see your stitches. Stick to smooth acrylic or cotton yarn; avoid fuzzy or textured yarn until you're comfortable with basic techniques.
9. What Should I Do If My Chain Circle Center is Too Big?
If the center hole left by the chain circle feels too large, try:
- Creating fewer chains or pulling your chain stitches tighter before joining.
- Using a smaller hook for the foundation chain to create a tighter base.
10. Where Can I Find Projects and Tutorials for Crochet Circles?
There are numerous online resources, including:
- The Secret Yarnery, which offers beginner-friendly guides and patterns.
- Free video tutorials on YouTube, such as "How to Crochet a Perfect Circle."
- Crochet blogs and communities that provide tips, tricks, and project ideas for all skill levels.
![]()
Christa Patel is a passionate crocheter, educator, and writer with over a decade of experience in the craft. Known for her approachable teaching style, Christa specializes in creating beginner-friendly guides that help aspiring crafters develop their skills with confidence. A lifelong lover of yarn and texture, she combines creativity with practicality to design projects that are both functional and beautiful.
Christa is the founder of "The Modern Crafter Chronicles," a blog dedicated to promoting accessible crochet techniques, helpful tutorials, and inspiring project ideas. She believes crochet is more than just a hobby—it’s a powerful tool for relaxation, creativity, and self-expression.
When she’s not working on her latest crochet project, Christa enjoys exploring new yarn shops, connecting with fellow crafters in her online community, and crafting handmade gifts for loved ones. Her mission is to make crochet fun and enjoyable for everyone, regardless of skill level.
Follow Christa’s journey and discover more of her tutorials and patterns at The Modern Crafter Chronicles.
About the Author
With a passion for crafting easy, beginner-friendly tutorials and patterns, Christa inspires crafters of all skill levels to unleash their creativity worldwide. She encourages yarn lovers to connect, create, and crochet a world filled with beautiful handmade treasures!
Beginner's Guide: Crochet Perfect Circles Without the Magic Ring!