Best Crochet Stitch for a Bulky Yarn Blanket: The Ultimate Guide to Cozy Blankets
Nothing beats the feeling of curling up under a squishy, cozy, and thick handmade blanket. If you've ever worked with super chunky yarn, you know the comfort it brings and how quickly it turns into a beautiful project. But finding the best crochet stitch for bulky yarn can make all the difference in the finished look and feel of your blanket. The right technique lets you make the most of every yard, keeps your project dense and warm (not holey or floppy), and brings out the true softness of the yarn. In this guide, I'll walk you through my favorite two-row repeat stitch that makes bulky yarn shine, while sharing tips to help you create a perfect, snuggly blanket—whether you're working for yourself or as a gift.
Why Choosing the Right Stitch for Super Chunky Yarn Matters
Grab that jumbo yarn and a comfy seat. Before you start your blanket, it's important to know why stitch selection matters so much when working with super bulky yarn. Here are some of the common challenges you might run into:
- Big gaps and holes between stitches, making the blanket less warm
- Uneven tension, causing wavy or puckered edges
- Difficulty joining new balls or cakes (especially with slippery yarn)
- Heavy, stiff blankets if the wrong stitch is used
With thicker yarn, every stitch is amplified. The right stitch gives your blanket a dense, plush feel with minimal holes, so your hard work turns into the warm hug you imagined. Keep in mind, chunky yarn projects eat up more yarn than you think. For a lap-size blanket, I used 17 cakes of 100 grams each! The payoff is worth it, though, because you end up with a super squishy, cloud-like result.

Overview of the Dreamy Two-Row Repeat Stitch
Let me introduce my absolute favorite stitch for bulky yarn blankets: a simple two-row repeat using double crochet and half double crochet. This stitch pattern makes the best of your yarn, keeps the process stress-free, and lets your hands remember what comes next without much thought. The fabric this creates is both plush and thick. Each stripe on your blanket can be done with a single ball or cake, which makes color changes simple and helps you plan ahead if you're playing with gradients or stripes.
The texture is a dreamy mix—one row with a bit of open space (thanks to double crochet), the next row closes those gaps with dense half double crochets. Together, they give you a blanket that looks and feels amazing. It's soft enough for a cozy nap, sturdy enough for regular use, and so squishy that it's bound to become a family favorite.
For more ideas on how to get the most from thick yarn, check out my post on budget-friendly crochet stitches for fast, fun projects.
Materials Needed for This Project
Here's what you'll want to gather before starting:
- Super chunky yarn (like chenille yarn or another thick option). My sample blanket took 17 cakes (100g each) for a great lap size.
- Large crochet hook (size will depend on your yarn, but chunky yarn usually calls for at least a 9mm or larger)
- Stitch markers (optional, but helpful for beginners)
- Sharp scissors for cutting
- Lighter (for singeing knots if you're joining yarn)
- Tapestry needle for weaving in ends (if needed)
You can find my favorite sharp tip needles here and check out yarn and hook suggestions in the description of the video above.

Preparing Your Yarn and Hook
Start by making a slip knot the way you're most comfortable with. Loosen or tighten it so it slides easily onto your hook, but don't make it too tight. It should move with just a gentle tug. If you're new to crochet, practice a few slip knots to find your groove. Place the slip knot near the fattest part of your hook. That chunkier section helps form nice, even loops in your foundation.
Tip: Don’t tighten your stitches too much, especially when working with thick yarn. Give your hands and the yarn some room to breathe. This helps your blanket stay soft and stretchy.
Creating the Starting Chain for Your Blanket
To begin, chain 65—or the number that matches your desired blanket width. There's no stitch multiple in this pattern, so you're free to pick any length. Here's how to get it right:
- Make the chain longer than you think you need, since bulky stitches shrink the width a bit as you work the next rows.
- Keep your chain loose and relaxed. Don't yank the yarn after each link; instead, push the new loop up toward the fattest part of your hook each time.
- Let your first row of stitches “settle” before checking your length. If it’s shorter than expected, go back and add a few chains up front for a wider blanket.
Common chain mistakes to watch for:
- Too tight: Stiff, curled starting edge. Ease up your grip and avoid pulling after each new chain.
- Too loose: Uneven gaps between chains. Keep your tension steady, letting the hook guide the yarn.
- Inconsistent tension: Some chains fat, some skinny. Keep your yarn in the same spot on your finger the whole way.
Take your time. If you love your chain, you’ll love the finished blanket.

Understanding Stitch Shrinkage and Tension
Bulky yarn likes to shrink up once you start adding more rows, so it’s always smart to make your chain a bit longer than the finished width you want. Tension is just how tightly or loosely you hold the yarn as you work. Too tight and your blanket will curl up like a taco. Too loose and it slips out of shape or sags.
You want a natural tension—one where the yarn glides, your stitches look even, and the blanket keeps its shape with a little give. Think “relaxed but not floppy.” If you find your chains are fighting you (either hard to push through or unusually flimsy), adjust your grip or how hard you’re pulling while you work.
Working Into the Back Loops for a Neat Edge
One small trick makes a big difference in the look of your blanket: working into the back loops, also called “camel bumps,” along the base chain. This makes the top and bottom edges of your blanket match perfectly, so your finished piece has clean lines from start to finish.
Follow these steps for a pro-level edge:
- Turn your chain so you can see the row of bumps along the back.
- Skip the first bump under the working yarn.
- Insert your hook into the second bump (the next one along the back).
- Yarn over and pull up a loop for your first single crochet.
- Repeat into every back loop along the chain.
Working into these “humps” takes a little practice on chunky yarn, but creates a stretchy yet tidy foundation.

Row 1: Single Crochets Into Back Loops
Now, start building that soft fabric! Work one single crochet into each back loop across the foundation chain. No need to keep your stitches extra loose now—use your normal, comfortable crochet tension.
Focus on sliding your hook cleanly into those back loops for a straight edge. At the end of this row, your blanket will already have the beginnings of that signature plushness and uniform stretch. Pause if you want, check your width, and make sure you love the feel before moving on.
Benefits of Back Loop Single Crochet Base
This technique pays off instantly:
- The bottom edge mirrors the smooth, even top edge—your blanket looks finished even without a border.
- Keeps the stretch consistent, so the blanket lays flat.
- Avoids that annoying tight, pinched feeling some starting rows get, especially with bulky yarn.

Starting Row 2: The First Row of the Repeat
Now for the part that brings all the squish. To begin row 2:
- Chain one, making the loop a little bigger than usual.
- Turn your work.
- In the very first stitch, work a double crochet (DC). Inserting the hook right where your chain comes from ensures straight edges.
- For beginners: Place a stitch marker in the first stitch so you can spot it later.
This small bigger chain at the start helps keep the rows loose and prevents bunching.
Row 2: Double Crochet Across
Double crochet is the hero here. Work one DC into each stitch along the row using even tension. With super chunky yarn, DC stitches stand tall and form soft “pillars”—these add a touch of airiness to the otherwise dense blanket while speeding up progress.
Don’t forget about your stitch marker at the end. When your hook’s tired, feel free to pause and admire how the open spacing of this row balances the overall texture.

Starting Row 3: Second Row of the Repeat
Chain one (again, bit bigger than normal), turn your work, and dive into half double crochet (HDC):
- In the very first stitch, work a HDC.
- Slide in a stitch marker if you’re learning or easily lose track at the row’s edge.
- Continue with HDC in every stitch across.
This row closes in the spaces left by the double crochet, giving the blanket serious squish and density.
Row 3: Half Double Crochets Across
Half double crochet is the “meat and potatoes” of this blanket. It pulls everything together, giving you a tighter weave with no holes. Keep your stitches the same height so the texture is even and plush.
At the end of your row, use the stitch marker to help identify the last stitch and finish neatly. Good markers can be a lifeline, especially as the blanket grows.

Starting Row 4: Returning Row of Double Crochet
Repeat the rhythm:
- Chain one (slightly bigger), turn your work.
- Start again in the first stitch with double crochet.
- Work DC in every stitch along the row.
With every pair of rows, you build a tidy, easy-to-remember pattern that shapes the blanket’s whole vibe.
Explaining the Two Row Repeat Pattern
Here’s how it goes:
- Row 2: Double crochet all the way across.
- Row 3: Half double crochet all the way back.
- Repeat: Double crochet on odd rows, half double crochet on even rows (after the first single crochet base).
This pattern gives you a plush texture with durable rows. The double crochet adds a bit of visual interest, while the half double closes gaps and plumps up the fabric. For easy tracking, always chain one (slightly bigger) when starting a new row, and place a stitch marker in the first stitch.

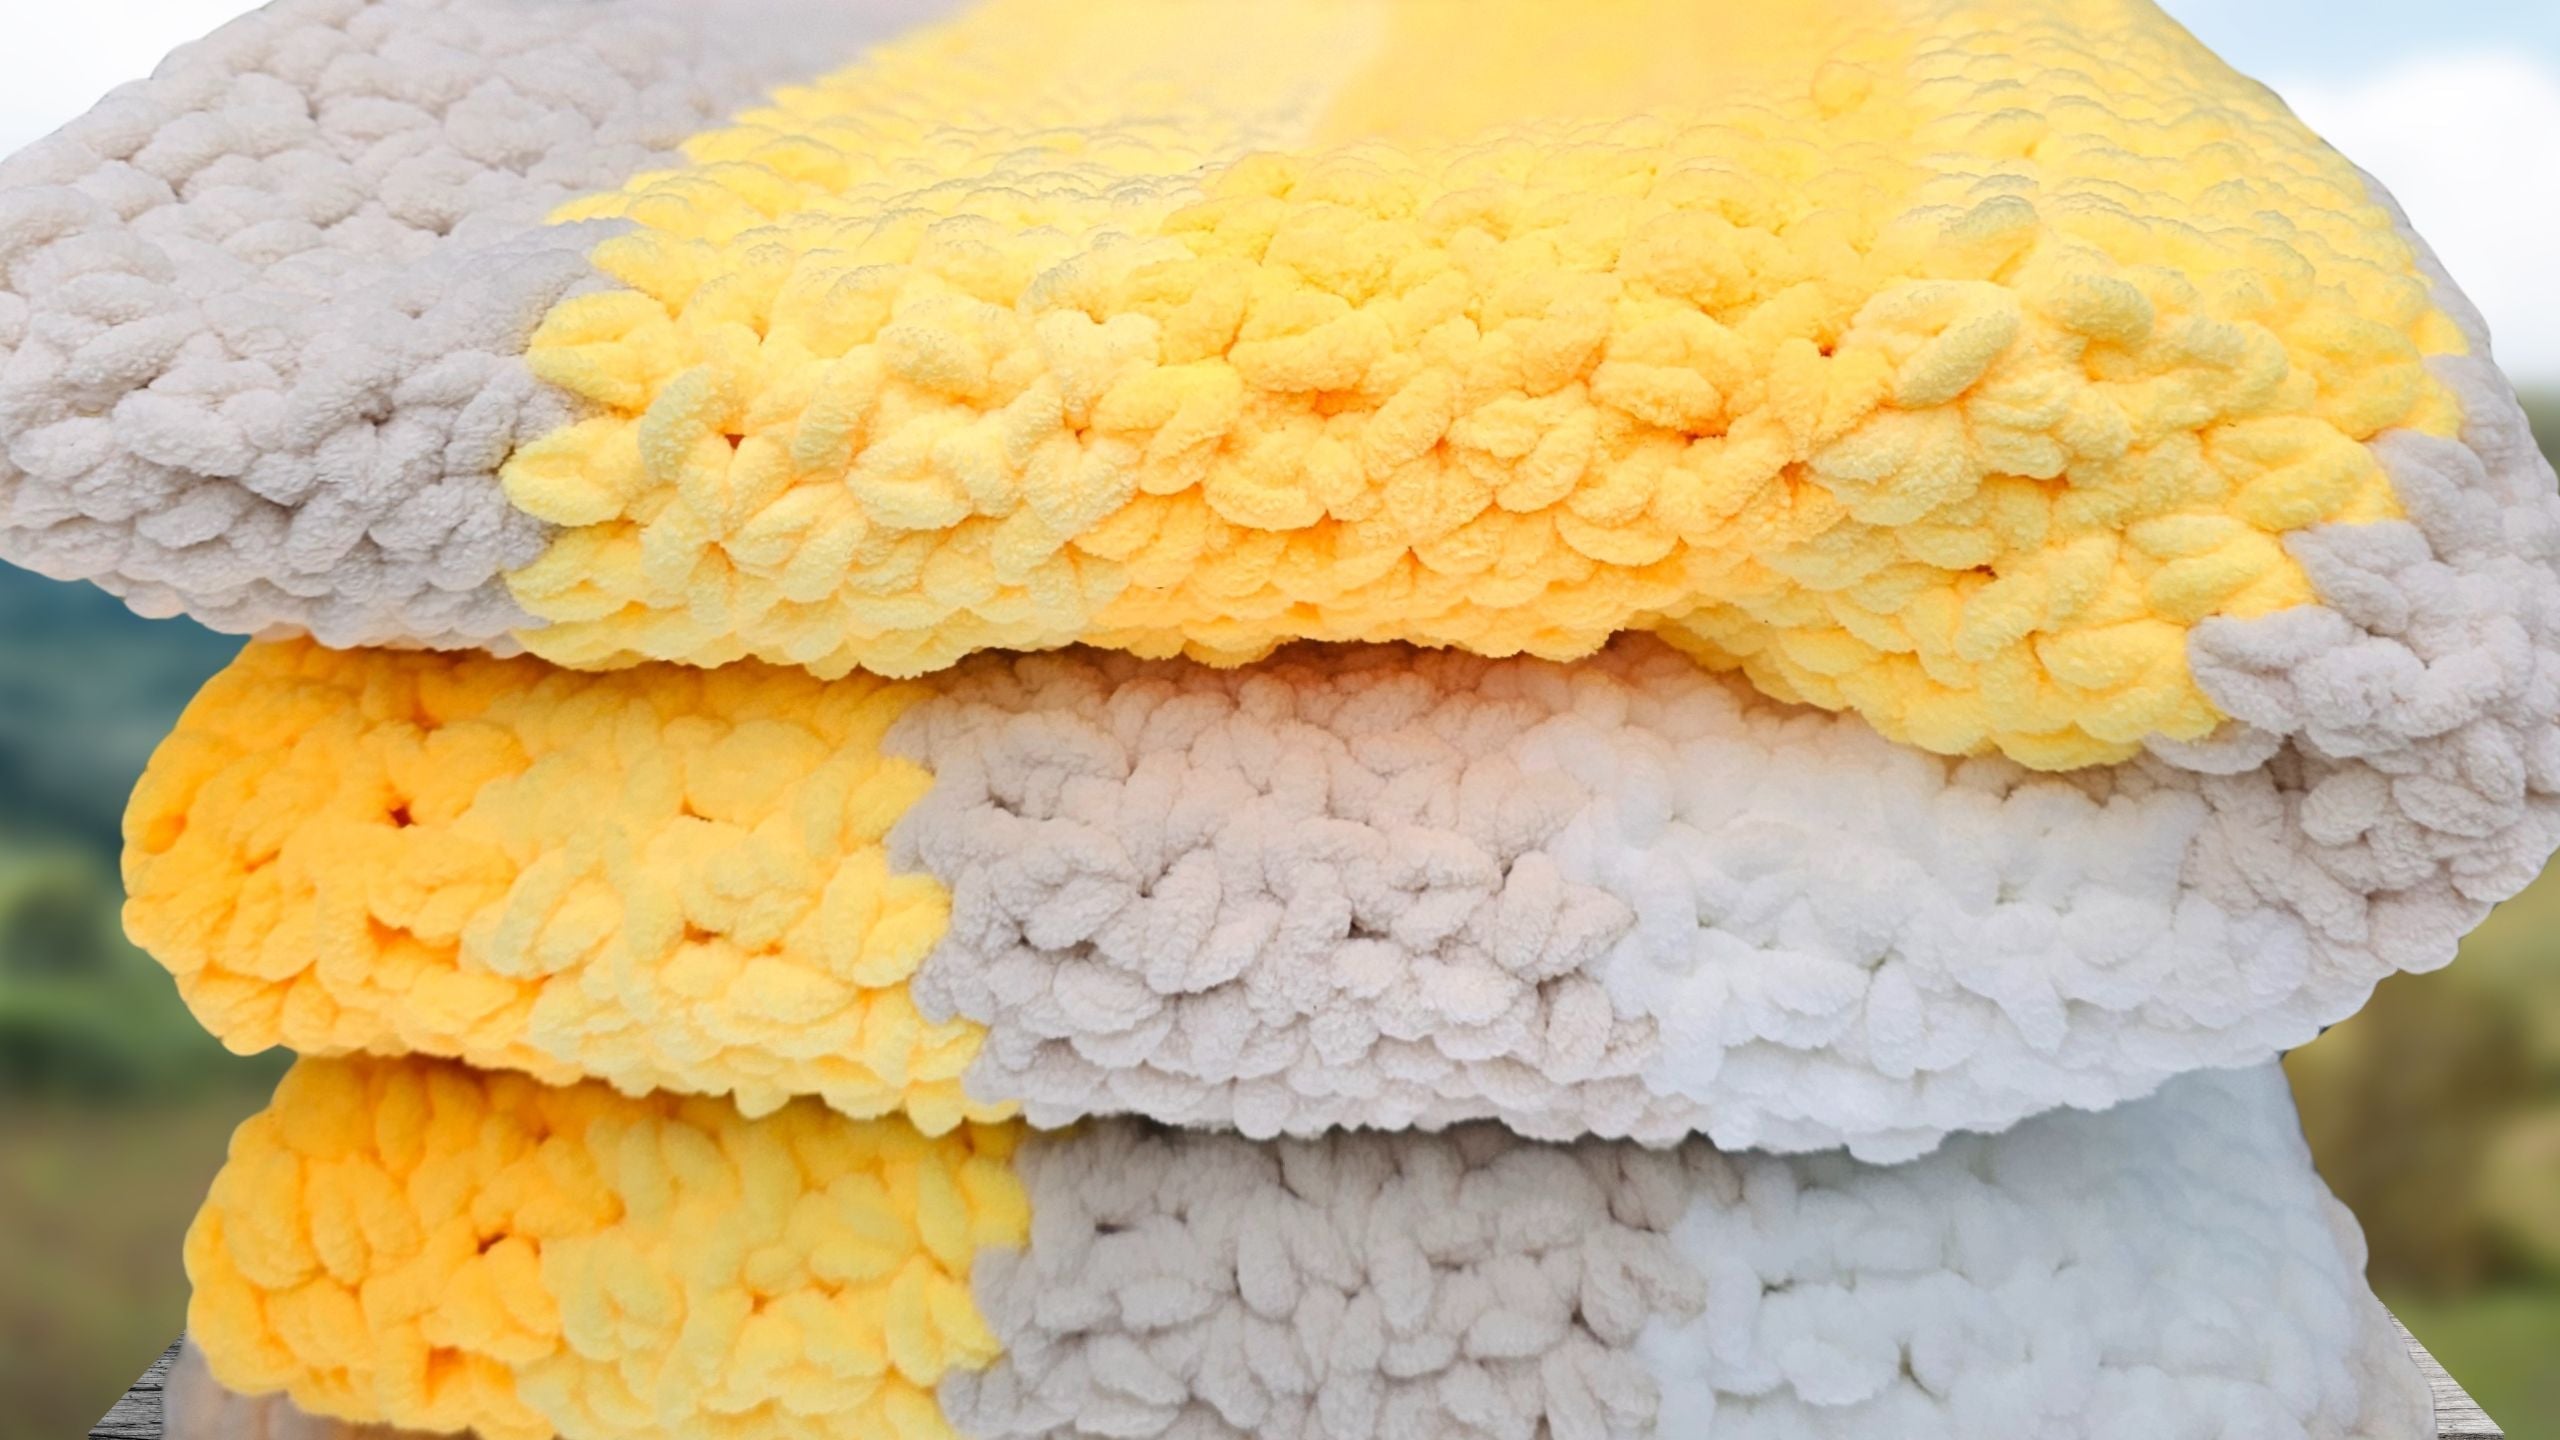
Visualizing the Stitch Texture and Finished Fabric
What you’ll notice as you work is a blend of slightly spaced DC rows and dense, soft HDC rows. The fabric grows quickly and stays fluffy without those too-big openings. On a close-up, you’ll spot subtle striping where DC and HDC alternate, making the blanket look as good as it feels.
It’s simple, modern, and dreamy—a perfect fit for movie nights, chilly mornings, or adding texture to your home. The result is a dense and soft blanket, warm enough for the coldest nights but still light enough to drape across your lap.
Looking for other chunky yarn ideas? Check out some quick bulky yarn scarves for fast, fun projects.
How to Change Colors or Join New Yarn Balls
Joining chunky yarn can be tricky. Tails tend to pop out or knots become bulky. I recommend the “magic knot” method—here’s why:
- No long tails to sew in later.
- Knot holds tight and won’t slip out, even on slippery chenille or velvet yarn.
- Minimal yarn waste, since you can use very short ends.
- Seam is nearly invisible and doesn’t change the thickness of your row.
This method keeps the blanket soft, smooth, and lets you change yarn cakes or colors with zero fuss.

Step-by-Step Magic Knot Instructions
Here’s how I do the magic knot:
- Take your new yarn and wrap it around the old/existing yarn. Tie a simple overhand knot close to the end of the old yarn (keep the tail short).
- Pull that knot very snug—super chunky yarn won’t usually break, but tug with confidence.
- Now, take the old yarn and wrap it around the new yarn, tying another overhand knot. Again, keep the tails short.
- Slide the two knots together by pulling the yarn firmly from each side. Keep pulling on the yarn itself and on the tails until both knots are right up against each other.
- Give a good, strong pull. If the yarn snaps, start again. It’s better to break here than to find out later while washing or using the blanket.
- Trim both tails close to the knot.
You’ll have a strong knot ready to hide in your next stitches.
Securing the Magic Knot with a Lighter
For extra peace of mind, especially with synthetic fiber yarns like chenille, use a lighter:
- Carefully singe the knot for just a second until you see the fibers shrivel slightly and bond together.
- Safety tip: Don’t hold the flame too long or touch the yarn directly—just brush the flame quickly past where you want the fibers sealed.
- The goal is to “weld” the knot without changing yarn color or texture.
This keeps knots from coming loose and keeps your blanket looking and feeling perfect.
Warning: Always use a lighter in a well-ventilated space and away from flammable surfaces or kids. Don’t try to melt natural fiber yarns (like wool or cotton), as they’ll just burn.
![]()
Hiding the Magic Knot Seamlessly in the Blanket
Once you’ve finished the knot, keep crocheting as usual. As you reach the knot with your hook:
- Try to work the knot into the center of a stitch, so it disappears under a loop.
- If it’s sitting on the edge or looks too prominent, simply unravel (frog) back a few stitches, adjust your tension, and reposition the knot under your hook as you pull through the loop.
- With a little practice, the knot vanishes inside the row and is impossible to feel on either side.
This works especially well with thick and plush yarn. You get a join that’s strong and discreet, and you avoid bulky, obvious knots or loose tails sticking out.
Troubleshooting the Magic Knot Join
If you notice your knot has slipped out of place, or you see little tails poking out:
- Don’t panic—just unravel a few stitches to reach the knot again.
- Adjust your loops to pull the knot snugly inside a stitch.
- Experiment with slightly more or less tension to get the knot to settle exactly where you want it.
If, for any reason, the knot feels too big or seems likely to pop open, you can always redo it. Thick yarn can handle a few tries, and you’ll find your rhythm as you work.

Continuing the Blanket: The Repeat Pattern
Once your knot is hidden and your new yarn is secure, keep going with your two-row repeat. Alternate double crochet and half double crochet rows, always beginning each row with a slightly larger chain one and always working into the very first stitch.
The more you work, the more you’ll notice the signature stripes form—one row with just a hint of space, the next row cozy and tight. This cycle makes a blanket that’s as pretty as it is snuggly.
If you want to explore other textures or need new pattern inspiration, see my cozy blankets collection.
Finishing Your Blanket: The Final Row
Once your blanket has reached the size you want (or you run out of yarn), end with a single crochet row to echo your foundation.
- Chain one (normal size this time).
- Turn and work one single crochet into every stitch across.
- This gives your blanket a finished, even edge.
After your last stitch, chain one to secure and cut the yarn. Pull the yarn tail through the last loop and snug it down tight. You’ll need to sew in the first and last tail with a tapestry needle, but with the magic knot technique, there shouldn’t be many ends to deal with.
Aftercare, Gifting, and Extra Tips
Now, your blanket is ready for snuggling, gifting, or even showing off in your home. Here's how to get the most from your handiwork:
- For machine-washable yarn, use a gentle cycle and lay flat to dry.
- If gifting, consider rolling the blanket with a ribbon. You can even add a custom label for a personal touch.
- Want to up your crochet game? I recommend trying some of the top free crochet blanket patterns for extra inspiration.
Left Handed?
Conclusion
Bulky yarn blankets are all about comfort and fast gratification. Once you master this two-row repeat, you'll have the power to make endless throws, lap blankets, and gifts with ease. Super chunky yarn can be intimidating at first, but the right stitch unlocks its soft, plush nature and delivers a finished result you'll want to wrap up in every night.
If you've enjoyed this walkthrough, explore my full library of popular crochet patterns for blankets. And don’t forget: creativity grows with every project and every new technique learned. Let's keep making beautiful things together—stay hooked!
FAQs
What is the best crochet stitch for a bulky yarn blanket?
A two-row repeat using double crochet and half double crochet gives both thickness and softness with minimal holes. This stitch combo is easy to remember and works well for bulky or super chunky yarn.
How many skeins of yarn do I need for a chunky blanket?
For a lap-size blanket, you’ll need about 15–18 cakes (100g each) of bulky yarn. The exact amount depends on your desired size and the brand of yarn.
Do I need a special hook for bulky yarn?
Use a large hook—usually 9mm or bigger—so your stitches stay loose and easy to work. Always check the yarn label for size suggestions.
Can beginners make a chunky crochet blanket?
Yes! Bulky yarn and the simple two-row repeat make this a great project for beginners. The stitches are easy, and the fabric grows quickly.
Why do my edges look uneven?
Bulky yarn highlights changes in tension. Keep each starting chain loose, use stitch markers on row ends, and work into the first and last stitch of each row for straight, neat edges.
How do I join new yarn without bulky knots?
Use the magic knot method to connect yarn ends securely with minimal bulk. Trim the tails close and hide the knot inside the stitches as you crochet.
Do I need a border for my chunky blanket?
It’s optional. If you work into the back loops for your starting row, your edges will look finished. Add a simple border if you want extra polish.
![]()
Christa Patel is a passionate crochet designer, teacher, and the founder of Secret Yarnery. With years of hands-on experience and a love for bold, colorful projects, Christa shares simple tips and modern patterns that make crochet easy and fun for everyone. Her blankets, tutorials, and crochet hacks have inspired thousands of makers around the world. When she’s not surrounded by soft yarn and bright hooks, Christa enjoys helping others grow their skills and creativity—one cozy project at a time. Discover more of her work, free tutorials, and creative community at Secret Yarnery.