Crochet African Flowers Easily with the JAYGO Method | Step-by-Step!
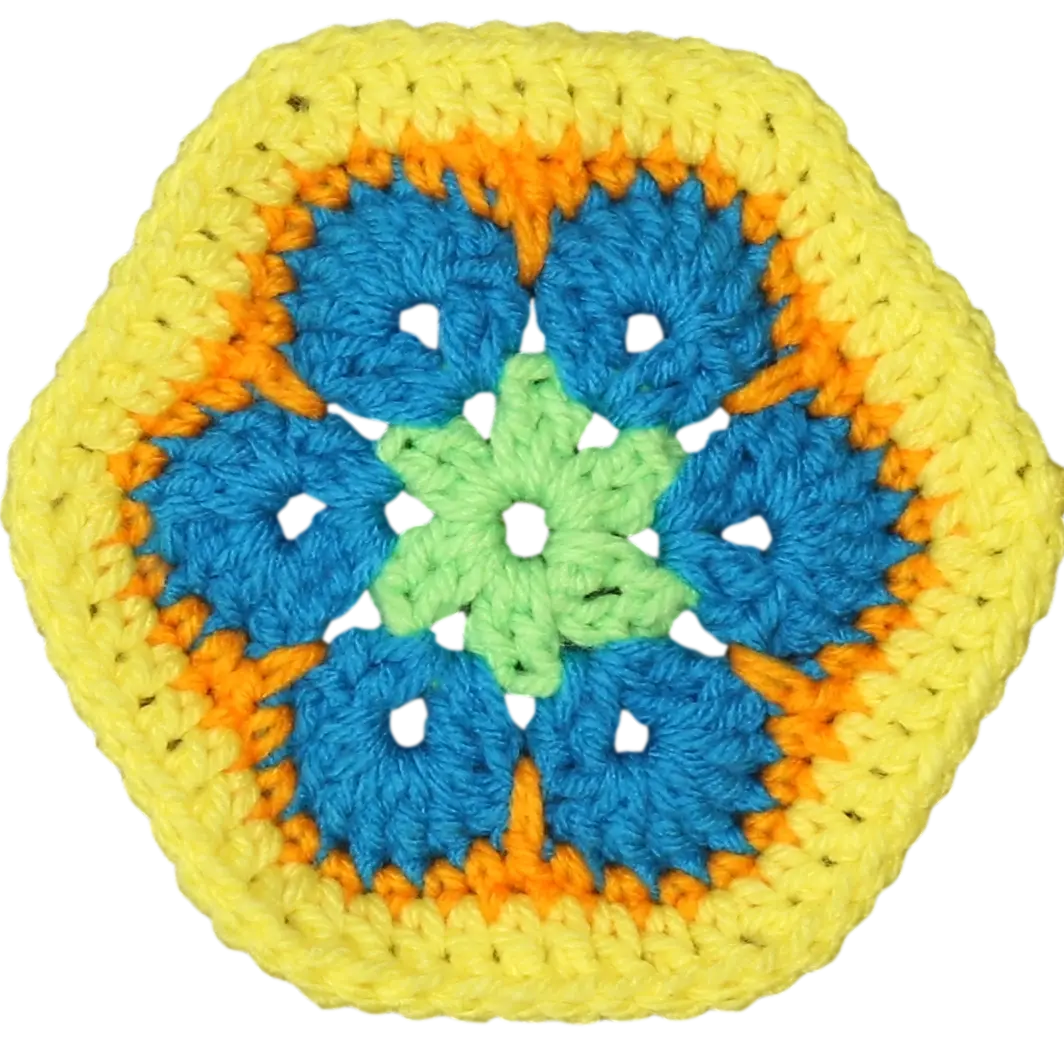
Have you ever dreamed of creating beautiful, seamless crochet projects with ease? The Join-As-You-Go (JAYGO) technique is here to make that dream a reality! This method allows you to connect your crochet motifs as you complete them, saving you time and creating a polished, professional finish. In this tutorial, I'll guide you through using the JAYGO method with charming African flower hexagons. And guess what? The same joining magic can be applied to exercise ball covers, just by switching from hexagons to pentagons!
What Makes JAYGO So Great?
Why is the Join-As-You-Go technique a favorite among crochet enthusiasts? Here's why:
- It doesn't demand extra time compared to finishing the last round of a hexagon.
- It magically creates a cute, woven texture as you work.
- It offers versatility, looking fantastic whether you choose a single, unifying color or a vibrant mix to showcase the unique joining.
Ready to simplify your crochet and achieve stunning results? Let's dive in!
Get the Written Pattern
Want to follow along with a detailed written pattern? You can find it over on my website: secretyarnery.com. This pattern uses the exact same joining technique that is used to make our exercise ball covers, but with pentagons instead of hexagons.

Materials You'll Need
Before we get started, gather these essential materials:
- Crochet hook: I recommend a hook size appropriate for your yarn.
- Yarn: Choose your favorite colors! I used different colors for each hexagon in the tutorial to clearly show how the join works.
- Scissors: For snipping those yarn ends.
- Yarn needle: To weave in the ends for a neat finish.
- Finished African flower hexagons: The more the merrier!
Before You Start: Finish Round 5
Before you begin the JAYGO technique, it's crucial to complete round 5 of your African flower hexagon. If you need a refresher on how to crochet the African flower hexagon, check out my tutorial on YouTube. And for those interested in creating an exercise ball cover, I also have a pentagon video tutorial available.
For the first block, we'll only be joining on one side. Therefore, you'll need to complete round 5 on your next block, leaving just one side open for joining.

Joining on One Side: Step-by-Step
Okay, let's get into joining! Here's how to join on one side.
Step 1: The First Double Crochet
Begin by making one double crochet into the corner stitch of the block you're currently joining.
Step 2: Slip Stitch to Join
Now, find the corner space of the completed block. Insert your hook into that space, grab the yarn, and slip stitch to join.
Step 3: Double Crochet Back
Make one double crochet back into the same stitch on the block you're working on.
Step 4: Continuing the Join
Pull your hook towards yourself to clearly see the next stitch. Insert your hook into the next stitch on the completed block, grab the yarn, and slip stitch to join.
Step 5: Repeat the Pattern
Continue alternating between making a double crochet on the block you're working on and a slip stitch to join to the completed block. This creates that beautiful woven effect.
Step 6: The Corner Join
As you approach the corner, make your last double crochet into the same stitch where you started. Then, slip stitch into the corner space of the block you're joining to.
Step 7: Finishing Off
To complete the join, slip stitch over to the top of the chain-3 (or chain) that began the round. Secure your yarn with a chain-1, cut the yarn, and weave in the ends.
Avoiding Common Mistakes
Keep these tips in mind to ensure a smooth joining experience:
- Skipping Stitches: Always pull your hook down towards yourself to clearly see the next stitch and avoid accidentally skipping any.
- Too Many Stitches: Don't worry if it feels like there are too many stitches on the completed block; the corner stitch will align correctly.
- Tight Joins: Keep the yarn pulled a little tight to create snug joins, especially in the corners.
Moving On: Joining on Two Sides
For the next block, we'll be joining on two sides. Finish your block on all sides except for two, leaving those two sides open. Work into the corner space with just one double crochet, no chaining. Find the corner space of the first block you're joining to. Put your hook down into that space, grab the yarn, and slip stitch to join. Wrap your yarn and put it right back into the same stitch because you're working on your corner of the block.

Joining on Two Sides: A Detailed Walkthrough
Let's break down the process of joining on two sides:
Step 1: First Corner
Locate the corner space of the first block you're joining to, and slip stitch to join.
Step 2: Double Crochet
Make a double crochet into the same corner space on the block you're working on.
Step 3: Working Along the Side
Pull your hook toward yourself to find the next stitch, and slip stitch to join. Then, make one double crochet into the block you're joining.
Step 4: Repeat
Continue alternating between a double crochet on the block you're working on and a slip stitch to join to the completed block.
Step 5: The Second Corner
When you reach the corner of the first side, make a double crochet into the corner stitch. Then, slip stitch into the corner space of the block you're joining to.
Step 6: Connecting the Corners
For a secure corner join, find the corner of the opposite block, insert your hook, bring your yarn back up, and slip stitch through all the loops.
Step 7: Finish the Corner
Wrap your yarn and finish that corner with a double crochet into the same stitch.
Step 8: Second Side
Pull your hook toward yourself to see that first stitch after the corner, and start working into that stitch. Slip stitch to join.
Step 9: Finishing Off
When you reach the end of the second side, slip stitch into the corner space of the work you have finished. Slip stitch straight over to the top of that chain to join. Chain one to secure your yarn, cut your yarn, and weave in the ends.
Pro Tip: Tension
Maintaining consistent tension is key to a beautiful finished product. Tight joins in your corners look best!
- Loose tension can result in a gappy appearance.
- Tight tension can cause your project to scrunch up.

Joining on Three Sides: The Final Stretch
When you have one spot left, you'll be joining on three sides. Start the same way, with your finished work above and the next block you're joining. Finish the next block you're joining on three sides, leaving the three sides open. Find that first corner of where you're going to be joining to, and slip stitch to join. Work into the very same space with one double crochet. Pull your hook toward yourself, so you can see that next stitch, and make one slip stitch to join.
Joining on Three Sides: The Complete Guide
Here's a step-by-step guide to mastering the three-sided join:
Step 1: First Corner
Find that first corner of where you're going to be joining to, and slip stitch to join.
Step 2: First Side
Make one double crochet into the block you're working on, then one slip stitch into the block you have finished.
Step 3: Second Corner
When you're in the corner, you're going to start your corner on the block you're working on and into that first corner space, bring your yarn up. Then, into the opposite corner space, bring your yarn up.
Step 4: Connecting the Corners
Turn your hook and slip stitch through all of that to join.
Step 5: Second Side
One double crochet into that same spot/stitch, then pull your hook back and look for that next stitch, and slip stitch to join.
Step 6: Third Corner
When you've done your double crochet into your corner stitch (the fourth stitch on your petal), that's when you want to start going into your corners.
Step 7: Joining the Third Side
Make your last double crochet into the same stitch that you started, and your last slip stitch into that space, the corner space of the work you have finished.
Step 8: Finishing Off
Slip stitch jump straight over and slip stitch into the top of your chain, a tight little slip stitch. Chain one to secure your yarn, cut your yarn, leaving a long enough tail to work later, pull your hook up and your yarn through, and snug that down to secure.

Working in a Row
Now that you know how to join your motifs, how do you start a new row? It's simple! You pick up the stitches from the row above, placing the new blocks in the correct position. As you work across your entire project, you'll see your creation come to life.
Blocking
Once you've completed your project, blocking is an essential step. Blocking helps even out your stitches and gives your finished piece a professional look. There are two main methods:
- Wet Blocking: Soak your project in lukewarm water, gently squeeze out the excess, and lay it flat to dry, shaping it as you go.
- Steam Blocking: Use a steamer or iron with a steam setting to gently steam your project, shaping it as it dries.
Weaving in the Ends
Weaving in the ends is an important part of finishing any crochet project. It secures your yarn tails and prevents them from unraveling. Here's the best method:
- Thread your yarn needle with the yarn tail.
- Weave the needle through several stitches on the back of your work, following the direction of the stitches.
- Snip off the excess yarn.
The technique may vary based on the type of yarn you're using. Thicker yarns require fewer passes while fine yarns require more.
Different Color Schemes to Try
One of the joys of working with African flowers is the endless possibilities for color combinations! Here are a few ideas to spark your creativity:
- Monochromatic: Use different shades of the same color for a subtle and sophisticated look.
- Complementary Colors: Pair colors opposite each other on the color wheel (e.g., blue and orange) for a bold and vibrant effect.
- Rainbow: Embrace a full spectrum of colors for a playful and cheerful design.
- Pastel: Opt for soft, muted colors for a delicate and dreamy aesthetic.

Project Ideas Using JAYGO African Flowers
Ready to put your new skills to the test? Here are some project ideas to inspire you:
- Blankets/Afghans: Create a cozy and colorful blanket that will become a treasured heirloom.
- Scarves/Wraps: Design a unique and eye-catching scarf to add a touch of handmade charm to your wardrobe.
- Bags/Purses: Make a sturdy and stylish bag that's perfect for everyday use.
- Pillows: Add a pop of color to your home decor with vibrant African flower pillows.
- Garments: Crochet vests, sweaters, or cardigans for a one-of-a-kind, handmade fashion statement.
- Exercise Ball Cover: Give your workout equipment a stylish makeover with a custom-crocheted cover using the pentagon variation.
Don't miss out on other exciting crochet patterns and resources!
Call to Action: Share Your Projects!
I'd love to see your finished projects! Share them on Instagram using the hashtag #SecretYarnery. And be sure to join the Secret Yarnery Crochet Community on Facebook to connect with fellow crocheters and share your inspiration!
Left Handed?
Subscribe and Stay Hooked!
For more awesome crochet tutorials just like this, be sure to subscribe to my YouTube channel and hit the notification bell so you don't miss out on new videos.
Additional Resources
- Right Handed Version: https://youtu.be/YBcuHe4dkvw
- Left Handed Version: https://youtu.be/DgxGVdUhAB4
- Check out my list of Crochet Must Haves.
- Find written patterns on the Secret Yarnery website.
- Sign up for the Newsletter to stay up to date.
- Left Handed Tutorials are available to make it easier to learn.
- Take a look Behind the Scenes to see what I'm working on.
With the Join-As-You-Go (JAYGO) technique, creating beautiful African flower projects has never been easier. Remember, it's all about practice, patience, and a splash of creativity. So, grab your hook and yarn, and let's get started on your next crochet masterpiece!
FAQs
What is the Join-As-You-Go (JAYGO) method?
The JAYGO method is a crochet technique where you join motifs, such as hexagons or pentagons, while crocheting them. This eliminates the need to sew them together later and creates a seamless, neat finish.
Do I need advanced crochet skills to use the JAYGO method?
No, the JAYGO method is beginner-friendly. If you’re comfortable with basic stitches like double crochets and slip stitches, you can easily follow the steps.
Can I use the JAYGO method for any crochet motif?
Yes, the JAYGO method is versatile and can be used with various crochet motifs, including hexagons, squares, and pentagons. Adjustments may be needed depending on the shape.
What type of yarn is best for African flower motifs?
Any yarn works, but medium-weight yarns like worsted or DK yarn are commonly used. Select bright or contrasting colors to make your motifs pop.
How do I maintain consistent tension when joining motifs?
Keep your stitches snug but not too tight. Practice maintaining the same amount of slack throughout the join to ensure a unified look.
What if I make a mistake while joining motifs?
You can unravel stitches and redo them. The JAYGO method makes it easier to fix problems as you work since you’re finishing one motif at a time.
How do I change colors with the JAYGO technique?
Complete the motif’s round before starting the join and work with a new color of yarn on the final round. Make slip stitches or double crochets in the desired color for the join.
Why do I need to block my completed project?
Blocking helps even out stitches, aligns motifs, and gives your project a professional finish. It’s especially beneficial for complex patterns and multi-color projects.
Can the JAYGO method be adapted for non-flat projects?
Yes, the JAYGO method is highly adaptable. For example, you can use it to make exercise ball covers or even wearable projects like vests and cardigans.
What’s the best way to weave in the ends?
Use a yarn needle to thread tails through the back of your stitches, following the direction of the work. This helps secure loose ends and prevents them from unraveling.
![]()
Christa Patel is the creative force behind The Secret Yarnery, a vibrant community for crochet enthusiasts of all skill levels. With years of experience in crochet design, Christa specializes in fun, easy-to-follow tutorials and unique patterns that inspire creativity. Her passion for crochet is matched only by her love of teaching. She believes anyone can crochet with the right guidance and encouragement.
Christa's expertise shines through her detailed video tutorials, especially on her YouTube channel, where she has built a global community of like-minded crocheters. From basic stitches to intricate projects like African flower motifs and exercise ball covers, Christa makes crochet accessible, practical, and enjoyable.
When Christa isn't crocheting, you can find her experimenting with new color palettes or sharing behind-the-scenes glimpses of her crochet journey. She lives by her motto: "Crochet is for everyone!" Her mission is to spread joy through stitches and help others create something meaningful, one beautiful project at a time.
Follow Christa's work at Secret Yarnery, subscribe to her YouTube channel, or join her crochet community on Facebook for endless inspiration and support in your crochet journey.
About the Author
With a passion for crafting easy, beginner-friendly tutorials and patterns, Christa inspires crafters of all skill levels to unleash their creativity worldwide. She encourages yarn lovers to connect, create, and crochet a world filled with beautiful handmade treasures!
Crochet African Flowers Easily with the JAYGO Method | Step-by-Step!