Crochet an Easy Desk Basket: Beginner Guide for a Stylish Home Decor!
Looking for a simple and stylish way to organize your desk? Then you're in the right place! This easy desk basket is a fun and practical project, perfect for beginners and experienced crocheters alike. Made with chunky yarn, it works up quickly and adds a touch of handmade charm to any workspace. Follow along with this step-by-step guide and discover how to crochet your own adorable and functional desk basket. Plus, I'll share some helpful tips and tricks to ensure your project turns out perfectly.
Table of contents
Gather Your Supplies
Before we dive in, let's gather all the materials you'll need for this project. Having everything on hand will make the process smooth and enjoyable.
-
Chunky yarn: I recommend using soya and oatmeal colors for a lovely, neutral look.
-
5mm crochet hook: This size is ideal for chunky yarn, but you may need to adjust depending on your yarn thickness.
-
Scissors: For cutting the yarn.
-
Darning needle: To weave in the ends and create a neat finish.
-
Stitch marker: A simple piece of yarn in a contrasting color will do the trick.
Why are these items important? Chunky yarn creates a sturdy basket with a nice texture. The crochet hook needs to be the right size to create tight stitches. Scissors are essential for finishing off your project. The darning needle is important to ensure your ends are securely tucked away. Finally, a stitch marker will help you keep track of your rounds as you work in a spiral.
If you don't have chunky yarn, you can substitute with a lighter weight yarn, but you'll need to use a smaller crochet hook and possibly work more rounds to achieve the same size.

Choosing the Right Yarn
The yarn you choose plays a big role in the final look and feel of your basket. For this project, yarn weight and fiber content are important factors to consider. Chunky yarn is ideal because it creates a sturdy and substantial basket. The thickness of the yarn allows the basket to hold its shape well, making it perfect for organizing desk supplies.
I suggest using soya and oatmeal colors as they create a warm and inviting palette. However, feel free to explore other color combinations that suit your personal style. You can find a wide variety of yarn options to suit your taste.
If you're feeling adventurous, you can even use one ball of yarn by working from both the center and the outside simultaneously. This creates a unique, subtly striped effect.
Understanding Crochet Hooks
Crochet hooks come in various sizes, each designed for different yarn weights. The size of your hook determines the size of your stitches and the overall gauge of your project.
Using the correct hook size is crucial for achieving the desired gauge. If your hook is too small, your stitches will be too tight, and your basket will be stiff. If your hook is too large, your stitches will be loose, and your basket won't hold its shape.
For chunky yarn, a 5mm hook is generally recommended. However, if you're using thinner yarn, you'll need to use a smaller hook to maintain a tight stitch.
You can find a great selection of crochet hooks to get started.
Preparing Your Yarn
Before you start crocheting, it's helpful to prepare your yarn. This involves finding the center pull of the skein and winding it into a ball (if it's not already).
Most yarn skeins have an end tucked into the middle, which you can pull out to start crocheting. This is known as the "center pull." Gently reach into the skein and feel around for the end. If you're having trouble finding it, try looking for a loose strand on the outside of the skein that might be connected to the center.
Once you've found the center pull, carefully unravel it. To prevent the outside strand from tangling, you can wrap it around the skein as you go.
If your yarn becomes knotted, don't panic! Gently work out the knots with your fingers, being careful not to pull too hard and break the yarn. You can also use a yarn needle or crochet hook to help untangle stubborn knots.
Alternatively, consider using a ball winder to wind your yarn into a neat and tidy ball, this makes it easier to work with.

Making a Magic Ring
Now for the magic! We're going to start our basket with a magic ring, also known as a magic circle. This technique creates a closed center for your project, eliminating the hole that can sometimes occur when starting with a traditional chain.
Here's how to make a magic ring:
- Wrap the yarn around your fingers, forming an "X."
- Hold the yarn with your thumb.
- Insert your hook under the first strand and catch the second strand.
- Pull the loop through and twist the hook.
- Yarn over and pull through the loop on the hook to secure the ring.
It might take a few tries to get the hang of it, but once you do, you'll be amazed at how easy and versatile the magic ring is.
A common issue with the magic ring is that it can be too loose. To fix this, make sure you're holding the yarn taut as you work your stitches. You can also try using a smaller crochet hook for the first round to create tighter stitches.
If the magic ring isn't your style, you can skip it! But, it's the best way to start this project.
Round 1: Single Crochet into the Magic Ring
Now that you've created your magic ring, it's time to start crocheting! In this round, we'll be working single crochet stitches into the center of the ring.
Insert your hook into the center of the magic ring, yarn over, and pull through a loop. Yarn over again and pull through both loops on the hook. That's one single crochet stitch!
Repeat this process 11 more times, creating a total of 12 single crochet stitches into the center of the ring. Make sure you're going over both strands of yarn as you crochet, this will help secure the ring and create a sturdy base for your basket.
If you're not familiar with how to do single crochet stitches, don't worry! Check out this helpful crochet patterns.
Remember, the beginning chain does not count as a stitch.
Closing the Magic Ring
Once you've completed your 12 single crochet stitches, it's time to close the magic ring. This will create a tight and secure center for your basket.
To tighten the ring, gently pull the yarn tail. This will cinch the stitches together, closing the hole in the center.
Try to make the loop as small as possible without breaking the yarn. I find that Kenyan yarn is strong and can withstand a good tug!
Now, hold the tail from your magic ring over the front of your work.
Round 2: Increasing in Each Stitch
In this round, we'll be increasing in each stitch around, this means we'll be working two single crochet stitches into each stitch from the previous round. This will increase the diameter of our circle and create a flat base for the basket.
To start, join the round by making a single crochet into the first stitch. This is where we'll place our stitch marker.
Place a stitch marker at the beginning of the round. This will help you keep track of where you started and ended.
Now, work two single crochet stitches into each stitch around. This means you'll be inserting your hook into the same stitch twice, creating two new stitches in that spot.
As you crochet, be sure to crochet over the yarn tail to secure it. This will save you from having to weave it in later.
If you're not sure whether you're going into the correct stitch, look for the two loops that form each stitch. These loops will be visible on the top of your work, and they'll guide you to where you need to insert your hook.

Understanding Stitch Markers
Stitch markers are your best friend when crocheting in the round! They help you keep track of where you started and ended each round, especially when working with complex stitch patterns.
You can create a simple stitch marker using a piece of yarn in a contrasting color. Just loop the yarn around your hook at the beginning of the round and then move it to the next round as you go.
To move the stitch marker at the end of each round, simply slip it off your hook, work a stitch into the last stitch of the round, and then slip the marker back onto your hook.
Alternatively, you can use safety pins or specialized crochet markers, which you can find at most craft stores.
Round 3: Alternating Single Crochet and Increase
In this round, we'll be alternating between one single crochet and two single crochets (increase) in each stitch around. This will continue to increase the diameter of our circle, creating a nice, flat base for the basket.
The pattern for this round is: "single crochet, increase, single crochet, increase..." Repeat this pattern all the way around.
Remember to move your stitch marker at the end of the round!
If you're having trouble keeping track of your stitches, try counting them as you go. This will help you ensure that you're following the pattern correctly.
The last stitch should be an increase.
Troubleshooting Stitch Count Errors
What if you get to the end of the round and realize your stitch count is off? Don't panic! Minor discrepancies are not critical for this project.
If you're off by just a stitch or two, you can try adding or removing a stitch to correct the error. Alternatively, you can simply continue crocheting, and the error will likely even out as you go.
Remember, the bottom of the basket is not the most important thing in the world. A few extra or missing stitches won't make a huge difference in the final result.
Round 4: Increasing with Two Single Crochets
For this round, we're going to work two single crochets into one stitch, then two single crochets into the next, repeating all the way around.
Don't forget to move your stitch marker at the end of the round.
If you're not sure which stitch you need to go into, try pulling your stitches back to see the stitch you need to go into.
The pattern will get easier as the circle gets bigger, so just keep going!
Round 5: Increasing with Three Single Crochets
In this round, we'll work one single crochet into the next three stitches, then two single crochets into the fourth. This will continue to expand the base of our basket.
The pattern for this round is: "single crochet, single crochet, single crochet, increase..."
Remember to move your stitch marker at the end of the round.
To maintain even tension throughout the round, try to keep your stitches consistent in size and tightness.
Dealing with Wobbling
As you add more stitches to the base of your basket, you might notice that it starts to wobble. This means the circle is not laying flat and has a chunk that wants to stand up. This is a common issue when crocheting in the round, and it's usually caused by adding too many stitches too quickly. It means that the diameter is not as big as the amount of stitches.
If you see the base starting to wobble, work a round of single crochet stitches without increases. This will help flatten the base and prevent it from becoming too wavy.
Simply work one single crochet into each stitch around, without adding any extra stitches.
If wobbling persists, there's a helpful article on easy crochet projects for beginners.
Remember, wobbling is fixable, and it doesn't require restarting the project.

Alternating Increase Rounds
To correct the wobbling, we'll alternate between doing increases and not doing increases. This means we'll work one round with increases, followed by one round without increases, and then repeat.
By alternating increase rounds with non-increase rounds, we can gradually expand the base of the basket while maintaining a flat shape.
For this round, we're doing four single crochets into four stitches, then two single crochets into one stitch.
Achieving the Desired Base Size
The number of rounds you need to crochet will vary depending on the desired base size and the thickness of your yarn. The Easy Crochet Desk Basket pattern is simple.
To determine the appropriate size, measure the base against your scissors or other items you plan to store in the basket. The base should be large enough to accommodate the intended contents.
It's perfectly fine if the base isn't perfect, a little bit of character is what makes handmade items special!
Starting the Sides of the Basket
Now that we've achieved the desired base size, it's time to start working on the sides of the basket. This involves transitioning from increasing rounds to non-increasing rounds.
To start the sides, work one single crochet into each stitch around, without increasing. This will create a vertical wall for the basket.
As you crochet, maintain a consistent stitch height along the sides. This will help create a smooth and even wall.
Keep in mind that the first few rows of non-increasing will be laying down flat as the base gets larger. The number of non-increasing rows it will be before the walls start depends on how loose your stitches are.
Crocheting the Walls
The sides are starting to take shape! They look so cute.
To make crocheting easier, flip the basket inside out. This will allow you to work on the "right" side of the fabric, which is often easier to see and work with. The inside is the pretty side!
As you crochet the walls, work in continuous rounds to create a seamless finish. This means you'll simply keep crocheting around and around, without joining the rounds.
The stitch marker isn't required for the sides, but it can be used to keep track of your progress.
Determining the Basket Height
The height of the basket is entirely up to you! Crochet the sides until they reach your desired height.
To help you decide, measure the height against the items you plan to store in the basket. The height should be tall enough to keep the items contained, but not so tall that they're difficult to access.
In this tutorial, I crocheted about seven rows for the sides.
Finishing the Basket
We're almost there! It's time to finish off the basket.
To finish the last round, work one regular single crochet and then two slip stitches. This will create a smooth and even edge.
Next, secure the yarn tail to prevent unraveling. You can do this by weaving it through several stitches on the wrong side of the work using a darning needle.
Once the end is cut, it will lay down nicely.
The top looks flat with the crab stitch.
Adding an Edging (Crab Stitch)
If you like, you can leave the basket as is. Or, you can add an edging to give it a more finished look.
One popular edging option is the crab stitch, also known as the reverse single crochet. This stitch creates a rope-like edge along the top of the basket.
Here's how to create a crab stitch:
- Chain one.
- Insert your hook into the stitch to the right (backwards).
- Yarn over and pull through.
- Yarn over and pull through both loops on the hook.
Maintain even tension while working the crab stitch to create a neat and consistent edge.
The first couple of stitches will be tricky because they are slip stitches.
Joining the Edging
Once you've completed the crab stitch edging all the way around, it's time to join the edging to the first crab stitch.
Slip stitch into the first crab stitch to join the edging. This will create a seamless finish.
To hide the join, try to work the slip stitch as invisibly as possible.
Weaving in the Ends
To secure the yarn and prevent unraveling, it's important to weave in the ends. This involves threading the yarn tail through a darning needle and weaving it through several stitches on the wrong side of the work.
Insert the yarn tail through the darning needle, then weave the needle through several stitches. Pull the yarn tail through to secure it. Then, trim any excess yarn.
Hide the ends as much as possible, hiding your join.
Take the yarn down on the inside and loop it through.
Change direction while weaving in the ends to prevent them from pulling out.
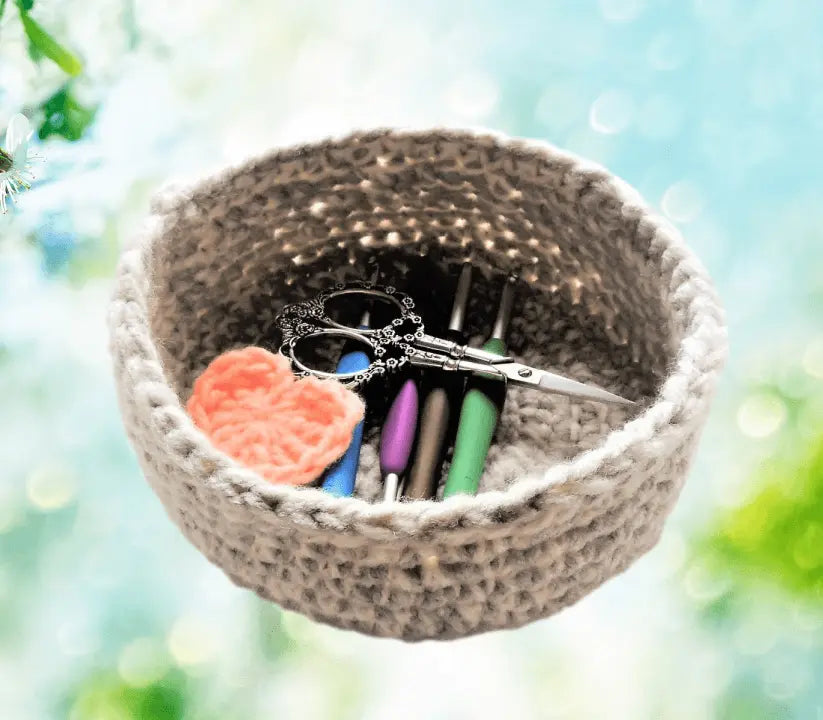
The Finished Desk Basket
And there you have it! Your very own crocheted desk basket is complete.
Take a moment to admire your handiwork. This basket features sturdy construction and a stylish design.
This super cute little basket is perfect for storing crochet hooks, scissors, or other small items on your desk.
Congratulations on completing this project!

Encouragement and Call to Action
I hope you enjoyed this crochet tutorial and found it helpful. Now that you've made your own desk basket, I'd love to see it!
Share pictures of your finished desk baskets on social media. You can also find me on Instagram and Facebook.
If you're looking for more Crochet patterns and inspiration, check out the Secret Yarnery Crochet Patterns.
Thanks for joining me on this creative adventure, and happy crocheting!
FAQs
Can I use any type of yarn for this project
Yes, you can use different types of yarn, but chunky yarn is recommended for a sturdy and durable basket. If you use thinner yarn, you will need a smaller hook and may have to add more rounds.
What size should the finished basket be?
The size of the basket is customizable. You can adjust the base size and height based on your needs, whether it's to hold pens, scissors, or other desk supplies.
Do I need to use the magic ring to start?
No, it's not mandatory. You can use a basic chain and join it into a circle as an alternative. However, the magic ring provides a seamless and tight starting point.
What if my basket doesn’t hold its shape?
If the basket feels floppy, make sure your stitches are tight and consistent. Also, consider using thicker, more structured yarn, or add a fabric stiffener to the walls after completing the basket.
How do I measure the base size?
To measure the base size, you can place your scissors, pens, or other desk items over the base as you crochet. Adjust its diameter to accommodate your items.
Can I add handles to the basket?
Yes! Between the rows of single crochet on the basket walls, skip a few stitches (depending on handle size) and chain the same number of skipped stitches. Continue as normal to add simple handles.
How do I fix uneven or wobbly bases?
If your base isn’t laying flat, alternate between increase rounds and non-increase rounds. Crocheting a single round without increases often fixes the wobble.
Crochet is the best way to express yourself with yarn.
![]()
Christa Patel is a passionate crochet designer and creator behind the popular Secret Yarnery. With years of experience, she specializes in crafting beginner-friendly crochet projects that inspire crafters of all skill levels. Christa is dedicated to making crochet accessible, fun, and rewarding by offering detailed tutorials, easy-to-follow patterns, and plenty of helpful tips.
Her love for crochet began as a hobby but quickly blossomed into a creative journey of sharing knowledge and building a vibrant community of yarn enthusiasts. Through her blog, YouTube channel, and social media, Christa encourages everyone to embrace their creativity and explore the joys of handmade treasures.
When she’s not crocheting, Christa enjoys connecting with followers, experimenting with new designs, and inspiring others to bring their ideas to life. Whether you’re crafting a desk basket or a cozy blanket, Christa’s warm teaching style ensures a delightful experience.
Follow Christa’s work and join her community:
Explore more of her crochet patterns and tutorials for your next project!
About the Author
With a passion for crafting easy, beginner-friendly tutorials and patterns, Christa inspires crafters of all skill levels to unleash their creativity worldwide. She encourages yarn lovers to connect, create, and crochet a world filled with beautiful handmade treasures!
Crochet an Easy Desk Basket: Beginner Guide for a Stylish Home Decor!