C2C Crochet Tote Bag Cover: Easy DIY Dollar Store Makeover!
Ever wonder how to turn a simple, inexpensive item into something truly special? I'm Christa from The Secret Yarnery, and I'm excited to show you how to crochet a stunning cover for a basic dollar store tote bag! This project is all about taking something ordinary and turning it into a unique, eye-catching accessory. I used some bright colors, but you can customize this project with any color combination you like.
In this blog post, which accompanies my YouTube video tutorial, I'll guide you through every step of the process. You can watch the video here:
I'll cover everything from the materials you'll need to detailed instructions for creating the crochet panels, assembling your tote, and adding those final, personal touches. Let's get started and create your crochet tote bag cover!
Why This Crochet Tote Cover is Perfect for You
Looking for a crochet project that's both fun and functional? This tote cover ticks all the boxes!
Beginner-Friendly C2C Technique
This project uses the corner-to-corner (C2C) technique. C2C involves crocheting small blocks diagonally to create a larger piece. It's super easy to learn, especially with my step-by-step instructions. If you're just starting out with crochet, this is a fantastic way to get comfortable with basic stitches while creating something beautiful. You can learn more about essential crochet stitches for beginners to boost your confidence.

Customizable Colors and Designs
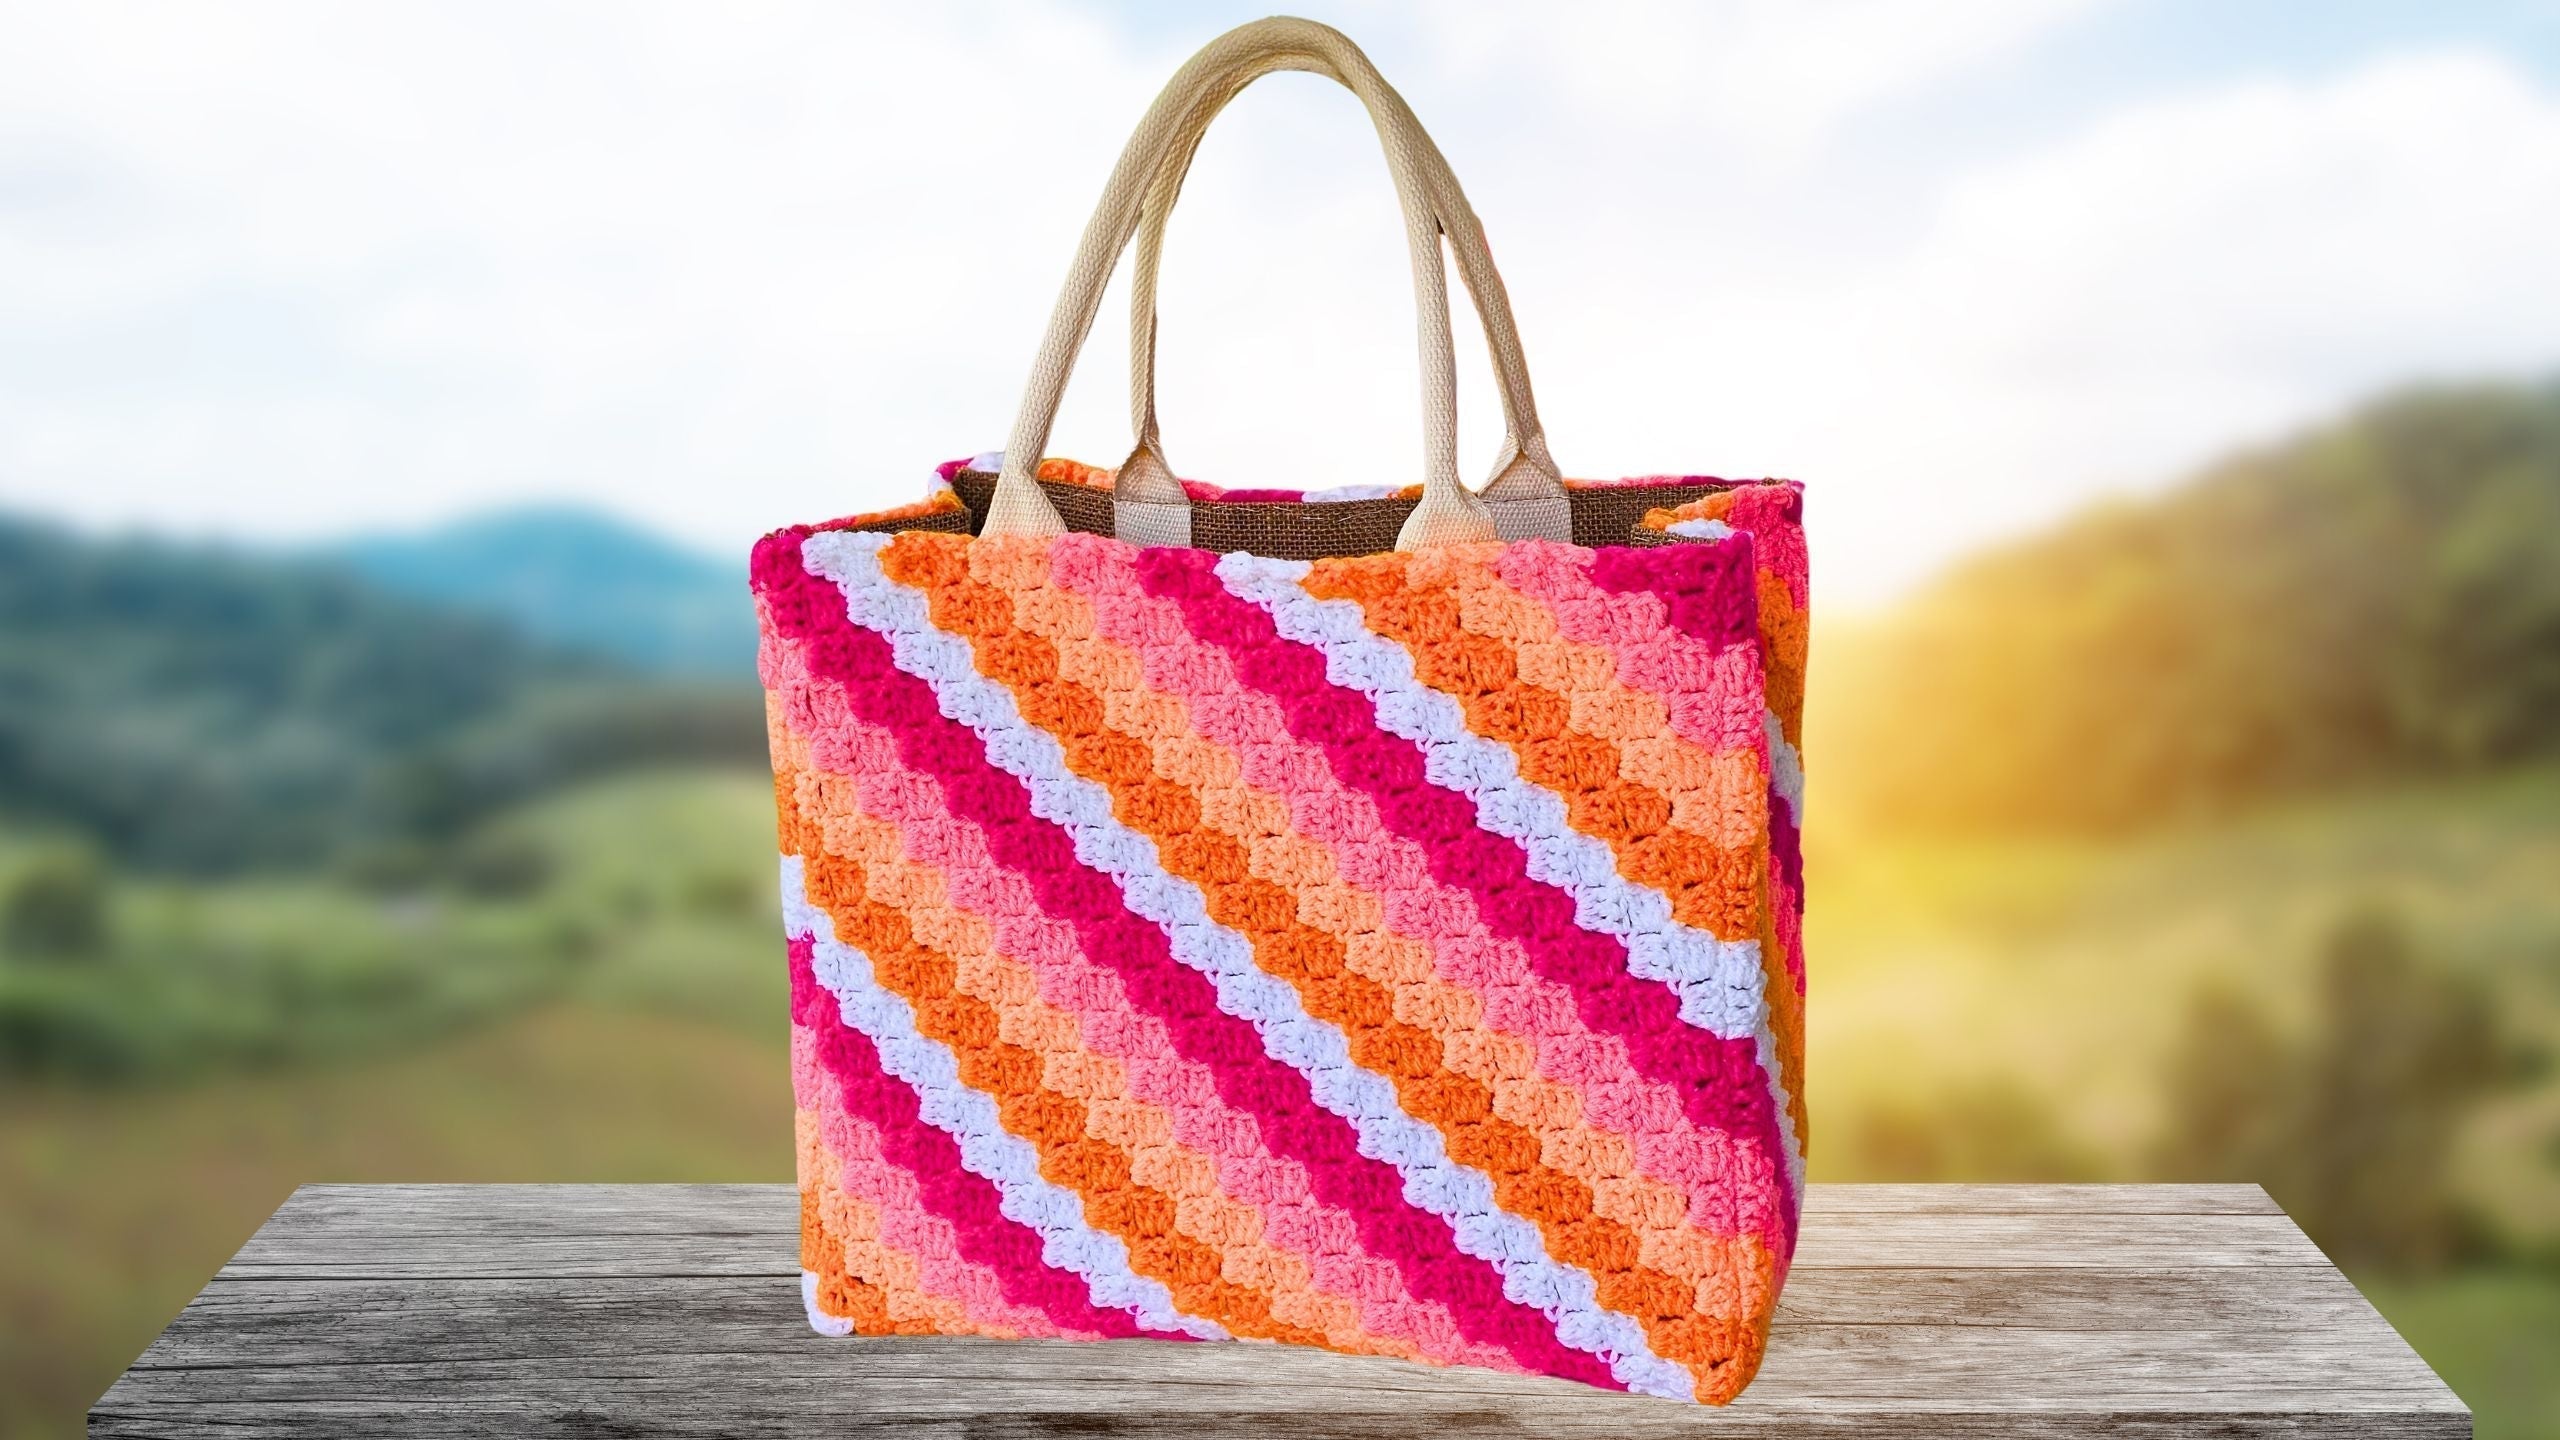
One of the best things about this project is how customizable it is. I used five different colors for a vibrant look, but you can use any colors you like! Picture a beachy tote with blues and greens, or a bold, rainbow-striped bag for summer. You could even create a sleek, minimalist tote using a single color. The possibilities are endless!
Practical and Durable
Forget flimsy, stretchy handles! By covering a pre-made tote, you get the benefit of no-stretch handles and a sturdy construction. This bag is built to last, ready for all your beach trips, shopping sprees, and everyday adventures.
Budget-Friendly Fun
You don't need to break the bank to create this stylish tote. I used a dollar store tote bag as the base. Paired with some affordable yarn, this project is a budget-friendly way to add a personal touch to your accessories.

Gather Your Supplies: The Crochet Tote Treasure Hunt
Before we dive into the pattern, let's gather the materials you'll need. Think of it as a mini treasure hunt!
The Tote Bag
The foundation of our project is a simple shopping bag. The ideal dimensions are 14 inches across, 13 inches tall, and 8 inches wide. Look for a sturdy, plain tote bag at your local dollar store or online. For convenience, you can find a similar tote bag on Amazon.
The Yarn
I used five different colors of yarn for my tote, but feel free to get creative with your color choices! Cotton and acrylic yarns are both great options. Cotton is durable and has a nice drape, while acrylic is more affordable and comes in a wide range of colors. If you're looking for the yarn I used, check out this link. You'll need less than one ball of each color, about 400 grams total for the entire bag. You can also explore yarn-saving crochet stitches to make the most of your materials.
The Crochet Hook
A 5mm crochet hook is perfect for this project. It's a versatile size that works well with most yarns. If you need a new hook, you can find a similar one on Amazon.
Other Essentials
Here's a quick checklist of the other tools you'll need:
- Stitch marker
- Yarn needle (you can find some great sharp tip needles here)
- Scissors
- Clear nail polish or quick-dry top coat (for securing those yarn ends!)

C2C Crochet Basics: The Building Blocks of Your Tote
Let's walk through the basics of the C2C technique, which forms the foundation of our tote cover.
The Slip Knot
Start by making a slip knot. Leave a long tail of yarn – you'll need it later for sewing in the ends. Place the slip knot onto your crochet hook.
The Foundation Chain
Next, chain five. This creates the base for our first C2C block.
The First Block
Skip the first two chains and make a double crochet into the third chain from your hook. Then, make a double crochet into the next chain and another into the last chain. You should have a total of three double crochets. This is your first C2C block!

Marking Your Progress
If you're new to C2C, grab a stitch marker and place it into the chain-2 space at the bottom of your block. This will help you identify where to join the next block.
Creating the Second Block
Chain five again. Skip the first two chains and make a double crochet into the third, fourth, and fifth chains. You've now created your second block.
Joining the Blocks
Flip the first block up and slip stitch into the chain-2 space where you placed the stitch marker. Chain two to create the height for the next row. Place the stitch marker into the chain space of your second block.
Increasing: Growing Your C2C Panels
Now, let's learn how to increase, which means adding new blocks to make our C2C panels bigger.

Starting a New Row (Increase Row)
To start a new row, always begin with a new block. Chain five, skip the first two chains, and make a double crochet into the third, fourth, and fifth chains.
Flipping and Rotating
This is where it gets a little tricky, but don't worry! Hold the finished block down. Now, flip the larger piece up. Rotate the two pieces together.
Building the Staircase
You'll see where the blocks connect. Slip stitch into the chain-2 space to join. Chain two, and make three double crochets into that same space. You're building a "staircase" of blocks. Each stair needs a new stair on top of it as you increase!
Color Changes: Adding Stripes to Your Tote
Ready to add some color to your tote? Here's how I changed colors every two rows.
When to Change Colors
I changed colors every two rows. A good indication that it's time to change is that all your tails are on the same side of your work.
How to Change Colors
When you're about to finish the last double crochet of a block, leave the last two loops on your hook. Cut your yarn, leaving a long tail. Grab your new color and finish the double crochet with the new color. Make sure to leave a long tail of the new color as well.
Managing the Tails
Hold both tails along the back of your work as you continue crocheting. Don't worry if the loops are a little big; you can tighten them up later.
Maintaining a Straight Edge: Essential Tips
Keeping a straight edge is crucial for creating neat, professional-looking panels.
The Importance of Counting
Always count your stitches to make sure you have the correct number of blocks in each row.
Common Mistakes and How to Avoid Them
- Skipping Stitches: Be careful not to skip any chains when making your double crochets.
- Adding Extra Stitches: Double-check that you're only making three double crochets per block.

Decreasing: Shaping Your Rectangle
Once your side piece is long enough, it's time to start decreasing to create a rectangle.
Identifying the End of the Increase
When the side piece is ready to turn into a rectangle, mark the end of this increase with a stitch marker. This reminds you not to add any more blocks on that side.
The Slip Stitch Technique
Instead of building a new block, slip stitch along the edge. Make loose slip stitches, pulling them up a bit to create a nice, even edge. Do four slip stitches into the first stitch, then three after.
Maintaining the Staircase
Continue working up the staircase as usual on the other side, adding a new block to each stair.

Finishing into a Square: Completing the Rectangle
Now, we'll decrease on both sides to finish the panel into a rectangle.
Decreasing on Both Sides
No new blocks are added at all during this stage. We're simply slip stitching and turning.
Slip Stitching and Turning
After making your last slip stitch into the space, turn your work. Make three slip stitches with larger loops, and then change color.
Repeating the Process
Continue working back and forth, slip stitching, turning, and changing colors, until you have completed the square. If you want to master more C2C techniques, you may want to check out my C2C master class.
Weaving in the Ends: Neatening Your Crochet
Time to tidy up those loose ends!
The Knotting Method
For the tails where you changed color, tie matching tails together in a knot. Pull the knot tight, especially if you're using acrylic yarn.
Securing with Nail Polish
Apply a small dab of clear nail polish to the knot. Let it dry, then trim the ends close to the knot.
Sewing in the First and Last Tails
The first and last tails need to be sewn in with a yarn needle.

Assembling Your Tote: From Panels to Bag
Let's put it all together!
Arranging the Pieces
Arrange your crochet pieces around the bottom of the tote bag.
Choosing Your Thread
Use a strong thread like coat thread, sewing thread, or even dental floss.
Preparing the Thread
Cut six lengths of thread and knot the ends together for a double strand.
Starting the Seam
Insert your needle into the corner stitches and secure the thread with a knot.
The Stitching Technique
Sew the bag together with small, even stitches, going back and forth. Pause the video and do this yourself.
Finishing the Seam
Finish off the thread with multiple knots and hide the ends within the stitches.

Attaching the Crochet Cover to the Tote: A Perfect Fit
Almost there!
Turning the Bag Inside Out
Turn the bag inside out (if you haven't sewn in your tails).
Lining Up the Corners
Line up the corners of the crochet cover with the tote bag. Make sure the crochet is slightly taller than the bag.
The Stitching Technique (Attaching to Tote)
Stitch the crochet to the tote bag, taking small stitches on the outside and larger stitches on the inside.
Fixing Open Corners: The Final Touches
If your tote has open corners, here's how to fix them:
Identifying Open Corners
Identify any open corners on the tote bag.
Choosing Matching Yarn
Use a yarn color that matches the corner.
The Darning Technique
"Darn" the corners by weaving yarn back and forth to fill up the space. Make sure to cover the bag material with yarn.
Sewing in the Ends
Sew in the yarn tails to secure the corners.
Before & After
See the difference? Now you have clean corners!

Show Off Your Crochet Tote!
Thanks for following along with this tutorial! I hope you enjoyed creating your own Crochet Tote Bag Cover.
I'd love to see your finished projects! Share them on social media using the hashtag #SecretYarnery. It's always so inspiring to see how you make each project your own. If you enjoyed this then you should check out my bag collection.
Left Handed?
Continue Learning
Want to explore more crochet projects? Check out other videos on my channel. Don't forget to subscribe to stay updated on new patterns and tutorials. Keep creating, and stay hooked!
FAQs
1. What is a C2C crochet technique?
C2C stands for Corner-to-Corner crochet. It’s a method where you work small blocks diagonally from one corner of your project to the other, creating a square or rectangle.
2. Can I use any type of yarn for this tote cover?
Yes! Cotton and acrylic yarns both work well. Cotton is strong and holds its shape, while acrylic is affordable and comes in many colors.
3. What size tote bag should I use?
A bag about 14 inches wide, 13 inches tall, and 8 inches deep works best. Any sturdy plain tote will do.
5. How long does it take to make the cover?
Most people can finish in a few evenings or a weekend, depending on their skill and speed.
6. Can I add lining or pockets inside?
Yes! You can sew a fabric lining or pockets inside your tote before adding the crochet cover for extra storage and durability.
7. What if my panels don’t fit the tote perfectly?
You can adjust the size of your panels by adding or removing rows. Try your work against the tote as you go and adjust as needed.
8. How do I stop the yarn ends from unraveling?
Tie secure knots and use clear nail polish on the ends, as mentioned in the tutorial, for extra hold.
![]()
Christa Patel is the founder and creative mind behind The Secret Yarnery. With years of crochet experience, Christa teaches easy-to-follow tutorials for all skill levels, focusing on simple techniques and colorful designs. Her friendly and practical approach has inspired thousands to pick up a hook and start crocheting. Christa’s mission is to make yarn crafts fun, accessible, and stress-free, helping everyone create beautiful, functional pieces—one stitch at a time. Find more of her tutorials and patterns on YouTube and The Secret Yarnery blog.
About the Author
With a passion for crafting easy, beginner-friendly tutorials and patterns, Christa inspires crafters of all skill levels to unleash their creativity worldwide. She encourages yarn lovers to connect, create, and crochet a world filled with beautiful handmade treasures!
C2C Crochet Tote Bag Cover: Easy DIY Dollar Store Makeover!