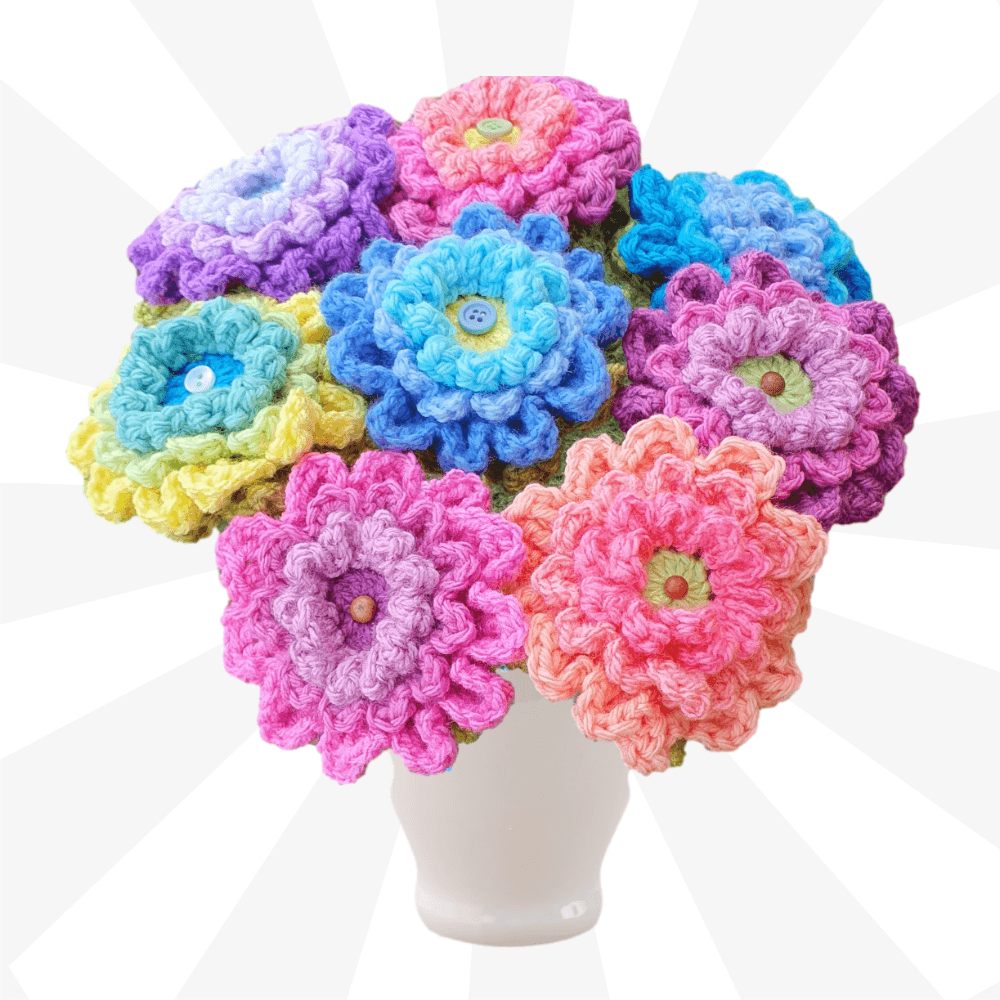
Crochet Your Own Gorgeous Chrysanthemum Flower Bouquet
Have you ever wanted to create something beautiful and lasting with just a hook and some yarn? Imagine crafting a stunning bouquet of chrysanthemums that never fades, adding a touch of handmade charm to your home or becoming a heartfelt gift for someone special.
I'm Christa from The Secret Yarnery, and I'm excited to guide you through making this easy crochet flower bouquet. These little blooms are incredibly quick to make using up those small yarn scraps. The possibilities are endless; arrange them in a vase, use them as embellishments on other projects, or even incorporate them into granny squares. You could easily add this skill to your growing skillset of crochet tutorials.
Ready to get started? This blog post will give you a step-by-step guide to creating your own crochet chrysanthemum bouquet. By the end, you'll have the skills to whip up a whole bunch of these delightful flowers in any color combination you can dream up.
By the way, if you're a righty or a lefty, I've got you covered! Find the tutorials here:
Table of contents
Materials You'll Need
Before we dive in, let's gather our supplies. Here's what you'll need to create your crochet chrysanthemum flower bouquet:
- Yarn: Choose four different colors for the flower petals and one color for the leaves. I love using Ice Yarns, which you can find here.
- Crochet Hook: A 5mm crochet hook works perfectly for this project.
- Knitting Needles or Bamboo Skewers: These will serve as the stems for your flowers.
- Buttons or Beads: For a touch of whimsy, you'll use these to embellish the stem ends.
- Needle: A sharp tip needle for sewing in those pesky yarn ends. You can find some here.
- Scissors: For cutting yarn. Here's a good pair.
- Small Elastics: (Optional) These can be helpful for securing the leaves to the stem.
- Hot Glue Gun: (Optional) If you're using buttons or beads, a hot glue gun will help attach them to the skewers.
- Consider using bags for yarn ball storage.
As an Amazon Associate I earn from qualifying purchases.

Getting Started: Flower Center (Color 1)
To begin our crochet flower bouquet, we'll start with the center of the flower. You have two options for this: a chain three method or a magic ring. Both work well, so choose whichever you feel most comfortable with.
Chain Three Method
- Make a slip knot and place it on your hook.
- Chain three.
- Slip stitch into the very first chain you made to form a ring.
- Chain one.
Magic Ring Method
If you prefer using the magic ring, you can start that way. If you aren't familiar with the magic ring I would suggest watching some crochet tutorials. It will be easier to make your flower later.
Next Steps (Regardless of Method)
- Into the center of the ring, work 12 double crochets.
- Tip: If you run out of space, slide your stitches back around the ring to create more room.
- Slip stitch into the top of the first double crochet to join.
- Chain one to secure the yarn.
- Cut the yarn, leaving a long tail for sewing.

Securing the Center: Sewing in the Ends
Now, let's take care of that yarn tail. This is an important step to ensure your flower center stays nice and secure.
- Thread your needle with the yarn tail.
- Go underneath the loops around the edge of your ring.
- Pull the tail gently to close the ring tightly.
- Sew in the tail in the opposite direction to further secure it.
If you used a magic ring, make sure you pull it as tight as possible before sewing in the tail. This will prevent a hole from forming in the center of your flower.
Creating the First Petal Layer (Color 2)
Time to add the first layer of petals! We'll be working in the front loops only for this round.
- Identify the join from the previous round. We're going to start one stitch ahead of it.
- Attach your new color to the front loop with a slip stitch.
- Chain one (this counts as your first chain two).
- Make two double crochets into that same front loop.
- Chain two.
- Slip stitch into the same front loop to finish your first petal.
Now, repeat this pattern all the way around, working into each front loop. You should have a total of 12 petals.
Detailed Petal Instructions
- Slip stitch into the next front loop.
- Chain two.
- Make two double crochets into the same front loop.
- Chain two.
- Slip stitch into the same front loop to finish the petal.
Don't be afraid to pause and rewind if you need a closer look.

Joining the First Petal Layer
Once you've made all 12 petals, it's time to join the round.
- Slip stitch to finish your last petal.
- Slip stitch into the first petal to join the round.
- Chain one.
Creating the Back Layer for Color 2
Now we will be working on the back of the flower for some added dimension.
- Flip your work over to the back side.
- Identify the back loops. Each petal has a corresponding back loop.
- Slip stitch into the back loop of the next petal to get started.
- Chain one.
- Make two half double crochets into the same back loop.
- Continue making two half double crochets into each back loop around.
Don't worry about having a precise stitch count for this round. Remember, it's a flower.
Finishing Color 2
- Slip stitch to the top of the first half double crochet to join.
- Chain one to secure the yarn.
- Cut the yarn, leaving a small tail.
You can either sew in these tails or tie them in a knot. If you're using acrylic yarn, knotting is often a good option.
Adding the Third Color: Petal Layer
For this round, we'll be creating another layer of petals, using a slightly different stitch pattern.
- Join your new color into the front loop, one stitch ahead of the join from the previous round. This helps to keep the join neat.
- Slip stitch with both strands to join.
- Chain one (this counts as your first chain two).
The petal pattern for this round is worked over two front loops:
- Into the same front loop: one double crochet.
- Into the next front loop: one double crochet, chain two, and slip stitch.
Detailed Instructions for Each Petal
- Slip stitch into the next front loop.
- Chain two, one double crochet.
- Into the next front loop: one double crochet, chain two, and slip stitch.
Repeat this all the way around.
Joining the Third Petal Layer
After completing all 12 petals, slip stitch into the first stitch to finish the round. Chain one.

Creating the Back Layer for Color 3
Time to work on the back again!
- Flip your work to the back side and identify the back loops.
- Slip stitch into the back loop to get started.
- Chain one.
The stitch pattern for this round is alternating:
- One half double crochet into the first back loop.
- Two half double crochets into the next back loop.
Repeat this alternating pattern all the way around.
Finishing Color 3
- Slip stitch into the top of the first half double crochet to join.
- Chain one to secure the yarn.
- Cut the yarn, leaving a tail.
Secure the tails by knotting or sewing them in.
Adding the Final Color: Petal Layer (Color 4)
Get ready for the final layer of petals! These will be the largest and most dramatic petals.
-
Join your new color into the front loop, one stitch ahead of the join from the previous round.
-
Slip stitch with both strands to join.
-
Chain one (counts as the chain two).
This petal pattern is worked over three front loops:
-
Into the same front loop: one double crochet.
-
Into the next front loop: two treble crochets.
-
Into the next front loop: one double crochet, chain two, and slip stitch.
Detailed Instructions for Each Petal
-
Slip stitch into the next front loop.
-
Chain two, one double crochet.
-
Into the next front loop: two treble crochets.
-
Into the next front loop: one double crochet, chain two, and slip stitch.
Continue working around the flower.
Finishing the Final Petal Layer
Once you've completed all 12 petals, slip stitch into the first petal to finish the round. Chain one to secure the yarn. Cut the yarn, leaving a tail. Tie off the ends.

Making the Leaves: Starting the Magic Ring
Let's move on to the leaves. We'll start with a magic ring.
- Provide clear instructions on how to create a magic ring.
- Alternative: If a magic ring is too difficult, explain the chain three ring alternative, but emphasize the need to leave a long tail for sewing the ring shut later.
- Chain one.
- Work 12 double crochets into the center of the ring, going over the tail.
Closing the Ring and Round 2
- Explain how to count double crochets (excluding the initial chain one).
- Grab the tail and tighten the magic ring securely.
- Slip stitch to the top of the first double crochet to join.
- Chain one.
- Round 2: Two double crochets into each stitch all the way around (resulting in 24 stitches).
Creating the Leaf Edges: Round 3
- Slip stitch to the top of the first double crochet to join.
- Chain three.
- Edge Pattern:
- Skip two stitches, single crochet into the third stitch.
- Chain three, skip two stitches, single crochet into the third stitch.
- Repeat around the circle.
- Joining the end:
- Chain three, slip stitch into the very first chain to join.
- Turn the work.
Forming the Leaf Shape: Final Round
- Working into the first space:
- Half double crochet.
- Double crochet.
- Treble crochet.
- Picot: Chain three, slip stitch into the third chain from the hook.
- Treble crochet.
- Double crochet.
- Half double crochet.
- Working into the next space: slip stitch to start.
- Repeat:
- Half double crochet.
- Double crochet.
- Treble crochet.
- Picot: Chain three, slip stitch into the first chain.
- Treble crochet.
- Double crochet.
- Half double crochet.
- Repeat this pattern into each space around the leaf.
Finishing the Leaf
- Slip stitch into the bottom (beginning) of the first leaf to join.
- Chain one to secure the yarn.
- Cut the yarn, leaving a long tail for sewing.
- Pull the hook up and snug the yarn to secure.
- Securing the Magic Ring:
- Tighten the magic ring as much as possible to close it completely.
- Sewing in the Tail:
- Use a sharp-tipped needle to sew in the tail.
- Follow the direction the tail came from, working it forward about halfway around.
- Go back in the opposite direction, weaving through the stitches to secure.
Assembling Your Crochet Flower Bouquet
Now for the fun part! Here's how to put it all together:
- Gather your flower, leaf, and skewer/knitting needle.
- Insert the skewer through the center of the flower.
- Take the leaf, ensuring the "macaroni" (picot) side is facing up.
- Insert the skewer through the center of the leaf.
- Adjust the leaf position to your liking.
- If the leaf is loose, use small elastics to secure it to the skewer.
- Optional: Glue a button or bead to the top of the skewer for decoration.
Final Thoughts and Encouragement
Wasn't that fun? Now you have an awesome [Crochet Flower Bouquet]! With some practice and a love for creation, you can make as many as you like.
Why not try mixing different colors? Try different yarns, too. Make it your own. Remember to check out other crochet patterns on The Secret Yarnery.
I'm waiting for you here, and stay hooked!
Crochet Must Haves List
- Bags - Yarn Ball Storage ➡️ https://amzn.to/36cbr3A
- Bags - Large UFO Zipper Pouches ➡️ https://amzn.to/3uqgQ0n
- Bags - Regular UFO Zipper Pouches ➡️ https://amzn.to/3DYxvLB
- Ball Winder ➡️ https://amzn.to/3Jzd4Y0
- Baskets - WIPS ➡️ https://amzn.to/3tQK9te
- Color Wheel ➡️ https://amzn.to/3hJN3IG
- Crochet Hooks ➡️ https://amzn.to/2p5etkC
- Foot Warmer ➡️ https://amzn.to/3RaMtn0
- Measuring Tape ➡️ https://amzn.to/3JviyD8
- Neck Light ➡️ https://amzn.to/2UYNrW4
- Needle Threaders ➡️ https://amzn.to/3zdCK7S
- Needles - Blunt Tip ➡️ https://amzn.to/2MRffKP
- Needles - Sharp Tip ➡️ https://amzn.to/3qEGZWk
- Scissors ➡️ https://amzn.to/3EC1CHy
- Stitch Markers ➡️ https://amzn.to/3GdGCYg
- Tea - Kericho Gold ➡️ https://amzn.to/3zrTcB8
- Tins - Accessories ➡️ https://amzn.to/3EN6nxT
- Yarn ➡️ http://bit.ly/39EZwZX
Left Handed?
FAQs
1. What type of yarn is best for this project?
It’s best to use any yarn that complements your preferred texture and colors. Acrylic, cotton, or blended yarns work great. Lightweight or medium-weight yarn is ideal for defined petals.
2. What size crochet hook should I use?
A 5mm crochet hook is recommended, but you can experiment with smaller or larger hooks depending on how tight or loose you want the petals to look.
3. Can I make these flowers with a different number of petals?
Absolutely! You can adjust the petal count by modifying the number of stitches in each round or the spaces you work into.
4. What can I use as an alternative to skewers for stems?
You can use knitting needles, floral wires, or even wooden dowels. If you want a more natural look, wrap the stem with green floral tape.
5. What is the Magic ring method?
The magic ring (or adjustable loop) is a technique allowing you to crochet in the round without leaving a hole in the center. It’s a popular method for creating tightly closed designs like flowers.
6. How do I choose colors for my bouquet?
For a realistic look, stick to colors found in nature, such as yellow, white, pink, or red. For a whimsical bouquet, mix and match bright, contrasting colors.
The creative mind behind The Secret Yarnery. As a lifelong crochet enthusiast, she is passionate about inspiring others to explore the world of yarn crafts. With years of experience and a knack for simplifying even the most intricate patterns, Christa has become a go-to resource for crocheters of all skill levels.
Christa is dedicated to making crochet fun and accessible, offering step-by-step tutorials, project ideas, and helpful tips to fuel your next creative adventure. Whether you're a beginner or an experienced crocheter, Christa's approachable teaching style ensures everyone can enjoy the art of crafting.
When not designing crochet patterns, Christa enjoys spending time with her family, experimenting with new yarns, and sharing her love of handmade creations with her global community. You’ll often find her connecting with fellow crafters on her blog, YouTube channel, and social media platforms.
Discover more of her work at The Secret Yarnery, and join Christa in her mission to spread the joy of crochet, one stitch at a time!
About the Author
With a passion for crafting easy, beginner-friendly tutorials and patterns, Christa inspires crafters of all skill levels to unleash their creativity worldwide. She encourages yarn lovers to connect, create, and crochet a world filled with beautiful handmade treasures!
Beginner's Guide to Crochet Bouquet - Easy DIY Flower!