Easy Crochet Scarf for Beginners: Learn the Quick V-Stitch Pattern!
Have you ever wanted to learn how to crochet? Or maybe you're looking for a super simple project that you can work on while relaxing? This guide is for you! I'm going to show you how to crochet an easy crochet scarf using the V-stitch. It's a perfect project for beginners, and it works up really fast. Let's get started!
Getting Started with Your Crochet V-Stitch Scarf
This easy crochet scarf is a fantastic project. What makes it so great for beginners? It uses a simple, one-row repeat. That means once you learn the row, you just keep repeating it until your scarf is the length you want. The V-stitch pattern also creates a beautiful, textured design that adds a touch of elegance to your finished project. And the best part? It works up incredibly quickly! You'll be amazed at how fast you can create a cozy and stylish scarf. If you're a beginner, check out these tips for how to crochet for beginners.
What is the V-Stitch?
So, what exactly is the V-stitch? It's a crochet stitch that creates a "V" shape. You make it by combining double crochet stitches and a chain stitch. It's a versatile stitch, and that's why it's popular for beginner projects. The V-stitch is worked right into the middle, so its quick! Also, it gives your scarf a lovely straight edge! You can see the written crochet patterns here.

Materials You'll Need
Alright, let's gather our supplies. To crochet this V-stitch scarf, you'll need:
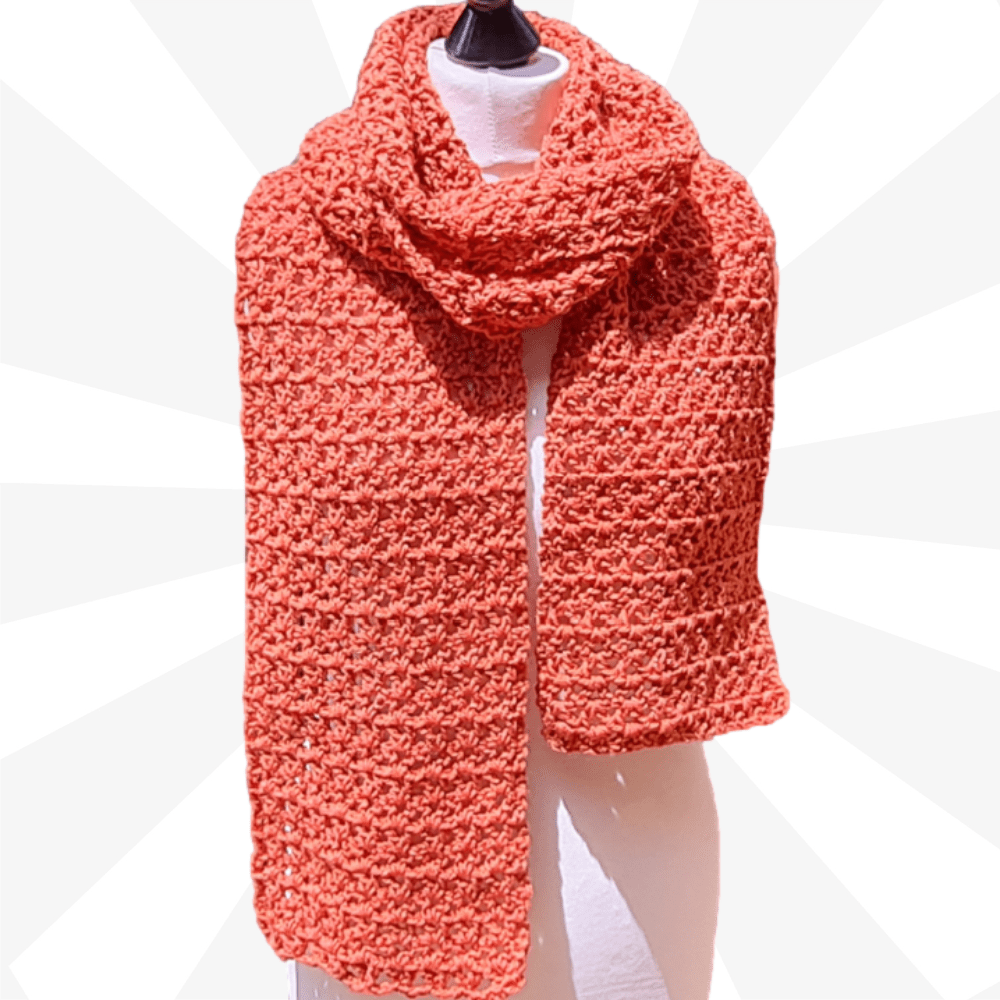
- Yarn: I recommend using Ice Yarns Saver. This yarn is 200 grams and has 330 meters. This amount of yarn is perfect for a long scarf that measures about 8 inches wide and 75 inches long. If you want a slightly smaller scarf, you can use about 150 grams. You can often find great deals on yarn online.
- Crochet Hook: I used a 6.5 mm or K hook for this project. However, you can also use a 6 mm or 7 mm hook. It really depends on your personal preference and the tension you crochet with. If you're not sure what size hook to use, start with the recommended size and adjust as needed to achieve the desired look and feel of your scarf.
- Other Supplies: You'll also need a needle for weaving in your ends and a pair of scissors.
You can find a variety of yarn here. I recommend getting a set of crochet hooks here. These sharp tip needles on Amazon will help with weaving in your ends. https://amzn.to/3qEGZWk
Understanding Gauge
Gauge is the number of stitches and rows you get per inch or centimeter. Why is it important? It helps you achieve the desired size and look for your project. For this scarf, gauge isn't super critical. But it can affect the final dimensions. If you want to make sure your scarf turns out the same size as mine, I recommend crocheting a small swatch to check your gauge. To do this, crochet a square of V-stitches, measure it, and compare it to the gauge listed in the pattern. If you have more stitches and rows per inch, your tension is too tight. Try using a larger hook. If you have fewer stitches and rows per inch, your tension is too loose. Try using a smaller hook.

Creating the Foundation Chain
Okay, let's start crocheting! First, we need to make a slip knot. Do this any way you normally do. Shrink that down and pop it onto your hook. Now, we're going to chain a multiple of three. The number of chains you make will determine the width of your scarf. For my scarf, I chained 30. So, one, two, three, four, five, six, seven... all the way to 30. If you want a refresher on how to chain, I'll link to a beginner's crochet class.
Working into the Back Loops
Working into the back loops creates a neater edge. See the pretty little "v's"? Put your thumb on them loosely, you don't want to squish them. Just roll it to the side, and you'll see those "v's". The first one is right underneath the working yarn. We wanna look for the fourth stitch, the fourth chain, that is where we're going to start our scarf.
Crocheting the First Row: The V-Stitch
Now for the fun part! Let's create our first row of V-stitches.
- Wrap the yarn.
- Insert the hook into the fourth chain (back loop).
- Yarn over and pull through a loop (double crochet).
- Chain one.
- Yarn over and pull through a loop again (double crochet into the same chain).
That's our first V-stitch! Now, we're going to skip two chains and work into the third chain to create the next V-stitch. Repeat this V-stitch pattern across the entire chain. Remember to maintain consistent tension as you crochet. At the end of the chain, there will be two chains left, skip one and work into the last chain. Make one double crochet. We always finish our rows with one double crochet.
Understanding the V-Stitch Pattern
Why is it called the V-Stitch? Because it makes a V! The V-stitch pattern is created by working a double crochet, chain one, and another double crochet all into the same stitch. The "V" shape emerges as the pattern repeats.
Starting Row Two: Setting Up the Repeat
Now, let's start Row 2. Chain three. This counts as a stitch. Now, turn your work. To turn your work, slide your hand under your working yarn, grab your work, and turn it towards you. This ensures the chain is facing the right direction. Now we're going to work right into the center of these v's all the way along our row.
Crocheting Row Two: V-Stitch into V-Stitch
Time to crochet the second row! Work directly into the center of each V-stitch from the previous row. Create a new V-stitch (double crochet, chain one, double crochet) in each V-stitch space. Remember, you're not working into individual stitches. You're working into the spaces between the stitches. The repetition is: "Every V gets a V." Keep a consistent tension for a uniform look. Make sure to highlight where those stitches start.

Finishing Row Two: The Last Stitch
Let's finish Row 2. After working the last V-stitch, you need to work into the chain three from the beginning of the previous row. Place one double crochet into the top of the chain three, making sure to get two strands of that stitch on your hook. This completes the row and creates a clean edge.
Row Two is the Repeat!
That's it! Row two is the repeat! Every v gets a v!
Starting Row Three: Setting Up the Repeat Again
Let's start Row 3. Reiterate the steps for starting each row: chain three and turn the work. Emphasize the importance of turning the work correctly to maintain the pattern. This ensures the chain is facing the right direction when we work into it.
Crocheting Row Three: Repeating the V-Stitch Pattern
Continue crocheting V-stitches into the center of each V-stitch from the previous row. Remember to maintain consistent tension. Pause the video and practice the repeat until you feel comfortable.
Finishing Row Three: Completing the Repeat
Finish Row 3. Work one double crochet into the top of the chain three from the beginning of the previous row. This step ensures a clean and consistent edge.
The Importance of Turning Your Work
I'm happy that we've been turning our work nicely, so far.
Continuing the Scarf: Row Repeat
Row 2 is the repeat. Keep crocheting the same row repeat over and over. Start with a chain three, then a V into every V, and end with a double crochet. Crochet until the scarf reaches the length you want.

Common Mistakes to Avoid
Here are some common mistakes to avoid:
- Skipping stitches: It's very important to accurately count and skip stitches.
- Tension issues: It's also very important to maintain consistent tension.
- Working into the wrong space: Also be careful to work into the correct V-stitch space.
- Not turning correctly: You have to turn the work correctly to maintain the pattern.
Adjusting the Width and Length
You can adjust the width of the scarf by changing the number of chains in the foundation chain. The chains should always be a multiple of three. You can also change the length of the scarf by crocheting more or fewer rows. This lets you personalize your scarves.
Finishing the Scarf: Tying Off
Let's finish the scarf. At the end of the last row, after the last double crochet, chain one. Cut the yarn, leaving a long tail for weaving in. Pull the hook up and through the loop, then snug it down to secure.
Weaving in the Ends
Weaving in the ends is important. It secures the yarn and prevents unraveling. Here are some tips for weaving in ends neatly:
- Use a yarn needle.
- Weave the ends along the same color stitches on the back of the work.
- Secure the ends by weaving them in different directions.
- Trim any excess yarn.
You can find sharp tip needles on Amazon to help. https://amzn.to/3qEGZWk
Blocking Your Scarf
Blocking is a process that evens out your stitches and improves the drape of your project. There are different blocking methods, like wet blocking and steam blocking. Here are general instructions for wet blocking:
- Soak the scarf in lukewarm water.
- Gently squeeze out excess water.
- Lay the scarf flat on a blocking board or clean surface.
- Pin the scarf to the desired dimensions.
- Let it dry completely.
Caring for Your Crochet Scarf
Here are some tips for washing and caring for your finished scarf:
- Check the yarn label for specific care instructions.
- Hand wash or machine wash on a gentle cycle.
- Lay flat to dry.
- Avoid using high heat in the dryer.
Styling Your V-Stitch Scarf
There are many ways to style your scarf! Here are some of my favorites:
- Drape it loosely around the neck.
- Wrap it multiple times for added warmth.
- Tie it in a knot or bow.
- Pair it with different outfits and accessories.
Gifting Your Handmade Scarf
This scarf makes a thoughtful handmade gift. To personalize the gift, you can choose the recipient's favorite colors or add a handmade tag.
More Crochet Projects for Beginners
Here are some other beginner-friendly crochet projects:
- Simple blankets
- Hats
- Dishcloths
- Amigurumi
You can find other beginner-friendly crochet patterns on the Secret Yarnery website.
Why Crochet is a Great Hobby
Crochet has many benefits! It's relaxing and therapeutic, and it's a creative outlet. It's also portable and easy to take on the go. You also get the opportunity to create handmade gifts and experience a sense of accomplishment.
The Secret Yarnery Community
Join the Secret Yarnery community! You can subscribe to the YouTube channel here. Follow on social media. Share your finished projects using the hashtag #SecretYarnery.
Call to Action: Share Your Creations!
Share photos of your finished scarves on social media using the hashtag #SecretYarneryVStitchScarf!
Final Thoughts and Encouragement
The V-stitch scarf is a great project for beginners. Keep practicing and exploring different crochet techniques! Remember that mistakes are part of the learning process. You can find written patterns to help you along the way.
Additional Resources
Here are some helpful resources:
- Free pattern: https://bit.ly/4eyaVu4
- Printable PDF pattern: https://bit.ly/3Kydrmj
- Right handed tutorial: https://youtu.be/4essdAtaHqs
- Left handed tutorial: https://youtu.be/8Cq-mqXT87g
- Left Handed Tutorials: https://bit.ly/3UWNmoJ
Behind the Scenes
See some Behind the Scenes: https://bit.ly/3V104kL
Support the Secret Yarnery
Buy me a coffee: https://ko-fi.com/secretyarnery
Membership
Join: https://bit.ly/44UC1bH
Written Patterns
Written Patterns: https://secretyarnery.com
Newsletter
Newsletter: https://bit.ly/3ssa0tn
Crochet Must Haves
Here are some Crochet Must Haves!
- Bags - Yarn Ball Storage: https://amzn.to/36cbr3A
- Bags - Large UFO Zipper Pouches: https://amzn.to/3uqgQ0n
- Bags - Regular UFO Zipper Pouches: https://amzn.to/3DYxvLB
- Ball Winder: https://amzn.to/3Jzd4Y0
- Baskets - WIPS: https://amzn.to/3tQK9te
- Color Wheel: https://amzn.to/3hJN3IG
- Crochet Hooks: https://amzn.to/2p5etkC
- Foot Warmer: https://amzn.to/3RaMtn0
- Measuring Tape: https://amzn.to/3JviyD8
- Neck Light: https://amzn.to/2UYNrW4
- Needle Threaders: https://amzn.to/3zdCK7S
- Needles - Blunt Tip: https://amzn.to/2MRffKP
- Needles - Sharp Tip: https://amzn.to/3qEGZWk
- Scissors: https://amzn.to/3EC1CHy
- Stitch Markers: https://amzn.to/3GdGCYg
- Tea - Kericho Gold: https://amzn.to/3zrTcB8
- Tins - Accessories: https://amzn.to/3EN6nxT
Thanks for Hooking Along!
Thanks for following along! Stay hooked for more crochet tutorials! If you're still at the start of your journey, be sure to check out the 21 Top Tips for Crochet Beginners on the Secret Yarnery blog!
I hope this blog post has helped you create a beautiful V-stitch scarf with confidence. Happy crocheting!
FAQs
1. Is this scarf suitable for absolute beginners?
Yes! The V-stitch scarf is an excellent project for beginners. It uses a simple one-row repeat, making it easy to learn and practice. Plus, it works up quickly!
2. How long will it take to complete the scarf?
This depends on your skill level and the amount of time you spend crocheting each day. Most people can finish this scarf within a couple of days if they dedicate some focused time to it.
3. Can I use a different type of yarn?
Absolutely! You can use any medium-weight yarn you prefer. Keep in mind that the size, texture, and drape of your scarf might change depending on the yarn you choose.
4. What size crochet hook should I use?
This tutorial recommends a 6.5 mm (K) hook, but you can also use a 6 mm or 7 mm hook. The hook size may vary depending on your yarn choice and personal tension.
5. How can I adjust the width of the scarf?
You can adjust the scarf's width by chaining a multiple of 3 for your foundation chain. For a wider or narrower scarf, simply increase or decrease the number of chains.
6. What is the purpose of checking gauge?
Gauge ensures your scarf will turn out the desired size. While it's not critical for this scarf, checking your gauge can help with consistency and achieving a specific look.
7. Do I need to block the scarf?
Blocking is optional but highly recommended. It helps even out your stitches and adds a professional finish to your scarf.
8. Can I crochet this scarf in different colors?
Yes! You can use multiple colors by changing yarns at the end of a row or incorporating stripes. This adds a personal and unique touch to your scarf.
9. What tips can help maintain consistent tension?
- Relax your hands and wrists as you crochet.
- Avoid pulling the yarn too tightly or letting it go too loose.
- Work at a steady, comfortable pace.
10. How do I ensure the edges stay straight?
At the end of every row, remember to work one double crochet into the top of the chain three from the previous row for a neat and straight edge.
![]()
Christa Patel is a passionate crochet enthusiast, designer, and the creative mind behind the Secret Yarnery. With over 10 years of experience, she has inspired countless individuals to pick up their hooks and create beautiful handmade items. Christa's love for crochet extends beyond the craft itself—she’s dedicated to making crochet accessible for beginners and enjoyable for all levels.
Through her tutorials, blogs, and patterns, Christa simplifies complex techniques, providing support and encouragement for crocheters at every stage of their journey. Her warm teaching style and practical insights have built a vibrant, global crochet community. When she's not crocheting, you can find her surrounded by yarn, designing new patterns, or sharing her knowledge on her popular YouTube channel.
Follow Christa Patel and the Secret Yarnery on YouTube and social media to discover more inspiring crochet projects, tips, and tricks. Join the community and start your crochet journey today!
About the Author
With a passion for crafting easy, beginner-friendly tutorials and patterns, Christa inspires crafters of all skill levels to unleash their creativity worldwide. She encourages yarn lovers to connect, create, and crochet a world filled with beautiful handmade treasures!
Easy Crochet Scarf for Beginners: Learn the Quick V-Stitch Pattern!