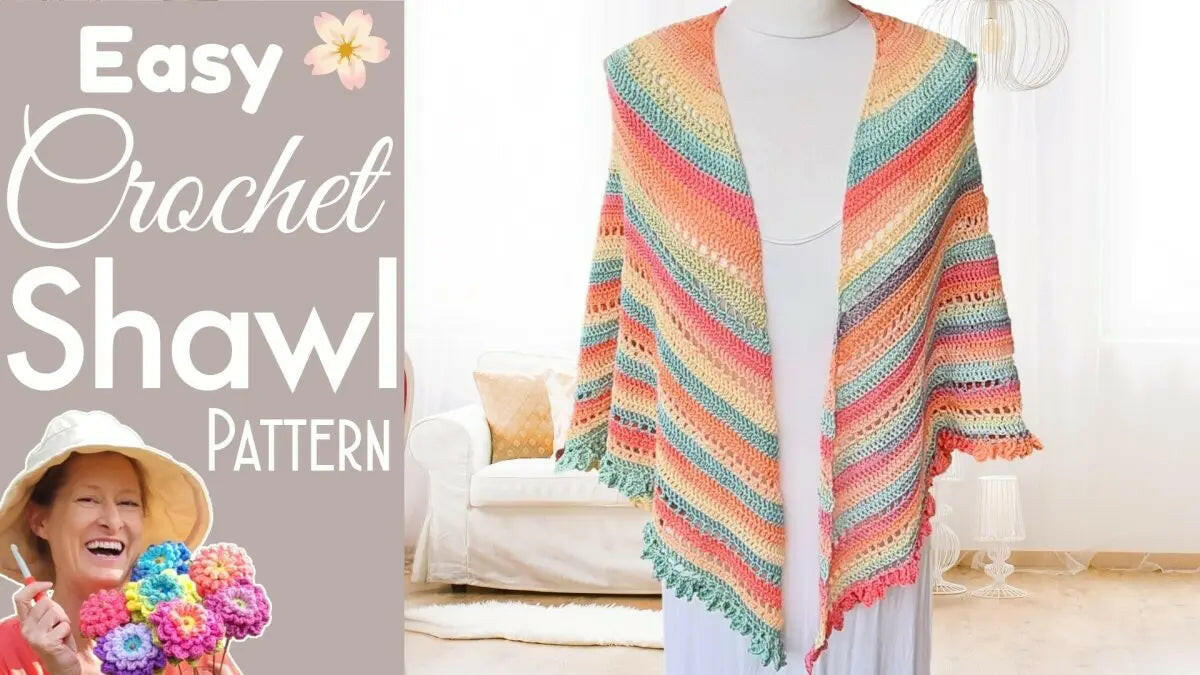
Easy Crochet Gelato Shawl: A Beginner-Friendly Guide
Have you ever wanted to create a beautiful, cozy shawl with your own two hands? Something that's both stylish and comfortable? The Easy Crochet Gelato Shawl is the perfect project for you! Whether you're new to crochet or have some experience, this step-by-step guide will walk you through creating a stunning shawl that's perfect for any occasion. Imagine yourself strolling through a winter wonderland or attending a sophisticated evening out, wrapped in the warmth and elegance of your handmade Gelato Shawl. Are you ready to get started?
Table of contents
Materials You'll Need
Before we dive in, let's gather the materials you'll need to create your Gelato Shawl. Having everything on hand before you start makes the process smoother and more enjoyable. Here's your checklist:
-
Gelato Yarn (Ice Yarns Size 2 weight): You'll need about 400g. This yarn is 100 grams microfiber acrylic and 320 meters for 100 grams. It's thin but feels a lot like mercerized cotton. You can find similar yarns here.
-
4mm Crochet Hook: A 4mm crochet hook is ideal for this project, ensuring your stitches are just the right size.
-
Yarn Needle (for weaving in ends): This is essential for a clean finish! I recommend these blunt tip yarn needles to weave in those ends.
-
Stitch Marker: A stitch marker helps keep track of the bottom point of your shawl, especially as it grows.
-
Scissors: Every crafter needs a good pair of scissors! These scissors will do the job!
Tip: When working with slippery yarns like Gelato, a sharp-tipped needle can really help when weaving in the ends.

Getting Started: The Foundation of Your Shawl
Every masterpiece starts with a single step. In this case, it's the slip knot and initial chain.
Making the Slip Knot and Initial Chain
- Slip Knot: Begin by making a slip knot, leaving a long tail. This tail will be woven in later, so don't skimp on the length!
- Chain Six: Chain six. This forms the base of your shawl.
- Join into a Ring: Work into that very first chain you made (right on top of that slip knot), and slip stitch to join. This creates a small ring.
- Hold the Center Open: Hold the center of the ring open with your finger and thumb. This makes it easier to work into the ring in the next step.
Round 1: Building the Center
Now, let's start building the center of your shawl.
- Four Single Crochets: Into the ring, going over your tail, make four single crochets.
- Four Double Crochets: Into the ring, still going over your tail, make four double crochets.
- Chain Two: Chain two. This creates the bottom point of the shawl.
- Four More Double Crochets: Into the center of the ring, going over your tail, make four more double crochets.
- Slip Stitch to Join: Slip stitch into the top of that first stitch to join. You want to slip stitch right into the two strands of that "V" on the top of your hook.

Growing Your Shawl: Step-by-Step Instructions
Now that you've created the foundation, it's time to grow your shawl, one row at a time!
Round 2: Increasing the Size
- Chain Four and Turn: Chain four and turn your work.
- Two Double Crochets: Into that very next stitch, do two double crochets.
- Three Double Crochets: Into the next stitch, do three double crochets.
- One Double Crochet (x2): Into each of the next two stitches, do one double crochet.
- Five Double Crochets into Chain Space: Into your chain space (that's the bottom tip of your shawl), do five double crochets.
- Place Stitch Marker: Pull your hook up, making a bigger loop. Take your hook out and isolate those last five double crochets. Pop a stitch marker into that center stitch (the third of the five). This marks the tip of your shawl.
- One Double Crochet (x2): Put the loop back onto your hook and shrink it down. Into each of the next two stitches, do one double crochet.
- Three Double Crochets (x2): Into each of the next two stitches, do three double crochets.
Window Row: Adding Texture and Visual Appeal
- Chain Five and Turn: Chain five and turn your work.
- Double Crochet, Chain One: Into that very same stitch (right where your chain is), do one double crochet, chain one.
- Repeat: Into the next stitch, one double crochet, chain one. Repeat this for the next three stitches.
- Skip One, Double Crochet, Chain One: Wrap your yarn, skip a stitch, and into the second stitch, do one double crochet, chain one. Repeat this pattern until you are one stitch away from your stitch marker.
- Center Stitch: Skip one and go into that center stitch at the bottom of your shawl. Do one double crochet, chain two, and one double crochet into that same stitch.
- Chain One, Skip One, Repeat: Chain one, skip one, and continue the "double crochet, chain one" pattern back up the other side.
- Ending the Row: When you have two stitches left, chain one, one double crochet into the next stitch, chain one, one double crochet into the chain.

Working into Window Spaces: Creating Solid Sections
- Chain Four and Turn: Chain four and turn your work.
- Two Double Crochets: Into that very first stitch (right where your chain is coming from), do two double crochets.
- Three Double Crochets into the Space: Into the space in between those first two double crochets, do three double crochets.
- Two Double Crochets into Each Space: Into each space along the side, do two double crochets.
- Five Double Crochets at the Tip: When you get to your stitch marker, pop it out and into that space, do five double crochets. Remember to put your stitch marker in the middle of the 5 double crochets at the tip.
- Two Double Crochets into Each Space: Two double crochets into each space all the way back along the row to the last space.
- Last Space and Chain: Into that last space, do three double crochets. Into the fourth chain, do three double crochets.
Solid Double Crochet Rows: Building Density
- Chain Four and Turn: Chain four and turn your work.
- First Stitches: Right into that very first stitch, do three double crochets. Then, into the next stitch, do three double crochets.
- One Double Crochet: Now, just one double crochet into each stitch, working all the way down along the side of your shawl.
- Center Stitch: When you get to your stitch marker, pop it out and into that stitch, do five double crochets.
- One Double Crochet: One double crochet into each stitch, working all the way back down along the side of your shawl.
- Last Stitch and Chain: In your last stitch, do three double crochets. Then, into the top chain, do three double crochets.

Repeat Pattern: Customizing the Size
Now comes the fun part: repeating the pattern to make your shawl as big as you like! You can use the basic repeat of four rows of double crochet, followed by a window row, then a row of working into the windows.
Or, I like to use this alternate repeat pattern: Windows, two rows of double crochet, Windows, four rows of double crochet, Windows, six rows of double crochet, Windows, and eight rows of double crochet then Windows.
Repeat either pattern until your shawl is the size you want it to be. Just remember to end on a Window row before starting your border!
The Drop Leaf Border: Adding a Finishing Touch
The border is what really makes this shawl special. It adds a delicate, decorative edge that elevates the whole piece.
Starting the Border
- Chain Three and Turn: After finishing your last windows row, chain three and turn your work.
- Double Crochet: In the next double crochet (the top of that stitch), make one double crochet.
- Chain Two: Chain two.
- Six Double Crochets: In the next space (working right around that post), do six double crochets.
- Single Crochet: In the next stitch, make one single crochet.
Repeating the Border Pattern
Here's the repeat for the rest of the border:
- Chain Three: Chain three.
- Double Crochet: In the next space, one double crochet.
- Chain Two: Chain two.
- Six Double Crochets: In the space, working around that double crochet you just made, do six double crochets.
- Single Crochet: In the next stitch, one single crochet.
Tip: Don't worry if the border looks a little funny at first. It will stretch out and even out as you work.

Handling the Center Point
When you get to the center tip of your shawl, just treat it like a regular space. Work the border pattern (chain three, double crochet, chain two, six double crochets, single crochet) into that center space.
Finishing the Border
- End of Row: At the end of the row, you'll have your chain and your last double crochet empty.
- Chain Three: Chain three.
- Double Crochet: In that last real double crochet, make one double crochet.
- Chain Two: Chain two.
- Six Double Crochets: In the space, do six double crochets.
- Single Crochet: Single crochet into the chain.
- Chain One: Chain one to secure your yarn.
Final Steps
- Cut Yarn: Cut your yarn, leaving a long tail.
- Secure End: Pull your hook up and your yarn through, and snug it down to secure.
- Weave in Ends: Weave in all those loose ends for a clean, professional finish. I like to use these sharp tip needles for this.
Tips and Tricks for Success
Here are a few extra tips to help you along the way:
Dealing with Slippery Yarn
When using a slippery yarn like Gelato, it's super important to securely weave in your ends. I like to sew them in multiple directions for extra security.
Adjusting Stitch Counts
If your stitch count goes off on a window row, don't panic! You can adjust the number of "boxes" (spaces) on each side to ensure they are equal. No one will ever know!
Handling the Center Point in Window Rows
Depending on where you end up at the center point of your shawl, you might need to adjust your pattern slightly. Just mirror what you do before and after the center point.
If you are at the center point of your shawl and you are going to be working into the second stitch and not the third, go ahead and work into that second stitch with your double crochet and chain one. And now still go into that Center Stitch with your double crochet chain two one and two and one more double crochet into that same Center Stitch just like that and then whatever you did before the point of your shawl you want to do after so it went in to the Stitch right before the center Stitch so we want to go in to the Stitch right after so we went into this Stitch we want to go in to that Stitch you want to do like a mirror so I've done my chain one so into that very next Stitch one double crochet and chain one and now we're back to skipping a stitch and doing everything like usual so just depending on where you end up at the tip of your shawl just go ahead and mirror what you do before and after and don't worry if it looks exactly the same as the row before there's two different ways of doing it and both are fine

Show Off Your Project!
You did it! Share your finished Gelato Shawl with the world! Post a picture on social media and use the hashtag #SecretYarneryGelatoShawl. I'd love to see your beautiful creations!
More Crochet Fun
Ready for more? Head over to my website for the written pattern of this shawl and other fun crochet patterns. If you are left-handed, check out these tutorials for more help! Don't forget to subscribe to my YouTube channel for more crochet inspiration! Check out other patterns for scarves, wraps, and shawls.
Left Handed?
FAQs
1. How long does it take to make the Gelato Shawl?
The time depends on your skill level and how much time you dedicate to the project. For beginners, it might take a few days to a week, while experienced crocheters could complete it in 2-3 days.
2. Can I use a different type of yarn?
Yes, you can! While Gelato Yarn (size 2 weight) is recommended for its smooth texture, you can substitute it with other similar weight yarns. Choose yarn that feels comfortable to you and matches the project vibes.
3. How should I care for my completed shawl?
Wash your shawl according to the instructions on your yarn label. Most microfiber acrylic yarns can be machine washed on a gentle cycle and air dried flat to maintain their shape.
4. What if I lose track of my stitch count?
If your stitch count goes off, don’t panic! Adjust the number of "boxes" (spaces) or add/reduce stitches evenly on each side to bring your shawl back in balance. Visual symmetry is more important than exact numbers.
5. Can I make the shawl larger or smaller?
Absolutely! Customize the size by repeating the pattern until you reach your desired size. Always end on a Window row before starting the border.
6. What does "working into the window spaces" mean?
This means crocheting into the gaps created by chains from the previous row rather than inserting your hook into a specific stitch. These spaces are often called "windows."
7. How do I prevent the yarn from slipping or fraying?
Slippery yarns like Gelato may fray or come undone, so securely weave in your ends in multiple directions. Use a sharp-tipped needle to secure loose ends for a polished finish.
8. Is the Gelato Shawl suitable for beginners?
Definitely! This pattern is beginner-friendly and comes with step-by-step instructions. Plus, the included video tutorial is a helpful guide for visual learners.
9. Can left-handed crocheters follow this pattern?
Yes! If you're left-handed, this playlist has detailed tutorials to help you get started.
10. Where can I get support or inspiration for my shawl?
You can subscribe to The Secret Yarnery YouTube Channel for tutorials and tips or visit their website for written patterns and other fun projects.
11. What is the purpose of the stitch marker?
The stitch marker helps track the bottom point of your shawl as it grows. It ensures symmetry and saves time while working through the pattern.
12. What can I do if my shawl looks uneven?
Unevenness is often due to tension inconsistencies. Block your finished shawl to even it out. Simply spray with water, lay it flat, and gently stretch it to the desired shape before letting it dry.
![]()
Christa Patel is the creative mind behind the Secret Yarnery, a trusted resource for crochet enthusiasts worldwide. With years of experience, Christa specializes in designing beginner-friendly yet stunning crochet patterns that inspire creativity and confidence in crafters of all skill levels.
As a passionate crocheter, Christa is known for her clear and approachable teaching style, breaking down complex patterns into simple, easy-to-follow steps. Through her engaging video tutorials, written patterns, and helpful tips, she has cultivated a community where crocheters can connect, learn, and share their work.
Christa’s dedication to making crochet fun and accessible shines in every project she creates, from colorful blankets to intricate borders. Whether you’re a seasoned expert or just picking up a hook for the first time, Christa's guidance will help you craft something beautiful.
For more crochet patterns, tips, and inspiration, visit her website at The Secret Yarnery, or check out her YouTube channel filled with step-by-step tutorials.
About the Author
With a passion for crafting easy, beginner-friendly tutorials and patterns, Christa inspires crafters of all skill levels to unleash their creativity worldwide. She encourages yarn lovers to connect, create, and crochet a world filled with beautiful handmade treasures!
Gelato Shawl with Drop Leaf Border