Ready to turn four simple granny squares into a cozy, customized sweater? In this guide, I’ll show step by step how you can crochet your own Four Squared Granny Crochet Sweater, perfect for anybody just starting out or looking for a fun, stash-busting project. With no sewing and endless options for sizing and color, this is the ultimate beginner-friendly sweater pattern. We’ll cover everything from picking your yarn and tools, to crocheting the squares, to joining them seamlessly as you go. Let’s get started and keep things stress-free and creative!
Overview of the Four Squared Granny Crochet Sweater Project
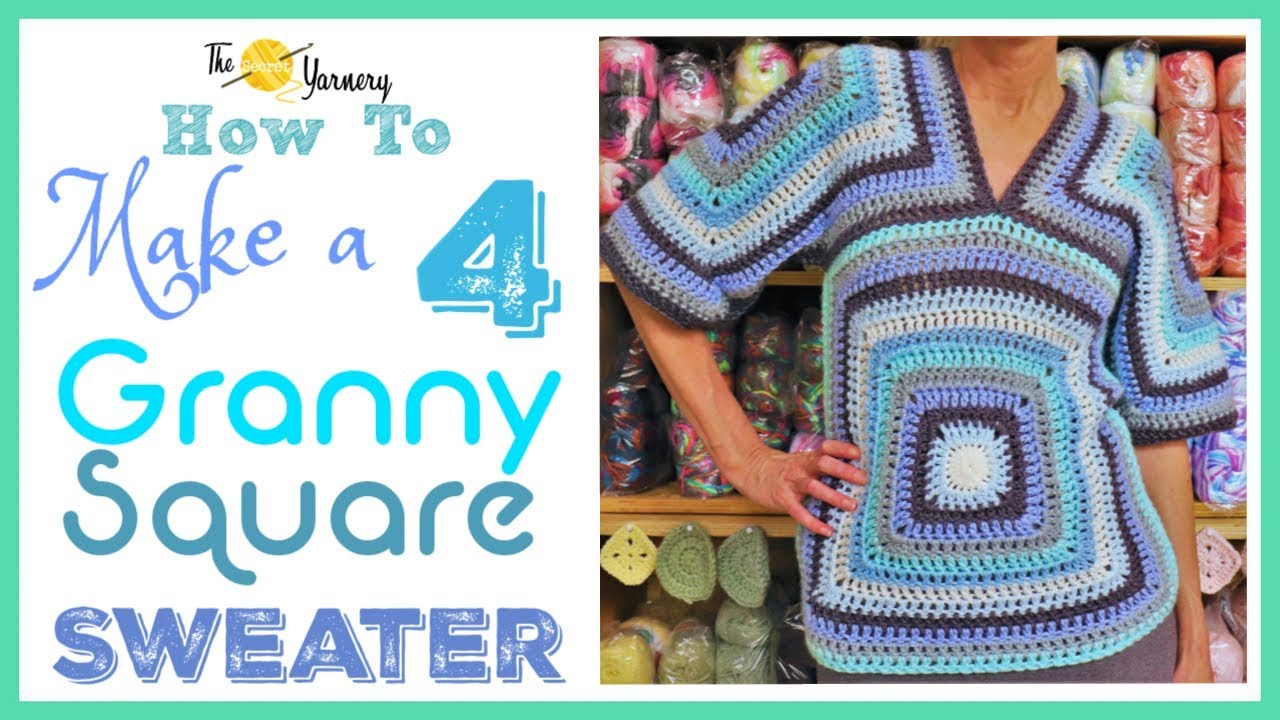
This granny square crochet sweater is built from just four granny squares, joined as you go—no sewing required! Each square forms part of the sweater’s body and sleeves, making assembly a breeze even for beginners. You can pick any colors you like, dive into your scrap basket, or keep it classic. I’ve added a twist to the pattern by changing up colors and using a special technique at the top to avoid bulky joins. Sleeves can be kept short or made longer for a bell sleeve look. It’s super easy to personalize your fit and style.
If you’re new to granny squares or want to see more beginner-friendly ideas, check out my Beginner Friendly Crochet Sweater Pattern for extra tips and inspiration.
Materials Needed for the Project
For this project, you’ll need:
- Yarn: Use worsted weight (#4) yarn. This is a great way to use up leftover scraps or choose a set of colors that work well together. Scraps not only add personality but are a sustainable choice!
- Crochet Hook: I recommend a 7mm Clover crochet hook. Bigger hooks make the work faster, create a soft, drapey texture, and are easier to maneuver—especially with chunkier yarns.
- Notions: Stitch markers help with layout and joining, scissors for neat ends, and a yarn needle for weaving in tails.
- Optional tools: a measuring tape if you want to match sizing closely to a shirt or tank top.
You can find yarns, hooks, and accessories in specialty stores or online shops. For more inspiration, check out my Granny Squares Collection to see colorful pattern options and more sweater ideas.

Preparing to Crochet: Understanding the Granny Square Basics
A granny square is one of the most popular and beginner-friendly motifs in crochet. Traditionally, you start with a circle and work outward in square rounds, creating a flexible and decorative fabric. For this sweater, the center is a solid circle—no large holes—so it covers better. After the center, you build up rows to form the square, alternating colors as you wish.
The real magic comes in with the join-as-you-go method: you connect the squares with slip stitches and double crochet rather than sewing them after. This means your sweater takes shape almost as you crochet, saving time and giving a smooth finish.
Both right- and left-handed crocheters can follow along. If you’d like structured guidance, check my Easy Crochet Granny Square Tutorial.
Measuring and Planning Your Sweater Size
Planning your granny square crochet sweater size is simple:
- Lay out a t-shirt or tank top that fits the way you want.
- Measure across the bust to judge how wide your granny square fabric needs to be.
- For a more fitted sweater, make squares almost as wide as the shirt since crochet stretches.
- Want a roomy, cozy fit? Match your squares’ width to the shirt’s width—or make them just a smidge bigger.
- Length is up to you. Hip measurements aren’t as important for this cropped style, but you can always make squares bigger for longer coverage.
Measuring Tips:
- Always lay your squares flat, with the “pretty” side (V stitches facing up) for sizing.
- As you build, periodically lay the tank top on the squares to double-check the fit.
- Remember: crochet fabric relaxes with wear.
Starting Your Granny Square: Making the Magic Ring
To start your granny square, you’ll begin with a magic ring. This gets rid of the center hole and gives the sweater a tidy, solid look.
Here’s how I do it:
- Drape the yarn tail over your non-dominant hand, holding it down with your thumb on your ring finger.
- Wrap the yarn around your two fingers to make an X, then flip your hand over and tuck the working yarn under your thumb.
- With your hook facing down, go under the short strand, hook the long strand, and bring it through.
- Swivel your hook toward and away from yourself, then let your thumb relax to slide the yarn.
- Grab the long yarn again and pull it through the loop on the hook—this forms your magic ring.
Leave the tail handy, as you’ll work over it for a snug center. Next, chain three (this counts as your first double crochet). Keep your tension relaxed for the first few stitches; too tight and the center won’t close properly.

Crocheting the First Round: 19 Double Crochets into the Magic Ring
With your magic ring ready, you’ll work 19 more double crochets (dc) into the ring. Your chain three counts as the first dc, for a total of 20.
- Wrap yarn, insert hook into the ring, yarn over and pull up a loop (three loops on hook).
- Yarn over, draw through two loops, yarn over, draw through the last two loops.
- Repeat until you have 20 dc, including your first chain three.
Count as you go. I like to count out loud or use stitch markers every few stitches to avoid missing any.
Once done, grab your tail and pull to close the center. Don’t yank too hard or you might break the yarn—just enough to close the gap. Find the top of your chain three, slip stitch to join the round, then chain one to secure before cutting your yarn.
Working over the tail as you do your double crochets tucks it away neatly and cuts down on finishing work later.
Changing Colors and Beginning Round Two
Now it’s time to change up your color. You can follow your own color pattern or use up odds and ends for each round.
- Pick up your next color. Look five stitches back from your join spot on the previous round; that’s where you’ll insert your hook.
- Loop the new color on your hook, pull it through, and slip stitch to join.
- Chain two (counts as your first double crochet in this method).
- Work four double crochets, one into each stitch, working over your tail for the first stitches.
This way, you blend your tails into the project for a tidy finish. If you have your own way of joining new yarn, use what feels best.

Creating the First Corners: Decreasing to Hide Extra Stitches
When you reach the join from your previous round, there’s a spot where the chain three and next stitch look doubled. You only want to count this as one stitch. Here’s how I tackle it:
- Into the double spot, do a double crochet decrease: dc2tog (double crochet two together) over those two stitches (leave last loop of both on hook, yarn over, pull through all three).
- Chain one and then place another double crochet into the same stitch as before. This begins your corner.
- If you see a tiny, extra stitch right next to the corner, work into it—don’t skip it.
First Corner Sequence
- Start double crochet in first “lump” after chain
- Start double crochet in next part of same stitch
- Yarn over, pull through all three loops (dc2tog)
- Chain one
- Double crochet again into same corner
This decrease smooths out the seam so it lays flat.
Continuing the Round: Working Double Crochets and Corners
Continue the pattern across the side:
- Work four double crochets, one into each stitch
- At the next corner, work: one double crochet, chain one, one double crochet (corner formation)
- Repeat for all four corners
Once you reach the end, slip stitch to join into the top of the chain three. Chain one, cut your yarn, and pull through to secure the round.
Work over tails as you go, dropping them after a few stitches to make weaving them in easier later.

How to Keep Your Granny Square Straight: Flipping After Each Round
To keep your square from warping or twisting, flip your work over after each round. This habit gives you crisp, straight edges that line up perfectly when you join squares later.
- Work into the “back” of your square for each new round (the V stitches should face up).
- Choose a spot away from the last color join for a neater look.
- Use the “macaroni” (the little loop on top of the V stitches) as a guide for where to insert your hook.
- Stitch markers help remind you which side is the “pretty” side and which isn’t, making seaming and finishing a breeze.
Alternating Small and Big Corners for Square Growth
To build your square up big enough for sweater size, keep your corners neat by alternating rounds:
- Small corner: 1 double crochet, chain 1, 1 double crochet
- Big corner: 2 double crochets, chain 1, 2 double crochets
Alternate these each round, which helps keep the square flat and prevents edges from ruffling or curling.
Corner Pattern Summary:
- Odd rounds: Small corners (1 dc, ch 1, 1 dc)
- Even rounds: Big corners (2 dc, ch 1, 2 dc)
Finish each round with a slip stitch and chain 1 to secure before changing colors as you wish.
Want more inspiration for granny square projects? Dive into my Top 20 Free Crochet Granny Square Projects.
Edging Squares and Final Round Color Choice
Choose a single color to edge your squares for the final round. This color will tie the squares together visually and make joining easier later.
- Square 1: Complete edging in your chosen joining color.
- Squares 2 and 3: Edge three sides, leaving one side open for joining.
- Square 4: Edge on one side only (border to be added when joining).
Keep your “pretty side” up during this step so your joins all face the correct direction.
Joining Granny Squares: Preparing Your Squares for Assembly
Time to assemble! Take your first square (fully edged), and a second square (one side unedged).
- Lay the squares with right sides facing out, matching up the sides to be joined.
- Isolate the corner stitches and double-check your stitch counts before starting.
- Use a combination of slip stitch and double crochet to join the two sides together as you work.
- As usual, work over the yarn tails for a tidy finish.
This join-as-you-go approach means less fiddling with sewing needles later.
Joining Squares Side-by-Side: Step-by-Step Technique
Now for the fun part: making that smooth, flexible join.
- Find the matching stitches on both squares.
- Double crochet into the square closest to you, then slip stitch into the matching stitch on the second square.
- Alternate double crochet and slip stitch all the way down the side.
- As you move along, keep your tension relaxed and your hook facing slightly downward to avoid skipping or missing stitches.
- When you reach the corner, work five double crochets into the corner space, slip stitching into the join for a secure, flexible seam.
This creates a neat, braided join that's as stretchy as the sweater itself.
For more quick sweater inspiration, see my Quick Crochet Sweater Project.
Completing the Join Around Corners
Joining around corners takes a bit of attention:
- Work five double crochets into the corner space, slip stitch to anchor into the join.
- If your edges don’t line up perfectly, that’s okay—just fudge a little creatively so the join stays neat on the outside.
- End each join round by slip stitching into the chain three and chaining one to secure before cutting your yarn.
Flip your work now and then to check that the join looks tidy and the edge lays flat.
Creating the Sweater Body Loop
Once all four squares are joined in a line, it’s time to make the body of your sweater:
- Join the last sides to form a tube.
- Slip stitch and double crochet in the same join-as-you-go style along the final seam.
- When finished, lay the tube flat or try it on for size. Crochet fabric is stretchy, so it’ll fit many body types, but this is a good time to make sure you’re happy with the fit before moving to sleeves.
If you want to take a break, now’s a good time to rest and admire your progress!
Planning the Sleeves: Measuring and Marking
For easy, symmetrical sleeves:
- Fold your spare squares in half and count the stitches on both edges to find the exact middle.
- Mark the center with stitch markers on both the square itself and the tube edge you’ll be joining it to.
- The top quarter marks will set your back and front neckline for a balanced look.
- Align all markers before beginning your join, which will help sleeves hang evenly.
A notepad or table comes in handy to keep track of which stitches you’ve counted on each square.
Joining Sleeves to the Sweater Body: First Steps
Let’s start building the sleeves right onto your tube:
- Attach your yarn at the underarm corner and chain two (first double crochet).
- Work double crochets along the sleeve edge, working over tails as always.
- When you reach the marker, grab the matching square and use slip stitch joins to attach stitches together.
- Alternate double crochet and slip stitch across to make a shoulder seam that’s smooth and flat.
This makes the sleeve attachment almost invisible from the outside.
Joining Sleeve Corners and Forming the Sleeve Top
At the shoulder, you’ll add three to five double crochets in the corner space to shape the join.
- Mark the beginning and end of the join with stitch markers for clarity.
- Keep your joins on the firm side for durability, especially around the underarm and shoulder, which take the most stretching and wear.
If the fabric starts to twist, fold it gently—sometimes holding the work differently helps make the join less confusing. Keep a consistent tension along this join the same as the rest for a professional result.
Joining Sleeve to Sweater: Continuing Across the Edge
Work your way down the other side of the sleeve using the same double crochet and slip stitch method.
- Always go one stitch at a time: double crochet into your side, then slip stitch into the sweater body.
- Keep an eye on your stitch count and alignment so you don’t skip or double up on stitches.
- After finishing the join, work double crochets around the cuff or add extra rounds for a longer sleeve or bell shape—just as you like.
Finishing Touches: Joining Front, Back, and Cuff
With the sleeves attached, it’s time to join the front of the collar slightly, sew up the back neck about two-thirds of the way, and neaten the cuffs.
- Decide which side is the front and back of your sweater.
- Use stitch markers to mark off how much of the neck opening you want to join—leave enough for your head to fit comfortably!
- Join using the same slip stitch and double crochet method, working along the seam from the underarm to your neck marker.
- Make sure your joins are tidy, especially in visible spots like the neckline and cuffs.
If you’d like to add more color or adjust fit, now’s the best time—just slip stitch on more yarn and keep going.
Customizing Sleeve and Sweater Length
You have lots of freedom to make this granny square crochet sweater your own.
- Add extra rounds of single crochet or double crochet at the cuffs for a longer sleeve.
- Leave sleeves short for warmer weather or extend them for autumn coziness.
- Border the bottom edge with single crochet or a decorative stitch.
- Experiment with stripes, ombres, or solid borders for a unique look.
If you love the look and want more granny square projects, explore my Colorful Crochet Granny Squares for lots of pattern options.

Weaving in Ends and Final Sweater Fit
The last step is weaving in your yarn ends with a yarn needle. Turn your sweater inside out or flip the square so all tails are on the back. Weave each tail into nearby stitches and snip off the excess.
Try on your new sweater! Crochet fabric stretches and relaxes with wear, so don’t worry if it feels snug at first. This comfy, colorful piece will soften up over time—and you’ll know you made it yourself, one granny square at a time.
Conclusion
Crocheting a granny square sweater is both easier and more flexible than you might think. With just four squares, a hook, and your favorite yarn scraps, you can create a wearable, stylish project to keep for yourself or gift to a friend. No sewing needed, so you get instant gratification with each join.
If you enjoyed this pattern or want even more ideas, check out my Easy Granny Square Ideas 2025 for more fun projects, and don’t miss the Simple Crochet Sweater for Beginners if you want to try this build in a different style. Whether you’re a newbie or have years behind the hook, you’ll love adding this granny square crochet sweater to your wardrobe. Share your creations online, tag your posts, and let the world see your handmade style. Stay creative, and as always—stay hooked!
Frequently Asked Questions (FAQs)
1. How much yarn do I need for this granny square sweater?
Yarn amounts vary based on size, yarn weight, and sleeve length. For most adult sizes with worsted weight yarn, 500–800 grams is plenty. Using scrap yarn? Gather all leftovers and weigh as you go.
2. Can I make this sweater with different yarn weights?
Yes! Adjust your hook size to match your yarn. Finer yarns will need more rounds for the same size. Do a test square and measure before starting all four squares.
3. What if my granny squares aren’t the same size?
Lay them flat and count your rounds and stitches to match sizes. If one square is smaller, add extra rounds. Steam or block if needed before joining.
4. How do I join the squares if I want a different join style?
Try any favorite join method—sewing, slip stitch, or single crochet—on the final round edges.
5. Can I add length to the sweater or sleeves later?
Yes! Add rounds at the bottom edge or sleeve cuffs after assembly to make the sweater or sleeves longer.
![]()
Christa Patel is the creator behind Secret Yarnery, known for easy, colorful crochet designs and helpful video tutorials. With years of experience teaching beginners and sharing crochet tips, Christa loves making projects simple and fun for everyone. Her patterns focus on clear instructions, practical advice, and ways to use yarn scraps creatively. When she’s not crocheting, Christa enjoys connecting with fellow makers around the world through her videos, blog, and vibrant crochet community.
Find more patterns, ideas, and crochet inspiration from Christa at Secret Yarnery.
About the Author
With a passion for crafting easy, beginner-friendly tutorials and patterns, Christa inspires crafters of all skill levels to unleash their creativity worldwide. She encourages yarn lovers to connect, create, and crochet a world filled with beautiful handmade treasures!
Four Granny Square Crochet Sweater: Easy Step-by-Step Pattern!