How to Crochet a Circle Into a Square Step-by-Step!
Transforming a colorful circle (or polka dot) into a neat, sharp-edged square is one of my favorite crochet techniques. It opens up endless possibilities for blankets, pillows, and all sorts of projects. In this guide, I'm breaking down every step for anyone who's ever wondered how to turn those fun circles into perfect squares. No complicated jargon, just hands-on crochet wisdom.
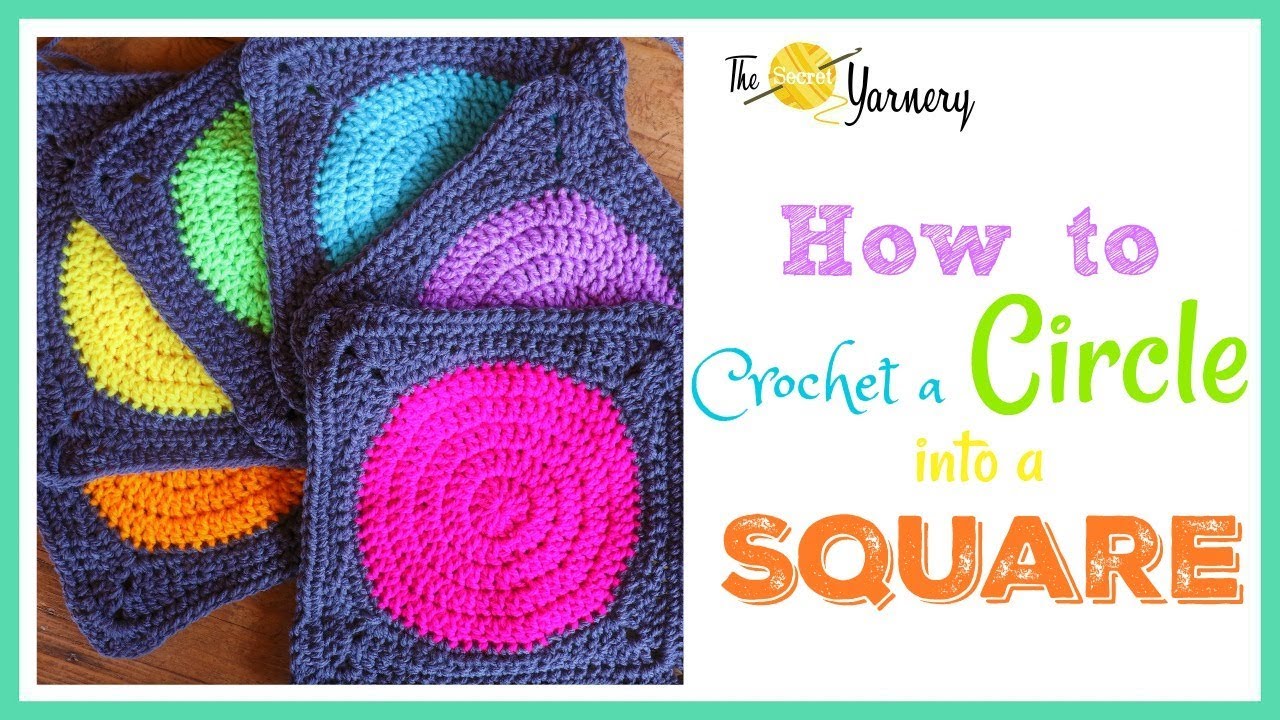
Here’s the video tutorial so you can follow along as you read:
Let’s turn your circles into beautiful squares!
Materials Needed
Every great crochet project starts with having the right tools at hand. Here's everything I use for this circle-to-square transformation:
- Crocheted Circle: Start with a finished circle, like a five-round polka dot.
- Yarn: Use the same yarn as your original circle (or get creative with another color for the square edge).
-
Crochet Hook: Match the hook size you used for your circle to keep stitch sizes consistent.
Crochet Hooks – My top picks -
Scissors: For snipping tails and finishing off neatly.
Sharp, handy scissors like these will make your life easier -
Stitch Markers: Help you mark corners, making everything easier.
Try brightly colored stitch markers for easy counting - Cozy Beverage: Okay, not essential, but coffee, tea, or cocoa always makes crochet time cozier.
A little organization goes a long way. I like keeping my yarn and tools in a project basket. For extra inspiration, check out the circle to square best sellers for patterns and kits.

Understanding Your Starting Circle
Before sizing up the square, let’s take a closer look at your starting circle.
To count the number of rounds in your circle:
- Find the Center: Start with the smallest ring in the middle.
- Count Outward: Count each complete ring of stitches, including the initial magic ring or center round.
- Total Your Rounds: Most polka dot circles I make have five rounds, giving that classic look.
For example, a five-round circle will look like this:
- Center circle
- Second round
- Third round
- Fourth round
- Fifth round (outermost edge)
If you’re working with a five-round circle, you'll likely have 60 stitches on your final outer ring. Different circle sizes mean different stitch counts on the edge, but the transformation process remains the same. Being precise here saves lots of confusion later on.
If you want a refresher on basic circle technique, visit my beginners guide to crocheting circles without magic ring, where I detail other ways to start a round circle if you don’t want to use the classic magic ring.
Using Stitch Markers to Divide the Circle
Dividing your circle precisely sets you up for neat corners and straight edges.
Why use stitch markers? They indicate where each corner will go, making it easy to know where to switch between side and corner stitches.
Here’s how I do it:
- Count Total Stitches: For a five-round circle, that’s 60.
- Divide by Four: 60 ÷ 4 = 15 stitches per side.
- Set Stitch Markers: Place a marker every 15 stitches around the edge. You’ll mark four spots—these are your corners.
Step-by-step:
- Count out 15 stitches from your join or starting point.
- Place a stitch marker.
- Repeat, moving around the circle, until all four markers are set.
Now your circle is split into four equal sections, like the quadrants of a pie. Each marker says, “Here’s where your corner will be!” This makes the circle-to-square transition smooth and foolproof. If your stitch count differs, just divide your total edge stitches by four for your own perfect layout.

Preparing to Crochet Your First Round on the Circle
Getting started on your square round is all about positioning and handling the join.
First, flip your work so the pretty side is facing up (this is the smooth side with the best stitch definition). If you see a texture that looks like macaroni, that's the back—keep it down.
To join yarn:
- Insert your hook into the “V” of a stitch just before your original join spot.
- Pull a loop of new yarn through and slip stitch to join.
Once joined, hold your yarn tail along the top edge and work your first few stitches over the tail. This instantly weaves it in, giving your finished piece a tidy look.
Continue working a single crochet in each stitch. Once you reach the place where you joined or finished off an old tail, drop the unused tail—no need to keep carrying it.
Glossary:
- V of stitch: The top part of each crochet stitch looks like a “V”—always insert your hook under both loops.
- Slip stitch: Insert hook, yarn over, pull through both loops.
- Single crochet: Insert hook, yarn over, pull up loop (2 loops on hook), yarn over, pull through both.
Handling Chain Stitches and Knots in the Circle
Chain stitches from forming your original circle often pop up as little gaps or knots. You might be tempted to skip these areas, but for the best look, crochet into or around the knot so you maintain a seamless edge.
I prefer to:
- Push my hook under the knot made by the chain.
- Draw up a loop of working yarn.
- Without completing the stitch, insert my hook into the next proper stitch.
- Yarn over again and pull through all three loops on the hook.
This “smushes” (technical term!) the knot in between two stitches, closing the gap and blending it into the round. It looks neater and keeps the stitch count even. If you skip these knots, the edge shows an obvious gap—nothing major, but I like that seamless finish.
Continue working one single crochet into each regular stitch all the way around, including these knot-areas. Your circle should now have a clean, uniform outer edge.

Completing the First Round and Joining
Once you’ve single crocheted all the way around, it’s time to join and build up for the square.
- Insert your hook into the top of your first single crochet (it’s often a hint larger).
- Yarn over and slip stitch to join.
- Chain three—this will count as your first double crochet of the new round.
- Turn your work so you’re always working from the right direction.
Smooth joining keeps your corners straight and stitch counts accurate. Lose track of your stitches or miss a join, and the whole square might skew or bulge.
Pro Tips:
- Always join in the top of the first stitch to keep your rounds tight.
- When in doubt, count your stitches after each round.
Working the First Square Round: Stitch Pattern Overview
Now for the magic: transforming round edges into crisp square corners.
The pattern follows a sequence to build sides and corners:
- 2 half double crochets (hdc)
- 2 double crochets (dc)
- Corner: 2 double crochets, chain 1, 2 double crochets (all in one stitch)
- 2 double crochets
- 2 half double crochets
- Fill the flat side with single crochets (the number depends on your side length)
This makes one side and a corner, repeated for all four edges. The “corner” stitch pattern is the key—these clusters create the square’s points.
Stitch Order Table (One Side and Corner):
| Step | Stitches | Count |
|---|---|---|
| Build side up | Half double crochet | 2 |
| Next step | Double crochet | 2 |
| Form corner | Double crochet, ch 1 | 2+ch1+2 (all in one) |
| Begin side down | Double crochet | 2 |
| Finish edge | Half double crochet | 2 |
| Flat section | Single crochet | 6 (or as per marker) |
Repeat this sequence for all four sides of your circle.
Starting the Square Round: First Stitches
After turning your work and making your starting chain-3, crochet a double crochet (dc) into the same space. It might feel far apart, but it’ll line up as you continue.
Into the next two stitches, make one double crochet each. Then, make two half double crochets in the next two stitches.
Now, for the flat side, make six single crochets in the next six stitches. This portion forms the straight edge between corners, balancing your soon-to-be square.
You’ll notice the differences in height between single, half double, and double crochet here: singles are shortest, half doubles in the middle, and doubles create the tallest “wall.” This gradual transition gives your square its crisp sides and sharp corners.
Building Up and Around the Corners
To shape a square’s corners, each corner stitch cluster packs in the height.
At every corner marker:
- Work two double crochets into the same stitch.
- Chain one (this will be your actual corner point).
- Work two more double crochets into that same stitch.
The chain one separates your double crochet clusters, causing the square to “turn” outward at each marker.
After the corner, build down the next side:
- Two double crochets (one into each stitch)
- Two half double crochets (one into each stitch)
- Then return to six single crochets along the next flat edge
Consistency in corners keeps your shape sharp. Get in the habit of double-checking each corner for the complete cluster and one chain between the stitches—it’s easy to miss.
Quick Reminder: Count your stitches at each edge before starting the corner.
Managing Stitch Count and Adjustments
Sometimes, as you work through the round, sides might stretch a bit too far or pull in too tightly. Here’s how I adjust:
- If your side is too long, decrease by working two single crochets together.
- If your side is too short, add an extra single crochet into a stitch along the flat section.
Always make these increases or decreases in the flat side (the single crochet area), not at the corners or transitional stitches. This way, your square stays symmetrical and visually neat.
Common Issues and Simple Fixes
- Sides bulge or pucker: Adjust singles by one or two stitches next round.
- Corners look rounded: Double-check for missing stitches in corner clusters.
- Edge looks wobbly: Verify that you’re not skipping stitches at chain spaces.
A little attention here makes joining squares easy later on.
Finishing the First Square Round and Joining
Here’s how I wrap up that formative first square round:
- Work your two half doubles and two doubles into the last four stitches.
- In the same spot as your starting chain three, create your final corner cluster: two double crochets, chain one, and join.
For a neat join:
- Single crochet into the top of your starting chain.
- Slip stitch with your working yarn.
- Pull open that corner space slightly with your thumb—a neat open corner is easier to work into on the following rounds.
- Chain three and turn your work to get ready for the next square round.
Second Square Round: Adding More Singles
On this next round, the sides grow longer, so the number of single crochets between corners increases for flatter, broader sides.
Here’s the pattern for each side:
- After chain-3 and double crochet in the corner, work two double crochets, two half doubles, and now ten single crochets along the flat edge.
- Repeat corner: two half doubles, two doubles, corner cluster (2 doubles, chain 1, 2 doubles).
I keep a finger in my working corner or open the stitch each time to make sure I return to the correct place after turning my work. The key sign you’re set up right: four posts or stitches remaining before each corner.
Every round you add builds the square’s shape, reinforcing both sturdy corners and straight sides.
Repeating Corner and Side Stitch Patterns on Round Two
Just like the last round, every side is made with the same mixture of doubles, half doubles, and singles—but with longer stretches of singles.
- After rounding each corner, check that sides match in length.
- When in doubt, pull your corner gently to reveal hidden stitches.
- Keep the sequence:
- Two doubles
- Two half doubles
- Ten singles
Corners: Two doubles, chain one, two doubles—always in the same space.
Take time after each side to count stitches. The pattern’s rhythm makes it easy to spot any accidental skips or extra stitches before they become an issue.
Quick Checklist for Each Side
- Flat edge: Ten single crochets
- Approaching corners: Two half doubles, two doubles
- Corners: Two doubles, chain one, two doubles
If in doubt, count “posts” (vertical bars) between corners—you want four at each edge before every corner stitch pattern.
Handling Corner Stitches When They Look Confusing
On larger circles, you might spot corners looking crowded or missing a stitch.
Don’t panic—just pull your last corner stitches gently. You’ll find any “hidden” posts right next to one another. The chain from the round below may look odd but trust the stitch count.
When you reach these spots, work your usual two half doubles and then two double crochets. If a particularly messy or tight spot occurs, aim for the soft hole left by the prior chain, treating it as its own stitch. Your eye will thank you in the finished piece.
Tip: Place a marker in each formed corner after every round for extra clarity.
Finalizing Round Two and Starting Round Three
To finish round two:
- Two half doubles, two doubles, then build your last corner in the chain space from your initial join.
- Single crochet into your chain-three for a secure join.
- Open up the corner with your fingers—easy visibility prevents missed stitches next round.
- Chain three, turn your work, and get set for the next round.
With every completed square round, you’ll notice edges getting more defined—the magic of the circle becoming a true square.
Third Round: Half Double Crochet Around
This round brings it all together with half double crochet (hdc) in every stitch. Each post from the previous rounds gets a stitch on top.
- Work one hdc in each stitch around.
- At each corner, work two hdc, chain one, two hdc into the corner space.
This evens out all your sides, giving your square a clean, solid edge that’s easy to join with others. Carefully stitch into every post—including the one that looks a little hidden right next to the corner—so no space is left uncovered.
Using half double crochets here gives the square just enough structure without extra bulk.
Side note: Hdc is sometimes called the “Goldilocks” stitch—it’s not too tall, not too short, but just right for clean lines.
Joining Round Three and Options for Finishing or Continuing
When the hdc round is complete, you have a choice.
- If you want individual motifs: Fasten off with a slip stitch after the last corner hdc cluster, chain one, and pull yarn through.
- If you’re making a blanket or need to join multiple squares, keep your yarn attached for a join-as-you-go method.
You can either sew your squares together or follow my favorite technique: join-as-you-go. It’s fast and means you’ll weave far fewer ends later on.

Table: Finishing Options
| Finish Style | Pros | Cons |
|---|---|---|
| Fasten & sew | Secure, good for stacking projects | Takes longer; more thread to weave |
| Join-as-you-go | Faster assembly, fewer ends to weave | Requires more planning up front |
Preparing the Square for Joining
Before moving to assembly, prep your square with a final round of double crochets.
- Work with the “pretty” side facing up.
- Into the first or top-left corner, double crochet all around the edge.
- In corners, place two double crochets in the same space for clear points.
Finish at the same corner, and use a stitch marker to keep that spot clear while you queue up your next square. If you’re planning a large blanket, prepping a basket with squares and their attached yarn balls is a good system.
Stitch Markers and Managing Multiple Squares
Stitch markers are your best friend:
- Keep them in corners after every round for quick reference.
- Use different colors on each motif for organization.
- As you work on a batch of squares, a “whip basket” keeps everything tidy and means no hunting for stray motifs.
Yarn ball holders and zippered pouches help keep yarn neat—especially if you’re dealing with lots of colors or planning a big project.
Join-As-You-Go Method Introduction
The join-as-you-go approach lets you add a new square to your blanket without sewing individual motifs together later. This saves time and makes your project feel finished as you go.
In the next part of my tutorial series, I walk through this process one step at a time, so don’t stress about trying something new. If you want to join me, get your squares prepped after following this guide.
Stay tuned for that video—I’ll hold your hand for the join-as-you-go method!

Additional Tips and Troubleshooting Throughout the Project
Throughout these steps, I've picked up a few tricks that make the circle-to-square transition smoother.
- Always check stitch counts after each round. This prevents surprises when joining motifs later.
- Work tails in as you go. It saves time in the end and keeps edges tidy.
- If you notice gaps at chain spaces, try my knot-smushing trick for smooth transitions.
- Tension matters. If your squares start curling or bulging, loosen up your stitches a notch.
- Keep rounds and corners counted so you don’t lose track as rounds grow larger.
- To change sizes, simply add or subtract stitches per side when setting up with stitch markers.
Troubleshooting FAQ
- My square is curling: Loosen your stitches next time, or block your finished square with a damp towel and pin.
- I missed a corner cluster: Unravel a few stitches and rework that section.
- Sides aren’t even: Increase or decrease singles as needed along the flat side.
- Big holes at joins: Make sure you’re joining through the correct top-of-stitch loop.
If in doubt, lay your square flat at every round end and compare all sides. Consistent checking keeps mistakes minimal.
![]()
I’m Christa, the maker behind Secret Yarnery. I teach simple, fun crochet so you can finish projects you’re proud of. I love bright colors, bold motifs, and patterns that look fancy but feel easy. When I’m not filming tutorials or sipping coffee with my hook, I’m answering questions from our crochet community and testing new yarn combos.
What you’ll find here:
- Step-by-step videos and photo guides
- Beginner-friendly tips that save time
- Join-as-you-go methods and smart finishing
- Circle, square, and motif patterns you can mix and match
About the Author
With a passion for crafting easy, beginner-friendly tutorials and patterns, Christa inspires crafters of all skill levels to unleash their creativity worldwide. She encourages yarn lovers to connect, create, and crochet a world filled with beautiful handmade treasures!
How to Crochet a Circle Into a Square Step-by-Step!