Crochet a Perfect Circle: Beginner’s Guide to Flat, Seamless Results!
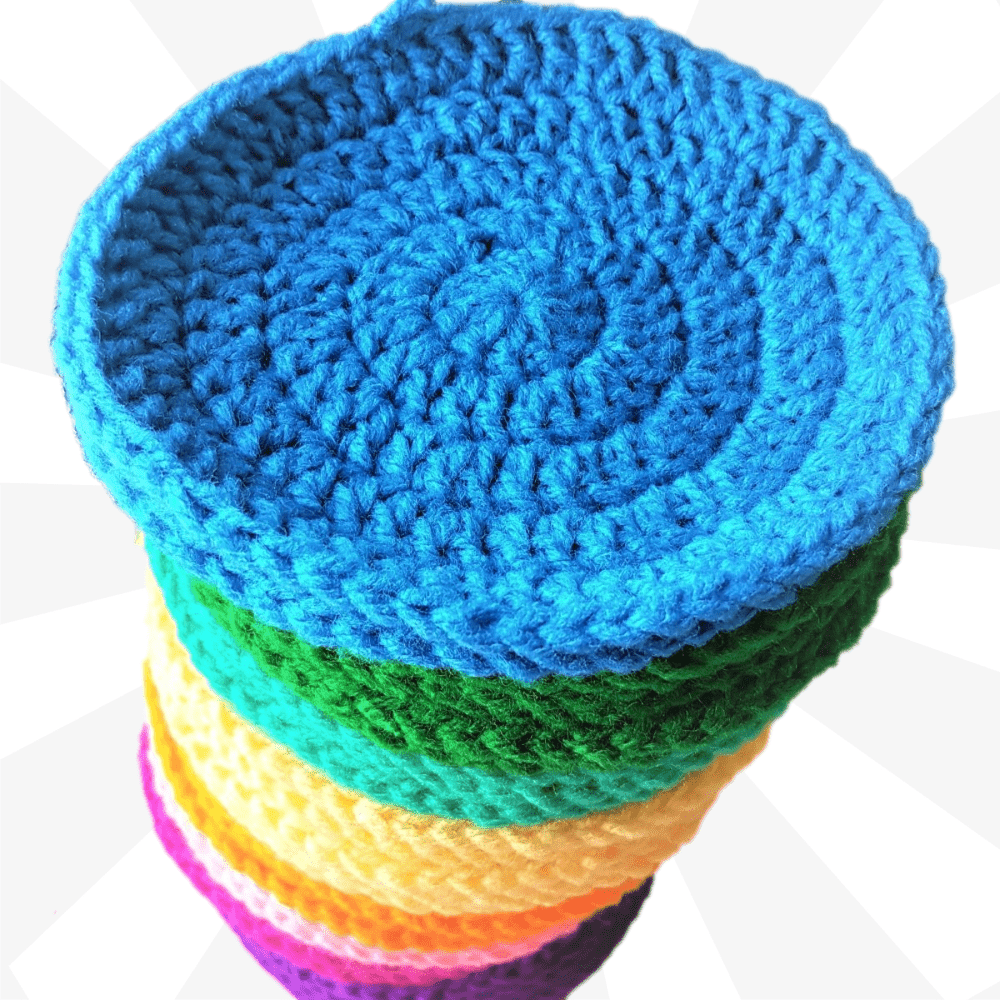
Have you ever wanted to crochet a perfect circle? It's a fundamental skill that opens up a world of possibilities, from cozy coasters to stylish hats. In Crochet Class #18, I'll show you how to create a flawless 5-round circle. Don't worry, I'll also guide you on how to adapt the pattern to any size you desire, plus, I'll share a nifty trick to make your joins virtually invisible.
Whether you're just starting out or looking to refine your technique, this tutorial will help you:
- Master the art of crocheting a circle that lies perfectly flat.
- Achieve seamless joins for a professional finish.
- Customize your circles to any size you need.
Getting Started with Your Crochet Circle
Let's get started on your crochet circle. Whether you’re aiming to create a simple coaster, the base for a hat, or a component for a larger project, mastering the perfect circle is essential. We'll focus on achieving a flat, even result, free from unwanted ripples or cone shapes. Plus, you'll learn a trick to hide that pesky join, ensuring a seamless finish.

Gathering Your Supplies
Before we dive in, let's gather the necessary supplies:
Yarn
I recommend using a four worsted weight acrylic yarn for this tutorial. It's easy to work with and readily available. The weight of your yarn will affect the finished size of your circle. Want a chunkier circle? Opt for a heavier yarn. Prefer something delicate? A lighter yarn will do the trick. There are so many yarns available, check them out: Yarn Conversion Chart – Easily Find the Right Yarn for ....
Crochet Hook
A 6 mm crochet hook is ideal for worsted weight yarn. The hook size is crucial. Too small, and your stitches will be tight and dense. Too large, and they'll be loose and floppy. The goal is to find the sweet spot that creates even, well-defined stitches. If you want to see some hooks, check out this link Crochet Hooks from the video description for crochet must haves.
Needle
You'll need a needle for weaving in your ends. A blunt tip needle is your best bet. It'll glide through the yarn without splitting the fibers. Weaving in ends can be annoying, but it's essential for a clean, professional finish. You can pick up a set of Needles - Blunt Tip from the video description.
Scissors
Any sharp pair of scissors will do for cutting the yarn. Keep them handy so you can snip those ends neatly. Dull scissors can make a mess, so make sure yours are nice and sharp! Here is a good pair of Scissors from the video description.

Understanding the Written Pattern
If you prefer to follow along with a written pattern, I've got you covered. It's available on my website, The Secret Yarnery.
The pattern is written in plain English, so you don't have to worry about deciphering complicated crochet jargon. I want everyone to feel confident and successful, regardless of their experience level. If you'd like to see the written pattern, check out this link: https://bit.ly/3CPE5DD.
Round 1: Creating the Center
Let's start crocheting our perfect circle!
Making a Slip Knot
- Leave a short tail (about 2 inches) of yarn.
- Form a loop and pull the yarn through.
- Tighten the knot gently.
The tail will be woven in later, so don't make it too long.
Chain 3
- Yarn over and pull through the loop on your hook.
- Repeat two more times.
Remember, don't count the knot or the loop on the hook. Count the little "v's" – that's three chains.
Joining to Form a Ring
- Insert your hook into the very first chain you made (right on top of the slip knot).
- Pull the tail down along the chain to create a "u-shape".
- Slip stitch through both loops to join.
Holding the join open is key. This will make it easier to work into the center of the ring.
Chain 2 (Does Not Count as a Stitch)
This chain adds a bit of height and fills in the space, but it doesn't count as a stitch in this round.
Double Crochet 12 into the Ring
- Yarn over.
- Insert your hook into the center of the ring.
- Yarn over and pull through (3 loops on hook).
- Yarn over and pull through 2 loops (2 loops on hook).
- Yarn over and pull through the last 2 loops.
Crochet over the yarn tail to secure it as you go.
If you're not familiar with double crochet stitches, feel free to pause and look at my beginning crochet classes playlist: Crochet 101: A Beginner's Guide to Mastering the Craft.
Adjusting for Space
If you run out of room in the ring before you finish your 12 double crochets, gently push the stitches back along the chain. This will create more space in the center.
Counting Stitches
Only count the real double crochet stitches. Ignore the chain 2. Separate the stitches with your fingers to count them accurately.

Round 2: Increasing the Size
Let's move on to round two!
Chain 2 (Does Not Count as a Stitch)
Again, this chain doesn't count as a stitch.
Increase in Each Stitch
An "increase" means working two double crochets into the same stitch. In this round, you'll place two double crochets into each stitch from Round 1. At the end, you should have 24 double crochets.
Working Around
Make sure you're working into every single stitch. It's easy to miss one, which will throw off your stitch count.
Counting Pairs
Count the pairs of double crochets. You should have 12 pairs (24 stitches total). This makes it easier to verify your count.
Joining the Round
Slip stitch to the top of the first real double crochet of Round 2.
Round 3: Adding More Stitches
Time for round three!
Chain 2 (Does Not Count as a Stitch)
You know the drill – this chain doesn't count.
Stitch Pattern: 1 Double Crochet, Increase**
- Work one double crochet into the first stitch.
- Work two double crochets (an increase) into the next stitch.
- Repeat this pattern around the entire round.
Mnemonic Device
To remember the pattern, think "1, ink (increase)". It's a simple way to keep track of where you are.
Working Around
Maintain the "1 double crochet, increase" pattern consistently. Don't get distracted!
Ending on an Increase
Your last stitch should be an increase. This ensures the circle stays flat and your stitch count is correct.
Total Stitch Count
You should have 36 double crochets at the end of this round. Remember, we're adding 12 stitches each round.
Joining the Round
Slip stitch to the top of the first real double crochet of Round 3.

Round 4: Continuing the Pattern
On to round four!
Chain 2 (Does Not Count as a Stitch)
Yes, still doesn't count.
Stitch Pattern: 1 Double Crochet, 1 Double Crochet, Increase**
- Work one double crochet into the first stitch.
- Work one double crochet into the next stitch.
- Work two double crochets (an increase) into the third stitch.
- Repeat this pattern around the entire round.
Mnemonic Device
Think "1, 2, ink (increase)" to remember this round's pattern.
Working Around
Stay consistent with the "1 double crochet, 1 double crochet, increase" pattern.
Ending on an Increase
You should end the round with an increase to keep the circle flat.
Total Stitch Count
You should have 48 double crochets at the end of this round. Accuracy is key!
Joining the Round
Slip stitch to the top of the first real double crochet of Round 4.

Round 5: The Final Round (For This Tutorial)
We've reached round five!
Chain 2 (Does Not Count as a Stitch)
Still not counting it!
Stitch Pattern: 1 Double Crochet, 1 Double Crochet, 1 Double Crochet, Increase**
- Work one double crochet into the first stitch.
- Work one double crochet into the next stitch.
- Work one double crochet into the next stitch.
- Work two double crochets (an increase) into the fourth stitch.
- Repeat this pattern around the entire round.
Mnemonic Device
"1, 2, 3, ink (increase)" will help you remember the pattern.
Working Around
Keep the "1 double crochet, 1 double crochet, 1 double crochet, increase" pattern going.
Ending on an Increase
End with an increase right before the beginning chain for a perfect circle.
Total Stitch Count
You should have 60 double crochets at the end of this round, with 12 increases.
Joining the Round
Slip stitch to the top of the first real double crochet of Round 5.
Finishing Off Your Circle
Now, let's finish things off.
Chain 1 (To Secure)
This creates a knot to prevent your work from unraveling.
Cutting the Yarn
Leave a long enough tail for weaving in – about 6 inches should do it.
Pulling Through
Pull the yarn through the loop on your hook and tighten.
Weaving in the End
Use your needle to weave the yarn tail into the back of the stitches. This hides the end and secures it. Needles - Blunt Tip will help you get the job done.

Making a Larger Circle: Expanding Your Project
Want to make a bigger circle? Here's how to continue the pattern:
The Pattern
Each round increases by 12 stitches.
Round 6
Stitch pattern: 1 double crochet in each of the next four stitches, increase. Mnemonic: "1, 2, 3, 4, ink."
Round 7
Stitch pattern: 1 double crochet in each of the next five stitches, increase. Mnemonic: "1, 2, 3, 4, 5, ink."
General Rule
Add one more single crochet to the pattern before each increase in each subsequent round. Keep going until your circle is the size you want.
Importance of Keeping Track
It's easy to lose track as the circle grows. I recommend using Stitch Markers to mark the beginning of each round or the location of increases.
Common Mistakes and How to Avoid Them
Even with the best instructions, mistakes can happen. Here are some common issues and how to fix them:
Uneven Circle
- Cause: Incorrect stitch counts, inconsistent tension.
- Solution: Count your stitches carefully and maintain even tension.
Rippling Edges
- Cause: Too many increases.
- Solution: Reduce the number of increases in the following rounds.
Cone Shape
- Cause: Not enough increases.
- Solution: Add more increases in the following rounds.
Joining Issues
- Cause: Visible seam.
- Solution: Use the "invisible join" technique (covered in video) or try a different joining method.
Creative Uses for Crochet Circles
Now that you know how to crochet a perfect circle, what can you make with it?
- Coasters: Thicker yarn adds extra absorbency.
- Appliques: Add to hats, bags, or clothing.
- Blankets/Afghans: Create many circles and join them.
- Hats: Start with a circle for the crown.
- Bags: Use circles as the base or decorations.
- Amigurumi: Perfect for heads and bodies.
Choosing the Right Yarn for Your Project
The type of yarn you choose can make a big difference in your finished project.
Yarn Weight
Different yarn weights (e.g., worsted, DK, bulky) are best for different projects. Finer yarn for doilies, thicker yarn for rugs.
Yarn Fiber
Cotton, wool, and acrylic all have different properties. Cotton for dishcloths, wool for blankets.
Color Choices
Use a Color Wheel to find colors that complement each other.
Essential Crochet Tools and Accessories
Here are some must-have tools for any crocheter:
- Ergonomic Hooks: Reduce hand fatigue.
- Yarn Storage: Keep your yarn organized.
- Stitch Markers: Track rows and stitches.
- Measuring Tape: Check gauge and project size.
Maintaining Consistent Tension for Beautiful Results
Consistent tension is key to a beautiful, even crochet project. If you struggle with tension, here are some tips to keep in mind.
Importance of Tension
Consistent tension affects the appearance and size.
Tips for Maintaining Tension
Hold the yarn comfortably, and avoid pulling too tightly or loosely.
Practicing Tension
Create a swatch to practice before starting your project.
Understanding Crochet Abbreviations
Abbreviations make patterns easier to read, here are some common crochet abbreviations:
- ch = chain
- sl st = slip stitch
- sc = single crochet
- dc = double crochet
- inc = increase
Caring for Your Crochet Projects
Taking care of your crochet projects will make sure they last.
Washing Instructions
Follow yarn label instructions. Hand washing is often recommended for delicate projects.
Drying Instructions
Lay flat to dry to prevent stretching.
Storage Tips
Store in a clean, dry place, away from direct sunlight.
Resources for Learning More About Crochet
Want to keep learning? Here are some resources:
- Online Tutorials: YouTube channels and websites.
- Crochet Books: Books for techniques and patterns.
- Crochet Communities: Online or local groups.
- The Secret Yarnery: Check out my other classes and patterns, plus you can view left handed tutorials [Left Handed Tutorials 👈🏼 https://bit.ly/3UWNmoJ]!

Share Your Creations!
I'd love to see your finished crochet circles! Use the hashtag #SecretYarneryCircle and tag me on social media.
Conclusion: Keep Crocheting!
Crocheting is a relaxing and rewarding hobby. Keep practicing, and explore new techniques. Thanks for joining me in this class, and don't forget to subscribe for more tutorials! [SUBSCRIBE 🔔 https://bit.ly/3VvXdCd]
Add FAQs
1. Why does my circle curl up or form a cone?
Cause: Not enough increases in each round.
Solution: Ensure you are adding the correct number of increases in every round as described in the tutorial. Each round adds 12 stitches evenly.
2. Why does my circle ripple or have wavy edges?
Cause: Too many increases in each round or inconsistent tension.
Solution: Double-check your pattern and stitch count. Practice maintaining consistent tension.
3. How do I know what size circle to make?
A: The size depends on your project. For smaller items like coasters, 4-5 rounds are enough. For hats or large bases, keep adding rounds until you reach your desired diameter.
4. What if I don't have a 6 mm crochet hook?
A: Use a hook size that matches your yarn weight. Check the yarn label for recommendations or go slightly smaller/larger for tighter or looser stitches.
5. Can I use a different stitch instead of double crochet?
A: Yes, but the stitch count and increase requirements will differ. For single crochet, you may need to add more rounds and adjust for increases.
6. How do I make the joins invisible?
A: Use the invisible join technique by finishing each round with a seamless join. This is demonstrated in the video tutorial.
7. What is a good yarn to start with?
A: Use a worsted weight acrylic yarn—it’s beginner-friendly, affordable, easy to handle, and widely available.
8. Why is my crochet circle uneven?
Cause: Your tension may be inconsistent, or you may have missed stitches.
Solution: Practice maintaining even tension. Count stitches at the end of every round to avoid errors.
9. How do I weave in the yarn tails neatly?
A: Use a blunt-tipped needle and carefully weave the yarn along the back of stitches. This ensures a clean and secure finish.
10. How do I scale this for larger projects like rugs or blankets?
A: Continue the pattern by adding one more single stitch in each repeat before every increase (e.g., Round 6: 1, 2, 3, 4, increase, Round 7: 1, 2, 3, 4, 5, increase, etc.). Use thicker yarn and a larger hook for bigger circles.
![]()
Christa Patel is the creator behind The Secret Yarnery, a vibrant community for crochet enthusiasts worldwide. With years of experience leading crochet classes and designing patterns, Christa specializes in making crochet accessible, fun, and creative for everyone. Her step-by-step tutorials and approachable teaching style have helped thousands of beginners master the art of crochet.
Christa believes in providing clear, easy-to-follow instructions so crafters of all skill levels can succeed in their projects. From crafting cozy home décor to intricate amigurumi, her blog and YouTube tutorials cover a wide variety of projects to inspire creativity.
When she’s not crocheting, Christa loves exploring new yarns, sharing pro tips, and empowering her audience with resources like free patterns and crochet hacks. She’s passionate about fostering a supportive community, and you’ll often find her engaging with fellow crocheters through social media.
Connect with Christa Patel:
- Website: The Secret Yarnery
- YouTube: The Secret Yarnery Channel
Bring joy and relaxation into your life through Christa's teaching, and join her journey of creativity, one stitch at a time!
About the Author
With a passion for crafting easy, beginner-friendly tutorials and patterns, Christa inspires crafters of all skill levels to unleash their creativity worldwide. She encourages yarn lovers to connect, create, and crochet a world filled with beautiful handmade treasures!
Crochet a Perfect Circle: Beginner’s Guide to Flat, Seamless Results!