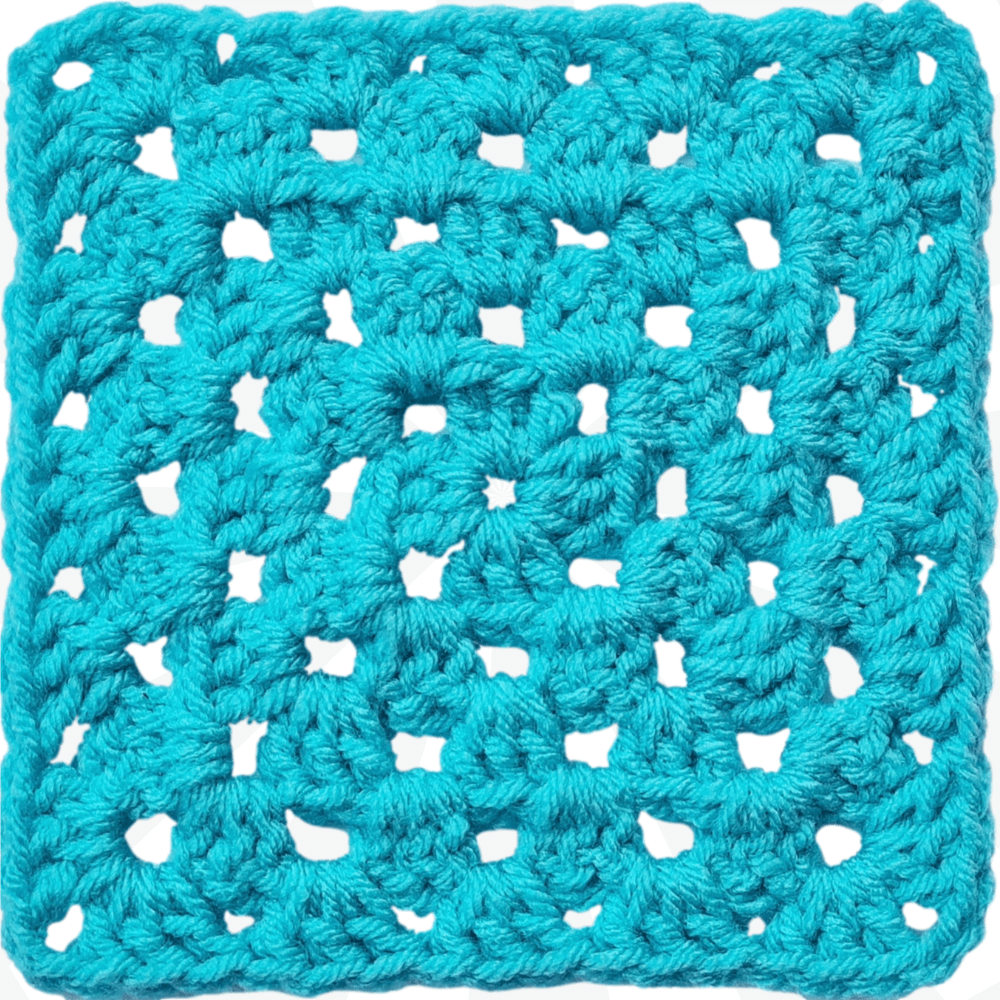
Crochet a No Seam No Twist Granny Square – Beginner Friendly Guide!
Have you ever wanted to crochet a granny square that looks absolutely flawless? A square that lies perfectly flat, with no twisting and an invisible join? I'm Christa, and I'm excited to share my method for creating just that! This pattern is designed for beginners, so don't worry if you're new to crochet. I'll guide you through each step to make a beautiful granny square that you'll be proud of.
What Makes This Granny Square Special?
What sets this granny square apart from other patterns? It's all about the details! First, the join is practically invisible, giving your finished project a clean, professional appearance. Second, it stays perfectly straight, without the annoying twist that plagues many granny square patterns. Best of all, it's beginner-friendly! Even if you're just starting out, you can master this pattern with ease. And once you've made a few, you'll discover how versatile they are. Use them to create blankets, scarves, bags, pillows, and so much more! Learn more about granny squares.
Gather Your Supplies
Before we start, let's gather everything we need. Here’s a list of the essentials:
- Yarn: You'll need some yarn, of course! I recommend a worsted weight acrylic yarn for beginners. In the video, I use Saver from Ice Yarns. This is a great choice because it's affordable and comes in a wide range of colors. But don't feel limited to acrylic. You can use cotton, wool, or any other fiber you like. Just keep in mind that the yarn's weight will affect the size of your finished square.
- Crochet Hook: The right hook size is crucial. I use a 6mm crochet hook for this tutorial, but you should choose a hook that corresponds to your yarn weight. Check the yarn label for the manufacturer's recommendation. If you're not sure, it's always best to start with a hook that's slightly smaller rather than larger.
-
Other Essentials: You'll also need a few basic tools:
- Scissors
- Yarn needle for weaving in ends.
- Stitch marker.
For your convenience, here is a list of Crochet Must Haves.

Getting Started: The Slip Knot
Alright, let's get started! The very first step is making a slip knot. This is how we attach the yarn to the crochet hook. There are many ways to make a slip knot, so use whichever method you're most comfortable with. Just be sure to leave a short tail, about 1.5 to 2 inches long. We'll be working over this tail, so there's no need for it to be long. Once you've made your slip knot, place it on your crochet hook and gently tighten it.
Round 1: Creating the Center Ring
Now we're ready to start crocheting!
- Chain 3: First, chain three. This counts as our first double crochet.
- Work into the First Chain: Now comes the slightly tricky part. We're going to work into the very first chain we made, forming a ring. Hold the tail along with the chain underneath your work. This can be a bit fiddly, so take your time and get everything situated. Slip stitch to join, forming a ring.
- Chain 3: Chain three again. This also counts as a double crochet.
- 2 Double Crochets into the Center of the Ring: Work two double crochets into the center of the ring we just created.
- Chain 2: Chain two.
- Repeat the Sequence: Now we're going to repeat a sequence of stitches. Work three double crochets, chain two, four times into the ring.
- Chain 1, then Join: To finish off the round, chain one, then join with a single crochet to the top of the chain three.
Understanding the Join: The Single Crochet Method
You might be wondering why we're using a single crochet to join. It is essential to create a near seamless finish. The single crochet join positions us perfectly for the next round and prevents the visible seam that's often found in granny squares. It's a simple technique that makes a big difference.

Round 2: Building the First Corner
Let's move on to round two.
- Chain 3: Start by chaining three. Remember, this counts as a double crochet.
- Turn Your Work: This is important! Turning your work helps maintain a square shape and prevents the granny square from slanting.
- 2 Double Crochets into the Same Corner Space: Work two double crochets into the same corner space where we just chained three.
- Place a Stitch Marker: Grab your stitch marker and place it in the corner space. This marks the end of the round and prevents us from spiraling.
- Work Corners: Now we're going to work corners into each chain-2 space from the previous round. Each corner consists of three double crochets, chain 2, three double crochets.
- Chain 1, and Single Crochet to Join: To finish the round, chain 1, and single crochet to join the top of the chain 3.
Marking Your Progress: Why Stitch Markers Matter
I can't stress enough how helpful stitch markers are! They prevent accidental spiraling, ensure your granny square stays square, and help you identify the last corner of each round. Trust me, using a stitch marker will save you from frustration down the road.
Round 3: Adding the Side Shells
On to round three!
- Chain 3: Chain 3. Remember that this counts as a double crochet. Turn your work.
- 2 Double Crochets into the Same Corner Space: Work two double crochets into the same corner space where we just chained three.
- Move the Stitch Marker Up: Move the stitch marker up to the corner space we just created.
- Work 3 Double Crochets: Work three double crochets into the space along the side.
- In Each Corner: In each corner, work three double crochets, chain 2, three double crochets.
- Repeat Around: Repeat this sequence around the entire square.
- Chain 1, and Single Crochet to Join: To finish the round, chain 1, and single crochet to join to the top of the chain 3.
Keeping Stitches Flat
Here's a little tip to keep your stitches looking neat. Ensure your stitches lay flat against the row below. If you find that your corners are puckering, try sliding the stitches back to create more room in the corners. This prevents puckering and maintains a clean look.

Round 4: Expanding the Square
Let's continue expanding our granny square!
- Chain 3: Chain 3. Remember that this counts as a double crochet. Turn your work.
- 2 Double Crochets into the Same Corner Space: Work two double crochets into the same corner space.
- Move the Stitch Marker Up: Move the stitch marker up to the corner space we just created.
- Work 3 Double Crochets: Work three double crochets into each space along the sides.
- In Each Corner: In each corner, work three double crochets, chain 2, three double crochets.
- Chain 1, and Single Crochet to Join: Chain 1, and single crochet to join to the top of the chain 3.
Dealing with the Center Tail
If you managed to crochet over the center tail as you worked, you can simply snip it off now.
Round 5: The Final Touches
We're almost there! Let's complete the fifth and final round.
- Chain 3: Chain 3. Remember that this counts as a double crochet. Turn your work.
- 2 Double Crochets into the Same Corner Space: Work two double crochets into the same corner space.
- Move the Stitch Marker Up: Move the stitch marker up to the corner space we just created.
- Work 3 Double Crochets: Work three double crochets into each space along the sides.
- In Each Corner: In each corner, work three double crochets, chain 2, three double crochets.
- Chain 2, and Slip Stitch to Join: Chain 2, and slip stitch to join to the top of the chain 3.
- Chain 1, Cut Yarn, Pull Through, and Secure: Chain 1, cut the yarn, pull it through, and secure the end.

Mastering the Corner: A Quick Recap
Let's recap the corner construction. Corners always consist of three double crochets, chain 2, three double crochets. This creates the distinct square shape. The trick to pretty corners is maintaining consistent tension.
Finishing Off: Securing Your Work
To give your granny square a professional look, take the time to weave in all loose ends with a yarn needle. Be sure to secure the final knot to prevent unraveling.
Left Handed?
Blocking Your Granny Square: Optional Step
For an even more polished finish, consider blocking your granny square. Blocking helps even out stitches and shapes the square. There are two main methods:
- Wet Blocking: Dampen the square, pin it to a flat surface, and let it dry.
- Steam Blocking: Use a steam iron to gently steam the square.
Troubleshooting: Common Mistakes and How to Fix Them
Even experienced crocheters make mistakes! Here are a few common issues and how to resolve them:
- Twisting: If your granny square is twisting, make sure you turn your work at the end of each round.
- Puckering: If your corners are puckering, check your tension and adjust your hook size if needed.
- Gaps: If you notice gaps in your work, make sure you're working the correct number of stitches in each space.
- Uneven Edges: If your edges are uneven, block the finished square to even them out.
Tips for Perfect Tension
Consistent tension is key to a beautiful finished product. Maintain a consistent grip on the yarn and avoid pulling the yarn too tight or leaving it too loose. Practice makes perfect!
Color Combinations: Inspiring Ideas
One of the best things about granny squares is their versatility. They can be made in any color combination you can imagine. Here are a few ideas to spark your creativity:
- One-Color: A classic and simple look.
- Two-Color: Alternate colors each round for a bold look. Check out Written Patterns Tagged "changing colors".
- Striped: Change colors every few rows for a colorful pattern.
- Scrap Yarn: Use up leftover yarn for a unique, eclectic design.
Project Ideas: What to Make with Your Granny Squares
Now that you know how to make a perfect granny square, what can you do with them? The possibilities are endless!
- Blankets: Combine multiple granny squares for a cozy blanket.
- Scarves: Create a stylish scarf by joining granny squares.
- Bags: Make a unique tote bag or purse.
- Sweaters: Design a trendy granny square sweater.
- Pillows: Add a pop of color to your home décor.
Granny Square Variations: Beyond the Basics
Once you've mastered the basic granny square, why not try some variations?
- Solid Granny Square: No spaces between the stitches.
- Flower Granny Square: Incorporate a flower motif in the center.
- Circle Granny Square: Create a circular shape instead of a square.
Common Crochet Abbreviations
Here are some common crochet abbreviations you might encounter:
- ch: Chain
- sc: Single crochet
- dc: Double crochet
- sl st: Slip stitch
- st: Stitch
Meet Christa from The Secret Yarnery
I'm Christa, and I'm the creative force behind The Secret Yarnery. I specialize in easy-to-follow crochet tutorials for beginners. My patterns are written in plain English, making them accessible to everyone.
Explore The Secret Yarnery Website
Find written patterns and more tutorials on secretyarnery.com. Discover a wealth of crochet resources and inspiration.
Subscribe to The Secret Yarnery YouTube Channel
Get notified of new crochet tutorials and patterns. Join a community of passionate crocheters. You can subscribe here.
Follow The Secret Yarnery on Social Media
Stay updated on the latest projects and news. Share your own creations and connect with other crocheters.
Join The Secret Yarnery Community
Share photos of your granny squares, ask questions, and get help from fellow crocheters. Find inspiration and support. You can join here.
Newsletter Sign-Up
Sign up for the newsletter to receive exclusive patterns and tips. Be the first to know about new videos and promotions. You can sign up here.
Left-Handed Crochet Tutorials
Find a collection of left-handed crochet tutorials. Learn the same techniques with mirrored instructions. Find all my left handed tutorials here: https://www.youtube.com/@lefthandedcrochettutorials.
Behind-the-Scenes Content
Get a glimpse into the creative process and learn about my inspirations and techniques in my behind the scenes content.
Buy Me a Coffee!
If you enjoy my tutorials, you can support The Secret Yarnery by buying me a coffee. Your contribution helps me create more free tutorials and patterns.
Share Your Granny Squares!
Share photos of your finished granny squares on social media. Use the hashtag #SecretYarnery so I can see your creations.
Conclusion: Happy Crocheting!
Congratulations! You've now mastered the art of the no-seam, no-twist crochet granny square. Get creative and start making beautiful projects with your new skills! Stay hooked and keep exploring the world of crochet. Thanks for hooking along, I'll see you in the next video and stay hooked!
FAQs
1. What is a granny square?
A granny square is a classic crochet motif made of simple stitches in a square shape. It's versatile and can be used in various projects like blankets, bags, scarves, and more.
2. Why does my granny square twist?
Twisting usually happens when you don't turn your work at the end of each round. Be sure to follow the instructions and turn your work as directed to maintain a flat shape.
3. How do I join multiple granny squares?
There are many methods to join granny squares, including slip stitching, whip stitching, or using a join-as-you-go technique. Choose the one that fits your project style.
4. What kind of yarn is best for a granny square?
Worsted weight acrylic yarn is beginner-friendly and affordable. However, you can use any yarn type, like cotton or wool. Just remember, the yarn weight affects the size and texture of the square.
5. How do I ensure an invisible join?
Using a single crochet to join each round (as shown in this tutorial) creates a nearly invisible join, ensuring a clean, professional look.
6. Do I need to block my granny squares?
Blocking is optional but recommended if you want a polished finish. It helps even out stitches and shapes the square. Wet blocking and steam blocking are two effective methods.
7. What are the most common mistakes when making granny squares?
- Twisting: Not turning your work.
- Puckering: Tight tension or insufficient corner space.
- Gaps: Missing stitches or incorrect stitch count.
- Uneven edges: Inconsistent tension or skipping blocking.
8. How can I mix colors in my granny squares?
Try alternating between rounds with two colors, create multi-color stripes, or make squares with leftover scrap yarn. Experiment with combinations to find what you love.
9. What size crochet hook should I use?
Use a hook size that matches your yarn weight. For worsted weight yarn, a 5mm–6mm hook works well. Always check your yarn label for recommendations.
10. How do I avoid puckering in the corners?
Ensure you don’t pull the stitches too tightly in the corners. If puckering persists, gently slide the stitches back to leave enough space.
![]()
Christa Patel is the passionate creator behind The Secret Yarnery, a vibrant online hub for beginner-friendly crochet tutorials and patterns. Known for her clear, step-by-step instructions, Christa makes crafting approachable and enjoyable for all skill levels.
A lifelong crocheter, Christa is dedicated to sharing her love for the craft with a global community. Her YouTube channel features tutorials, tips, and projects ranging from simple granny squares to advanced crochet techniques. With her warm teaching style, she empowers crocheters to explore their creativity and build confidence with every stitch.
Christa's mission is to make crochet accessible for everyone, whether you're learning for the first time or perfecting your skills. She specializes in patterns that are written in plain English, ensuring clarity and ease at every step. Through her work, she inspires a thriving community of crochet enthusiasts who support and encourage one another.
Beyond crochet, Christa enjoys experimenting with vibrant color combinations and creating timeless pieces from everyday yarn. She also offers resources such as written patterns, left-handed tutorials, and behind-the-scenes content to enhance your crochet journey.
Connect with Christa and discover a world of inspiration, creativity, and community at The Secret Yarnery or on her YouTube channel. Whether you’re a beginner or a seasoned pro, Christa is here to guide you every step of the way.
About the Author
With a passion for crafting easy, beginner-friendly tutorials and patterns, Christa inspires crafters of all skill levels to unleash their creativity worldwide. She encourages yarn lovers to connect, create, and crochet a world filled with beautiful handmade treasures!
Crochet a No Seam No Twist Granny Square – Beginner Friendly Guide!