Crochet Class 19: Master the Right & Wrong Sides of Your Project
Ever been working on a crochet project, only to realize you have no idea which side is supposed to be facing out? It's a common struggle! Knowing the right and wrong sides is essential for achieving the intended look and ensuring consistency throughout your project. I'm Christa from The Secret Yarnery, and in this Crochet Class 19, I'm going to show you a super simple way to tell the difference. Join me as we unravel this mystery and add another skill to your crochet toolkit! Be sure to also check out The Secret Yarnery YouTube channel for more helpful tutorials: The Secret Yarnery YouTube channel
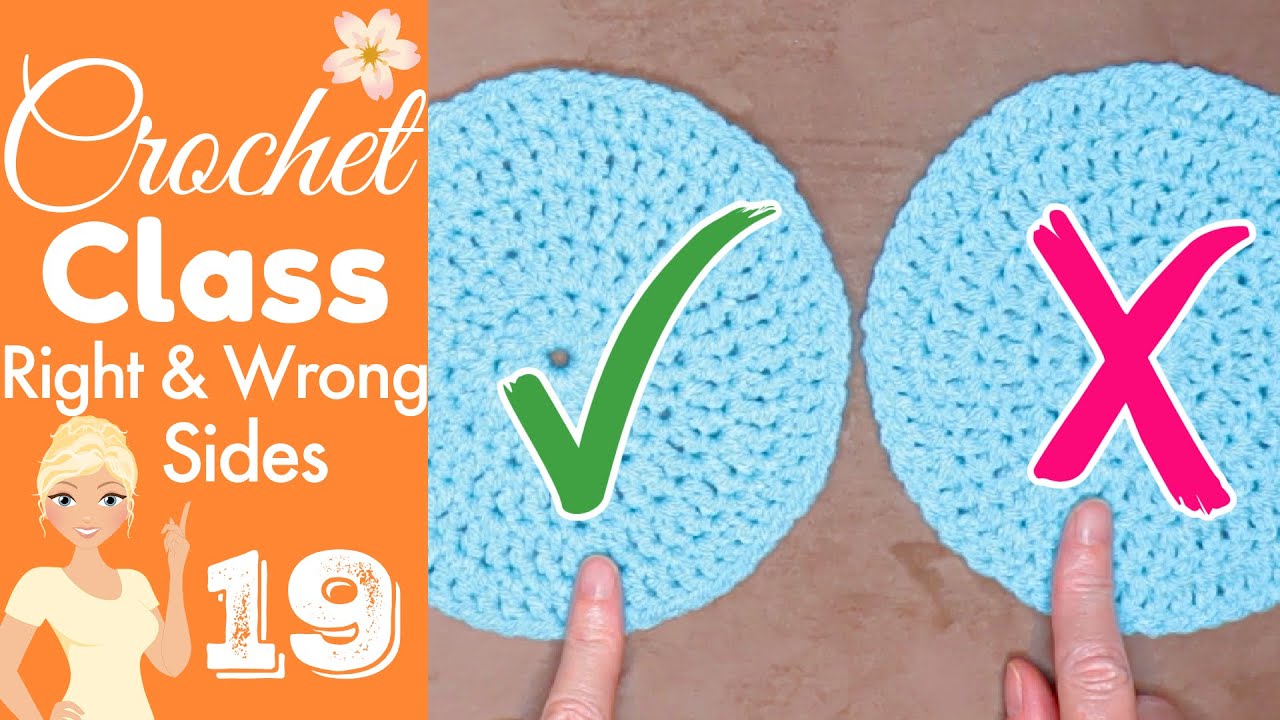
Method 1: Examining the Outside Edge (No Turning)
This first method is your go-to when you haven't turned your work after each row or round. It's a quick visual check that can save you a lot of headache.
The Right Side: Look closely at the outside edge. If you see those little "V's" clearly facing you all around the edge, congratulations! That's the right side of your work.
The Wrong Side: Now, flip it over. If you only see little "dimples" or "spots" around the edge, you're looking at the wrong side. It's that simple!
Understanding Turning Your Work
So, what does it mean to "turn your work?" It's simply rotating your project at the end of each row before starting the next. This changes the orientation of your stitches and, consequently, the appearance of your rows. This is a common technique in crochet, but it does mean we need another way to figure out the right and wrong sides!
Method 2: Identifying Row Height (Turning Involved)
Turning your work after each row creates a unique texture. Some of your rows will look a little bit shorter, and some will look a little taller. The trick is to identify which is which!
- Short Rows: These are actually the rows that are facing you, the front side.
- Tall Rows: Those taller rows? They're the back of your stitches.
Why does this happen? Because when you turn, you're essentially working back into the previous row, creating a slight difference in height. You can also find many crochet tutorials here at The Secret Yarnery.

Method 3: The "Post" Test (Turning and Non-Turning Variations)
This method involves identifying the "post" of a stitch. The "post" is the vertical part of the stitch, and where the stitch you're working into sits in relation to it can tell you a lot.
If You Haven't Turned Your Work: Find the post of a stitch, and give a little tug on the stitch you'd be working into. If that stitch is before the post, you're looking at the right side of your crochet.
If You Have Turned Your Work: Again, find the post and tug on the stitch you're about to work into. If the stitch is after the post, you're working on the wrong side.
The "Pasta" Analogy: A Visual Aid
Okay, time for a fun way to visualize this! Think of pasta. Seriously!
The Right Side: Penne Pasta The front side of your crochet should look like penne pasta. The stitches are more defined, they line up, and there's a bit of order to it. It all makes sense.
The Wrong Side: Elbow Macaroni The back side of your crochet is like a bowl of elbow macaroni. It's a "hot mess." Loops going every which way, nothing really makes sense.
So, remember: Penne = Right Side. Macaroni = Wrong Side. Easy peasy!
Additional Tips and Tricks
- Use a Stitch Marker: Place a stitch marker on the right side at the beginning of your project. This is a simple way to avoid confusion.
- Note the Starting Chain: If you consistently start your projects with the right side facing you, remember that the starting chain will be on the right side.
- Pay Attention to Color Changes: If your pattern involves color changes, the placement of the colors can help you identify the right side.
- Read the Pattern Carefully: Some patterns specify which side is considered the "right side." This is especially true for complex patterns or those using special stitches.
- Consistency is Key: Once you've chosen a method for identifying the right side, stick with it throughout your project!

Troubleshooting: Common Issues and Solutions
- Still can't tell the difference? Try using a magnifying glass to examine the stitches more closely. Sometimes a little extra magnification can make all the difference.
- The edges of the project are curling? Blocking can help flatten the edges and make it easier to see the stitch definition.
- The yarn is fuzzy and obscures the stitch definition? Try using a different yarn with better stitch definition, or try crocheting under brighter lighting. Fluffy yarns can be beautiful but challenging when learning to identify stitches!
- The pattern uses complex stitches? Refer to the pattern instructions for guidance on identifying the right side. You can also practice the stitch on a small swatch before starting the main project.
The Importance of Blocking
Speaking of blocking, it's worth understanding why it's so important. Blocking is a finishing technique that involves wetting or steaming your finished crochet piece and then shaping it while it dries. This not only evens out your stitches but also enhances the stitch definition, making it easier to see which side is the right side.
Pattern Considerations
It's important to remember that some crochet patterns are designed with a specific "right side" in mind. Always read the pattern carefully for instructions on which side should be facing out. Some patterns might not matter which side is considered the right side (like a simple scarf), while others absolutely do (like amigurumi, where the wrong side can affect the shape and appearance).
Quiz Time! Test Your Knowledge
Ready to see how much you've learned? Take this quick quiz!
- When the "V's" are facing you on the edge, is it the right or wrong side?
- If the stitch is after the post, is it the right or wrong side?
Answers: 1. Right side, 2. Wrong side

Beyond the Basics: Advanced Techniques
Understanding right and wrong sides becomes even more important when you move on to more advanced crochet techniques like intarsia, tapestry crochet, or Fair Isle crochet. These techniques often involve colorwork, and knowing which side is facing out ensures that your design looks the way it's intended.
Christa's Favorite Crochet Tools
Here are a few of my go-to crochet tools that make my projects easier and more enjoyable:
- Crochet Hooks: https://amzn.to/2p5etkC
- Scissors: https://amzn.to/3EC1CHy
- Stitch Markers: https://amzn.to/3GdGCYg
Explore More Crochet Classes
Want to keep learning? Check out the playlist for all of The Secret Yarnery's FREE CROCHET CLASSES!
Join The Secret Yarnery Community
I'd love for you to join our community of fellow crochet enthusiasts! Subscribe to The Secret Yarnery's YouTube channel: SUBSCRIBE. You can also join the Secret Yarnery Crochet Community Facebook group: Facebook Group. It's a great place to share your projects, ask questions, and get support. You can find me on these social media platforms:
- Instagram 💎 https://www.instagram.com/secretyarnery/
- Facebook 💎 https://www.facebook.com/secretyarnery
- Pinterest 💎 https://www.pinterest.com/secretyarnery/_saved/
- Twitter 💎 https://twitter.com/TYarnery
Explore Other Patterns and Resources
Expand your crochet horizons with these helpful resources:
- Written Patterns: WRITTEN PATTERNS
- Crochet Planner A4: CROCHET PLANNER A4. If you really want to stay organized, you may want to also consider the crochet planner.
- Crochet Planner Letter Size: CROCHET PLANNER LETTER SIZE
- Behind the Scenes: BEHIND THE SCENES
- Cool Merch: COOL MERCH
Conclusion
In this Crochet Class, we've explored several ways to identify the right and wrong sides of your crochet projects. From examining the outside edge to understanding row height and using the "post" test, you now have a variety of tools at your disposal. I hope you have enjoyed this Crochet Class. Being able to confidently identify the right side will not only improve the look of your finished projects but also make your crochet journey more enjoyable. Thanks for joining me for Crochet Class #19! Leave any questions or comments below. Stay Hooked!
FAQs
Q1: Why is it important to know the right and wrong sides of a crochet project?
Knowing the right and wrong sides ensures the final appearance matches the design intent. It keeps patterns, stitches, and textures consistent, especially for projects involving colorwork or specific stitch designs.
Q2: Is there always a noticeable difference between the right and wrong sides?
Not always. Simple patterns like single crochet or projects made in rounds without turning may look similar on both sides. In such cases, use a stitch marker or a specific method to track the right side from the start.
Q3: Can I switch the right and wrong sides during a project?
It's possible, but it may impact the overall look, especially if texture, stitch placement, or patterns are crucial. Consistency is key, so avoid switching mid-project unless the pattern specifies it.
Q4: What is the easiest way to mark the right side?
Use a stitch marker on the first row of the project to indicate the right side. You can also tie a small piece of contrasting yarn at the edge for quick identification.
Q5: Does the yarn type affect my ability to find the right and wrong sides?
Yes. Yarns with fluffy or fuzzy textures can obscure stitch details, making it harder to identify. Opt for smooth yarns when learning, and ensure proper lighting.
Q6: Are these methods the same for knitting?
No, knitting identifies the right and wrong sides differently because the structure of knitting varies. However, some concepts, like stitch markers, are similar.
Q7: How does color change affect the right and wrong side?
Color changes often highlight the right side, as the smoother transitions are commonly on the correct side of the project. Be mindful of where color changes align in your pattern.
Q8: Are there projects where the right and wrong sides don’t matter?
Yes, projects like simple scarves, blankets, or reversible designs can look good from both sides, making the distinction less important.
Q9: What should I do if I accidentally work on the wrong side?
If the pattern demands a specific side, unravel the stitches back to the error. If it doesn't impact the appearance, you can continue without fixing it, depending on your preferences.
Q10: Are there universal markers for finding the right side?
There’s no universal marker. However, methods like looking for "V's" in stitches, row height, or the "Penne Pasta" analogy can guide you in most projects.
![]()
Christa Patel is the creative mind behind The Secret Yarnery, a beloved crochet resource for enthusiasts of all skill levels. A passionate crocheter with years of hands-on experience, Christa has dedicated her craft to helping others embrace the art of crochet. Through her engaging tutorials, practical tips, and easy-to-follow lessons, she has created an inclusive community where beginners and advanced crafters alike can thrive.
Christa's mission is to make crochet accessible and enjoyable for everyone. She emphasizes technique, creativity, and simplicity in her approach, ensuring that her audience feels confident with every stitch. Her unique teaching style, combined with her infectious enthusiasm for yarn arts, has earned her recognition as a trusted expert in the crochet world.
When she's not crocheting behind the scenes or teaching on her YouTube Channel, Christa enjoys designing intricate patterns, exploring vibrant yarns, and connecting with the global crochet community. She’s also a firm believer in staying organized, which inspired the creation of tools like her crochet planners to help crafters stay focused and inspired on their crafting journeys.
You can find Christa actively engaging with her fans through platforms like Instagram, Facebook, Pinterest, and her Secret Yarnery Website, constantly sharing inspiration, patterns, and crocheting wisdom for makers everywhere.
Follow Christa to join a community that’s passionate about creativity, learning, and crochet!
Instagram: @secretyarnery
YouTube: The Secret Yarnery Channel
Website: The Secret Yarnery
About the Author
With a passion for crafting easy, beginner-friendly tutorials and patterns, Christa inspires crafters of all skill levels to unleash their creativity worldwide. She encourages yarn lovers to connect, create, and crochet a world filled with beautiful handmade treasures!
Crochet Class 19: Master the Right & Wrong Sides of Your Project