Easiest Crochet Slipper: A Beginner’s Step-by-Step Guide
If you’ve ever wanted to create something both cozy and practical with your crochet skills, these crochet slippers are a perfect place to start. They’re simple, quick, and customizable for any size—from kids to adults. Whether you’re crafting a thoughtful gift or keeping your toes toasty, this pattern will guide you from start to finish with ease. Bonus: You won’t feel rough stitches underfoot thanks to a clever yarn combination!
Meet Christa: Your Crochet Guide
Christa from The Secret Yarnery is known for her friendly, step-by-step tutorials that make even the most intricate projects feel approachable. She designs patterns with beginners in mind, using plain English and clear instructions in all her tutorials. Whether you're new to crochet or brushing up on basics, Krista’s teaching style makes it fun and stress-free.

Why Choose Crochet Slippers?
Crochet slippers check all the boxes: practical, cute, and beginner-friendly. They’re fast to make, comfy to wear, and versatile. Use them as cozy indoor shoes, unique DIY gifts, or even create a few pairs to sell at your next craft fair. They also make fantastic slip-on shoes for schools that require indoor footwear.
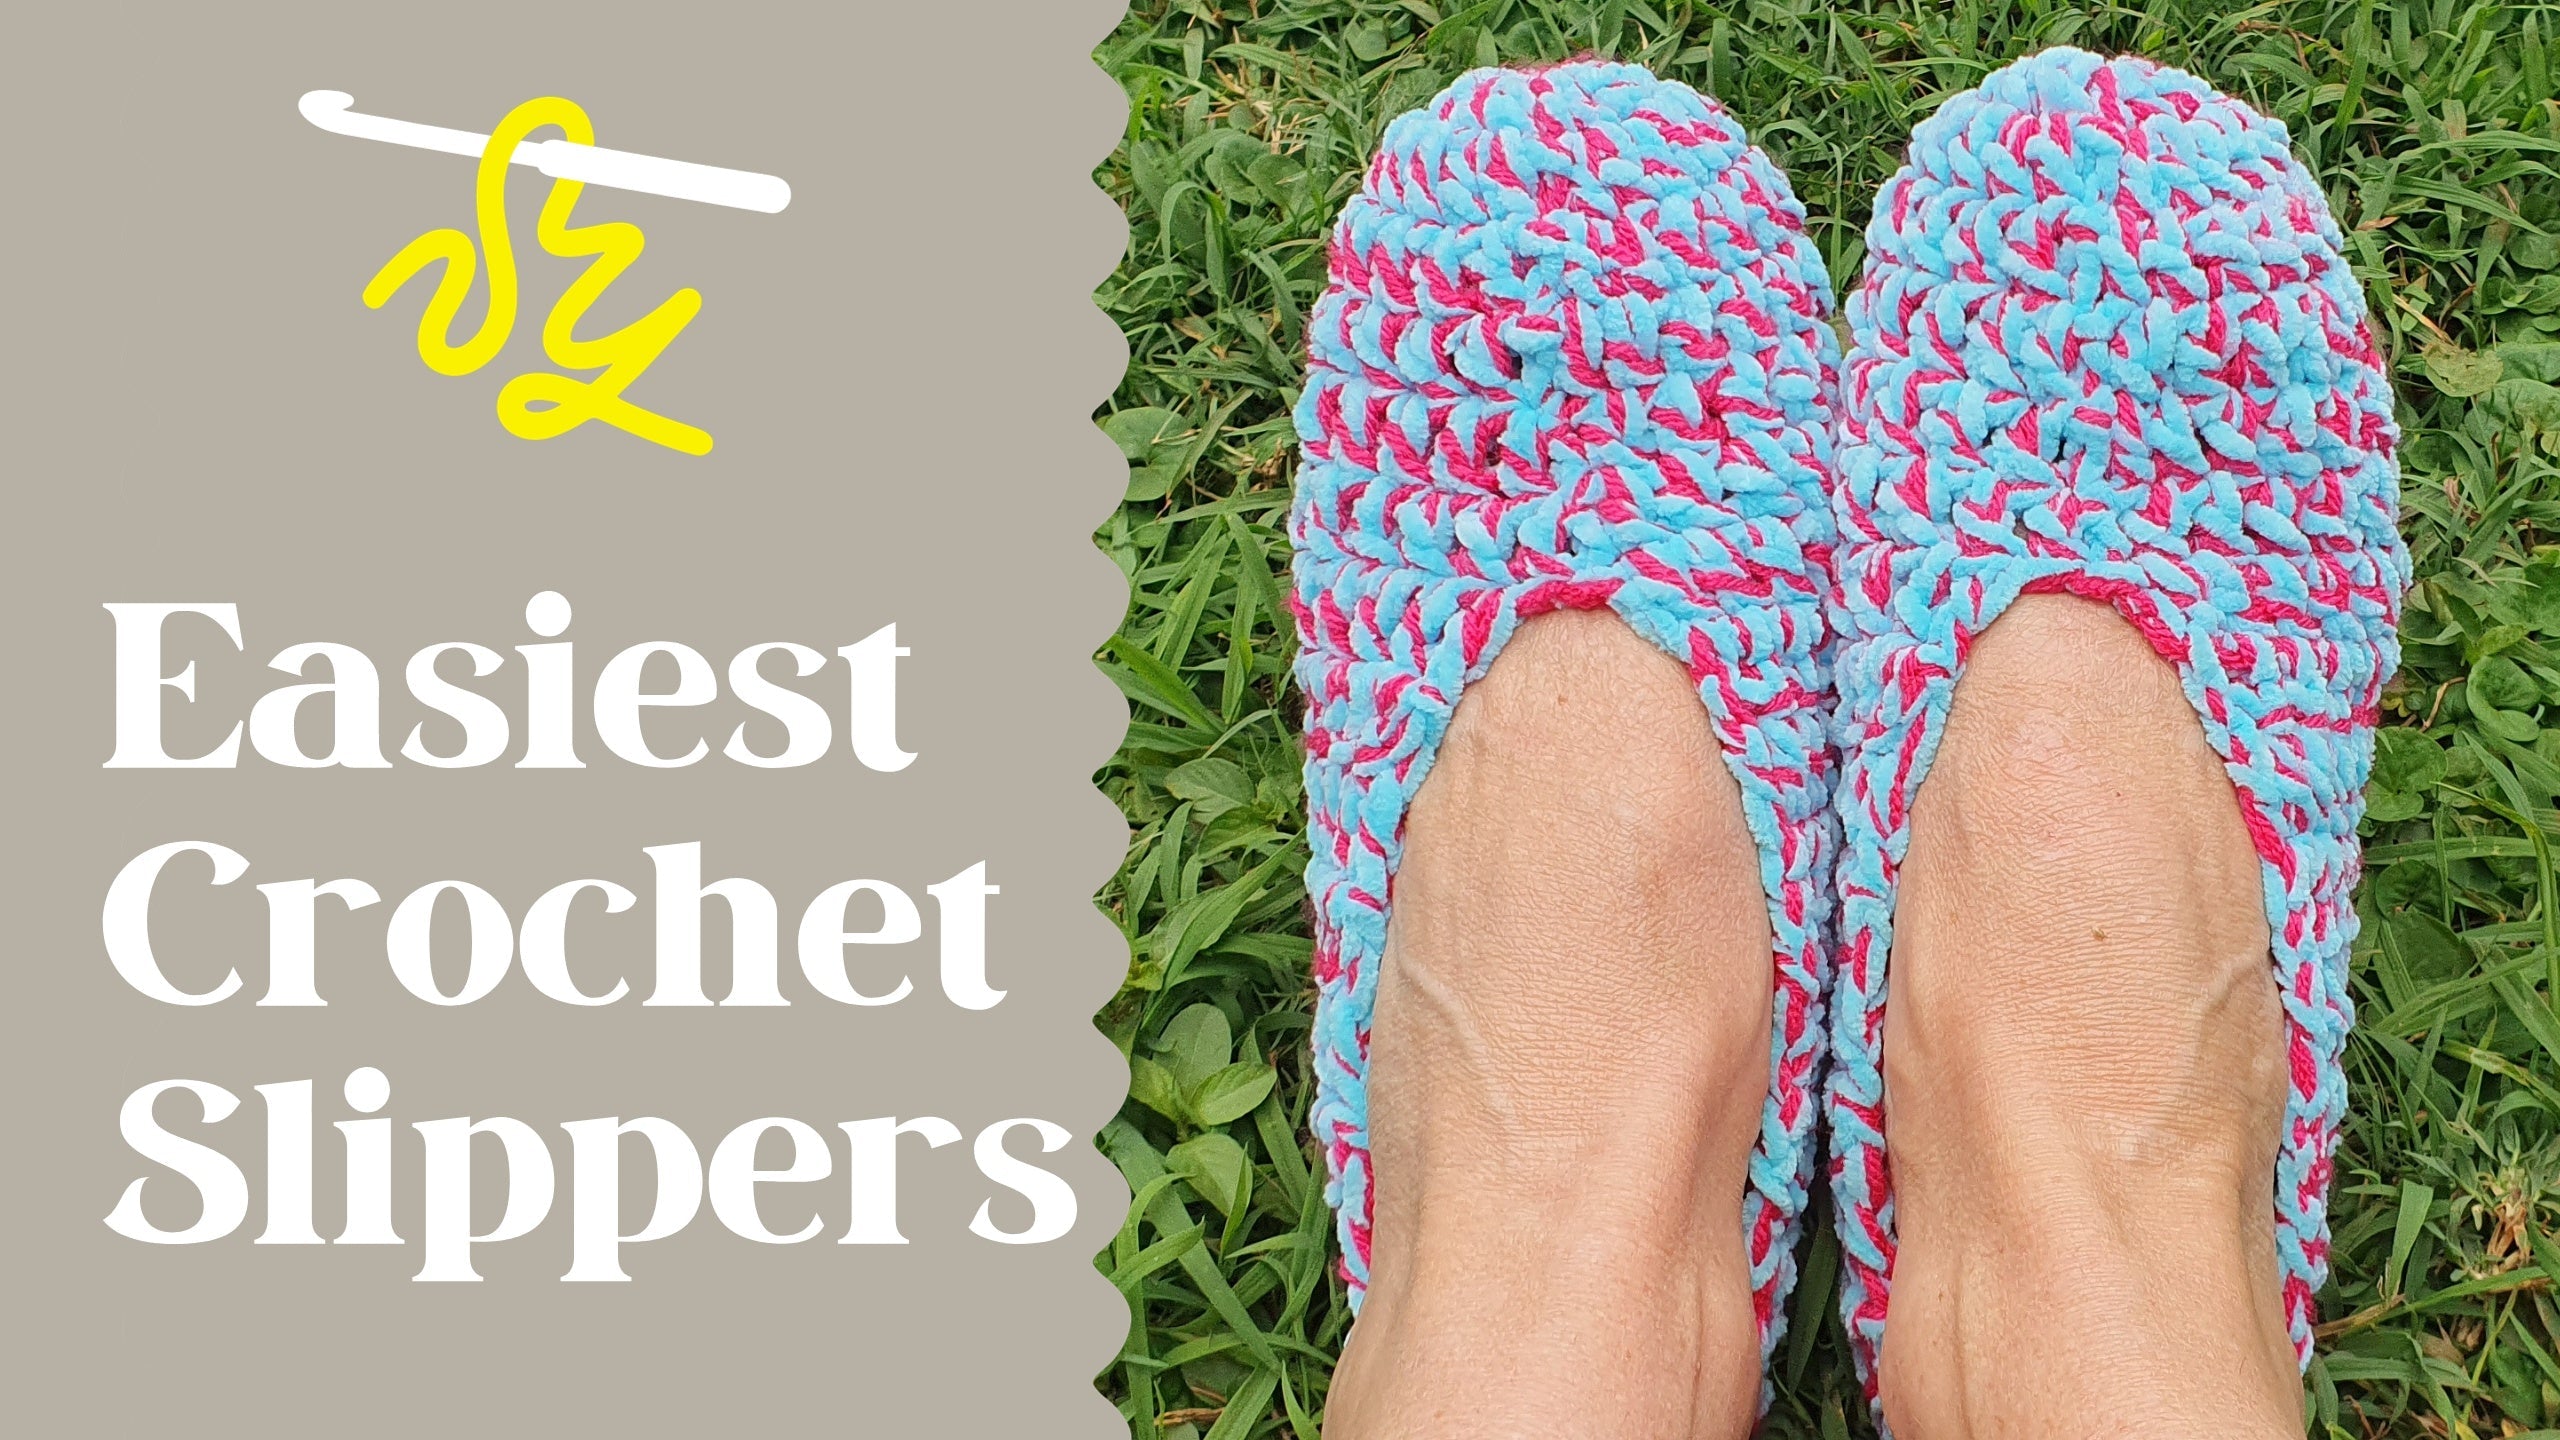
Yarn Types: Acrylic Meets Chenille
To make the perfect pair of slippers, Krista recommends combining two types of yarn: a durable acrylic yarn and a soft chenille or blanket yarn.
- Chenille yarn adds a squishy texture, cushioning your feet and masking the knots from crochet stitches.
- Acrylic yarn provides strength and structure to help the slippers maintain their shape even after repeated wear.
This combination ensures your slippers are both sturdy and comfortable—ideal for hours of cozy use. If you’re curious about beginner-friendly yarns, check out How to Start Crochet.

Tools You’ll Need
Getting started with these slippers doesn’t require a lot of fancy tools. Here’s what you’ll need:
- Yarn: Two balls, less than 100 grams each (choose one chenille and one acrylic for best results).
- Crochet Hook: A 6 mm hook is perfect for this project.
- Stitch Markers: Highly recommended for beginners to keep track of rounds and rows.
- Needle: For sewing in ends.
- Scissors: For trimming tails.
For more tips on beginner tools, visit Crochet 101: A Beginner's Guide to Mastering the Craft.
Why a 6mm Crochet Hook?
The 6mm crochet hook is a game-changer for quickly working through this pattern. It’s the ideal size for handling two strands (acrylic and chenille) together, ensuring your stitches glide smoothly. Plus, it helps speed things up—a handy perk if you’re working on multiple pairs as gifts or for a craft fair.
Step-by-Step: Making Your Crochet Slippers
Setting Up: The Magic Ring
The magic ring technique is the foundation of this pattern. It creates a neat, adjustable circle at the slipper’s center.
- Hold both yarn strands in your non-dominant hand and form an “X” shape over your fingers.
- Turn your hand, making sure there’s a short tail in front and the working strands in back.
- Slide your hook under the short tail, grab the working strand, and bring it through. Voila! You’ve got your magic ring.
Working over your tail chains secures the ring and prevents unraveling as you go.
Rounds 1–2: Building a Sturdy Base
For the first round, you’ll crochet 10 double crochets into the magic ring for a medium size slipper. (Use 8 for kids and 12 for larger slippers.) After cinching the center closed, join with a slip stitch and chain one to start the next round.
In round two, double the stitch count by making two double crochets in each stitch. This method creates a slightly cupped base, ensuring a snug, comfortable fit.
Customizing the Toe Section
For the toe portion, work six rounds of one double crochet into each stitch. Remember to slip stitch to join at the end of every round. If you’d like a wider toe, add an extra stitch before joining—it’s an easy way to adjust as you go.
Rows 7-16: Shaping the Heel
After completing the toe, switch to rows instead of rounds. This shift allows the pattern to form the slipper’s back. Chain one and turn your work at the end of each row. After ten rows, your slipper will be ready to seam at the back.
Stitch markers are particularly helpful in this section. Mark the first and last stitches in each row to ensure your edges stay even. For more beginner tips on maintaining your rows, explore How to Crochet for Beginners.
Assembly: Joining the Heel
Fold your finished slipper in half, making sure the toe section remains rounded at the front. Using your acrylic yarn tail, whip-stitch the back edges together. Secure it with a few extra stitches for durability. Once done, flip the slipper inside out to hide the seam.
Repeat the process for the second slipper, ensuring both are the same size before final assembly. If you need more guidance on joining or finishing techniques, read 21 Top Tips for Crochet Beginners.
Pro Tip: Test the Fit
Handmade slippers stretch with use, so they should fit snugly at first. Try on your first slipper before finishing the second one. Adjust sizing as needed by adding or removing rows before seaming the heel.

Customization Ideas: Size & Style
One of the joys of handmade projects is how easily they can be customized. This slipper pattern works for kids, women, and men—just vary the stitch count:
- Small sizes (kids): Start with 8 double crochets in the magic ring.
- Medium sizes (women): Begin with 10 double crochets.
- Large sizes (men): Use 12 double crochets.
Love experimenting with colors? Try mixing bold yarns for a funky look or sticking with neutrals for timeless style. For lots of beginner-friendly inspiration, check out Beginner Crochet Pattern Ideas.
Why These Slippers Are a Must-Try Project
These crochet slippers are perfect for anyone who wants a low-stress, high-reward pattern. They’re quick to make, endlessly customizable, and the chenille yarn ensures total comfort underfoot. Plus, they’re a fantastic way to use up leftover yarn from previous projects.
If you’re looking for more easy crochet ideas, explore Easy Crochet Projects for Beginners: Start Today.
Wrapping Up
There’s something incredibly satisfying about slipping on a pair of toasty DIY slippers. Whether you’re gifting them, selling them, or just enjoying them yourself, this pattern is a win for beginners and seasoned crocheters alike. Ready to stitch your first pair? Grab your yarn and hook—you’ve got this!
Left Handed?
FAQs About Crochet Slippers
1. Can I Use Just One Type of Yarn?
Yes, you can! However, using both acrylic and chenille yarns ensures a balance of durability and comfort. If using only one type, opt for a medium-weight yarn to maintain the slipper's structure and softness.
2. How Long Does It Take to Make These Slippers?
Most beginners can complete a pair of crochet slippers in about 3–5 hours. With practice, experienced crocheters might finish them even faster.
3. What If My Slippers Are Too Tight or Too Loose?
Handmade slippers stretch over time. If they’re too tight, pull slightly to loosen the stitches. If too loose, reduce your stitch count or go down a hook size for a snug fit.
4. Can I Wash Crochet Slippers?
Yes, these slippers are washable. Use a gentle cycle with cold water and lay flat to dry to preserve their shape and quality.
5. How Can I Make These More Durable?
For added durability, consider adding suede or leather patches to the soles or using a non-slip fabric paint for better grip.
6. Can I Adjust This Pattern for Different Sizes?
Absolutely! Adjust the initial stitch count in the magic ring:
- Start with 8 stitches for kids.
- Use 10 stitches for women’s sizes.
- Begin with 12 stitches for men’s sizes.
7. What’s the Best Crochet Hook for Beginners?
A 6mm crochet hook, as suggested in this pattern, is beginner-friendly. It works well with thicker yarns and provides consistent tension.
8. Can I Sell These Slippers?
Yes! Homemade slippers are popular at craft fairs and as custom gifts. Just make sure to calculate yarn costs and production time when pricing them.
9. Do I Need to Be an Expert Crocheter?
Not at all! This pattern is designed for beginners. Krista’s step-by-step tutorials make it easy—even if you’re new to crochet.
10. Can I Add Personal Touches?
Definitely! Customize colors, add embellishments like buttons or bows, or try stripes for a modern look. Creativity is part of the fun!
![]()
Christa Patel is the creative mind and crochet enthusiast behind "The Secret Yarnery." Known for her approachable teaching style and dedication to helping beginners, Christa has grown a loyal following of crochet lovers worldwide. Her step-by-step tutorials, clear instructions, and passion for creativity have helped countless people discover the joy of handmade crafts.
Christa specializes in creating beginner-friendly patterns that are practical, stylish, and fun to make. Whether it's cozy home decor or wearable accessories, she believes in making crochet accessible to everyone. Through her blog, YouTube channel, and online community, Christa inspires others to pick up a hook and create something beautiful.
When she’s not crocheting, Christa loves exploring new yarns, experimenting with fresh designs, and sharing tips to make crochet a stress-free experience. For more patterns, guides, and tutorials, visit The Secret Yarnery.
About the Author
With a passion for crafting easy, beginner-friendly tutorials and patterns, Christa inspires crafters of all skill levels to unleash their creativity worldwide. She encourages yarn lovers to connect, create, and crochet a world filled with beautiful handmade treasures!
Easiest Crochet Slipper: A Beginner’s Step-by-Step Guide