Yarn Center Pull Ball: Easiest Way to Keep Your Projects Tangle-Free!
Yarn can be your best friend or your biggest headache, depending on how you manage it. From tangled skeins rolling across the floor to the frustration of losing the working end midway through a project, I've certainly seen it all. But there’s an incredibly easy—practically no-fail—way to keep your yarn smooth, tangle-free, and always at hand: winding your own center pull ball. Let me walk you through this technique, step by step. Whether you’re just picking up a crochet hook for the first time or you’ve been stitching for decades, this will simplify every project from start to finish.
Why Make a Center Pull Ball of Yarn?
A center pull ball isn’t just neat—it’s a time saver that brings peace of mind to your creative space. Here are a few reasons I always wind my yarn into a center pull ball:
- Keeps yarn from rolling off the table or sofa and onto the floor
- Yarn feeds effortlessly with no tangles or knots
- Lets you pull from the center, keeping tension even
- Prevents waste and helps you use every last strand
- Great for both beginner and experienced crocheters
Having your yarn organized this way is especially helpful if you’re working on bigger projects or using lightweight yarns that can easily knot up.
What You’ll Need to Get Started
You don’t need special equipment, but having a few simple supplies makes the process easier:
- Yarn skein or loose yarn
- Scissors (helpful for snipping at the end)
- Baby barrettes or small clips (to secure the tail if you have them)
- Yarn storage bags can help keep your finished balls tidy. I love using storage bags designed for yarn balls for extra organization
Gather these before you start and you’ll have a smoother experience.

Preparing Your Yarn for Winding
Leaving a Tail
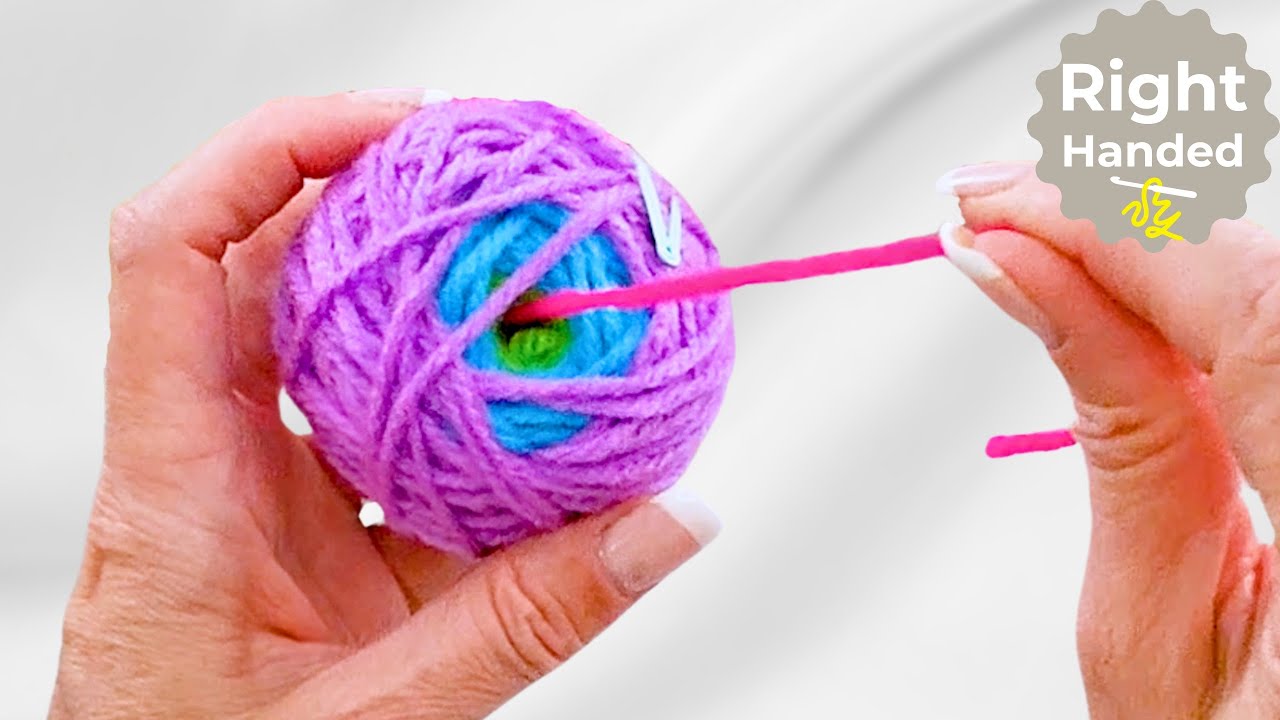
Start simple: leave about 8 inches of yarn tail when you begin. I’ve found that a tail this long is just right. It won’t vanish into the ball, but it won’t be in the way either. Keeping track of this tail is key since it becomes the “center pull” part—so don’t skip this step!
Holding the Yarn Tail
Getting your hands in position isn’t hard if you follow a few easy steps:
- Place the tail over your non-dominant hand (if you’re right handed, use your left).
- Hold it down with your pointer finger and thumb.
- Let that tail dangle—keep it handy but out of the main wrapping.
This small move ensures you won’t lose your center pull later.
Wrapping Yarn Around Your Fingers
Wrapping Over the First Two Fingers
Now, wrap your yarn around your first two fingers—a bunch of times! Don’t bother counting; the loop should be quite big but comfortable. Keep your 8-inch tail visible and make sure it’s not being wrapped in, as that’s your anchor.
It might feel strange at first, but you don’t have to be precise. Relax those hands and just keep winding. The key is keeping your tail separated from the working yarn as you go.
Sliding the Wrapped Yarn Off Fingers
Once you have a nice bundle, it’s time to slide the whole thing off your fingers. Here’s how to do it without losing your tail:
- Carefully open your hand, lightly pinching where the yarn loops meet your fingers.
- Slide the bundle off your fingers, keeping hold of the tail.
- Make sure the tail is loose and visible, sticking out one side.
You’re now ready to shape your center pull ball.
Building the Center Pull Ball Shape
Wrapping in the Opposite Direction
With your little yarn bundle in hand, you’ll start wrapping in a different direction (think perpendicular to your first wraps). This is where your yarn ball takes shape. The trick is to keep these wraps not too tight, letting the center stay relaxed enough for an easy pull later.
Tight centers can be hard to pull from, so keep your hand gentle. You want the inner “tunnel” to stay open for that tail to glide out.

Positioning Your Thumb and Pinky
Finger placement matters! Here’s my approach:
- Use your pinky to hold down the center tail if it tries to slip away.
- Anchor your thumb right on top of the tail’s exit point. This acts as both a placeholder and a reminder of where your pull end lives.
If you’re new, imagine your thumb is a bookmark—always showing you where that precious tail pops out. (If you want, snap a photo at this step for later reference!)
Maintaining the Tail Visibility
A lost center tail spells trouble, so keep an eye on it as you go:
- Always know where the tail is before adding fresh wraps
- Never wrap over the top of the exposed tail
- Use your thumb as a “marker” for the center
Following these habits will prevent future frustration and keep your yarn flow steady.
Rotating the Yarn Ball as You Wrap
Using Two Fingers to Rotate
Now it’s time to create a firm but springy ball with even tension. This is how I do it:
- Place your thumb next to the yarn tail, keeping the tail free.
- Start “walking” your fingers along the side as you wrap the yarn closely around your thumbnail.
- With every few wraps, rotate the ball slightly. This helps build an even, round shape.
- Keep your wrapping slow, watching for tension and avoiding traps over the tail.
Using this “walking” motion means your finished ball will feed smoothly from the center, and the outside stays tidy.
Keeping the Center Hole Open
The thumb should always protect the center hole. Don’t let your wrapping cover or pinch it closed. If the yarn starts getting tight and the hole shrinks:
- Lift your thumb gently out and lay it back on top
- Reposition so that you maintain enough space for the tail to move freely
Think of this step as keeping your yarn “breathing”—it’s okay to adjust as you go along.
Using a Baby Barrette to Secure the Tail
Once you have a neat ball, a baby barrette can prevent the tail from slipping inside. Here’s how I like to finish up:
- Clip the tail loosely to the side of the ball, near the exit point
- Makes it easy to spot when starting your next project
If you don’t have a barrette, a small binder clip, a bit of tape, or even a twist tie can work in a pinch. The goal is just to keep the tail from disappearing.
What Your Finished Center Pull Ball Should Look Like
You’ll know you got it right when you see:
- A compact, round yarn ball that fits comfortably in your hand
- A clearly visible yarn tail poking from the center
- No loose or tangled strands hanging out
- The outside layers holding snug but not squashing the core
Checklist:
- Center hole is accessible (easy to pull tail out)
- No lumps or knots on the outside
- Tail is neither too short nor wrapped up inside
Trouble signs like a tight core or hidden tail mean you might need to rewind and try again.
Troubleshooting Common Problems While Winding
Frequently Asked Questions:
-
What if the tail gets wrapped inside?
If you accidentally cover the tail, unwind a few wraps until it’s free again. -
What should I do if the center hole is too small?
Pause, lift your thumb, and carefully widen the opening before continuing. -
How do I keep yarn from slipping off my fingers?
Go slow, and pinch the wrapped portion gently with one hand as you work. -
Can I rewind a messy ball?
Absolutely! It’s always better to fix a problem than fight knots later on.
For a detailed photo guide and more approaches, see this tutorial from Tin Can Knits on hand-winding a center pull ball. This can help if you want to see the method with pictures too.
Why This Method is the Easiest for Beginners
This technique is great because:
- No special gadgets are needed—just your hands and yarn
- Portable and convenient, whether you’re at home or out and about
- Builds muscle memory for better yarn control during other projects
- Teaches you to recognize tension and yarn direction, making mistakes less likely later
I encourage anyone starting out to try winding yarn by hand before investing in gadgets. It’s such a good way to get to know your yarn.
Comparing Center Pull Balls Made by Hand vs. Ball Winders
Wondering about ball winders? Both have their place! Let’s compare:
| Hand-Wound Center Pull Ball | Ball Winder Method |
|---|---|
| Cheap—no tools needed | Requires a purchased tool |
| Can be done anywhere | Needs a table or surface |
| Teaches yarn “feel” and control | Fast, especially for multiple balls |
| More forgiving if you make a mistake | Looks professional, consistent shape |
If you find yourself winding many skeins, you might want a ball winder for speedy results. But hand winding gives you the most control, and you’ll never worry if you’ve left the tool at home.
Best Practices for Keeping Your Yarn Organized After Winding
Keeping your yarn tangle-free makes every project so much easier:
- Store finished center pull balls in yarn ball storage bags
- Use large zipper pouches for unfinished projects
- Keep regular zipper pouches handy for smaller works-in-progress
- Always mark which tail is the center pull if you have multiple balls
I like lining up my wound yarn by color or weight; it saves time and looks beautiful on any shelf.
Additional Tools to Enhance Your Crochet Experience
Great tools make your crochet life easier:
- Use a measuring tape for quick length checks
- Stitch markers can keep track of rows or complicated repeats
- Sharp scissors give tidy, worry-free snips on every tail
- Needles for weaving in (blunt or sharp tip depending on your yarn) help you finish strong
Having these supplies nearby means less time hunting for things and more time crafting.
How to Care for Your Yarn Balls Over Time
- Don’t squash your yarn balls in packed bins—let them breathe to stay fluffy
- Keep balls in bags or closed containers to avoid dust and curious pets
- If a ball becomes tangled or smooshed, just rewind it using the same method
- Store away from moisture and out of direct sunlight for color protection
Simple care will keep your yarn looking and feeling its best for every project.
Related Tutorials and Resources
For visual learners, you might want to see both right and left handed versions of this approach:
- Right handed step-by-step tutorial
- Left handed guide to making a center pull ball
- Want more patterns, tips, and community? Subscribe to my channel or become a member for live chats and more content
You’ll find plenty of support and inspiration, no matter your style.
Final Tips for New Crocheters
Patience is your most important tool as a beginner. Practicing with scraps of yarn helps you get the hang of center pull balls without worrying about waste. Mistakes are learning opportunities—enjoy each stage. And for extra support, join the next live Q&A, where I love cheering on fellow yarn lovers!
Summary Checklist: Steps to Wind Your Center Pull Ball
- Leave tail about 8 inches at the start
- Secure tail with pointer finger and thumb
- Wrap yarn around two fingers multiple times for a loose bundle
- Slide bundle off, keeping tail visible
- Wrap in the other direction to form the ball; not too tight
- Position thumb and pinky to track the tail and hold it in place
- Rotate ball as you wrap, using the “walking fingers” motion
- Keep center hole open at all times
- Use a barrette or clip to mark the tail if you have one
A quick check at each step ensures your yarn is always ready to go, center pull and tangle-free.

Call to Action and Encouragement for Readers
Try making your own center pull ball of yarn today—it’s quick, satisfying, and will save you hours of untangling. I’d love to see your progress or answer any questions in the comments. Don’t forget to subscribe for more free crochet videos and patterns. Let’s keep our yarn colorful, tidy, and ready for anything—happy crocheting!
Looking for more on yarn types and their best uses? Check out my guide to the best yarn types for inspiration on your next project.
For another hand method tutorial with photos, visit this post on hand-winding a center pull ball of yarn, and if you love creative solutions, check out the Reddit guide to using everyday items for center pull yarn balls.
Let’s keep our yarn (and our spirits) knot-free!
FAQs
1. Do I need special tools to wind a center pull ball?
No. You can wind a center pull ball using just your hands and scissors. Baby barrettes or small clips help but are not required. Fancy ball winders are optional for speed, not necessity.
2. How long should the starting tail be?
Leave about 8 inches. This keeps the center tail visible and easy to grab later without getting lost inside the ball.
3. What if my ball gets loose or messy while winding?
Pause and gently tighten the wraps by hand. If it's very messy or tangled, unwind back to a clean section and start wrapping again.
4. Is it okay if my center hole closes while wrapping?
Try to keep the hole open by leaving your thumb in place or widening it occasionally as you wrap. If it closes, gently open it back up; a tight hole makes pulling yarn difficult.
5. Can I rewind store-bought skeins or balls?
Yes! Rewinding store-bought yarn into a center pull ball improves tension control and often prevents tangles, no matter what shape it came in originally.
6. Why is my tail getting lost inside the ball?
This happens if you accidentally wrap over the tail. Unwind until the tail is free, then keep using your thumb or a clip to mark it.
7. Will winding yarn by hand weaken or stretch it?
Hand winding is gentle when done with relaxed tension. Don’t pull too tight while wrapping; this keeps your yarn strong and bouncy.
8. Can I use this method with all yarn types and sizes?
Yes. This works for any yarn weight or fiber type. Thin, slippery yarns may need extra attention to tension, while chunky yarns need a looser wrap.
9. What’s the best way to store center pull balls after winding?
Use mesh bags, zipper pouches, or storage containers to keep yarn dust-free and organized. Avoid squashing balls so they stay neat.
10. Is there a benefit to using a ball winder instead?
Ball winders save time if you have lots of yarn to wind, and they make uniform balls. Hand winding gives you more control and works anywhere—even away from home.
![]()
Christa Patel is a passionate crochet designer and teacher, known for her clear, beginner-friendly tutorials. She launched her blog and YouTube channel, The Secret Yarnery, to help crafters of all levels gain confidence with yarn and hooks. With years of hands-on experience and a love for colorful, creative projects, Christa believes anyone can discover the joy of crochet.
Her practical tips, step-by-step guides, and supportive online community have inspired thousands to pick up their first skein—or master new stitches. Christa lives in Nairobi, Kenya, where she films her tutorials surrounded by her vibrant yarn collection and pets. When she’s not crocheting, she enjoys sharing live chats, answering questions, and cheering on fellow yarn lovers around the world.
Find more of Christa’s patterns, videos, and tips at The Secret Yarnery, and join her mission to make crochet simple, fun, and accessible to all.
About the Author
With a passion for crafting easy, beginner-friendly tutorials and patterns, Christa inspires crafters of all skill levels to unleash their creativity worldwide. She encourages yarn lovers to connect, create, and crochet a world filled with beautiful handmade treasures!
Yarn Center Pull Ball: Easiest Way to Keep Your Projects Tangle-Free!