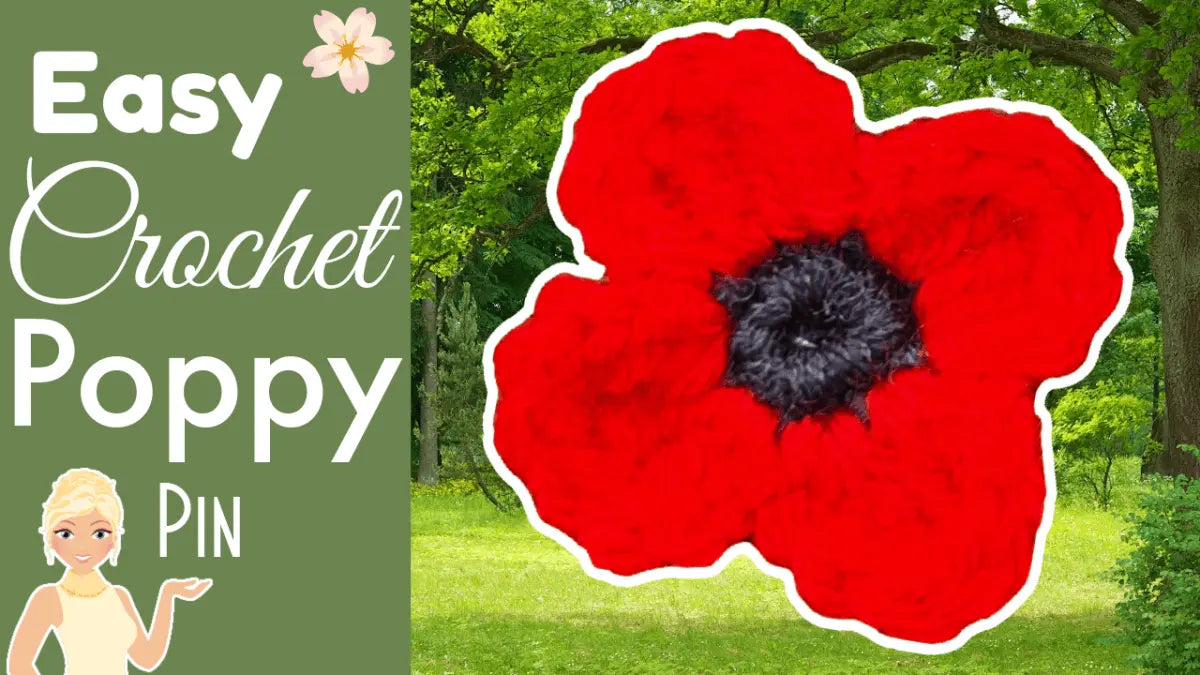
EASY 5 Minute Crochet Poppy Pin Pattern! – The Fastest Way To Make Meaningful Crochet Flowers
Crochet lovers know how rewarding it feels to finish a beautiful project in just a few minutes. This five minute poppy pin is a favorite of mine for exactly that reason. It’s fast, eye-catching, and makes a perfect addition to your clothing, tote bag, or even home decor. I love using these pins to honor Remembrance Day, but honestly, their charm works all year long. You’re not just whipping up a cute crochet: you’re learning a versatile little flower that comes together in less time than your favorite podcast’s intro. Ready to try it? Grab your hook and let’s get started.
Materials Needed to Make the Poppy
Before you start your poppy pin, round up these supplies. Feel free to swap out yarns and colors to fit your stash or style—this is a great stash-buster project!
-
Worsted weight yarn (size 4 acrylic works great!)
- Black or dark color for the center
- Red (or shade of your choice) for petals
- Crochet hook: 4.5 mm (US size 7) works best, but a 5 mm or 5.5 mm will work too
- Scissors
- Yarn needle for weaving in ends
- Safety pin or bobby pin for attaching as a brooch
Tip: Match your hook size to your yarn weight. A larger hook makes a bigger, looser poppy, while a smaller hook creates a tighter, daintier flower.
Tip: Using a More Visible Yarn for Tutorials
Sometimes black yarn makes stitches tough to spot, especially on camera or under evening light. For tutorials, I reach for a light gray instead of black, so every stitch stands out. If you’re new to crochet, try a lighter color for your first run. Once you’ve learned the pattern, go back to black for a classic look!

Preparing to Crochet: Making a Slip Knot and Starting Chain
Getting started is fast and simple. Here’s how I do it:
- Make a slip knot. Adjust the loop to fit comfortably on your hook.
- Chain three stitches (count them: one, two, three).
- If you prefer an adjustable center, use a magic ring. It works just as well and is great for advanced crocheters.
If you’re a beginner, chaining three keeps things simple and steady for your first poppy pin.
Creating the Center: Forming the Ring with a Slip Stitch
To make the flower’s center, I use this easy method:
- Insert your hook into the first chain you made, which sits right above your slip knot.
- Bring your working yarn behind your hook to create a small “U-shape”. This gives you more control.
- Hold both the working yarn and tail with your non-dominant hand to keep the ring open.
- Slip stitch into the first chain, pulling the yarn through to form your starting ring.
Having that “U-shape” under your hook makes controlling your stitches easier—especially on tiny projects like this.

Single Crochets into the Center Ring
Let’s build up the flower center:
- Chain one to lift your work.
- Into the middle of your small ring, work seven single crochets. Count out loud if you need to!
- 1
- 2
- 3
- 4
- 5
- 6
- 7
- Find the first single crochet you made. Slip stitch into it to close the round.
- Chain one again to secure the yarn before trimming.
Even tension is key. Try to keep your single crochets uniform, and make sure they snugly fill the ring with no gaps.
Cutting the Yarn and Preparing for Petals
Time to get your scissors out. Snip the yarn, leaving a decent tail—about six inches should do it, since you’ll use this later for tying and attaching the pin. Pull your yarn all the way through the last loop to fasten off neatly. If your tails are too short, it’ll make finishing a lot harder—so give yourself plenty of yarn to work with.
Starting the Petals: Joining the Petal Color Yarn (Red)
Here’s where the poppy comes to life:
- Locate the second stitch after your join. This helps space the petals evenly.
- Place your red yarn over your hook, pull through that stitch, and slip stitch both strands to join.
- Drop the red tail behind your work—this keeps it out of your way.
- Chain one to secure the new yarn.
- Everything should look snug, with your red yarn ready to go and your tails out of sight.
Remember, a slip stitch simply pulls new yarn through the stitch and the loop on your hook in one motion. A chain locks it in place.

Creating the First Petal: Overview of Stitches Used
Each poppy petal gets its shape with a specific mix of basic stitches:
- Double crochet: Taller than single crochet, adds height.
- Treble crochet: Even taller, creates a pointed tip for petals.
- Chain 2: Makes space for rounding the petal’s edge.
- Slip stitch: Secures your place for the next petal.
Stitch placement makes all the difference—a double crochet near the base and a treble at the tip will fan the petal naturally.
Step-by-Step: Making the First Petal
Let’s break it down, stitch by stitch:
- In the same stitch as your red join:
- Work 1 double crochet.
- Work 1 treble crochet.
- In the next stitch:
- Work 1 treble crochet.
- Work 1 double crochet.
- Chain two.
- Find the next stitch along your ring. Slip stitch here to anchor the petal.
Bold transitions: Double crochet, then treble in the same base stitch; move to the next stitch; chain, then slip stitch to ground the petal.
Continuing the Petals: Repeating the Pattern Around the Center
Each petal starts with a chain two after slip stitch. Repeat the same sequence:
- In the same stitch: 1 double crochet, 1 treble crochet.
- In the next stitch: 1 treble crochet, 1 double crochet, chain two.
- Slip stitch into the next stitch to anchor and start the next petal.
For every treble crochet, wrap your yarn twice before inserting your hook—this creates the poppy’s soft, rounded petals. Continue this pattern around the whole flower, working petal by petal until you’re back where you started. The last petal will build right before your initial join—count your stitches to keep the spacing neat.

Joining the Final Petal Round
When your last petal is in place, it’s time to close things off:
- Slip stitch into the next stitch (where your round began).
- Chain one to lock the yarn.
- Trim the red yarn, leaving a long tail—enough for tying or weaving later.
- Pull the loop and yarn all the way through to finish.
Spread out your petals gently so they’re evenly spaced and don’t smush each other. If you notice a gap, use a yarn needle to adjust before moving on.
Closing the Center: Pulling the Yarn Tail to Tighten
Flip your poppy over. Gently pull on the center yarn tail (the one from forming the ring). This draws the stitches tight and closes up the hole, making the poppy look more finished. Pull slowly and evenly to avoid puckering or distorting the circle.
The tighter the pull, the smaller the center hole and the neater the finished pin.
Managing the Yarn Tails for Assembly
You’ll have tails from both your original center and the red petal round. For the best attachment, aim to have two yarn tails on each side of the center, directly across from each other.
- If your tails aren’t aligned yet, use your yarn needle to sew one into place, hiding it behind a thick part of a petal.
- Keep the tails in the thickest petal portions for stability.
- Having them opposite makes your pin super stable, so it sits flat and holds tight.
Attaching the Safety Pin or Bobby Pin
Now comes the fun part—making your poppy wearable!
- Pick a safety pin or a sturdy bobby pin that will hold its shape.
- Make sure the opening faces up (so it’s easy to open and close without fiddling).
- Slide the pin through the poppy using the yarn tails to secure it from the back.
- Tie the tails over and around the pin, pulling firmly. Two or three knots are best for maximum hold.
- Once tied, cut off any remaining tail, keeping things neat.
If you want a more gentle grip for a scarf or hat, a bobby pin works great.

Finishing Touches: Neatening and Cutting Yarn Tails
Trim any bits of leftover yarn so nothing peeks out from the front or back. Gently tug the petals into their final shape and check if the center is still neatly closed. Make sure the pin attachment feels sturdy and doesn’t wiggle.
A quick once-over can turn an average poppy into a standout piece.
Alternative Uses for Your Crochet Poppy
These poppy pins aren’t just for lapels! Other creative uses I love:
- Decorate handbags, hats, or scarves
- Add as an accent on headbands or hair ties
- String several on a garland for festive decor
- Use as stylish gift toppers or embellishments
Try attaching them to cards for a lasting handmade touch.
Troubleshooting Common Issues in the Pattern
If you run into problems, try these quick fixes:
- Struggling to see stitches in black yarn? Practice on a lighter shade first.
- Petals have uneven shape? Focus on even tension and neat, consistent stitch placement.
- Missed a stitch or your petals don’t line up? Undo back to the error point (frogging just a bit saves more time later).
- For written step-by-step guidance, I recommend checking the free printable pattern linked below.
Link to Printable Written Pattern
Keeping a printout nearby makes crocheting so much easier. Grab the PDF printable poppy pin pattern direct from Easy crochet poppy pin product details for easy tracking while working.
Where to Find More Crochet Patterns & Resources at Secret Yarnery
If you love crochet patterns like this, the Secret Yarnery site has tons more. I share step-by-step tutorials and a friendly podcast for weekly inspiration. Dive into the Easy crochet poppy flower brooch guide for more flower patterns, or check out my collection of favorite supplies in the Amazon Store for hooks, tools, and gadgets that make crochet even more fun.
Recommended Crochet Hooks and Yarn Types
For a perfect poppy pin, here’s what works best:
- Worsted weight acrylic (size 4) yarn: Affordable, sturdy, and comes in every color.
- Crochet hooks: 4.5 mm for a compact poppy; 5 mm or 5.5 mm if you want bigger petals.
- If you use a chunkier yarn, just go up a hook size, and your flower will scale up too.
- Larger hooks give a looser, “fluffier” look; smaller hooks mean tighter, more defined petals.
Find the ideal set in my Amazon recommendations.
Additional Tips for Beginners
If this is your first poppy pin (or crochet project), start slow:
- Practice slip knots, chains, and single crochets to get familiar with basic movement.
- Place a stitch marker at the start of your round to avoid losing your place.
- Count your stitches out loud. It helps more than you think!
- Don’t worry about being perfect. Yarn is forgiving, and you’ll improve with every pin.
- If you’re a visual learner, use the video above whenever you get stuck—it walks through every step.
How to Customize Your Poppy Project
Personal style is half the fun!
- Try other reds: burgundy, cherry, even pink for a twist.
- Play with sizes—smaller hooks make delicate pins, bigger hooks craft statement flowers.
- Add beads or a touch of glitter yarn for a bit of sparkle.
- Swap out the safety pin for magnetic pins or pin backs for jackets and bags.
Experiment with backing materials for different accessories or to match your wardrobe.

Crochet Stitches Used in This Pattern: Definitions and Tips
A quick rundown on the stitches:
- Slip stitch (sl st): Pull yarn through stitch and the loop on your hook in one motion.
- Chain (ch): Yarn over, pull through loop on hook.
- Single crochet (sc): Insert hook, yarn over, pull up loop, yarn over, pull through both loops.
- Double crochet (dc): Yarn over, insert hook, yarn over, pull up loop, yarn over, pull through two loops, yarn over, pull through two loops.
- Treble crochet (tr): Yarn over twice, insert hook, yarn over, pull up loop, yarn over, pull through two loops (repeat twice).
Need more help? The stepwise video and my written guides are always there for you.
Safety and Care Instructions for Your Crochet Poppy Pin
These pins are handmade, so a little care goes a long way.
- Pin and unpin slowly to avoid stretching your yarn or snagging your clothes.
- Hand wash in cool water and air dry if anything gets on your poppy. Acrylic is durable but doesn’t love heat.
- Store pins flat or secure to a pin cushion to keep their shape.
Engaging with the Crochet Community
I love seeing everyone’s poppy pins out in the wild! Share your finished projects on social using #SecretYarnery. Join my weekly podcast or live Q&A for support, tips, and friendly chat. Have feedback or want to brag about your poppy stash? Let me know in the comments or tag me online. The more, the merrier.
Video Tutorial Recap and Learning Style Benefits
While reading step-by-step is helpful, pairing it with the video tutorial brings the whole process to life. Watching hands in motion makes those tricky moments easier, especially for visual learners. If you’re brand new to crochet, seeing a real-time demo can make all the difference. Play the video, pause as needed, and follow at your own pace.
https://www.youtube.com/watch?v=Eo7Taa3yM5w
Summary Checklist for Making Your Crochet Poppy Pin
Here’s what you need to succeed:
- Materials ready (yarn, hook, needle, scissors, pin)
- Center ring made with 7 single crochets
- Petals created using double and treble crochets with chains
- Tails positioned and pin attached securely
- Trimmed, even finish and sturdy shape
Encouragement to Share and Subscribe for More Crochet Projects
I hope you’ll enjoy making your poppy pins as much as I do. Every pin is a small work of art and a token of appreciation or remembrance. Don’t forget to subscribe for more patterns and tutorials! Join my friendly crochet community: Subscribe to The Secret Yarnery or become a community member here. Stay hooked!
If you’re looking for even more inspiration, dive into my Easy crochet poppy flower brooch guide or explore related projects like the Poppy field planter project guide to fill your space with even more handmade touches.
FAQs
How long does this poppy pin take to make?
Most crocheters finish one in 5 to 10 minutes. Your first may take a bit longer.
What yarn works best?
Worsted weight acrylic (size 4) is perfect. It holds shape, is easy to wash, and comes in bold colors.
What hook size should I use?
A 4.5 mm hook gives a neat, compact poppy. Use 5 mm or 5.5 mm if you want larger petals.
Can I use a magic ring instead of chaining three?
Yes. A magic ring gives a tighter center. Beginners may find chain-3 to ring easier.
Why are my petals uneven?
Check tension and stitch placement. Each petal uses dc then tr in one stitch, tr then dc in the next, chain 2, then slip stitch to anchor. Keep your trebles the same height.
My center hole won’t close. Help!
Tug the starting tail gently and evenly from the back. If it’s still open, weave the tail around the inner stitches and pull again.
How many single crochets go in the center?
Seven single crochets into the center ring, then slip stitch to close the round.
Do I have to start petals in the second stitch after the join?
Yes, starting in the second stitch spaces petals evenly and avoids crowding at the join.
Can I make this as a brooch with a pin back?
Absolutely. Sew or glue a flat bar pin back to the reverse, or tie around a safety pin using the yarn tails.
![]()
Christa Patel is the creator behind Secret Yarnery, where she shares easy, joyful crochet patterns and friendly step-by-step tutorials. She’s known for fast, beginner-friendly projects that look polished, feel meaningful, and fit into real life. From five-minute flowers to cozy home makes, Christa teaches in a calm, clear way that helps crocheters finish with confidence.
When she’s not filming tutorials or chatting on her weekly podcast, you’ll find her testing new hooks, organizing yarn by color, and cheering on makers in the Secret Yarnery community.
About the Author
With a passion for crafting easy, beginner-friendly tutorials and patterns, Christa inspires crafters of all skill levels to unleash their creativity worldwide. She encourages yarn lovers to connect, create, and crochet a world filled with beautiful handmade treasures!
EASY 5 Minute Crochet Poppy Pin Pattern!