Realistic Crochet Grass Tutorial: Easy Steps to Add Greenery Indoors!
Have you ever wished you could bring a touch of the outdoors inside without the hassle of maintaining real plants? I'm Christa, and I have just the project for you! Today, I'm going to show you how to create amazing artificial crochet grass that's perfect for adding a bit of nature and glamour to any space. This project is ideal for square planters, but don't worry, I also have tutorials for round and rectangular planters!
Table of contents
If you're eager to get started, a written pattern is available on my website, secretyarnery.com. My patterns are written in plain English, so it’s super easy to follow along. In this tutorial, I'll be using eyelash yarn to crochet a granny square that looks just like real grass. Let's dive in!
Gather Your Supplies
To make this artificial crochet grass, you'll need a few simple supplies:
-
Eyelash yarn – I'm using Eyelash Dazzle from Icy Yarns because I love the glitz and glam it adds. You can find the exact yarn I'm using here. Any eyelash yarn will work, or you can use a regular worsted weight yarn.
-
6mm crochet hook
-
Stitch marker
-
Scissors
If you'd rather not use eyelash yarn, a regular 4-ply worsted acrylic yarn works too. You can crochet an English garden granny square for a different, but equally cute, look. While it won’t have the same glamorous effect as the eyelash yarn, it still looks great! Find all your crochet must haves in one place!

Crochet the Grass: A Step-by-Step Guide
Now, let's get to the fun part – crocheting our realistic grass!
Round 1: Creating the Center Ring
First, make a slip knot. No need for a long tail since we won't be cutting anything off and we'll be working over it. Place the slip knot onto your 6mm hook and chain three.
Now, working with eyelash yarn can be tricky because it's hard to see the stitches. We'll be going by feel, so if you're new to granny squares, you might want to check out my granny square tutorial (not directly linked, as instructed).
Next, feel for the slip knot. We're going to work into that stitch right above it. The trick here is to hold the ring open with your finger and thumb. We want a U-shape underneath our hook, and we'll be working over the tail. Slip stitch to form a ring, making sure to keep it open. Chain three again.
Now, wrap your yarn and, while still holding the ring open, make two double crochets into the ring. Keep holding it open! There's one, and there's two. Chain two, one and two, still holding it open. Slowly rotate your thumb to create more space along the ring.
Make three more double crochets. One, two, and three. Chain two, one and two, and keep holding it open! Three more double crochets into the center of the ring. One, two, and three. I still have my finger in there, holding it open. You can slide the stitches back if needed.
Chain two again, one and two, and make our last three double crochets, still going over my tail. I'm not holding it open now; I'm just pulling at my beginning shell. I can feel where it's open. There's two and three.
Find that chain three with your finger and thumb. We're going to join with a chain one and a single crochet to the top of that chain three to join. Just find anywhere where you think the top of that chain three is. So, we're going to join with one single crochet.
Round 2: Marking the Corners
Now, hold that open underneath my hook. Pop your thumb or finger straight through it, and chain three: one, two, three. Make a bigger loop and grab your stitch marker. We're going to pop our stitch marker right into where we're holding it open with our finger and thumb. This will mark our corner space, so we know where it is when we're working around our square. We always have to use a stitch marker!
Get that loop back on your hook and shrink it down. Wiggle your fingers to find that space again. Our stitch marker is in the same spot. Make two double crochets into that same space: one and two.
Now, feel along. You'll feel your one double crochet, second double crochet, third. You'll feel that chain space for our next corner. Again, pop your finger and thumb into there to hold it open, and make a corner. Corners are three double crochets, chain two, and three double crochets. I’m keeping my thumb right in that space, so I know where it is. So I've done one, two, and three. Chain two, oops, chain two, and three more double crochets into that same space, holding it open with my finger and thumb. That's how I know where it is; I had my finger and thumb right in there: one, two, and three.

So, there's our corner. Feel along again. We want to feel for our next corner space, which is right there, and we're going to do a corner. Three double crochets, and I'm going to do the whole square with you, so don't feel like I'm leaving you behind. One, two, here's three double crochets, chain two, and three more double crochets into that same corner space. One, two, and three.
Round 3: Expanding the Square
If I'm going too fast or too slow, hit that gear icon on the video and adjust the speed. You can slow me down or speed me up, or just pause me to catch up. Adjust my speed right down there with that gear into the next space. Wrap your yarn, and we're going to do three double crochets, chain two, and three double crochets into the next corner space. One, two, and three, chain two. I’m still holding it open on my pinky this time, and three double crochets into the same corner space, just like that, and into the next space. That's where our stitch marker is.
So, you can see why we put our stitch marker in, or we would be really lost right now! Into this space where our stitch marker is, we're going to finish our corner. I'm going to leave my stitch marker there just so you can see the space I'm working into, but you can take the stitch marker out. There is one; we're going to do three double crochets. So, there is two, and here is three.
Now, if you're using a small flower pot, this might be the right size for you. If you're using a larger flower pot, let's keep going. So, we're going to join with a chain one and a single crochet to the top of that chain three to join. Just use your finger and thumb to isolate that first stitch, that first chain, and we're just going to make one single crochet into the top of it. It doesn't exactly matter where, and you can't really use your eyes. Try to get two strands on the top of your hook, but again, don't worry about it.
Before you finish that stitch, find that new corner and hold that open with your finger and thumb. One single crochet to join
Rounds 4 and Beyond: Customizing the Size
Still holding it open, chain three: one, two, three, and two double crochets into that same space. One and two.
Now, this is when I make a bigger loop and take out my stitch marker. I pop it into that space I'm holding open with my finger and thumb. That marks the new corner of the round we're working on. Loop back on your hook and shrink it down. The only difference is we have a space along the side.
Into that space along the side, make three double crochets. One, two, and three. Into the corner space, three double crochets, chain two, and three double crochets. We're just using our fingers to feel in between the shells, in between the stitches. So, there's one and two, here is three, chain two, and three more double crochets into that same corner space.
Our corners are always going to be the same: three double crochets, chain two, and three double crochets. Now feel your way along; there is a space along the side, so that gets three double crochets. One, two, and three. Into that corner space, just using your fingers and thumb to feel that space, we're going to do a corner. Corners are three double crochets, chain two, and three double crochets. So, there is two and three, chain two, one and two, and three more double crochets into that same corner space.
I guess the trick is remembering that you have to finish your corner. Just concentrate when you get to your corners that you're doing your three double crochets, your chain two, and your three double crochets into that new corner space. Now feel your way along; there is a space along the side, so that gets three double crochets. One, two, and three. Into your corner space, three double crochets, chain two, three double crochets. One, two, and three, chain two, one and two, and three more double crochets into that corner space. One, two, and three. Into that center space along the side, three double crochets, one, two, and three. Now, when you get to your corner space where our stitch marker is, three double crochets into that same space as your stitch marker, just to finish off that first corner we started. There's one, two, and three.
Then, just keep checking if it's the right size. I still have to make mine a little bit bigger.
To join and continue, chain one, and we're going to again feel with your finger and thumb to find that chain. Just feel where the top of it is, and push your hook through. Again, we want to get two or the most of that stitch on the top of our hook, two strands on the top, and single crochet to join.
Hold that corner open with your finger and thumb, and chain three: one, two, three, and two double crochets into that same corner space. One and two.

Now, this is when we're going to move up our stitch marker. Just make a bigger loop and take your hook out. Move your stitch marker up to your new corner space right there, just so we can see where it is when we're coming along or going around the corner. Loop of yarn back on your hook. Also, we're not turning our work.
For making grass, you will find if you're using eyelash yarn, one side will have less of the eyelash and one side will have a lot. I doubt you can really see it in the camera, but the underside is much more lush than the top side. We don't turn our work when making our artificial grass.
Now feel along. We're going to do the same as the last row, but there's going to be two spaces along each side, and that's going to be the general rule for as large as you want your granny square to be. Each round is the exact same except you will have one more space along the side. So, the next round if you're making it bigger will have three spaces along the side, etc. This is the repeat.
Into the first space, three double crochets. One, two, and three. Into the next space along the side, three double crochets. One, two, three. If you're making yours bigger, you'll just have more spaces here until you reach the corner. When you reach a corner, corners are three double crochets, chain two, and three double crochets into that same corner space. There is two and three, chain two, one and two, and three more double crochets into that same corner.
So, now you can pause the video and keep working along. Three double crochets into each space along the sides and corners, three double crochets, chain two, and three double crochets. Keep working all the way around, just using your finger and thumb to feel where you're going, and I'll meet you when we get back to our stitch marker.
When you get back to where you started, or where your stitch marker is, go ahead and check if it is the right size for your planter box. This is going to be the right size for mine. I'm going to join and finish. If you want to make yours bigger, just join with a chain one and a single crochet to join, and just keep repeating that round until your granny square or your grass is the size you want it to be. When it is a size you want it to be, go ahead into that space with a stitch marker and just finish off that corner with your three double crochets. One, two, and three.
Finishing Touches
We're going to chain two and slip stitch to join. Chain two, one and two, and we're going to slip stitch to the top of that chain to join. Just kind of guessing where it is, feeling along as best you can. Try to get most of that chain on the top of your hook, so two strands on the top of your hook, and slip stitch to join. Chain one to secure your yarn, cut your yarn, and pull your hook up and your yarn through, snug that down, and remove your stitch marker. You can sew in your ends if you feel like it, or if you're selling these things, that would be a good thing to do. If it's for your own house, it's up to you if you want to sew in your tail.
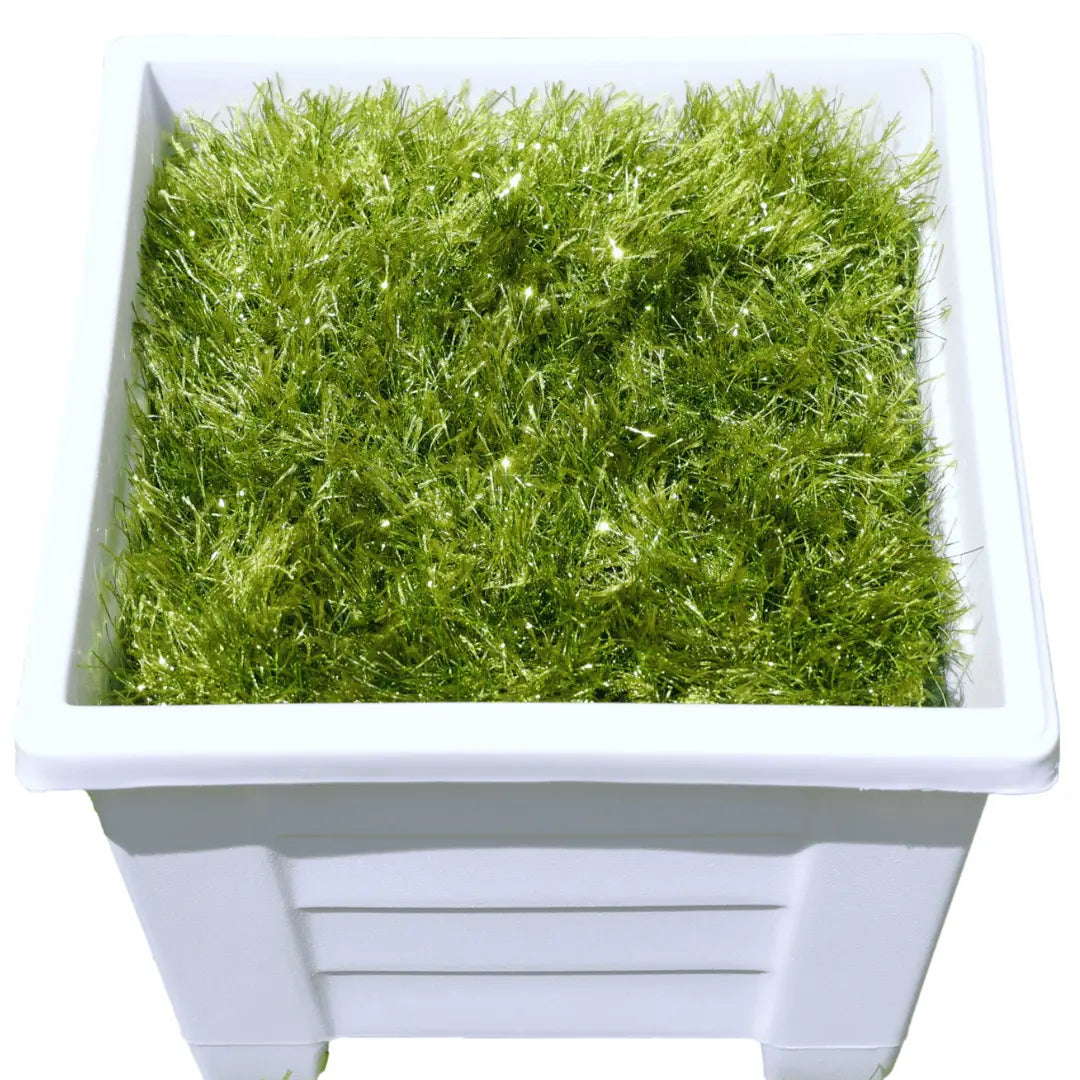
Assembling Your Indoor Garden
Grab your planter box and put your grass on top. If it's a bit snug, you can give it a little bit of a pull and get it to relax a little bit. It will fit just right inside your planter box. Now your planter box is ready for your flowers. Add a splash of color to your home with these beginner friendly crochet flower patterns.

Tips for Working With Eyelash Yarn
Working with eyelash yarn can be a bit challenging. It's difficult to see the stitches clearly, so relying on your sense of touch is key. Don't hesitate to use your fingers to feel for the spaces and stitches as you go.
A stitch marker is your best friend! Use it to mark the corners, so you don't lose your place. Remember, one side of the finished piece may have more "eyelashes" than the other. This is normal and adds to the realistic look.
More Crochet Fun!
I hope you enjoyed making this realistic crochet grass as much as I did! Now you can easily make your own easy crochet patterns!
Don't forget to subscribe to my channel here and stay hooked for more easy and fun crochet tutorials! And if you're looking to expand your crochet skills even further, explore my diverse collection of crochet patterns for your next project.
Left Handed?
FAQs
Can I use a different type of yarn instead of eyelash yarn?
Yes! While eyelash yarn creates a realistic grass effect, you can use 4-ply worsted acrylic yarn or similar. It will give you a different, yet equally charming, look like an English garden granny square.
How do I make the square larger or smaller?
To adjust the size, simply continue the granny square pattern by repeating the same steps in additional rounds until your desired size is achieved. Stop when it fits your planter or meets your design needs.
Do I need to sew in the yarn ends?
It's up to you! If you're making the grass for personal use, you can skip this step. For projects intended for sale or gifting, neatly sewing in the ends is recommended for a polished look.
Can I use this technique for other planter shapes?
Absolutely! This tutorial is tailored for square planters, but with slight adjustments, you can use similar techniques for round and rectangular planters. Check out my other tutorials for specific shapes.
How long does this project take to complete?
On average, the crochet grass can be completed in a few hours, depending on your skill level and the size needed for your planter.
Christa Patel is a passionate crochet artist and the creative mind behind The Secret Yarnery. With years of experience, she has dedicated herself to crafting easy-to-follow crochet tutorials, patterns, and inspiring projects for makers of all skill levels. Known for her warm teaching style and innovative designs, Christa specializes in blending practicality with creativity.
Through her YouTube channel and website, Christa simplifies complex crochet techniques, making them accessible for beginners and enjoyable for seasoned crocheters. Her love for yarn and artistic expression shines through her work, with popular projects ranging from home décor, like crochet grass, to stunning wearable pieces.
When she's not crocheting, Christa enjoys spending time with her family, experimenting with yarn textures, and connecting with her worldwide community of crochet enthusiasts. Follow her on her journey to learn, create, and stay hooked!
Discover more of Christa’s creations and tutorials on her website, Secret Yarnery, and her YouTube channel, where creativity knows no bounds.
About the Author
With a passion for crafting easy, beginner-friendly tutorials and patterns, Christa inspires crafters of all skill levels to unleash their creativity worldwide. She encourages yarn lovers to connect, create, and crochet a world filled with beautiful handmade treasures!
Realistic Crochet Grass Tutorial: Easy Steps to Add Greenery Indoors!