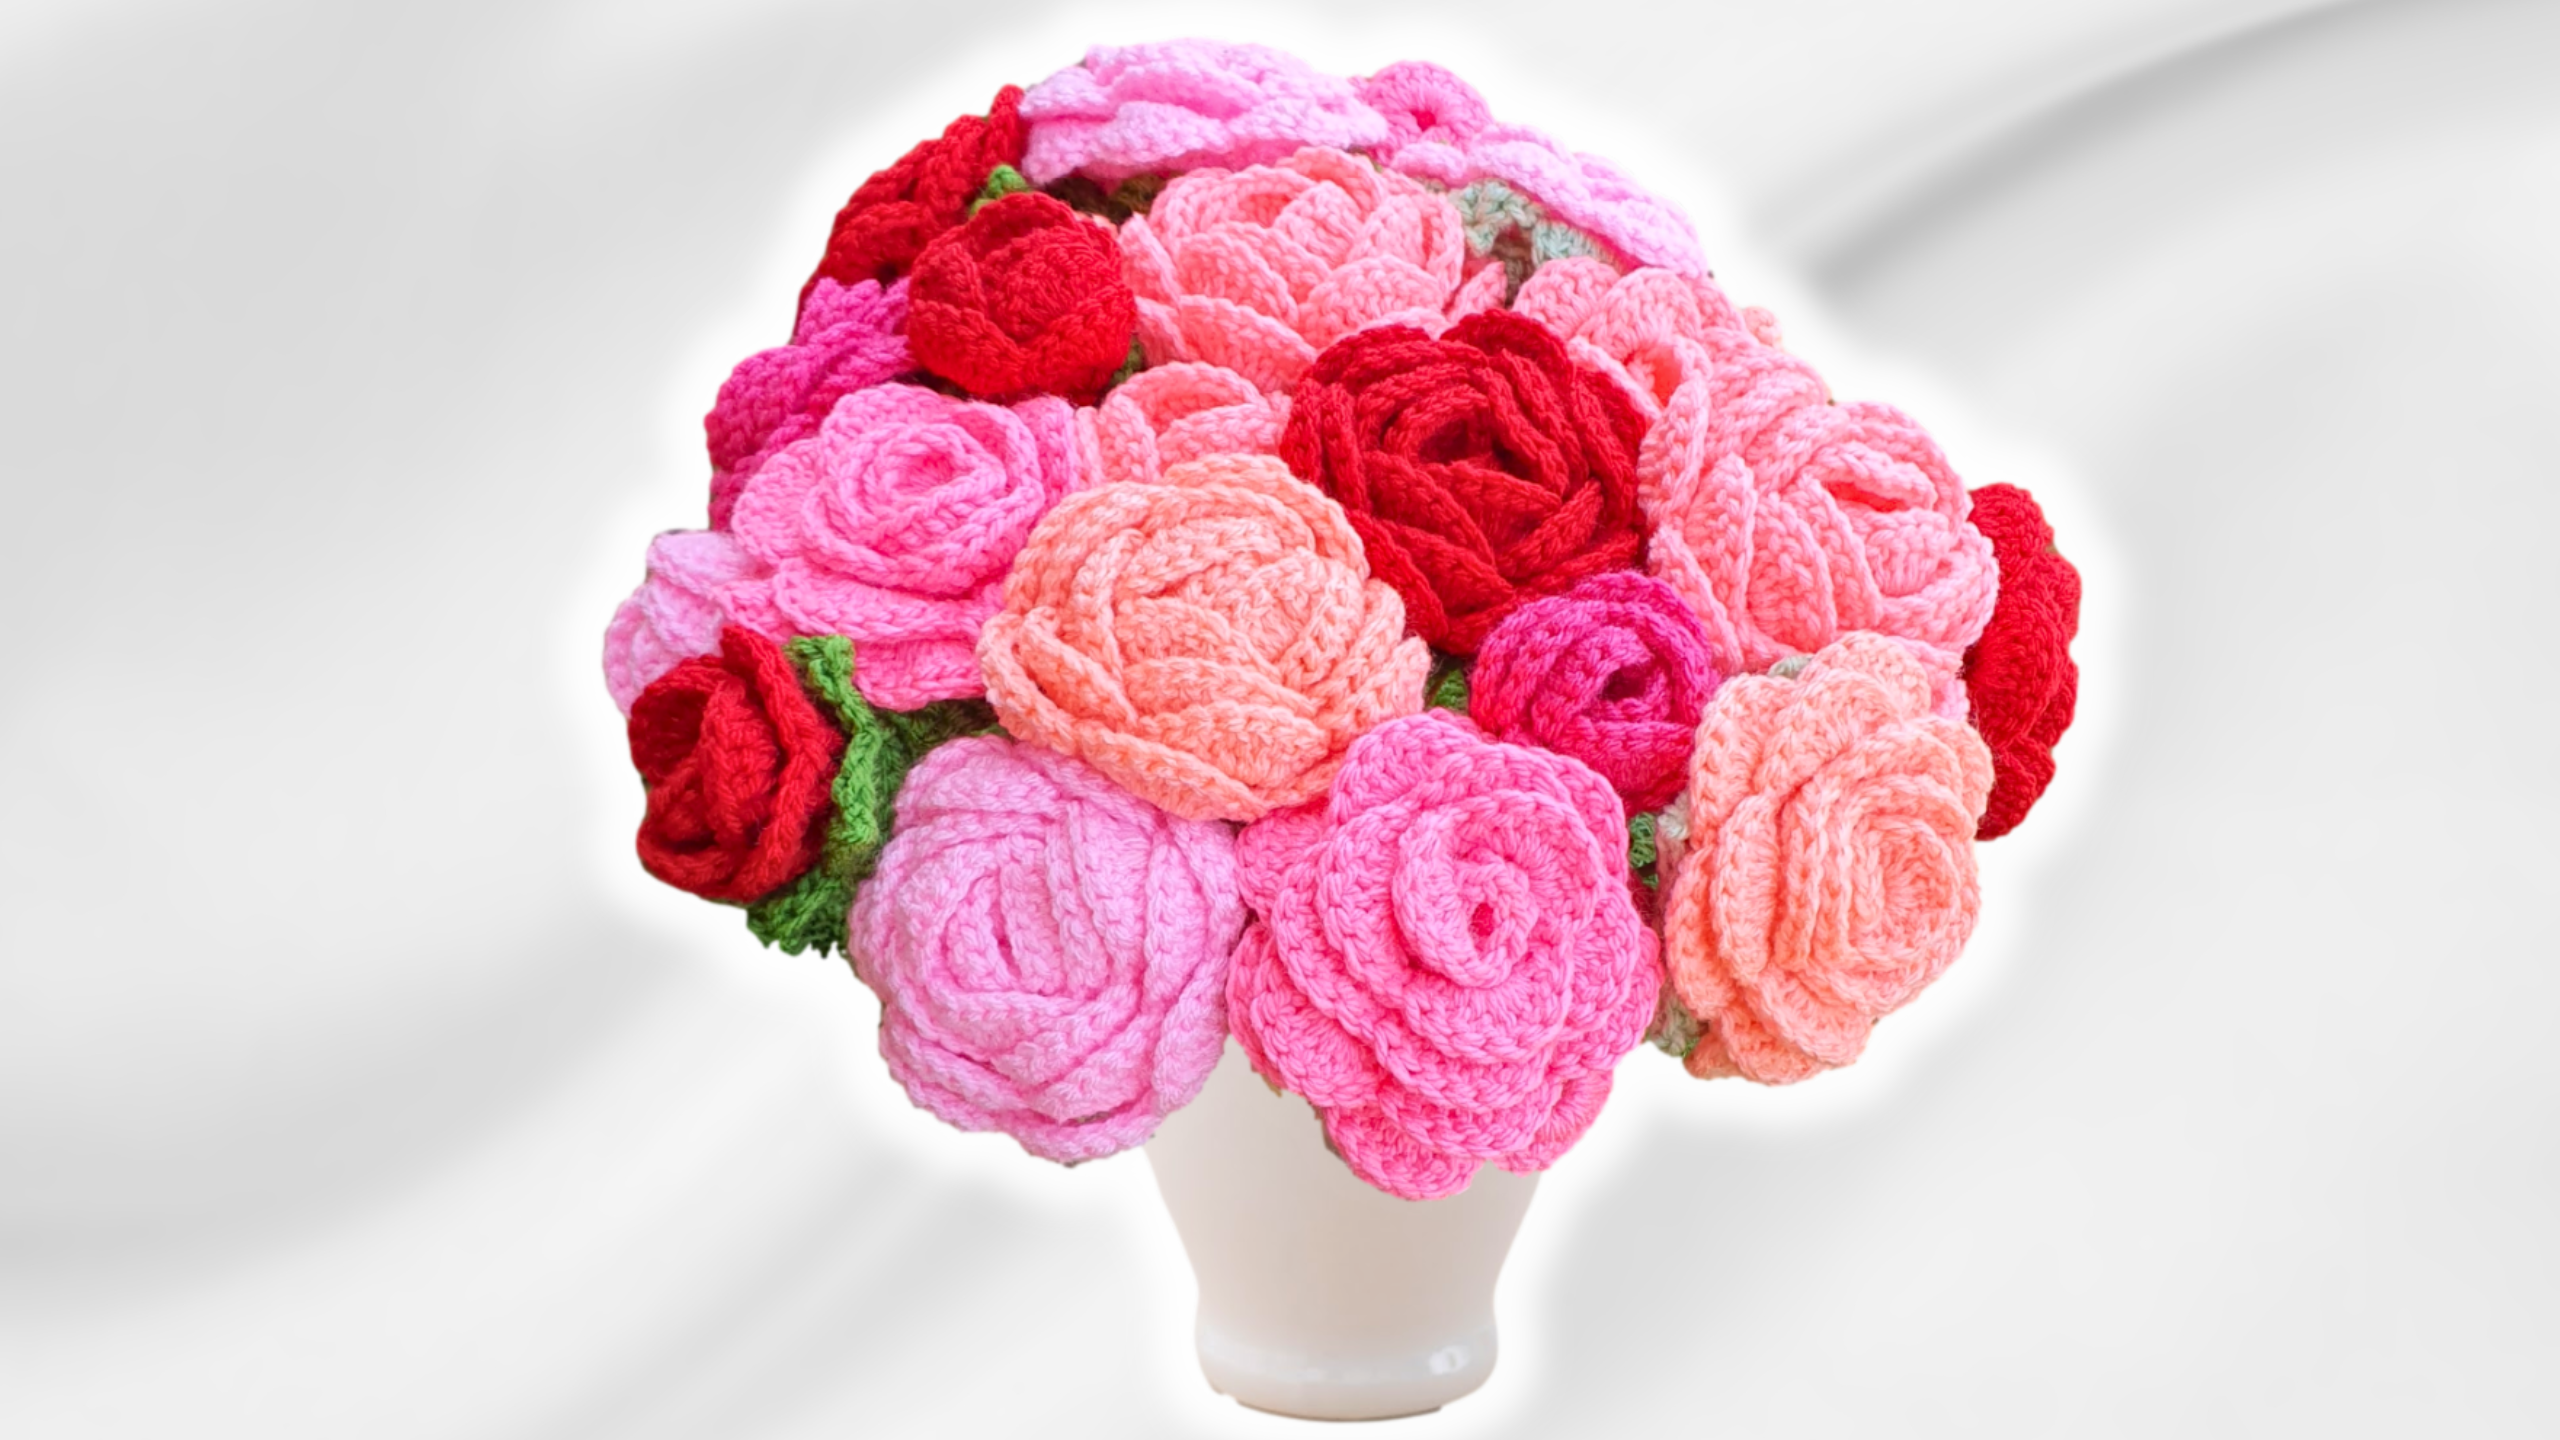
Easy Crochet Flower Bouquet: Perfect Valentine’s or Wedding Gift!
If you're seeking an enjoyable crochet project with stunning results, you're in the right spot. I'm Christa from the Secret Yarnery, and today, we're crafting crochet rose bouquets that are both easy to make and simply beautiful. Whether you're a beginner or a seasoned crocheter, these crochet flowers add a delightful touch to weddings, gifts, or even your home decor. Plus, they are washable and versatile! Let’s get started on this creative adventure.
Materials and Supplies Overview
To create this charming bouquet, gather a few essential supplies:
-
Yarn: Use various shades of pinks and corals or choose colors you love.
-
Crochet Hook: A 5mm hook works well.
-
Knitting Needles: Approximately 3.5mm helps to form the stem.
-
Scissors and a Yarn Needle for trimming and finishing.
Optional: Use buttons or barbecue skewers if you fancy alternative stems. Full written patterns are available here.
Yarn Selection and Color Guidance
Choosing the right yarn colors enhances your bouquet's beauty. I used shades of pinks and corals, giving a soft and romantic look, but any color can work. For durability and ease of care, I recommend acrylic yarn. It makes the bouquet washable and long-lasting, perfect for DIY Valentine's Day gifts.
Find more about yarn selection for crochet flowers here.

Tools for Assembly: Crochet Hook and Knitting Needles
The right tools really make a difference. I suggest a 5mm crochet hook for this project, providing you're comfortable with the grip. While 3.5mm knitting needles are used as stems, you can explore alternatives like plastic needles or even backyard sticks. Beginners will find that the correct tools can smooth out the learning curve.
Safety and Washing Instructions
One of the bouquet's standout features is its washability. Each piece is machine washable and dust free, making it a practical choice for long-term use. Just ensure to follow your yarn’s care instructions to preserve the beauty of your project.
Project Inspiration: Wedding Bouquet Idea
Imagine walking down the aisle with a dreamy crochet bouquet! It adds a personal touch to weddings or special events. Mix different flower sizes and colors to create arrangements that align with your vision. The possibilities are endless, limited only by your creativity.
More inspiration for special occasions can be found on our blog here.

Starting with a Slip Knot for Large Rows
Start by leaving around 10 inches of yarn for the slip knot. Secure it on your crochet hook, as this tail will later become essential for sewing rows together. This creates a strong start for building your rose bouquet.
Creating the Foundation Chain for Large Rows
To form the base of your flower, chain 63 stitches. Counting accurately helps maintain an even tension throughout the chain, leading to a consistent flower shape. This foundational step sets the tone for the entire project.
Working into the Back Loops: Understanding the Technique
When working into the back loops, locate what’s known as "camel bumps." Roll them to one side for clear visibility. This technique ensures that your V-stitch pattern remains consistent, vital for creating a robust and beautiful bouquet.

Making the First V-Stitch
Creating a V-stitch starts your pattern. Wrap your yarn and double crochet into the sixth back loop. Follow the pattern: one double crochet, chain two, and another double crochet. This forms the structure for progression.
Skipping Chains and Repeating V-Stitches
After your initial V-stitch, repeat by skipping two chains and creating another V-stitch. This process builds rhythm and ensures uniform rows, adding depth and elegance to your bouquet.
Completing the V-Stitch Row
Finish the row by working your last V-stitch into the final chain. It’s okay if 1-3 chains are left over. This flexibility ensures every flower in your bouquet stands unique and charming.

Transition to Row Two: Changing the Base
With row two, you'll chain three and turn your work to build "houses" in each V space. These serve as foundational blocks for flower petals. Follow the sequence closely to ensure seamless construction.
Building the “House” in V-Spaces
Each V-space transforms into a building unit for your flower’s petals. Working double crochets and chain two within these spaces creates your "house" framework. It’s a simple yet effective technique that gives structure to the bouquet.
Detailed Row Two House Construction
Inside each house, perform two double crochets, chain two, and then two more double crochets. Following this steady rhythm leads to a neat and professional appearance across all petals.
Repeating the Double Crochet Houses Around
Repeat the house pattern in each V-space throughout the row. Consistently checking your work ensures even stitch counts, enhancing the overall look and feel of your final bouquet.
Ending Row Two with a Final House
Conclude the row by completing the last house near the slip knot. Secure the end properly to set the stage for your petal rows, ensuring smooth transition into the next phase.
Transition to Row Three: Focus on Petals
Row three shifts the focus toward crafting petals. Begin with a chain one and turn your work, preparing for detailed petal creation in each house. This transforms plain rows into vibrant floral beauty.
Creating Petals in Each “House”
Each petal consists of eight double crochets in the house's center. Follow this by adding a single crochet between houses. This structured format results in elegant, uniform petals throughout.
Step-by-Step Petal Formation
Guide your petals with eight double crochets per house, adding a single crochet in the gaps for balance. If stitches appear oversized, gently push them closer together for uniformity. This attention to detail enhances each flower's aesthetics.
Completing the Last Petal in the Row
Finish shaping the final house’s petal, ensuring consistent stitch count across the row. Each well-formed petal contributes to the bouquet's overall harmony and appeal.
Securing the End of the Petal Row
To secure the row, work a slip stitch into the top of the chain three, joining the last petal. This anchors the work and prepares for future assembly steps.

Overview of the Rosebud Pattern Start
For a smaller flair, the rosebud pattern offers a similar yet distinctive option. Begin with a slip knot, combining shorter foundation chains (30 chains) with the same detailed craftsmanship.
Creating the Foundation for the Rosebud
Chain 30 stitches to form your rosebud foundation. Adhere to the technique of working into the sixth back loop or chain for initial stitches. Consistency ensures charming mini roses, adding variety to your bouquet.
Crafting these roses unlocks a world of creativity and expression, perfect for Valentine's Day or any personal celebration. Explore the beauty of crochet flowers with patterns for beginners here. Whether you’re gifting a loved one or sprucing up your home, this bouquet project brings joy and a sense of accomplishment. Happy crocheting!
Left Handed
FAQs
Q: What type of yarn is best for making a crochet flower bouquet?
A: Acrylic yarn is recommended for its durability and washability, making it ideal for long-lasting projects like bouquets.
Q: Can beginners easily make these crochet flowers?
A: Yes, the tutorial is designed for all skill levels, and beginners can follow the step-by-step instructions to create these beautiful flowers.
Q: What size crochet hook should I use for these flowers?
A: A 5mm crochet hook is suggested for this project to ensure comfortable handling and consistent results.
Q: Are there alternative materials for stems besides knitting needles?
A: Yes, you can use buttons or barbecue skewers as creative alternatives for the stems.
Q: How should I care for my crochet flower bouquet?
A: The bouquet is machine washable, but be sure to follow the specific care instructions for your chosen yarn to maintain its appearance.
Q: Can I personalize these flowers for specific events like weddings?
A: Absolutely! Experiment with different flower sizes and colors to customize your bouquet for weddings or any special occasion.
Q: What’s the significance of working into the back loops?
A: This technique creates consistently structured V-stitch patterns, adding robustness and beauty to your bouquet.
Q: How do I ensure my petals are uniform in size?
A: Focus on maintaining even stitch tension and follow the detailed petal formation steps to achieve symmetry and elegance.
![]()
Christa Patel is the creative mind behind the Secret Yarnery, a trusted resource for crochet enthusiasts worldwide. With years of experience, Christa specializes in designing beginner-friendly yet stunning crochet patterns that inspire creativity and confidence in crafters of all skill levels.
As a passionate crocheter, Christa is known for her clear and approachable teaching style, breaking down complex patterns into simple, easy-to-follow steps. Through her engaging video tutorials, written patterns, and helpful tips, she has cultivated a community where crocheters can connect, learn, and share their work.
Christa’s dedication to making crochet fun and accessible shines in every project she creates, from colorful blankets to intricate borders. Whether you’re a seasoned expert or just picking up a hook for the first time, Christa's guidance will help you craft something beautiful.
For more crochet patterns, tips, and inspiration, visit her website at The Secret Yarnery, or check out her YouTube channel filled with step-by-step tutorials.
About the Author
With a passion for crafting easy, beginner-friendly tutorials and patterns, Christa inspires crafters of all skill levels to unleash their creativity worldwide. She encourages yarn lovers to connect, create, and crochet a world filled with beautiful handmade treasures!
Easy Crochet Rose Flower Bouquet: Perfect Valentine’s or Wedding Gift!