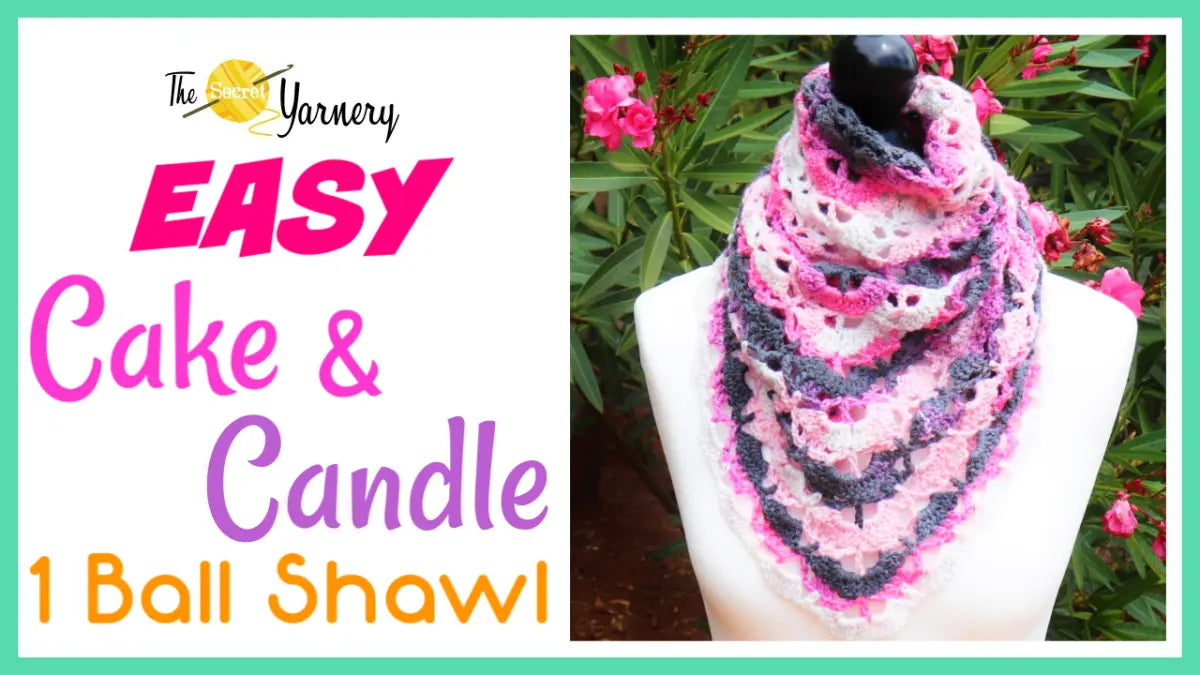
SUPER EASY Cakes & Candles 1 Ball Shawl: A Beginner-Friendly Crochet Tutorial
Ready to create something beautiful and useful with just one ball of yarn? I'm so excited to share this super easy crochet shawl pattern with you! The "Cakes & Candles" shawl is perfect for beginners, using simple stitches and a two-row repeat that's easy to memorize. Imagine the satisfaction of turning a single ball of yarn into a gorgeous, wearable item you can be proud of!
Table of contents
Why This Shawl is Perfect for Crochet Newbies
So, what makes this easy crochet shawl such a great project for beginners? First off, the stitch patterns are incredibly simple. We're literally making "cakes" and "candles" – easy to visualize, right? The design is repetitive, so you'll quickly memorize the pattern and be able to crochet without constantly checking the instructions. And the best part? You only need one ball of yarn to complete the project! This means you get a finished item quickly, giving you a boost of confidence and encouraging you to keep learning. Don't worry if you've never crocheted before; this pattern is designed with you in mind. It's all about having fun and enjoying the rewarding process of creating something with your own two hands. If you want some extra help, you can find the written pattern available on The Secret Yarnery website.

Gather Your Supplies: What You'll Need to Get Started
Before we dive in, let's gather all the materials you'll need. Here's a list to get you started:
- Yarn: Ice Yarns Magic DK (or equivalent size 3 yarn)
- Hook: 5mm crochet hook
- Darning needle
- Scissors
I used Ice Yarns Magic DK for this project. It’s a 100% acrylic, 100-gram ball with 340 meters of yarn. This yarn's size 3 thickness makes it ideal for the drape and texture we want in this shawl.
If you don't have Ice Yarns Magic DK, no problem! You can easily substitute it with any size 3 yarn. When choosing an alternative, look for yarn with approximately 340 meters per 100 grams. This will ensure you get a similar thickness and length, so your finished shawl will be close to the same size as mine. Another great option is to use a size 4 yarn, which is a standard craft yarn. If you go this route, you'll want to increase your hook size to a 6mm to maintain a nice, loose fabric that matches well with the yarn weight.
Feel free to experiment with different fibers too! This shawl would also look beautiful in cotton or bamboo yarn. Just check the yarn label and use the hook size recommended for that particular yarn. You can also find a wide variety of yarn at your favorite craft store.

Understanding Gauge: Making Sure Your Shawl Fits
Gauge, in crochet terms, refers to the number of stitches and rows you get per inch or centimeter. While it's important for fitted garments, don't stress too much about achieving an exact gauge for this shawl. This is because the final size isn't super critical. Variations in your tension will simply affect the overall size of the shawl, making it slightly larger or smaller. With one ball of yarn, the finished shawl measures approximately 40 inches wide and 20 inches tall. So, focus on relaxing and enjoying the process, rather than obsessing over perfect gauge.
Let's Get Started: Making the Slip Knot and Initial Chain
Alright, let's get started! First, we need to make a slip knot. Place the tail of your yarn over your hand, loop it around, and then bring the yarn through the loop to create a knot. Be sure to leave a long enough tail – you'll need it later to sew in the ends with a darning needle. Now, tighten the slip knot and place it on your crochet hook. Next, we're going to chain six. To do this, wrap the yarn over your hook and pull it through the loop on your hook. Repeat this six times.
When counting your chains, remember not to count the loop on your hook or the little knot at the beginning. Instead, count the "v's" in between. You should have six of these little "v's".
Creating the Center: The First Double Crochet and Chain Space
Now, wrap your yarn over your hook again, and insert your hook into the very first chain you made, right after the knot. Grab the yarn and pull it through the chain. You should now have three loops on your hook. Wrap the yarn over your hook again, and pull it through two loops. Then, wrap the yarn over your hook one more time, and pull it through the remaining two loops. Congratulations, you've just made your first double crochet!
Next, we'll create a chain-3 space, which will form the center of our shawl. Simply chain three (wrap the yarn over your hook and pull it through the loop three times). Now, wrap your yarn over your hook again and make another double crochet in the very same chain where you made the first one. This creates the very tip of our shawl. The neck edge will be right there, and the rest of the shawl will drape down your back or front, depending on how you choose to wear it.

Building the First Shell: Seven Double Crochets into the Space
Chain three (one, two, three) and turn your work. Now, into that space we just created, we're going to make seven double crochets. So, wrap your yarn and go into that space, grab your yarn and bring it back, wrap your yarn and take off two, wrap your yarn and take off two. That’s one!
Repeat this six more times, all into that same chain-3 space. Remember, if I'm going too fast, just pause this blog post or the video and catch up at your own pace. I'll be right here when you're ready! It’s important to count your double crochets to make sure you have the correct number. You should have seven double crochets, plus the initial chain-3 which counts as an eighth stitch. This is just for the ends of the rows.
Connecting the Shells: The Double Crochet in the Stitch
Wrap your yarn over your hook. Now, we're going to make a double crochet into the next stitch. Find the first double crochet we made in the previous row, and insert your hook into the top of that stitch. Wrap the yarn over your hook, pull it through the stitch, wrap the yarn over your hook and take off two, wrap your yarn and take off two. That’s it!
The Second Shell: Eight Double Crochets
Next, we're going to make another shell. This time, we'll be working eight double crochets all into the same space. Wrap your yarn over your hook, insert your hook into the next available space, and create eight double crochets. Again, pause if you need to!
Make sure you're counting your stitches as you go. It’s easy to lose track, especially when you're working multiple stitches into the same space.
Starting the Cake Row: Chain Six and First V-Stitch
Now we are at our edge and just finished a shell, so we always chain six. Chain six (one, two, three, four, five, six) and turn your work. This chain counts as a double crochet and the top of our "V".
Next, we'll create our first V-stitch. Wrap your yarn over your hook and insert your hook into the very first stitch, those little dimples are your stitches. Make a double crochet. So, that is your first v-stitch of the row, and we're just going to alternate doing the candles and shells or the cakes and V's.

Creating the First Cake: Double Crochets and Chain Spaces
Now we will chain one, wrap your yarn, and make our cake. Skip two stitches (one and two) and go into the third to start making our cake, so one, two, into the third. We are going to do three double crochets, one into each stitch, and that makes our cake!
Chain one, now into the top of the candle, we are going to do a V-stitch.
The Center V-Stitch: The Focal Point of the Shawl
The center of the shawl has two V-stitches. Into the top, push your hook in, just check that you've got two loops of that stitch on your hook, and do a v-stitch. Do a double crochet, chain three, wrap your yarn, and another double crochet all into the top of that stitch. Chain one, and now we're going to make a cake. Skip two stitches, one and two, wrap your yarn, and go into the third to make your cake. Cakes are three double crochets. Now we need to get to the center of our shawl, which is two V-stitches together.
Skip one, skip two into the third (which is also the double crochet that we put into the stitch, the very center of our shawl). We're going to do a V-stitch, so wrap your yarn and go into that double crochet, the top of the double crochet or the third stitch, grab your yarn and bring it back, wrap yarn and take off two, wrap your yarn and take off two, chain three (one, two, and three), wrap your yarn, and go into the very same stitch with a double crochet.
That is your first V-stitch, and because we're at the bottom of our shawl, we're going to do that twice. So, chain three (one, two, and three), and one more double crochet into the very same stitch.
Completing the Cake Row: Finishing the Second Cake and V-Stitch
Chain one, and now we're going to skip two and do our three double crochets. Skip one, skip two, into the third, we start to make our three double crochets.
Chain one, and now we're going to find that double crochet in the middle, and into the top of the double crochet, we're going to do the tip of our shawl, and that's just two V-stitches together.
Wrap your yarn, skip the double crochets, we're going to go into the chain. Push your hook into that weird little bit right after, just push your hook in, you want two loops of that chain on your hook, and make a double crochet, chain three, and one more double crochet in the same stitch.
Starting the Shell Row: Chain Three and Seven Double Crochets
Chain three (one, two, three) and turn your work. Now, you can kind of see that this is going to be our cake, and these are our V's. Wrap your yarn, we're going to make seven double crochets into this V-space, or into this V-stitch, right into the center, just that big opening, we're going to do seven double crochets. There's our seven double crochets – eight including our chain – just to make sure!
Adding the "Candle": The Single Double Crochet on Top of the Cake
Chain one, and now it's candle time! One double crochet into the center, the center double crochet of that cake, like that! Chain one, and seven double crochets into the next space, remembering to pause the video and just work along.
Connecting the Shells: The Double Crochet in the Stitch
Wrap your yarn, and we're going to go into this double crochet here, into this stitch, to make a double crochet. This line is going to go up our entire shawl, so into that stitch right there, we will make a double crochet.

Continuing to the Tip of the Shawl
Now into the next V space, we are going to do seven double crochets. Chain one, and there's our cake again, so put a candle on the cake. One double crochet into that center stitch, chain one, and there is our V over here.
So because it's on the edge, we're going to do eight double crochets into this corner V, or this edge V. Wrap your yarn and eight double crochets into this space!
Repeat the Pattern: Shells and Candles, Cakes and Vs
That is our pattern repeat. We do shells and candles, and then we do cakes and Vs. So, depending on what row you're doing, those are the two rows you just keep alternating doing them until you run out of yarn, which would be which would make a one ball shawl.
You can wear this front words with the V part on your chest and this on the front of your neck, or you can do two balls and make a normal-size shawl, or three balls for an extra extra large luxurious shawl.
So, don't think because it's a one ball shawl you can't make it bigger – you totally can!
Customizing Your Shawl: Size and Yarn Options
Feel free to get creative with your yarn choices! Experiment with different colors, textures, and fiber contents to create a shawl that's uniquely you. A color wheel can assist you in visualizing your color choices. The possibilities are endless!
Finishing Touches: Ending on a Shell Row
When you're getting close to finishing your yarn, just make sure you're going to end on a row of the shells with the candles. You don't want to end on this other row; it doesn't look as great to finish a shawl off. But if we end on this row, we don't have to do anything else to it. It looks super finished! So, I am just going to stop now.
Whenever you're going to stop, make sure you stop on a row with the shells, or else you have to frog it back. Don't do that!
Binding Off: Securing Your Stitches
When you have finished your row and put your last of these eight double crochets into the last V-stitch space, all you have to do to finish is just chain one, cut your yarn, pull your hook up, and your yarn through and snug that down.
Weaving in the Ends: The Final Step
Now you just have to take your needle and sew in your ends, try to keep it matching with the color if possible.
Enjoy Your New Shawl!
And there it is – it's finished! This is one ball. You can decide how many balls you want to use for yours.
I hope you enjoyed this video, you can find more crochet tutorials on the website.
Left Handed Instructions
For all of those left handed crocheters out there, check out all the left-handed tutorials here.
Written Pattern
You can also follow along with the written pattern.
Cakes & Candles Time Stamp
If readers are struggling to follow the instructions and are trying to repeat a row of cakes and candles, there is a time stamp in the description box if needed.
Crochet Must Haves List:
Here's a list of places to get some Crochet Must Haves:
- Bags - Yarn Ball Storage: https://amzn.to/36cbr3A
- Bags - Large UFO Zipper Pouches: https://amzn.to/3uqgQ0n
- Bags - Regular UFO Zipper Pouches: https://amzn.to/3DYxvLB
- Ball Winder: https://amzn.to/3Jzd4Y0
- Baskets - WIPS: https://amzn.to/3tQK9te
- Color Wheel: https://amzn.to/3hJN3IG
- Crochet Hooks: https://amzn.to/2p5etkC
- Foot Warmer: https://amzn.to/3RaMtn0
- Measuring Tape: https://amzn.to/3JviyD8
- Neck Light: https://amzn.to/2UYNrW4
- Needle Threaders: https://amzn.to/3zdCK7S
- Needles - Blunt Tip: https://amzn.to/2MRffKP
- Needles - Sharp Tip: https://amzn.to/3Rdq2ja
- Scissors: https://amzn.to/3EC1CHy
- Stitch Markers: https://amzn.to/3GdGCYg
- Tea - Kericho Gold: https://amzn.to/3zrTcB8
- Tins - Accessories: https://amzn.to/3EN6nxT
- Yarn: https://bit.ly/39EZwZX
More Crochet Patterns
Check out these other free crochet patterns that are available on the website!
Printable PDF Patterns
You can find printable PDF patterns here.
Newsletter Subscription
Subscribe to The Secret Yarnery Newsletter for all the latest news.
FAQs
Q: What if I don't have the exact yarn specified in the pattern?
A: No worries! You can substitute with any yarn of similar weight (size 3 DK) and yardage. Just be sure to adjust your hook size accordingly to achieve a fabric with good drape.
Q: Can I make this shawl larger than the one-ball size?
A: Absolutely! Simply use more yarn and continue the pattern repeat until you reach your desired size. Two balls will make a normal-sized shawl, and three balls will create an extra-large, luxurious shawl.
Q: What is the finished size of the one-ball shawl?
A: The finished shawl measures approximately 40 inches wide and 20 inches tall. Keep in mind that your gauge may vary slightly, which could affect the final size.
Q: I'm having trouble with the V-stitch. Can you explain it again?
A: Sure! A V-stitch is created by working a double crochet, chain three, and another double crochet all into the same stitch or space. This creates a "V" shape, hence the name.
Q: How do I prevent my shawl from unraveling?
A: The key is to weave in your ends securely. Use a darning needle to weave the yarn tail through several stitches of the same color, then trim the excess.
Christa Patel is the creative mind behind the Secret Yarnery, a trusted resource for crochet enthusiasts worldwide. With years of experience, Christa specializes in designing beginner-friendly yet stunning crochet patterns that inspire creativity and confidence in crafters of all skill levels.
As a passionate crocheter, Christa is known for her clear and approachable teaching style, breaking down complex patterns into simple, easy-to-follow steps. Through her engaging video tutorials, written patterns, and helpful tips, she has cultivated a community where crocheters can connect, learn, and share their work.
Christa’s dedication to making crochet fun and accessible shines in every project she creates, from colorful blankets to intricate borders. Whether you’re a seasoned expert or just picking up a hook for the first time, Christa's guidance will help you craft something beautiful.
For more crochet patterns, tips, and inspiration, visit her website at The Secret Yarnery, or check out her YouTube channel filled with step-by-step tutorials.
About the Author
With a passion for crafting easy, beginner-friendly tutorials and patterns, Christa inspires crafters of all skill levels to unleash their creativity worldwide. She encourages yarn lovers to connect, create, and crochet a world filled with beautiful handmade treasures!
Easy Crochet Cakes & Candles 1 Ball Shawl: Beginner-Friendly Tutorial!