Easy Crochet Granny Square for Perfect Color Changes Without Twisting!
Have you ever wanted to create something beautiful and unique with your own two hands? Crochet is a fantastic way to do just that! One of the most iconic and versatile crochet projects is the granny square. These squares can be combined to make everything from cozy blankets to stylish garments. And today, I'm going to show you how to make a color-changing granny square that's not only easy but also avoids common problems like twisting and visible seams. This pattern is my go-to because it looks fantastic on both sides, making it truly reversible. Plus, it's a great way to use up those leftover bits of yarn in your stash! Get ready to learn a simple technique that will have you crocheting beautiful, seamless granny squares in no time. The instructions are written in plain English, just like I'm talking to you right now!
Table of contents
 Tips for Perfect Tension Choosing the Right Colors for Your Project Caring for Your Crochet Granny Squares Granny Square Variations Granny Squares Around the World Final Thoughts Left Handed? FAQs
Why This Granny Square is Different
Let's face it, not all granny square patterns are created equal. How frustrating is it to spend hours crocheting a bunch of squares, only to find that they're all wonky and twisted? Or that there's an ugly seam running up the side? This pattern is designed to avoid all those headaches!
-
No Twist: One of the biggest issues with traditional granny squares is that the center tends to twist. This pattern prevents that by ensuring the stitches are balanced and secure from the very beginning. No more wonky centers!
-
Hidden Join: Unlike many patterns that leave a visible join running up the side of the square, this method hides the join in each and every round. This creates a much cleaner, more professional look.
-
Reversible Design: There's no "right" or "wrong" side to this granny square. Both sides look equally good, which makes it incredibly versatile for all sorts of projects. You do not need to worry about which side is up!
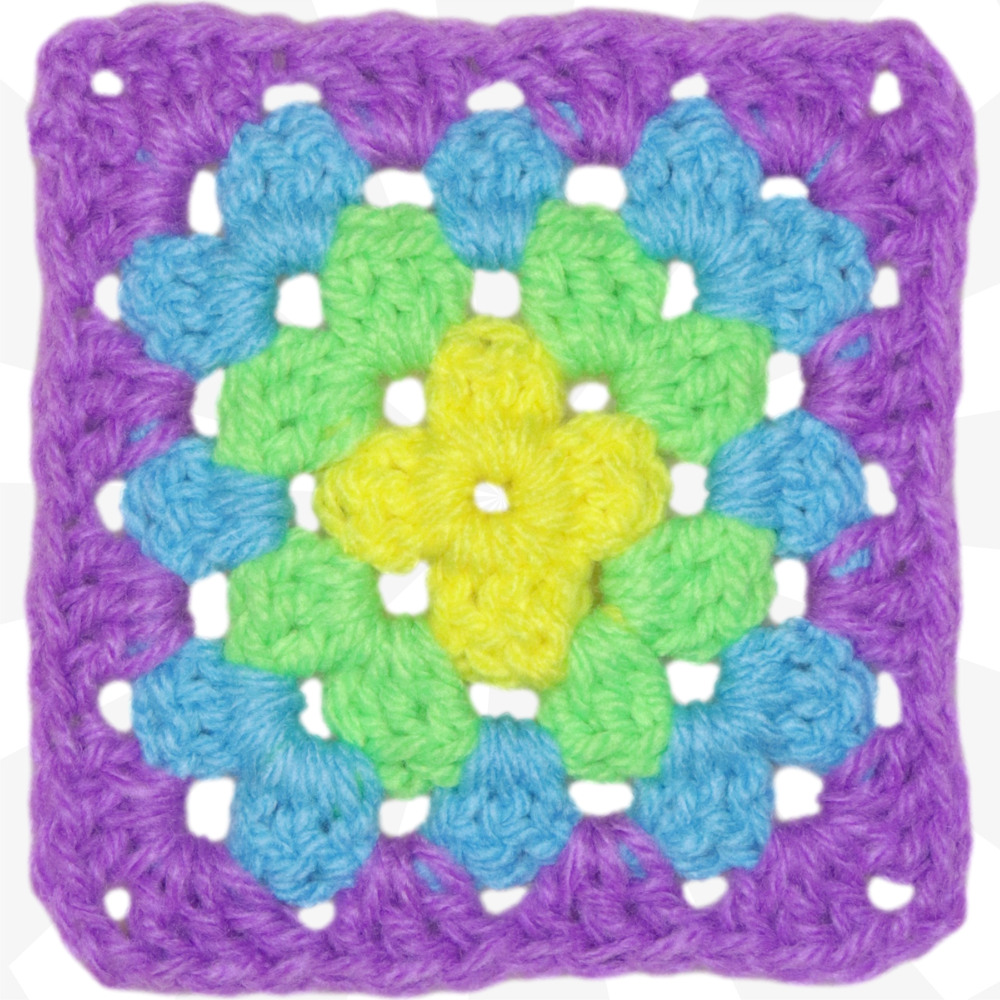
Imagine a beautiful blanket made of perfectly flat, even granny squares, with no visible seams and no twisting. That's the kind of result you can achieve with this pattern. These squares are ideal for blankets, garments, bags, and so much more. The possibilities are endless!

Materials You'll Need
Before we get started, let's gather our materials. Here's what you'll need to make this color-changing granny square:
- Yarn: I recommend using a size 4 worsted weight acrylic yarn, but you can really use any yarn you have on hand. This is a fantastic stash-busting project! You can find a great selection of yarn here.
- Crochet Hook: A 6mm crochet hook is ideal for worsted weight yarn, but you may need to adjust the hook size depending on the yarn you choose. A good set of crochet hooks is essential, and you can find one here.
- Scissors: You'll need a good pair of scissors for cutting the yarn. These scissors here are perfect for the job.
- Needle: A needle for weaving in the ends is essential for a clean finish. Blunt tip needles work great, and you can find them here.
Getting Started: Making a Slip Knot
Alright, let's get started! The first step is to make a slip knot. There are many ways to make a slip knot, so use whichever method you're most comfortable with. I won't bore you with the details, but just make sure it's snug on your hook.
Round 1: Creating the Center Ring
Now for Round 1! This is where we create the foundation of our granny square.
- Chain 3: Chain three stitches. This counts as our first double crochet.
- Form a Ring: Insert your hook into the very first chain you made (right on top of your slip knot). It doesn't matter exactly where you poke your hook into the stitch.
- Hold the Ring Open: This is important! Take your yarn tail underneath your work and form a "U" shape, holding it open with your finger and thumb. This creates space in the center of the ring.
- Slip Stitch: Slip stitch to join and form a ring, still holding that ring open.
- Chain 3: Chain three again. This counts as another double crochet.
- Two Double Crochets: Make two double crochets into the center of the ring, taking care to crochet over your yarn tail. There's one, and there's two!
- Chain 2: Chain two stitches.
- Repeat: Into the center of the ring, make three double crochets, then chain two. Repeat this sequence two more times.
- More Double Crochets: Into the center of that ring again, three more double crochets, going over your tail.
- Slide Stitches Back: Grab that starting chain and slide your new stitches back. This will give you some more space along the ring to lay your double crochets nice and flat side by side.
- Chain 2: Chain two.
- Three Double Crochets: Wrap your yarn and into the center of that ring, three double crochets.
We're just building the sides of our square right now.
- Finishing the Round: Now to end chain two and we're going to slip stitch into the top of that chain three to join. Get two strands of that stitch on the top of your hook.
- Cut Yarn: Cut your yarn leaving a long enough tail to sew in with a needle later, pull your hook up and your yarn through and snug that down to secure.
We're finished with this color now! Chain one to secure your yarn, cut your yarn, leaving a long enough tail to sew in with a needle later, pull your hook up and your yarn through, and snug that down to secure. That finishes round one! If you are interested in my work check out the weekly podcasts.

Round 2: Adding the First Color
Time for Round 2 and our first color change!
- Turn Your Work: Flip your work over.
- Join New Color: Put your hook into that corner right before our join, grab a loop of your next color yarn (leaving a long tail for weaving in later), bring it through, and slip stitch with both strands to join.
- Chain 2: Drop your tail (just holding it along the back of your work), and chain two. (If you join your yarn in a different way, chain three instead.) This counts as our first double crochet.
- Two More Double Crochets: Two more double crochets into that corner space. One and two.
- Corner Stitch Pattern: Into the next corner space (we can work over that tail, so just hold it along your work), we're going to do a corner. Corners are three double crochets, chain two, and three double crochets.
- Repeat: Repeat around into the next corner we're going to do a corner, so three double crochets, chain two, and three double crochets
- Finish Corner: Now when we get back to the corner where we started, we're just going to finish that corner, so three double crochets into that first corner space where we started, now we're finished with this color also.
- Slip Stitch: Do a chain two, and slip stitch to the top of that chain three to join.
We're going to slip stitch, so pop your hook in and one slip stitch to join.
- Cut Yarn: Chain one to secure your yarn, cut your yarn leaving a long enough tail to sew in with a needle later, pull your hook up and your yarn through, and snug that down to secure.
That finishes round two.
Round 3: Continuing the Square
On to Round 3, where we continue to expand our square!
- Turn Your Work: Turn your work.
- Join New Color: Find a corner where you haven't joined your yarn, pop your hook in, grab your next color loop of yarn on your hook (leaving a long enough tail to sew in with a needle later), bring it through, and slip stitch with both strands to join.
- Chain 2: Drop your tail (just holding along the back of your work), and chain two.
- Two Double Crochets: Two double crochets into the same corner space.
- Side Space: Into the side space (just this middle space along the side), three double crochets.
- Corner Stitch Pattern: Into the next space, we're going to do a corner, so every corner always gets a corner. Corners are three double crochets, chain two, and three double crochets.
- Repeat: Repeat this sequence into the next space along the side, three double crochets.
- Finishing Round Into the corner where we joined, I'm just going to hold that tail along the edge of my work so I can work over it with my new stitches, so corners always get a corner, three double crochets, chain two, and three double crochets all into the same corner space.
- Cut Yarn: Cut your yarn leaving a long enough tail to sew in with a needle later, pull your hook up and your yarn through, and snug that down to secure.
That finishes round three.

Round 4: Establishing the Pattern
Round 4 is where we establish the repeating pattern that we'll use to make the granny square as big as we want!
- Turn Your Work: Turn your work.
- Join New Color: Look for a corner where we haven't joined our yarn, slide your hook in, get your next color yarn loop of your next color yarn on your hook (leaving a long enough tail to sew in with a needle later), bring it through, and slip stitch with both strands to join.
- Chain 2: Drop your tail (just holding it along the side of your work), and chain two.
- Two Double Crochets: Into that same corner, two double crochets.
- Side Spaces: Into each of these side spaces, three double crochets into each, so three double crochets into the first space and three double crochets into the next space.
- Corner Stitch Pattern: Into your corner, corners always get corners, corners three double crochets, chain two, and three double crochets all into the same corner space.
- Finishing the Round: When you get back to where we started, we're just going to finish that corner with our three double crochets into that corner space.
That finishes round four.
Repeating Round 4 to Your Desired Size
Want to make your granny square bigger? It's easy! Just keep repeating Round 4 until your square is the size you want. Remember to keep those yarn tails long enough for weaving in later!
The Secret to a Seamless Join
Want to keep going with the same color yarn? I'll show you a secret join to keep your join straight up in that corner, so nobody sees that little chain going up the side of your granny square.
- Chain 1: Chain one.
- Single Crochet Join: Now we're going to single crochet to join, so same spot as we were going to slip stitch, but we're just going to go in and make one single crochet to join, just holding that spot open with your finger and thumb in between those sets of three double crochets.
- Chain 3: Single crochet and chain three.
- Turn Your Work: Turn your work, still holding that open with your finger and thumb, and two double crochets into that first corner space right where that chain is coming from.
- Stitch Marker: Now we want to grab a stitch marker. We just want to mark that corner right where we joined right there, so when we're coming along, we're going to know that that's a corner and not a side space, and I would just keep going as usual in the same color yarn.

Weaving in the Ends
Weaving in your ends is key. Use a yarn needle to weave the ends back and forth through the stitches on the back of your work. Secure the ends by splitting the yarn and weaving the tail through the split fibers. This will prevent your ends from coming undone later.
Color Combination Ideas
One of the best things about granny squares is the endless possibilities for color combinations. Here are a few ideas to get you started:
- Monochromatic: Use different shades of the same color for a subtle and sophisticated look.
- Complementary Colors: Choose colors that are opposite each other on the color wheel for a bold and eye-catching effect.
- Rainbow: Use a variety of colors in a rainbow sequence for a fun and cheerful design.
- Pastels: Opt for soft, muted colors for a delicate and dreamy look.
- Neutrals: Create a sophisticated and versatile palette with neutral colors like gray, beige, and cream.
For inspiration, use a color wheel!
Project Ideas for Your Granny Squares
What can you make with your granny squares? The possibilities are endless! Here are a few ideas:
- Blankets
- Pillows
- Scarves
- Bags
- Sweaters
- Cardigans
- Hats
- Vests
If you are looking for unique projects take a look at The Secret Yarnery written patterns.
Tips for Choosing Yarn
Choosing the right yarn can make a big difference in the final result of your project. Consider the following factors when selecting yarn for your granny squares:
- Fiber Content: Cotton is a great choice for warm-weather projects, while wool is ideal for cozy winter blankets. Acrylic is a versatile and affordable option that's easy to care for.
- Weight: Use the same weight yarn throughout your project to ensure consistent stitch size and overall appearance.
- Color: Think about the color palette you want to create and how the colors will work together.
- Texture: Experiment with different yarn textures for added interest and visual appeal.
Hook Size Guide
Choosing the right hook size is essential for achieving the correct gauge and overall look of your project. The recommended hook size is usually indicated on the yarn label.
Understanding Crochet Terms
Here are some common crochet terms used in this pattern:
- Slip Knot: The first knot you make on your hook to start crocheting.
- Chain (ch): A basic stitch that forms the foundation of many crochet projects.
- Slip Stitch (sl st): A stitch used to join rounds or to move across a row without adding height.
- Double Crochet (dc): A common stitch that creates a taller fabric than single crochet.
You may like the easy to follow plain English instructions on The Secret Yarnery's written patterns.
Common Mistakes to Avoid
Here are a few common mistakes to avoid when crocheting granny squares:
- Uneven Tension: Maintain consistent tension throughout your project for a neat and even fabric.
- Incorrect Stitch Count: Count your stitches carefully to ensure you're following the pattern correctly.
- Forgetting to Chain 2 in Corners: Remember to chain 2 in the corners to create the square shape.
- Joining Incorrectly: Follow the instructions carefully for joining each round to avoid visible seams.
- Not Weaving in Ends Securely: Weave in your ends properly to prevent them from coming undone.
Troubleshooting Tips
Having trouble? Here are a few troubleshooting tips:
- Granny Square is Twisting: This pattern is designed to prevent twisting, but make sure you're following the instructions carefully and holding the center ring open.
- Granny Square is Not Square: Double-check your stitch counts and corner construction.
- Yarn is Splitting: Try using a different hook or yarn.
- Stitches are Too Tight/Loose: Adjust your tension or hook size.
How to Read a Crochet Pattern
Crochet patterns use abbreviations and symbols to represent different stitches and instructions. Take the time to read the pattern carefully before starting your project. The Secret Yarnery newsletter is a great resource to help you.
Benefits of Crochet
Crochet is a wonderful hobby with many benefits:
- Stress Relief: The repetitive motion of crochet can be calming and relaxing.
- Creativity: Crochet provides a creative outlet for expressing your personal style.
- Mindfulness: Crochet can promote mindfulness and focus, helping you to be present in the moment.
- Sense of Accomplishment: Completing a crochet project can give you a sense of satisfaction and pride.
- Community: The crochet community is supportive and welcoming.
The Secret Yarnery Community
I would love for you to join The Secret Yarnery community. Connect with other crocheters and share your projects! Learn more and join today!
Behind the Scenes at The Secret Yarnery
Are you curious about what happens behind the scenes at The Secret Yarnery? Check out my YouTube channel to get a behind the scenes glimpse!
Left-Handed Crochet Tutorials
Are you a left-handed crocheter? Don't worry, I've got you covered! Check out my left-handed tutorials on YouTube.
Support The Secret Yarnery
There are many ways you can support The Secret Yarnery:
- Subscribe to my YouTube channel.
- Like and comment on my videos.
- Share my patterns and tutorials with others.
- Buy me a coffee through Ko-Fi.
Crochet Must-Haves
Here are some essential crochet tools and accessories I recommend:
Step-by-Step Photo Tutorial: Round 1
(Imagine detailed photo tutorial with clear photos for each step, captions explaining each action, and reference to the video tutorial.)
Step-by-Step Photo Tutorial: Round 2
(Imagine detailed photo tutorial with clear photos for each step, captions explaining each action, and reference to the video tutorial.)
Step-by-Step Photo Tutorial: Round 3
(Imagine detailed photo tutorial with clear photos for each step, captions explaining each action, and reference to the video tutorial.)
Step-by-Step Photo Tutorial: Round 4
(Imagine detailed photo tutorial with clear photos for each step, captions explaining each action, and reference to the video tutorial.)
Tips for Perfect Tension
Perfecting your crochet tension is crucial for consistent and beautiful results. Aim for a balance where your stitches are neither too tight nor too loose. If your work feels stiff, try loosening your grip on the yarn. Conversely, if it's too floppy, tighten your tension slightly. Consistent tension leads to uniform stitches and a professional finish.
Choosing the Right Colors for Your Project
Selecting the right colors can elevate your crochet project from simple to stunning. Start by considering the overall mood you want to create. For a calming effect, choose analogous colors (those next to each other on the color wheel). For a vibrant look, try complementary colors (opposite each other). Don't be afraid to experiment and trust your instincts.
Caring for Your Crochet Granny Squares
Proper care ensures your crochet creations remain beautiful for years to come. Hand washing is always the gentlest option. Use cool water and a mild detergent, and avoid wringing or twisting. If you prefer machine washing, use a delicate cycle and place your granny squares in a mesh laundry bag. Always lay flat to dry to prevent stretching.
Granny Square Variations
Once you've mastered the basic granny square, explore the many variations that exist! Solid granny squares create a dense, warm fabric. Lacy granny squares add an airy, delicate touch. Textured granny squares incorporate special stitches for added dimension. Each variation offers a unique look and feel, so experiment and find your favorites!
Granny Squares Around the World
Did you know that granny squares have a rich history and are used in different cultures around the world? In some cultures, they are seen as symbols of comfort and family, and are often used to make blankets and other items for loved ones. Regardless of where they're from, granny squares all share a common trait: they're handmade with love.
Final Thoughts
And there you have it! With a little practice, you'll be crocheting beautiful color-changing granny squares in no time. Remember to have fun and experiment with different colors and yarn types to create your own unique designs. And don't forget to share your creations with The Secret Yarnery community!
Left Handed?
FAQs
Why is my granny square twisting?
Granny square twisting typically occurs when stitches are too tight or the tension is uneven. With this pattern, the method used ensures balanced and secure stitches to prevent twisting. Make sure to follow the instructions step-by-step.
How many colors should I use for a color-changing granny square
There are no strict rules! You can use as few as two colors, or as many as you want. Experiment with various combinations to create unique designs. Reference the Color Combination Ideas for inspiration.
Can I use a different type of yarn?
Yes! Although using worsted weight acrylic yarn is recommended, you can use any yarn type. Just adjust your hook size according to the yarn's label for the best results.
Can I make larger sizes
Yes! Simply continue crocheting the repeating pattern in Round 4 until your granny square reaches your desired size.
What should I do if my square is uneven?
Uneven squares often result from inconsistent tension or incorrect stitch counts. Double-check your stitches, ensure you’re chaining two in the corners, and block the square for even shaping.
How much yarn do I need for an entire project
The amount of yarn depends on the project size. For example:
- A small 40” x 40” blanket may require 3–4 skeins of worsted yarn.
- Larger projects will need proportionally more. Consider using a yarn calculator to estimate requirements.
Christa Patel is the creative mind behind The Secret Yarnery, a welcoming hub for crochet enthusiasts around the world. With years of crochet experience and a passion for teaching, Christa creates easy-to-follow tutorials and patterns that empower crocheters of all skill levels.
Her mission is to make crochet fun, approachable, and stress-free. Through her vibrant YouTube channel, detailed written tutorials, and growing crochet community, Christa shares her love for yarn and handmade projects.
Christa is known for her clear instructions and innovative tips, reflected in her signature patterns designed for real-life crocheters who value beauty and practicality. Whether you're just picking up a crochet hook or looking to explore advanced techniques, her work helps you grow your craft with confidence.
When she’s not crocheting, Christa enjoys connecting with fellow yarn lovers and inspiring creativity through her passion for the craft. You can explore more of her work on The Secret Yarnery website and join her thriving online community.
Stay inspired and keep stitching with Christa’s affordable patterns, engaging tutorials, and a treasure trove of crochet resources!
About the Author
With a passion for crafting easy, beginner-friendly tutorials and patterns, Christa inspires crafters of all skill levels to unleash their creativity worldwide. She encourages yarn lovers to connect, create, and crochet a world filled with beautiful handmade treasures!
Easy Crochet Granny Square for Perfect Color Changes Without Twisting!