Easy Granny Stitch Poncho Anyone Can Crochet: The Ultimate Beginner’s Guide
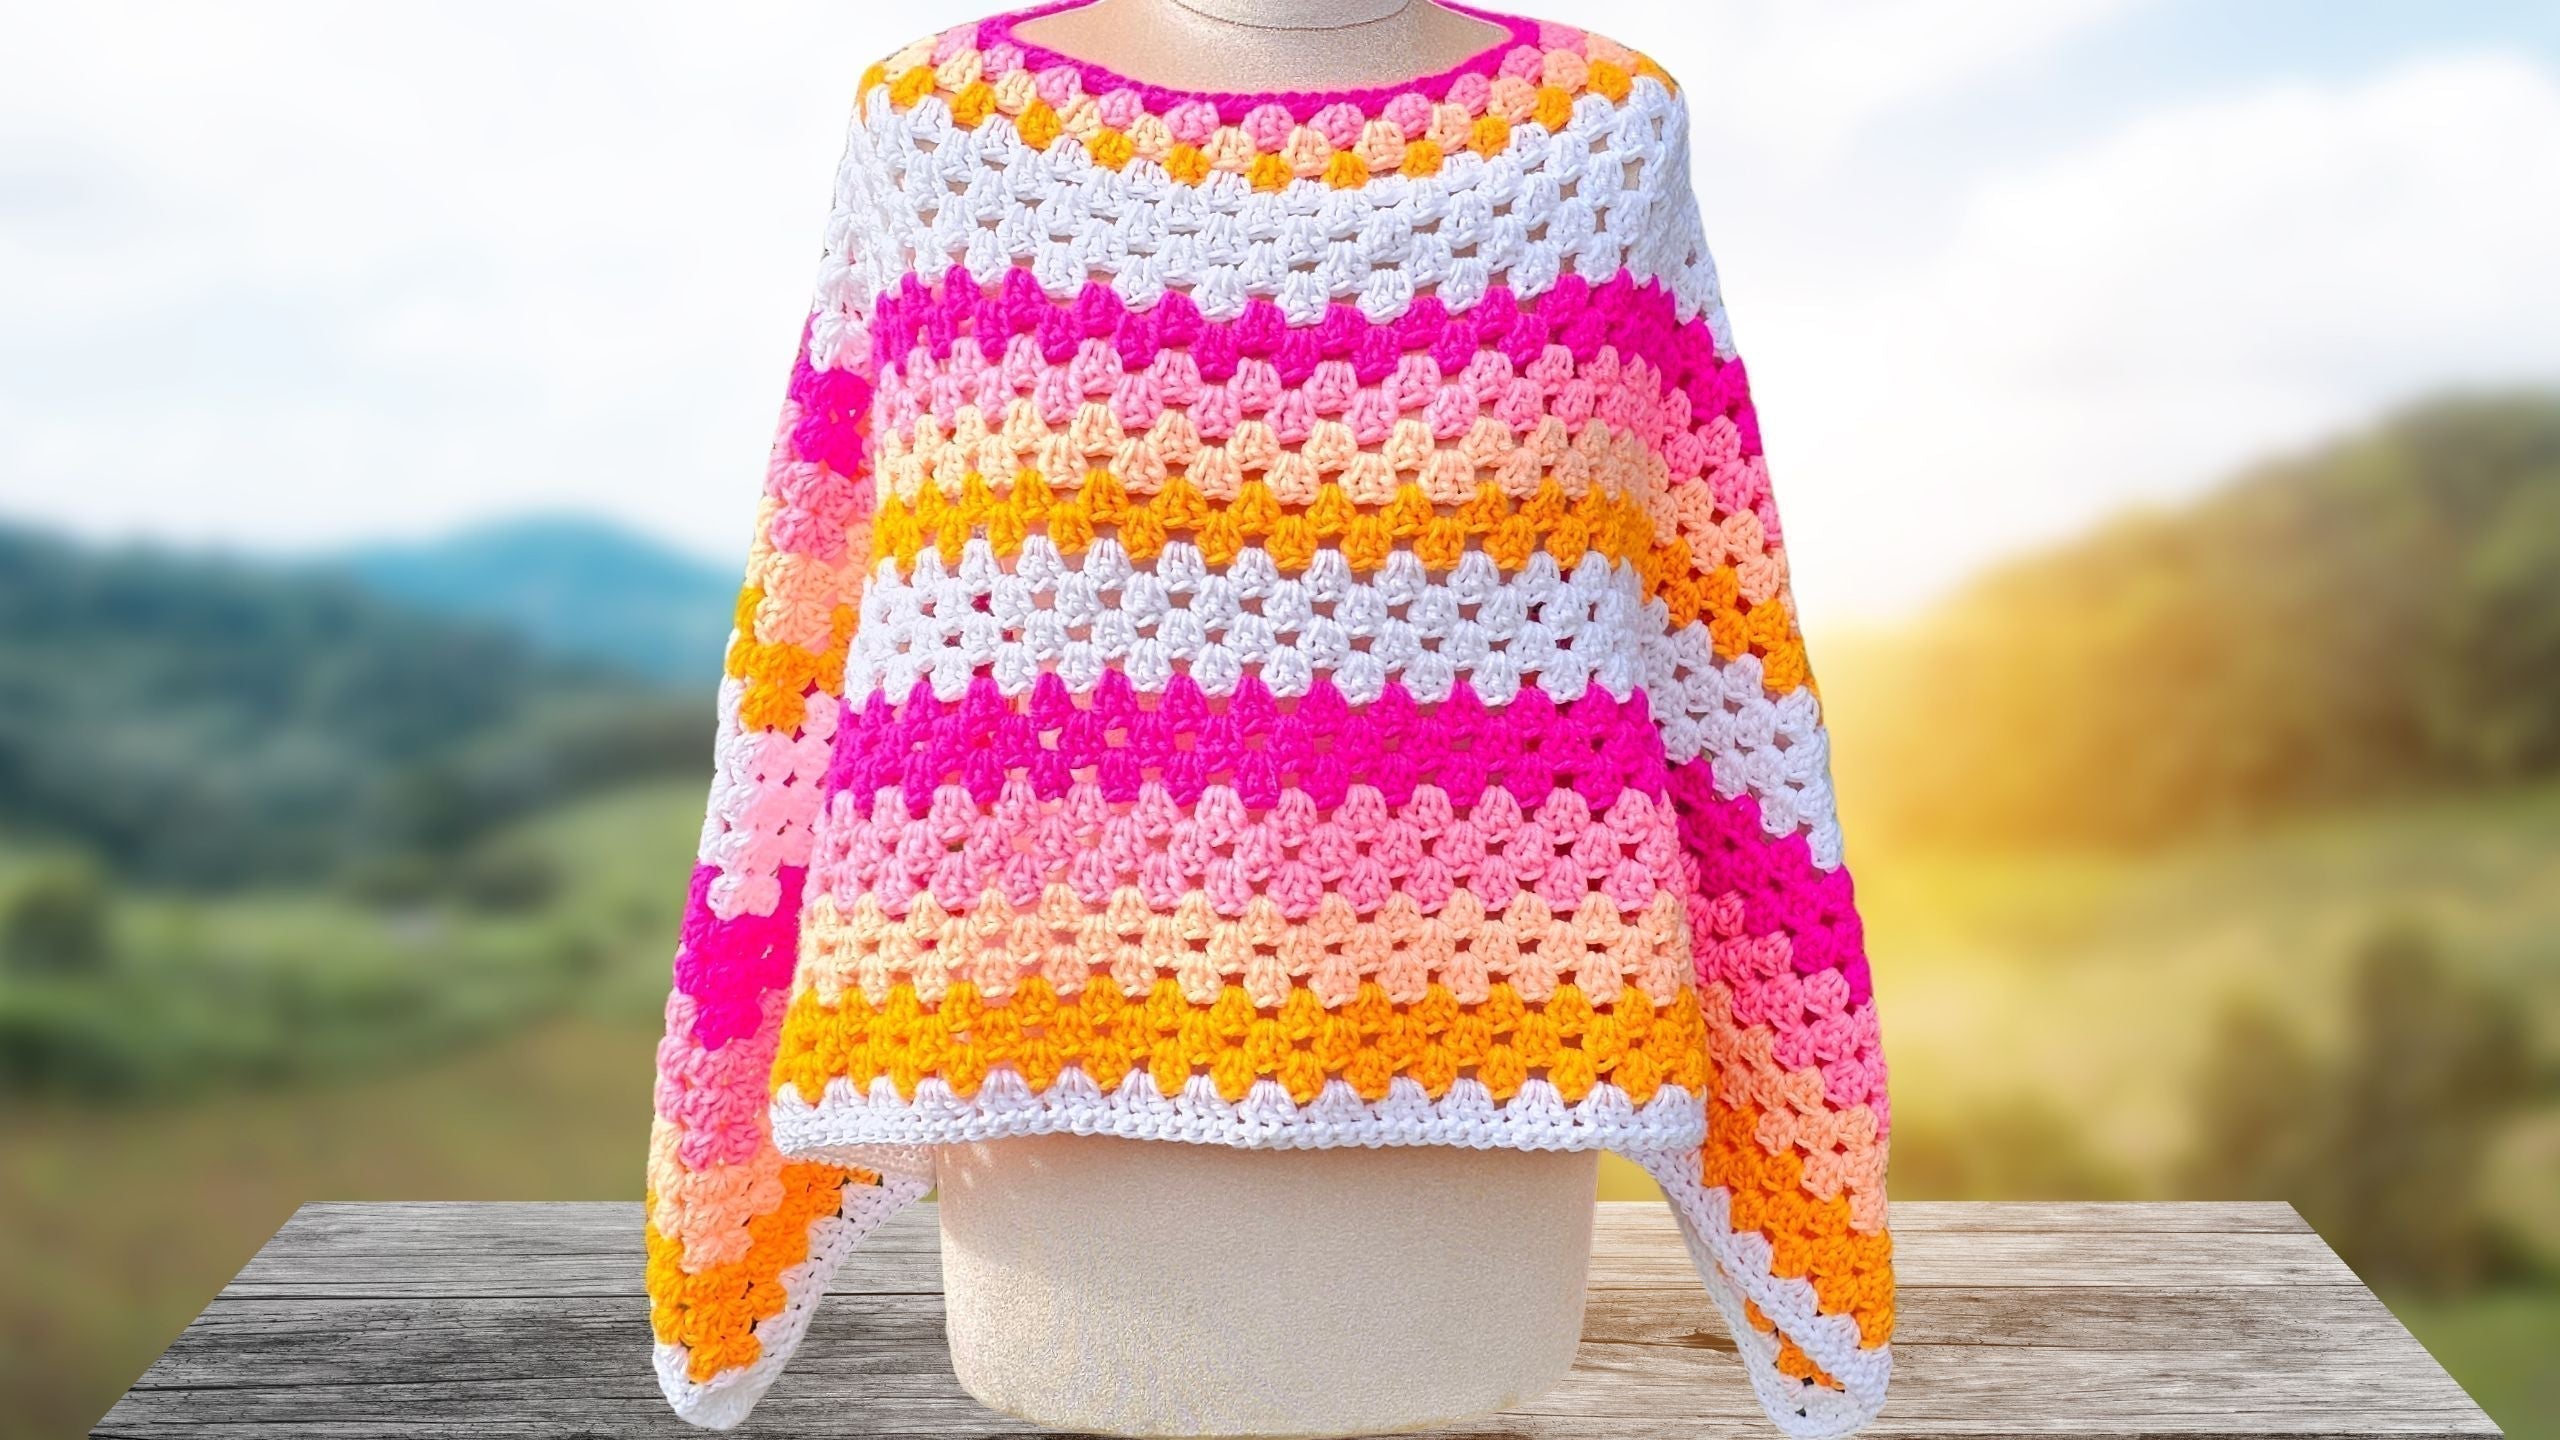
Have you ever wanted to make your own crochet wearable but worried it might be too hard? You’re not alone—I used to feel that way too. My solution was this easy granny stitch poncho, designed so anyone can make it, even with zero crochet experience. If you know how to make a double crochet and a single crochet stitch, you’re set. This poncho offers all the cozy style with very little stress, and you can personalize it with any yarn colors you like.
This post walks you through every step to make your first granny stitch poncho, using clear language, helpful tips about joining colors, and guidance for a smooth finish. Below you'll find everything you need: supplies, step-by-step instructions, and options to customize your fit and color pattern. If you'd like the detailed written pattern or want to see color suggestions for the stripes, you’ll find it within this guide and on my website. By the end, you’ll not only have your own poncho, you’ll gain the confidence to try more crochet wearables in the future.
Supplies You Will Need
Getting started is simple—you probably have most of what you need already. I used size 4 worsted weight acrylic yarn, which is often labeled as “medium” or “worsted” on the label. You can pick any brand or color; don’t feel locked into a specific palette. In my video, I chose four bright colors plus a neutral shade for a striped look, but you can just as easily stick with a single color for a classic effect.
Here’s what you’ll need to gather before you start:
- Yarn: Size 4 worsted weight acrylic is ideal (or any soft acrylic you have on hand).
- Colors: Four fun shades plus a neutral for stripes, or simply your favorite color. It’s your call.
- Crochet Hook: Both 6 mm and 12 mm hooks (size J and size O in US terms).
- Other Tools: A sharp pair of scissors, a large-eye yarn needle for weaving in tails, and a stitch marker (especially helpful for beginners).
If you like to shop online, I recommend browsing a selection of Free Crochet Patterns for Beginners for inspiration or 25+ Free & Easy Crochet Patterns for Beginners for quick and simple projects. You can also explore yarn options in my Beginner's Guide to Granny Stitch Poncho.

Understanding the Pattern Structure
This granny stitch poncho keeps things easy, using only two stitches: double crochet and single crochet. The “granny stitch” is made by grouping double crochets together (usually three in a shell), creating a lacy but sturdy fabric that drapes beautifully. After making your foundation chain, you’ll work in rounds, joining each round to keep the shape consistent.
Making a poncho this way lets you adjust the fit—just change the starting chain or add rounds as you go. If you prefer learning by reading, the Easy Granny Stitch Poncho Tutorial includes step-by-step photo guidance and the written pattern, which you can also download as a printable PDF. Written patterns on my site always use plain English, all explained as if I was sitting beside you.
Choosing Your Poncho Size: Chain Length Guide
Sizing your poncho is as simple as making a longer or shorter starting chain. Use this guide to pick the right size for your fit or for the lucky person you’re making it for:
- Extra Small (child): Chain 54
- Small: Chain 60
- Medium: Chain 66
- Large: Chain 72
Always leave a 6-inch tail at the start so you can join the chain ends together later. Adjust the chain as needed—try it on around your head and shoulders before joining to see if you like the fit and openness.
Size Chart for Starting Chain:
| Size | Starting Chain |
|---|---|
| Extra Small | 54 |
| Small | 60 |
| Medium | 66 |
| Large | 72 |
If in doubt, make the chain, check the width, and adjust before you start joining. The chain should comfortably fit over your head and sit loosely on your shoulders, as the finished poncho will “grow” with the stitch pattern.

Step 1: Starting Your Chain
To begin, I start with a slip knot (leaving a 6-inch tail) and slide it onto my hook. Then I chain the needed number of stitches for my chosen size. This step sets the width of the neck opening, so don’t be afraid to count twice.
The easiest way to work neat edges is to crochet your first row of single crochet stitches into the “camel bumps”—the little ridges on the back of each chain. To do this, turn your chain so the bumps face you and insert your hook into the second bump from your hook. Single crochet into each back loop along the chain.

Working into the back loops makes both the top and bottom edges match, giving the neckline a professional look and helping it stretch just the right amount. After finishing the single crochets, your chain will form a strip with neat, even edges.
Pause and check your work—no rush! If you’re new, take your time to count your stitches and enjoy the rhythm of forming that first row.
Step 2: Checking Your Chain and Preparing to Join
Once you’ve worked all your single crochets into the back loops, lay your strip flat on the table and double-check for twists. This is important. If you join with a twist, the poncho will never sit right. Stretch it out and make sure it’s completely straight and untwisted.

To form your circle, insert your hook under the first two loops (the “V” at the start of your chain) and slip stitch to join both ends. Take care to pull your tail gently so the join is snug but doesn’t pucker.
Decide if you want to switch colors for your first granny stitch round or stick with the same yarn. Both options look great—go with what excites you most.
Step 3: Joining and Starting the First Granny Stitch Row
Now you’re ready for the granny stitch round. Here’s how to start:
- Same color: Insert your hook and chain 3 (counts as the first double crochet), then work two more double crochets into the same stitch (your first “shell”).
- New color: Chain 1 to secure your old yarn, cut the yarn leaving a tail, and pull the yarn through. To join a new shade, place a stitch marker in the halfway stitch on the other side of your join (stitch 27 for XS, 30 for small, 33 for medium, 36 for large).
Joining a New Color:
- Insert your hook in the marked stitch (opposite your join).
- Place a loop of the new yarn on your hook.
- Pull it through and slip stitch with both yarn strands.
- Drop the tail and hold it along the back of your work.
- Chain 2 (counts as first double crochet).
- Add two double crochets into that same stitch for your shell.
Take it slow with color changes—nice, neat changes make the finished poncho look sharp and custom-made.

Step 4: Working the Granny Stitch Shells Around
With your shell started, the next step is to form shells all the way around:
- Skip two stitches on your chain.
- Into the third stitch, work three double crochets (the “shell”).
- Repeat: skip two, three double crochets in the next.
- Work until you reach the join or stitch marker.
Each shell should sit neatly beside the last. If shells look bunched or too loose, check your stitch count and tension. The stitch marker helps keep your place and makes it easy to find your increase point.

Creating the Corner Point (Increase):
When you come around to the join or the first stitch after the join, work three double crochets, then chain two, then three more double crochets into the same stitch. This forms a corner or “point” on the poncho, giving it that classic v-shape in the front and back.
If you’re a visual learner, I’d recommend glancing at the step-by-step photos in the Easy Granny Stitch Poncho Tutorial for diagrammed shell placement.
Step 5: Joining at the End of Round 1
You’re nearly through the trickiest part! After completing the final shell, it’s time to join for the next round.
- If you’re keeping the same color: Insert your hook in the top of the starting chain 3, single crochet to join (this keeps the seam tidy). Hold the space open, chain 2, and double crochet twice more in the same space to start your new round.
- If you’re switching colors: Chain 1, insert your hook in the top of the starting chain 3, slip stitch to join, and chain 1. Cut the yarn (leaving a tail to weave in) and pull the yarn through to secure.
Always keep your joins consistent—working into the top of the chain 3—so your shells line up and your poncho grows evenly.
At this stage, it’s easy to see the V-shape beginning to appear where your points land. Make sure the point remains stacked round after round for a balanced shape.

Step 6: Starting the Next Round and Joining New Colors
Ready for round two? I join the new yarn in the “opposite” corner from where I finished the previous round. This rotates the points and spreads the color beautifully.
- Insert your hook into the open corner space (where you just made the increase).
- With new yarn, slip stitch to join, chain 2 (counts as your first double crochet).
- In the same space, double crochet two more times to start your shell.
Now, make three double crochets in each space between the shells from the last round. When you reach the next point (corner space), work granny stitch shell (three double crochets), chain 2, three double crochets—just like before.
If you want a tidy edge, try crocheting over the loose tail with your double crochets as you go; it saves time weaving in ends at the finish.
Don’t worry if it feels slow. Pause as often as you want, rewind the video, or adjust playback speed until you’re comfortable.
Step 7: Continuing Around and Creating Corners
Keep working the shell stitch (three double crochets in each space) all the way around, repeating at each space. When you reach a corner, always work the extra point (three double crochets, chain two, three double crochets).

For neat, even shells, use your hook to gently pull the last shell backward, making room for the next one to sit right beside it. This keeps your poncho looking crisp and makes sure the shells don’t bunch up.
If you struggle to maintain the correct number of stitches, don’t stress—stitch markers help, and it becomes easier the more rounds you complete.
Step 8: Finishing Rounds and Adjusting Size
Continue as above, round after round. Each time, you can choose to join a new color for more stripes or stick with one color for a bold monochrome look.
If you want a longer or heavier poncho, just keep adding rounds until you reach your desired length. Before starting another round, rotate your work so you’re always joining in the opposite corner. This balances the stripes and makes the V-shape sharper.
I encourage following your own color sense or using the little chart included in the written pattern for guidance on stripe order. If you want more structured guidance, the pattern at Easy Granny Stitch Poncho Tutorial has color placement advice and additional tips.

Step 9: Finishing the Poncho with a Single Crochet Edge
Once your poncho is the perfect length, it’s time to make the edge smooth and finished. Grab your yarn and single crochet around the entire bottom edge.
To keep the border from curling, I turn the poncho over and work single crochets into the back loops of each stitch along the edge. This small tip helps it lay flat and gives the hem a gentle roll rather than a stiff curl.
As you move around, work one single crochet into each stitch. When you reach a corner, place three single crochets in the same space to form a nice, gentle turn. This makes the points defined and helps the poncho drape better.
If your arms get tired, pause and put your work down—it can take a little while, but you’ll love the polished result when you’re finished.
Step 10: Invisible Join for a Professional Finish
An invisible join gives your work a professional finish without a bulky seam. Once you’ve stitched around the border, don’t slip stitch or chain to finish. Instead:
- Work two single crochets in the final corner space (where you began).
- Cut the yarn with a long tail and pull it through the last loop.
- Thread this tail onto your yarn needle.
- Insert the needle from front to back under both loops of the first stitch of the round (where you would usually join).
- Bring the needle down through the middle of the last stitch made and pull gently to close the gap.
- Tuck and adjust the join until it looks like a regular stitch.
If you’d prefer, you can slip stitch and chain 1 to finish instead, but the invisible join really steps up the look and feels almost seamless on the skin.

Step 11: Sewing in the Yarn Tails
This isn’t the most fun part, but it keeps your poncho secure and neat. Thread each tail onto your yarn needle, weaving it back and forth into the stitches. For the neckline tail, I reinforce it by stitching several times back and forth near the join, since it will get extra movement as you pull the poncho on and off.
If you have a sharp-tipped needle, use it to weave deep into the fibers for maximum security. Trim the tails close once you’re sure they’re snug and woven in fully.
Don’t rush—this little effort makes your poncho look store-bought and keeps it from coming apart after washing or wearing.
Left Handed?
Additional Tips and Common Questions
Troubleshooting Common Beginner Issues
- If your chain is too tight it's ok for this pattern - it will help the neckline keep shape!
- Always, always check for twists before you join. Lay the chain flat and stroke it gently so it sits naturally.
- Color joins look neatest when you leave a long enough tail for weaving, work over the tails as you crochet, and snug the yarn down when changing colors.
- Shells too loose or tight? Practice keeping your tension smooth and consistent—not too tight, not too floppy.
Customizing Your Poncho
- Use as many or as few colors as you like. A color-block poncho makes a statement, but a solid color is classic and chic.
- Make the poncho longer by adding more rounds. Want elbow-length? Keep going!
- Change up the look with softer, chunkier, or blended yarns for new textures and drape.
Helpful Tools
For working with acrylic, a sharp yarn needle and good pair of scissors are handy. Beginners can benefit from placing stitch markers at each corner to keep increases lined up as the rounds grow.
If making more ponchos interests you, the Easy Crochet Poncho for Beginners walks through alternate poncho ideas. For floral vibes, check out the Cropped Flower Granny Square Poncho.

Conclusion
Finishing my first granny stitch poncho was a happy moment. I realized crochet wearables aren’t just for advanced crafters. With the right instructions and a little patience, anyone can make a soft, stylish piece that’s truly their own. Don’t be afraid to experiment with colors, sizing, or yarn. Enjoy the process—every stitch brings you closer to a handmade treasure.
By following these steps, you’ve created a cozy, colorful poncho just right for lounging at home, heading out with friends, or giving as a heartfelt gift. If you enjoyed making this, browse more patterns and tips over at my Easy Granny Stitch Poncho Tutorial. Stay hooked and happy crocheting!
FAQs
1. Can beginners really make this Poncho?
Yes! This pattern uses only basic stitches like single and double crochet. It’s beginner-friendly, with clear steps and lots of chances to practice simple techniques.
2. How do I pick the right yarn for my Poncho?
Choose size 4 worsted weight yarn. Acrylic is affordable and easy to wash, but you can use cotton or blends as well. Pick colors you love—solid, striped, or variegated all work.
3. What if my foundation chain feels too tight or too loose?
If it’s too tight, go up a hook size for the chain only. If it’s too loose, use a smaller hook or tighten your tension. Your chain should fit over your head but not slip off your shoulders.

4. Can I adjust the poncho size?
Yes. Make your foundation chain longer or shorter in multiples of three. Try on as you crochet to check the fit and adjust length by adding or removing rounds.
5. How long does the project take?
Most beginners finish this poncho in a weekend or less. More experienced crocheters may finish even faster, especially with chunky yarn.
6. Do I have to use a stitch marker?
It’s highly recommended. It keeps your increases even and makes it easy to spot where to work the poncho’s point.
7. How do I change colors neatly?
Join new colors at the start of a round, or wherever you like. Crochet over the tails to lock them in place and weave in any ends later for a tidy finish.
8. Can I add a hood, sleeves, or fringe?
Absolutely! Add a simple border, attach fringe to the edge, or follow a basic hood tutorial to make it your own.
9. What if my stitches look uneven?
Keep practicing and try to relax your tension. The single crochet border helps even out minor flaws so your finished poncho will look great.
![]()
Christa Patel is the creator behind Secret Yarnery, known for making crochet simple, joyful, and easy to follow for all skill levels. With a warm teaching style and a love for bright colors, Christa breaks down patterns step by step, so even beginners can make beautiful projects with confidence.
She shares clear video tutorials, detailed written guides, and helpful tips on her blog and YouTube channel. Christa believes everyone can enjoy crochet—whether you’re picking up a hook for the first time or looking for your next creative spark.
You can find more of Christa’s patterns, inspiration, and community support at SecretYarnery.com or watch her tutorials on Secret Yarnery’s YouTube channel. Join her vibrant crochet community, get inspired, and discover how easy handmade can be!
About the Author
With a passion for crafting easy, beginner-friendly tutorials and patterns, Christa inspires crafters of all skill levels to unleash their creativity worldwide. She encourages yarn lovers to connect, create, and crochet a world filled with beautiful handmade treasures!
Easy Granny Stitch Poncho Tutorial for Absolute Beginners!