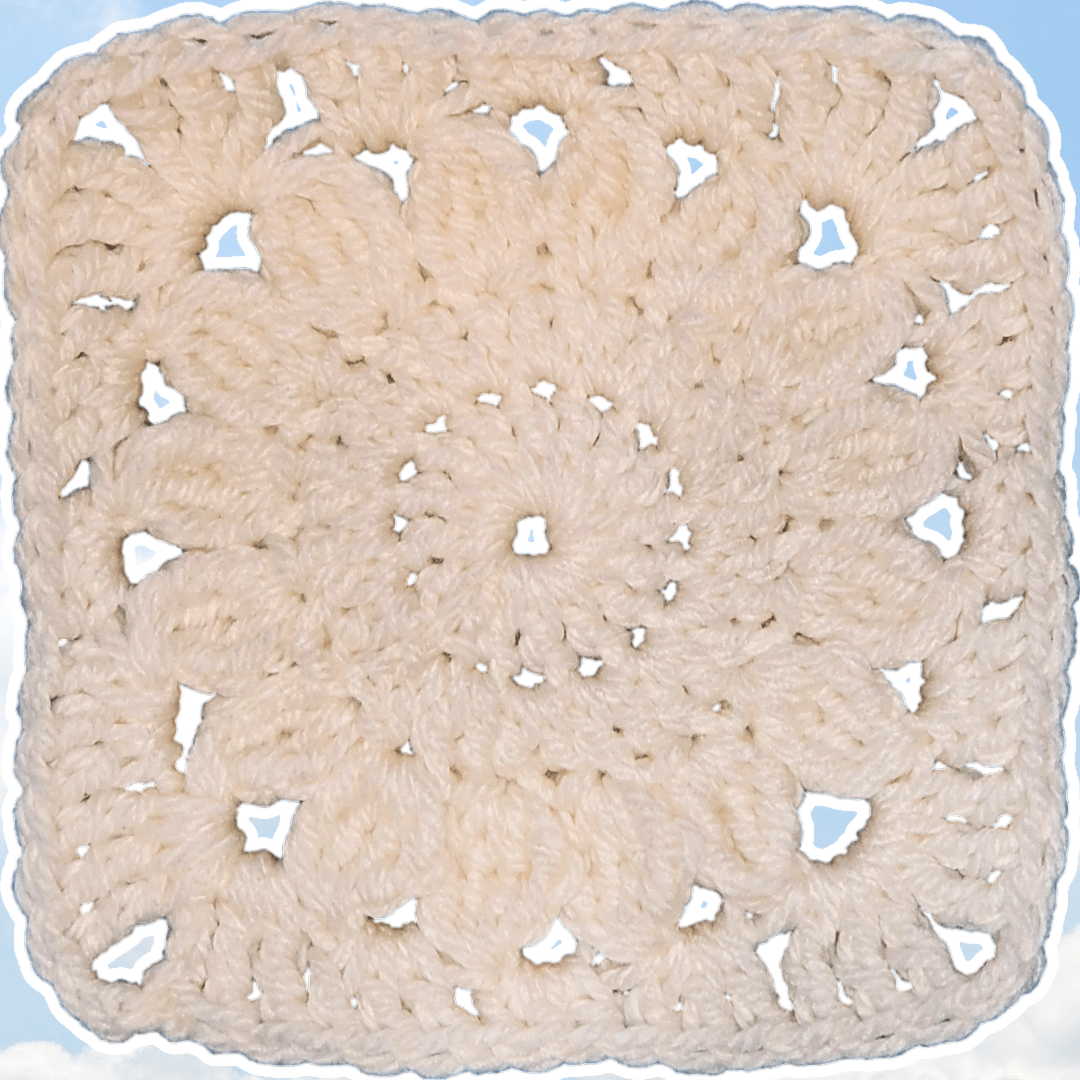
Crochet a Stunning One-Color Sunflower Granny Square: A Beginner-Friendly Tutorial
Have you ever wanted to create something beautiful and unique with your own two hands? Crochet is the perfect craft to do just that! In this tutorial, I'll guide you step-by-step through making a gorgeous one-color sunflower granny square. It's inspired by the classic sunflower design but simplified for an easy and enjoyable project, especially for beginners. Plus, you'll only have one pesky end to sew in when you're finished!
Let's get started and transform simple yarn into a stunning piece of art! You can also follow along with the written pattern available on my website, Secret Yarnery. And don't worry if you're new to patterns; it's written in plain English, just like I'm explaining it here.
What You'll Need to Get Started
Before we dive in, let's gather our supplies. For this project, I recommend:
- Worsted weight acrylic yarn (size 4): This is a versatile and readily available yarn, but feel free to experiment with other yarn weights and fibers to achieve different textures and effects.
- 6 mm crochet hook: This hook size is ideal for worsted weight yarn, creating a balanced and even stitch.
- Yarn needle: This is essential for weaving in those pesky ends, giving your finished granny square a clean and polished look.
- Scissors: For snipping the yarn.

Round 1: Creating the Magic Center
Every great granny square starts with a center! Here's how we'll create ours:
Making a Slip Knot
First, let's make a slip knot. There are many ways to make one, so use whichever method you're most comfortable with. The tail doesn't need to be very long – a couple of inches will do.
Chain 3 (or Magic Ring!)
Next, chain three. This will form the base for our first round. Alternatively, if you're familiar with the magic ring technique, you can use that instead for an even more seamless center.
Forming the Ring
Now, go back into that very first chain you made. Make sure your yarn tail is following along your work, and hold a small "u-shape" open underneath your hook. This helps with stitch placement. Slip stitch to join and form a ring.
Chain 3 and Double Crochet
Chain three again – this counts as our first double crochet. Then, work 15 double crochets into the center of the ring (using U.S. crochet terms).
Tips for Working in the Ring
If you find the space getting tight as you work your double crochets, don't worry! Simply slide the stitches back along the ring to create more room. Also, make sure you're crocheting over that yarn tail to secure it as you go.
Joining the Round
Finally, slip stitch to the top of the beginning chain three to join the round. You should now have a total of 16 stitches.

Round 2: Expanding the Circle
Let's make our circle bigger in the next round.
Chain 3 and Double Crochet in the Same Stitch
Start by chaining three – this counts as our first double crochet. Then, work one more double crochet into the same stitch as the chain three.
Two Double Crochets in Each Stitch Around
Work two double crochets into each stitch around the entire circle. It's important to pick up both the front and back loops of each stitch to create a solid fabric.
Joining the Round
Once you've worked two double crochets in every stitch, slip stitch to the top of the beginning chain three to join. This round significantly increases the stitch count, creating a larger circle that sets the stage for our sunflower petals.
Pro Tip
If your circle starts to ruffle, double-check that you've indeed worked two double crochets in each stitch. On the other hand, if it cups inward, you might need to increase your hook size or loosen your tension a bit.
Round 3: Blooming into Petals
This is where our granny square truly transforms into a sunflower!
Chain 3 and Starting the Treble Crochet Cluster
Chain three. Yarn over twice (for a treble crochet). Work a partially completed treble crochet into the same stitch as the chain three. Leave the last loop on the hook. Repeat this twice more (yarn over twice, partially completed treble crochet into the same stitch, leave the last loop on the hook). You should now have four loops on your hook.
Completing the Cluster
Yarn over and pull through all four loops on the hook to complete the cluster. Chain two.
Skipping a Stitch and Starting the Next Cluster
Skip the next stitch. In the following stitch, work four partially completed treble crochets, leaving the last loop of each on the hook (as before). You will have five loops on your hook.
Completing the Second Cluster
Yarn over and pull through all five loops on the hook. Chain two.
Repeating Around
Repeat the process of skipping a stitch, working a four-treble crochet cluster, and chaining two all the way around.
Important Note
The first skipped stitch can be a bit hidden, so pay close attention to identify it correctly.
Joining the Round
After the last petal, slip stitch to the first chain after the very first cluster (the chain two from the first petal).
Result
You should have 16 "petals" created in this round.
Troubleshooting
If you have the wrong number of petals, double-check your stitch counts and skipped stitches in this round. It's a common area for errors.
Round 4: Squaring It All Up
Time to turn our flower into a square!
Chain 1 and Slip Stitch into the First Space
Chain one. Slip stitch into the chain-two space between the petals.
Creating the First Side
Chain four (counts as the first treble crochet). Work two more treble crochets into the same space (three treble crochets total). In the next chain-two space, work three double crochets. In the next chain-two space, work three half-double crochets. In the next chain-two space, work three double crochets.
Creating the First Corner
In the next chain-two space (the corner space), work three treble crochets, chain two, and three more treble crochets (3 tr, ch 2, 3 tr).
Creating the Second Side
In the next chain-two space, work three double crochets. In the next chain-two space, work three half-double crochets. In the next chain-two space, work three double crochets.
Creating the Second Corner
In the next chain-two space (the corner space), work three treble crochets, chain two, and three more treble crochets (3 tr, ch 2, 3 tr).
Repeat for Sides and Corners
Repeat the sequence of three double crochets, three half-double crochets, three double crochets for the sides, and (3 tr, ch 2, 3 tr) for the corners around the entire square.
Finishing the Round
In the last corner space, work the corner sequence (3 tr, ch 2, 3 tr). Slip stitch to the top of the beginning chain four to join the round.
Continuing for a Larger Square (Optional)
If you want to make your granny square larger, chain one and single crochet into the top of the initial chain four to join. This positions you in the center of the corner. From there, you can chain three and continue with double crochets, or turn your work (depending on your preferred method).
Finishing and Weaving in the Ends
Almost there! Let's finish our granny square with a few final steps.
Securing the Final Stitch
Chain two. Slip stitch to the top of the chain three to join. Chain one to secure the yarn.
Cutting the Yarn
Cut the yarn, leaving a tail long enough for weaving in.
Pulling Through and Snugging
Pull the hook up and pull the yarn through the loop to secure. Snug the knot down.
Weaving in the Ends
Weave in the final yarn tail using a yarn needle. Since you crocheted over the starting tail in Round 1, it can be trimmed.
Final Touches
Trim any excess yarn, and admire your beautiful one-color sunflower granny square!
Troubleshooting Common Granny Square Problems
Sometimes, things don't go exactly as planned. Here are some common issues and how to fix them:
Granny Square is Curving or Warped
- Problem: The granny square isn't lying flat and curves or warps.
-
Solution:
- Check Tension: Make sure you maintain consistent tension throughout your work.
- Stitch Count: Double-check the stitch counts in each round to ensure accuracy.
- Hook Size: If the square consistently cups inward, try using a slightly larger hook.
Granny Square is Ruffling
- Problem: The granny square has too many stitches and is ruffling.
-
Solution:
- Stitch Count: Again, double-check those stitch counts!
- Hook Size: If it consistently ruffles, try using a slightly smaller hook.
Uneven Corners
- Problem: Corners aren't square or don't match.
-
Solution:
- Stitch Placement: Ensure the corner sequence (3 tr, ch 2, 3 tr) is worked correctly in each corner space.
- Tension: Maintain consistent tension in the corners to prevent them from pulling or distorting.
Holes in Corners
- Problem: Large gaps or holes appear in the corners.
-
Solution:
- Chain Count: Make sure you are chaining the correct number of chains in the corner (chain 2).
- Tension: Pull the yarn slightly snug when working the chain to minimize gaps.

Ideas for Using Your Flower Granny Squares
Now that you've mastered the one-color sunflower granny square, let's brainstorm some fun projects!
- Blankets and Afghans: Create a cozy and colorful blanket by joining multiple granny squares together. This is a classic and rewarding project.
- Pillows: Make decorative pillow covers using one or more granny squares. They add a personal touch to any room.
- Scarves and Shawls: Fashion a unique scarf or shawl by joining granny squares in a row or a more complex arrangement.
- Bags and Purses: Design a stylish bag or purse using granny squares as the main panels.
- Clothing: Incorporate granny squares into cardigans, vests, or even skirts for a vintage-inspired look.
- Home Decor: Frame a single granny square as art, or create a garland of granny squares for a festive touch.
Tips for Joining Granny Squares
So, you've got a stack of granny squares – now what? Here are some popular joining methods:
- The Mattress Stitch: This is a seamless and virtually invisible method for joining squares, perfect for blankets and larger projects where you want a clean look.
- The Single Crochet Join: A simple and sturdy join that creates a visible seam, adding texture and detail to your project.
- The Slip Stitch Join: A quick and easy join that creates a flat seam, ideal for lightweight projects.
- Join-as-You-Go Method: This clever technique allows you to join the squares as you crochet the final round, saving time and effort.
When choosing your joining method, consider the desired look and feel of the finished project. Experiment with different yarn colors for the joining to create interesting effects! Using the same yarn gives a cohesive look, or experiment with contrasting colors for a bolder statement.
Customizing Your Granny Squares
Want to make your granny squares even more unique? Here are some ideas:
- Yarn Colors: Experiment with different color combinations to create unique and personalized granny squares.
- Yarn Textures: Use different yarn textures (e.g., smooth, fuzzy, variegated) to add depth and interest.
- Border Options: Add a decorative border to your granny square to enhance its appearance.
- Size Variations: Adjust the number of rounds to create granny squares of different sizes.
Care Instructions for Your Crochet Project
To keep your beautiful crochet creation looking its best:
- Washing: Hand wash or machine wash on a gentle cycle with cold water.
- Drying: Lay flat to dry to prevent stretching or shrinking.
- Storage: Store in a cool, dry place away from direct sunlight.
Other Free Crochet Patterns from Secret Yarnery
Looking for more crochet inspiration? Check out all the free crochet patterns I have available on my website. You'll find patterns for everything from adorable amigurumi to cozy blankets and stylish accessories. There's something for everyone!
You can also find Granny Squares crochet patterns at Secret Yarnery.

Right and Left Handed Video Tutorials
Need a little extra help? I've got you covered with both right-handed and left-handed video tutorials for this pattern!
- Right-Handed Tutorial: https://youtu.be/6Y1e2UpWoGQ
- Left-Handed Tutorial: https://youtu.be/Bd0XSraoi_o
Another Granny Square Pattern
Want to try another fun granny square pattern? Check out my tutorial for a Colorful Sunflower Granny Square!
Crochet Must Haves
Here are some of my favorite tools and accessories for crochet:
Note: As an Amazon Associate I earn from qualifying purchases.
- Bags - Yarn Ball Storage ➡️ https://amzn.to/36cbr3A
- Bags - Large UFO Zipper Pouches ➡️ https://amzn.to/3uqgQ0n
- Bags - Regular UFO Zipper Pouches ➡️ https://amzn.to/3DYxvLB
- Ball Winder ➡️ https://amzn.to/3Jzd4Y0
- Baskets - WIPS ➡️ https://amzn.to/3tQK9te
- Color Wheel ➡️ https://amzn.to/3hJN3IG
- Crochet Hooks ➡️ https://amzn.to/2p5etkC
- Foot Warmer ➡️ https://amzn.to/3RaMtn0
- Measuring Tape ➡️ https://amzn.to/3JviyD8
- Neck Light ➡️ https://amzn.to/2UYNrW4
- Needle Threaders ➡️ https://amzn.to/3zdCK7S
- Needles - Blunt Tip ➡️ https://amzn.to/2MRffKP
- Needles - Sharp Tip ➡️ https://amzn.to/3qEGZWk
- Scissors ➡️ https://amzn.to/3EC1CHy
- Stitch Markers ➡️ https://amzn.to/3GdGCYg
- Tea - Kericho Gold ➡️ https://amzn.to/3zrTcB8
- Tins - Accessories ➡️ https://amzn.to/3EN6nxT
- Yarn ➡️ http://bit.ly/39EZwZX
Final Thoughts
I hope you enjoyed this tutorial and are now armed with the knowledge to create your own stunning one-color sunflower granny squares! Crochet is such a rewarding craft, and I'm thrilled to share my passion with you. Remember to experiment with colors, textures, and different joining methods to truly make your projects your own. Happy crocheting!
If you're a beginner crocheter, don't forget to check out easy crochet projects at Secret Yarnery.
FAQs
1. Can I use a different yarn weight for this project?
Yes, you can! While the tutorial recommends worsted weight acrylic yarn (size 4), you can experiment with other yarn weights or fibers. Keep in mind, using thinner or thicker yarn will change the size of your granny square, so adjust your hook size accordingly.
2. How can I make my granny square larger?
To make your granny square larger, continue adding rounds. After Round 4, repeat the square sequence of sides and corners: work three double crochets for sides and (3 treble crochets, chain 2, 3 treble crochets) for corners. This method allows you to expand the size until you reach your desired dimensions.
3. My square is curving or warping — what am I doing wrong?
This is a common issue with tension or stitch counts:
- If it’s cupping inward, your tension may be tight. Try loosening your stitches or using a larger hook.
- If it’s ruffling, there might be extra stitches. Be sure you’re following the stitch count precisely for each round.
4. Do I have to use a magic ring for the center?
No, the tutorial provides an alternative method by chaining three and slip-stitching to form a ring. Use whichever technique feels more comfortable or familiar to you.
5. Can I make this pattern with multiple colors?
Yes, even though this tutorial is for a one-color granny square, you can add different colors to bring vibrancy and dimension. Change colors between rounds or even use a variegated yarn for a multicolored effect.
6. How do I join multiple granny squares together?
You can use several joining methods:
- Mattress Stitch: Seamless and invisible.
- Single Crochet Join: Adds a visible border.
- Slip Stitch Join: Creates a flat finish.
- Join-As-You-Go: Connects squares while crocheting the final round.
Choose the method that suits the project and desired look.
7. What are some good uses for a sunflower granny square?
This granny square can be used in multiple ways:
- Blankets
- Decorative pillows
- Scarves
- Tote bags
- Table runners or coasters
- Wall art
Let your creativity run wild!
8. How do I fix uneven petals or sides?
Double-check your stitch counts in each round. Pay attention to:
- Consistent tension.
- Skipped stitches (especially Round 3).
- Proper placement of corner stitches in Round 4 for a balanced square shape.
![]()
Christa Patel is the passionate crocheter and creative mind behind Secret Yarnery, a haven for crochet enthusiasts worldwide. With over a decade of experience, Christa specializes in designing easy-to-follow patterns and beginner-friendly tutorials to inspire creativity and confidence in crafters of all levels. Her love for yarn and teaching shines through her engaging videos, blog posts, and written guides.
At Secret Yarnery, Christa shares a treasure trove of crochet tips, resources, and patterns that make crocheting accessible and enjoyable for everyone. Whether you're crafting your first granny square or tackling advanced crochet techniques, Christa’s warm teaching style and detailed instructions ensure your journey is rewarding and fun.
When she’s not designing new patterns, Christa enjoys spending time surrounded by her family, her yarn stash, and a good cup of tea. Her mission is to help people experience the joy of making something beautiful with their own hands, one stitch at a time.
Visit Christa at Secret Yarnery for even more crochet inspiration, tutorials, and free patterns. Connect with her through YouTube, where her community of crafters continues to grow. Happy crocheting!
About the Author
With a passion for crafting easy, beginner-friendly tutorials and patterns, Christa inspires crafters of all skill levels to unleash their creativity worldwide. She encourages yarn lovers to connect, create, and crochet a world filled with beautiful handmade treasures!
EASY One Color Sunflower Granny Square Tutorial for Beginners