How to Join Daisy Granny Squares Using the Easy Join-As-You-Go Method
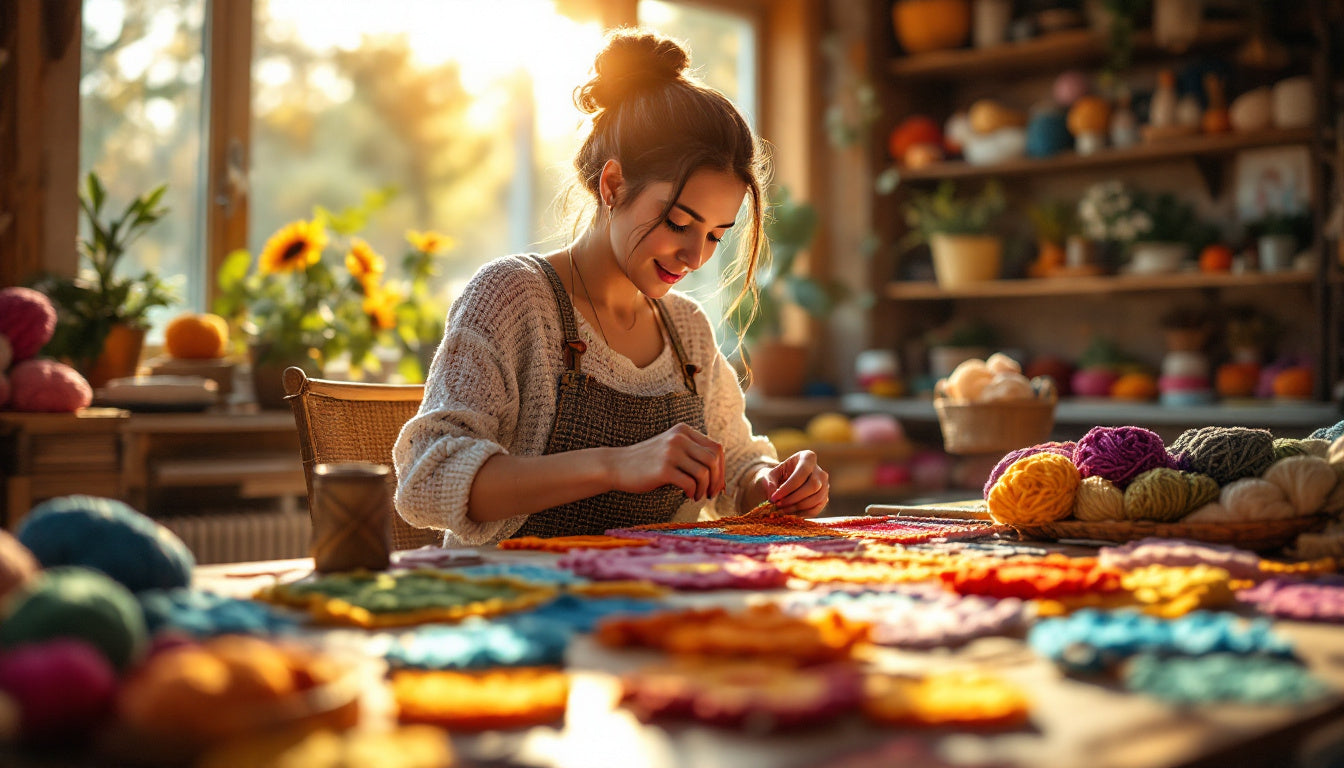
Creating a crochet project like a blanket, table runner, or scarf out of Daisy Granny Squares is already rewarding, but the process becomes even more satisfying when you know how to seamlessly join your squares as you go. The Join-As-You-Go (JAYG) method allows you to eliminate the need for sewing squares together later, resulting in a polished and cohesive look with less hassle. In this tutorial, I’ll guide you through every step of joining your Daisy Granny Squares effortlessly.
Why Use the Join-As-You-Go Method?
The JAYG method is perfect for those who want to save time while achieving a clean finish. It reduces the number of stitches needed to weave later, keeps your edges connected as you work, and creates a seamless grid-like effect that enhances the overall design. It's an ideal method for beginners and seasoned crocheters alike!
Want inspiration for your next project? Check out this NEW Daisy Granny Square pattern for a fresh take on the classic square.
Materials You’ll Need
Before starting, gather the following materials. It’s essential to use tools that complement the yarn weight you’re working with.
- Crochet hook: I used a 5mm hook for this tutorial, but choose a size that matches your yarn.
- Joining yarn: I used an oatmeal-colored yarn for joining to give contrast and consistency.
- Darning needle: For weaving in the tails neatly.
- Scissors: To trim the yarn after joining.
Need help choosing the perfect hook or yarn? Explore Secret Yarnery’s collection of granny square crochet patterns.

Steps to Join Daisy Granny Squares
Preparing Your First Square
Begin by edging one of your Daisy Granny Squares. Before doing so:
- Make a slip knot with the joining yarn and attach it to a corner of the square.
- Work your first shell (a group of 3 double crochets) in the corner:
- Chain 3 (this counts as 1 double crochet).
- Add 2 more double crochets into the same corner space.
You’re now ready to proceed with working all the way around your square using the established granny square pattern. For each space along the sides, create a shell of 3 double crochets followed by a chain 1. In the corners, add another shell by chaining 3 after the first set of double crochets.
Need a step-by-step walkthrough? Learn how to crochet a Daisy Granny Square Blanket here.
Joining the Second Square
After completing the first square, it’s time to attach additional squares using the JAYG method.
Completing One Side of the Second Square
- Repeat the process to edge one side of your new Daisy Granny Square. Work 3 double crochets per space and chain 1 in between shells.
- When you reach the first corner, it’s time to join.
Joining the First Corner
To connect the corners:
- Slip stitch into the corresponding corner space of the finished first square.
- Chain 1 and finish the corner by completing a shell in the square you’re working on.
Slip stitches act as replacements for the chain spaces, locking the two squares together in a neat and seamless manner.

Working Along the Joined Side
As you work along the remaining side:
- Crochet a shell in the current square.
- Instead of chaining 1, insert your hook into the adjacent space of the finished square, yarn over, and slip stitch to join.
- Continue this alternating process of shells and slip stitches until you reach the next corner.
You can replace the slip stitch with a single crochet if you want a looser join. Experiment with both methods to see which one works best for your project.
Joining the Third Square
Adding the third square is slightly different because you'll be joining two sides instead of one. Follow these steps:
Align the Third Square
Position the third square to ensure one side aligns with the previous two squares.
Joining the First Side
- Work along the first side as described earlier, joining with slip stitches into the closest square.
- At the corner, connect diagonally to the opposite square.
This diagonal join creates an “X” shape, preventing any gaps in the center where all the squares meet.
Completing the Third Side Join
After the diagonal join:
- Turn the work and complete the remaining corner.
- Continue working shells along the unconnected sides of the square until it’s fully joined to both adjacent squares.
Find useful crochet techniques and join-as-you-go patterns in this Continuous Join-As-You-Go Blanket guide.
Adding the Fourth Square
For the final square, follow the same steps as the third. Begin by edging one side of the square and join it to the other squares diagonally at the corners. Work across each side, linking them seamlessly with slip stitches.
Remember to secure your yarn tails at the end by weaving them neatly with a darning needle. This ensures your finished project looks polished and ready for use.
Tips for Joining Daisy Granny Squares
- Keep your tension consistent: Tightly worked stitches can cause puckering, while loose stitches may create gaps.
- Use stitch markers: These can help align corners and ensure that joins are visually balanced.
- Weave in the ends securely: Cut the tails only after weaving to prevent unraveling during use.
Discover more joining techniques and tutorials on our Join-As-You-Go collection.
Troubleshooting Common Issues
Uneven Tension
If your joins look wavy, adjust your tension. It helps to pause, lay your squares flat, and check your work as you go.
Gaps in the Corners
Diagonal joins can occasionally appear loose. If this happens, try inserting an additional stitch to tighten the crossing point.
Crooked Alignment
Before starting each join, lay out your squares and align edges carefully. Recheck spacing as you work.
For even more inspiration, browse Easy Crochet Daisy Granny Squares patterns and elevate your next project.
Expanding Your Join-As-You-Go Skills
The JAYG technique isn’t limited to just Daisy Granny Squares. Use it to create various projects like colorful throws, scarves, and baby blankets. This method eliminates the frustration of sewing individual pieces, allowing you to enjoy the creative process.
Joining Daisy Granny Squares with the JAYG method is a game-changer for crochet enthusiasts. It saves time, improves the project’s aesthetics, and keeps your work looking neat from start to finish. Whether you’re working on your first granny square blanket or a more intricate design, this method will level up your crochet game.
Looking for more tutorials? Explore The Secret Yarnery for an endless library of ideas. Have fun, and happy crocheting!
Left-Handed?
Frequently Asked Questions
1. What is the Join-As-You-Go (JAYG) method?
The Join-As-You-Go method is a technique that allows you to connect granny squares while crocheting rather than sewing them together after all the squares are complete. It results in seamless joins and saves time.
2. Do I need to block the Daisy Granny Squares before joining?
Blocking your squares helps ensure uniform size and shape, which makes joining cleaner and easier. While it's not mandatory, it is highly recommended for a polished finish.
3. What type of yarn works best for this method?
Any yarn suitable for granny squares can be used, but a medium-weight or worsted-weight yarn is ideal for most projects. Ensure the joining yarn complements or contrasts the square colors depending on your desired look.
4. Can I use the JAYG method for other granny square patterns?
Yes, the JAYG method is versatile and works on most granny square patterns, provided they have edges where the join can happen. It’s commonly used for blankets, scarves, and table runners.
5. What can I do if my corners look loose?
If corners appear loose after joining, you can insert an extra slip stitch or tighter single crochet for better tension. Adjusting your overall stitch tension may also help.
6. Is it okay to use slip stitches instead of single crochet for joining?
Yes, both slip stitches and single crochet can be used to join squares. Slip stitches create a tighter join, while single crochet provides a slightly more flexible and visible join. Choose based on your project’s needs.
7. Do I always have to join diagonally at corners?
Diagonal joins are necessary when assembling squares in rows or grids to connect all the corners cleanly. They help avoid gaps and add structural integrity to the project.
8. What happens if my squares don’t align perfectly?
If squares don’t align, check their sizes. You may need to redo parts of the edging or block the squares again. Adjustments can usually fix minor misalignments.
9. How many squares should I plan for a specific project?
The number of squares depends on the size of your project. For example:
- Blanket: 36 (6x6 layout) or more, depending on desired size.
- Scarf: 6–12 squares, joined in a row.
- Table runner: Typically 12–20 squares, depending on the length.
10. Can I mix Daisy Granny Squares with other designs?
Absolutely. Combining Daisy Granny Squares with basic granny squares or other patterns creates a visually interesting project. Keep the same size across all squares for a uniform look.
11. How do I secure loose ends effectively?
To secure loose ends, weave them back and forth through the yarn using a darning needle. Trim excess yarn only after ensuring the tails are firmly woven.
12. Can I adapt this method to a continuous joining approach?
Yes, you can transition to a Continuous Join-As-You-Go method by using a single continuous yarn strand for all joins. This technique is great for reducing ends to weave but requires careful planning to maintain alignment.
Got more questions or tips for JAYG? Share them and explore more crochet ideas in our Join-As-You-Go collection!
+![]()
Christa Patel is a passionate crochet artist and designer with years of experience in creating stunning handmade projects. She is the creative force behind The Secret Yarnery, where she shares detailed tutorials, patterns, and tips to inspire crocheters worldwide. Known for her accessible teaching style, Christa has helped thousands of beginners and experienced crocheters elevate their skills.
Her expertise shines through her innovative designs, like the Daisy Granny Squares, which have become a favorite among crochet enthusiasts. Christa’s dedication to the crochet craft is evident in her detailed guides, vibrant patterns, and helpful resources that make even complex methods like Join-As-You-Go (JAYG) easy to master.
Discover more of Christa's unique creations, crochet patterns, and tutorials on The Secret Yarnery, where she aims to spread creativity, joy, and a love for crochet. Follow her journey and stay inspired with her expert tips, project ideas, and community-driven inspiration!
About the Author
With a passion for crafting easy, beginner-friendly tutorials and patterns, Christa inspires crafters of all skill levels to unleash their creativity worldwide. She encourages yarn lovers to connect, create, and crochet a world filled with beautiful handmade treasures!
How to Join Daisy Granny Squares Using the Easy Join-As-You-Go Method