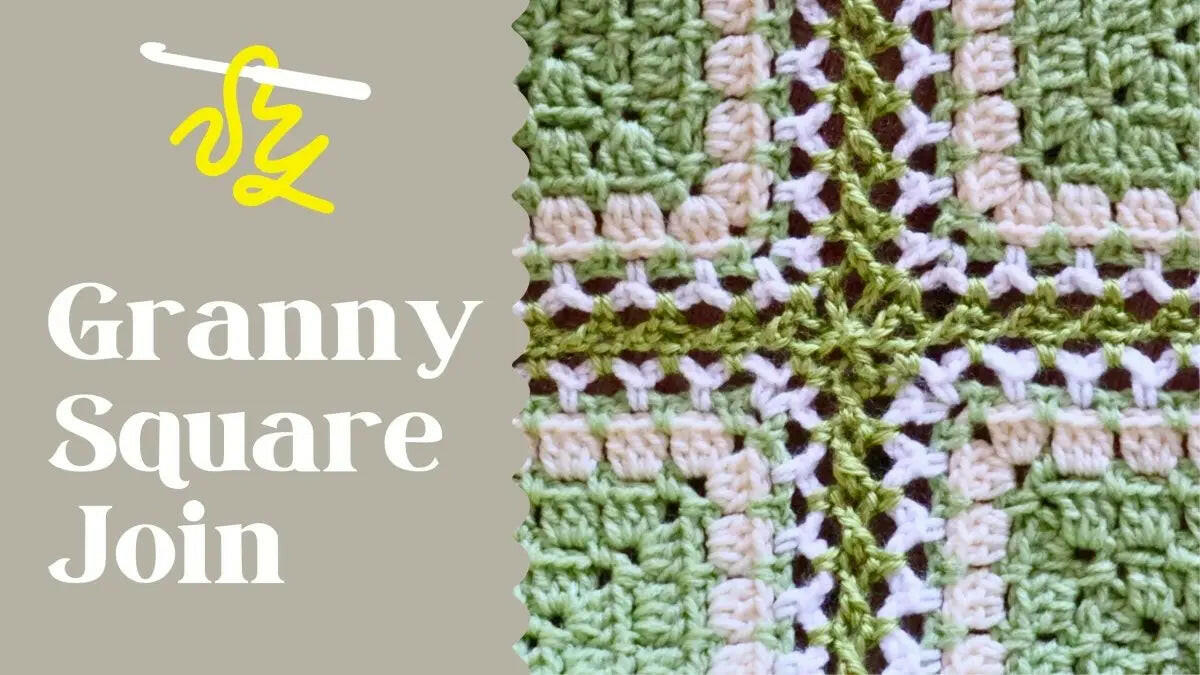
Master the Double Flat Braid Join: A Step-by-Step Granny Square Tutorial
Have you ever gazed upon a Granny Square blanket and wondered how those squares are joined together so seamlessly? The secret might just be the Double Flat Braid Join! This technique creates a beautiful, lacy, and sturdy connection between your crochet squares, elevating your project from simple to stunning.
The Double Flat Braid Join isn't just about looks; it also adds a unique dimension to your work. It introduces a decorative element while adding approximately 2 inches (5 cm) between each square, creating a distinctive texture and design. Whether you're a seasoned crocheter or just starting out, this method is easy to learn and will take your granny square game to the next level.
For those who prefer to learn by watching, I have a fantastic tutorial that walks you through each step. Right-handed? This link is perfect for you! Left-handed crocheters, don't worry, I've got you covered too! Check out the left-handed tutorial here: https://youtu.be/dqFEJcgAMW0.
Want more crochet tips and tricks? Make sure to subscribe to my channel for regular updates and inspiration! And if you prefer to follow along with a written pattern, you can find all my patterns on secretyarnery.com. The best part? My patterns are written in plain English, making them super easy to understand.

Materials You'll Need
Before we dive in, let's gather our materials. Here's what you'll need to master the Double Flat Braid Join:
- Granny squares (any type will work!)
- In the tutorial, I used these gorgeous flower granny squares.
- Yarn
- The same yarn you used for your granny squares.
- A joining color (something that complements or contrasts nicely).
- Crochet hook
- Use the same size hook you used for your granny squares.
- Yarn needle
- For weaving in those pesky ends!
- Scissors
Preparing Your Granny Squares
Edging the First Granny Square
First, we need to prepare our granny squares for joining. This involves adding a loop edge around each square.
- Turn your work: Find a corner where you haven't attached any yarn yet.
- Join your yarn: Pop your hook into that fresh corner space. Grab your yarn (leaving a tail long enough to sew in later), bring it through, and slip stitch to join.
- Chain two.
- Work around the square: In each space, work one single crochet, chain two.
- When you get to a corner: Work one single crochet, chain three, and another single crochet into the same corner space.
- Finishing the edge: Once you're back where you started, work one single crochet into that corner space, chain three. Slip stitch to join in between the legs of the very first stitch you made. Chain one to secure your yarn, cut your yarn leaving a long tail for sewing, and pull your yarn through to secure.

Adding the First Loops to the Second Granny Square
Now, let's add the first set of loops to the second granny square.
- Join your yarn: Pop your hook into any corner space and attach your yarn with a slip stitch.
- Chain four.
- Work around the square: In each space, work one single crochet, chain four.
- When you get to a corner: Work one single crochet, chain four, and another single crochet into the same corner space.
- Finishing the loop edge: Once you're back where you started, single crochet into that same corner space, chain four. Slip stitch to join right into the legs of that first slip stitch you made. Chain one to secure your yarn, cut your yarn leaving a long tail for sewing, and pull your yarn through to secure.
- Tip: To make that leg look perfect, sew in the first tail over the stitch to pinch it shut before sewing in the rest of the tail on the back side.
Sewing in the Tails
Before we start joining, it's super important to sew in all those tails! This will save you a headache later and give your finished project a clean look. Use your yarn needle to weave the tails securely into the back of your work.

Joining Your Squares Together: The Double Flat Braid
Arranging Your Squares
First, lay out your granny squares in the order you want them in your finished blanket or project. Once you're happy with the arrangement, stack each row to keep track of the joining order.
Edging the First Block
- Insert your hook into any corner space.
- Loop your joining color yarn on your hook and slip stitch to join, leaving a tail.
- Chain four.
- Work around the block: one single crochet and chain four into each loop.
- When you get to a corner: work one single crochet, chain six, and another single crochet into the same corner space.
- Finishing the edge: Slip stitch to join and secure the yarn, leaving a tail.
Joining on One Side
This is where the magic happens! Here's how to join your squares using the Double Flat Braid method.
- Complete three sides: Work the edging on three sides of your second block.
- Prepare the last corner: On the last corner, work one single crochet, chain three.
- Pull up a larger loop: Take your hook out.
- Insert your hook: Into the corner loop of the finished block.
- Put your yarn back on your hook and bring it through.
- Finish the corner: Chain three, single crochet to finish off the corner.
- Chain two, pull up a larger loop, hook out, and insert the hook into the next loop of the finished block.
- Yarn back on your hook, bring it through, chain two.
- Continue this pattern along the side: single crochet, chain two, pull up a loop, hook out, insert hook into the next loop of the finished block, yarn through, chain two.
- Tip: Taking the hook out each time creates that lovely twisted braid look!
Completing the Corner
- After the last chain two, single crochet into the corner space.
- Chain three, loop up, hook out, insert hook into the corner loop of the finished block, yarn through, chain three.
- Slip stitch to join: Chain one, cut yarn, and secure.

Joining the Top Row
- Position the first block: Above in your work area.
- Single crochet into the corner space, chain three.
- Pull up a bigger loop, hook out, and join kitty corner into the space of the block across from where you're joining.
- Chain three, single crochet into the same corner space.
- Chain two, pull up a bigger loop, and work into the first loop.
- Continue as before: single crochet, chain two, loop up, hook out, yarn through, chain two.
Joining on Two Sides
- Complete two sides of the block as before.
- Start joining kitty corner as described above.
- Important: Remember that the two spaces count as one!
- Continue joining along the side, remembering to join kitty corner in the corner.
You can explore other crochet patterns on my website too.

Edging the Entire Project
Once all your squares are joined, we need to finish off the edges to give it a polished look.
Round One
- Join your yarn: Into any loop (not a join).
- Chain three (counts as chain four).
- Work around the edge: Single crochet, chain four into each loop.
- Joins: Single crochet into each side of the join.
- Corners: Single crochet, chain six, single crochet.
Round Two
- Mirror the previous round: Using a different yarn color, follow the same steps as Round One.
- Single crochet, chain four into each space.
- Corners: Single crochet, chain four, single crochet.
Round Three and Four
- Use another yarn color
- Chain two, single crochet into each space around the blanket.
- Corners: single crochet, chain three, single crochet.
- For the final round: single crochet, chain two into each space. Chain two, single crochet into the space.
- Corners: two single crochets, chain one, two single crochets.
Considering trying out some beginner granny squares for your next project.
Finishing Touches
The Invisible Join
To finish off your project seamlessly, let's use the invisible join.
- Cut the yarn and pull the hook through the last stitch.
- Thread the yarn needle and put the needle under the two strands of the stitch.
- Put the needle back down where the yarn came from.
- Pull snug.

Sewing in the Remaining Tails
Sew in all the remaining tails to complete your project.
Now your crochet, granny squares project is complete! I hope you enjoyed this tutorial as much as I did.
Resources and Further Learning
Here are some handy resources and ways to support The Secret Yarnery:
- Written pattern: https://bit.ly/4gBDeZK
- Buy me a coffee: https://ko-fi.com/secretyarnery
- Join my group: https://bit.ly/44UC1bH
- Newsletter: https://bit.ly/3ssa0tn
- Left-handed tutorials: https://bit.ly/3UWNmoJ
- Behind-the-scenes content: https://bit.ly/3V104kL
Stay hooked!
Left Handed?
FAQs
1. What is the Double Flat Braid Join?
The Double Flat Braid Join is a crochet joining technique that connects granny squares with a decorative, braided effect. It creates open, lacy spaces between squares and adds a polished look to your project. It also adds approximately 2 inches (5 cm) of spacing between each square for a distinct texture.
2. What yarn works best for the Double Flat Braid Join?
Use the same type of yarn you used to create your granny squares. For the joining color, pick something that either complements or contrasts the squares to emphasize the braided effect.
3. Can I use this join for other types of crochet squares?
Yes! The Double Flat Braid Join is versatile and works with various crochet squares or motifs, as long as the edges are prepared correctly with loop stitches before joining.
4. I’m left-handed. Can I still follow the tutorial?
Absolutely! There’s a dedicated left-handed video tutorial here to guide you step by step.
5. Does this joining method work for beginner crocheters?
Yes, it’s beginner-friendly! While the technique may seem complex at first, the step-by-step instructions in the tutorial simplify the process. Work slowly, and don’t hesitate to pause or rewind the video.
6. Do I need to block the granny squares first?
Blocking is optional. However, blocking your granny squares ensures a more professional and even finish, making the joining process smoother.
7. How do I prevent tangling while joining multiple squares?
Keep the yarn for each row organized. Stack your squares in order and work one row at a time to avoid confusion. Practice sewing in tails as you go to reduce tangles.
8. Will this join make my project too loose?
Not at all. While the braid adds an open lacy look, it’s sturdy enough to hold the squares together securely. Be sure to tighten your stitches properly.
9. What size crochet hook should I use?
Use the same size hook you used to crochet your granny squares. This ensures consistency and prevents puckering or stretching at the joins.
10. How can I finish the edges neatly?
After joining all the squares, edge your project with several rounds of crochet stitches. Instructions for detailed edging can be found in the “Edging the Entire Project” section of the tutorial.
11. What’s the best way to handle loose ends?
Sew in all loose ends using a yarn needle. Be thorough when weaving to prevent ends from coming loose during regular use or washing.
12. Are there other projects where I can use this method?
Yes! The Double Flat Braid Join isn’t limited to blankets. Use it for bags, shawls, table runners, scarves, or any multi-piece crochet projects where you want a decorative connection.
![]()
Christa Patel is a passionate crocheter, designer, and the creative force behind The Secret Yarnery. With years of experience, Christa specializes in creating accessible and beginner-friendly crochet patterns and tutorials. Her mission is to make crochet easy and fun for everyone, whether you're picking up a hook for the first time or you're a seasoned pro.
Christa's carefully crafted videos and patterns are known for their clarity, warmth, and simplicity. She breaks down complex techniques like the Double Flat Braid Join into easy-to-follow steps to bring out the best in your projects. Her love for crochet is matched only by her enthusiasm for teaching others to explore their creativity.
When she's not crocheting or filming tutorials for her growing community, Christa enjoys connecting with fellow crafters through her YouTube channel and website. She also shares exclusive behind-the-scenes peeks, tips, and inspiration to help everyone stay hooked on their crochet journey.
Discover more from Christa by visiting The Secret Yarnery or subscribing to her channel for new patterns, tutorials, and crochet inspiration. With Christa, you’ll always find support, creativity, and motivation to take your skills to the next level!
About the Author
With a passion for crafting easy, beginner-friendly tutorials and patterns, Christa inspires crafters of all skill levels to unleash their creativity worldwide. She encourages yarn lovers to connect, create, and crochet a world filled with beautiful handmade treasures!
Master the Double Flat Braid Join: A Step-by-Step Granny Square Tutorial