Berry Biscuit Square | Secret Stitches Easy Crochet Stitch Sampler Blanket Part 1
If you love adding texture to your crochet and enjoy projects that come together block by block, you're in the right place. The Berry Biscuit Square is the debut pattern for the Secret Stitches Stitch Sampler Blanket , designed for crochet enthusiasts who want a satisfying project that's both beginner-friendly and visually interesting. Whether you’re new to textured stitches or looking for something fun to add to a blanket, this square brings together double crochets and popcorn stitches for a playful result. Join me as I walk through every step, from picking out the right yarn to finishing off your last stitch.
Materials Needed for the Berry Biscuit Square
Getting ready with the right supplies from the start makes crafting this square smooth and enjoyable.
Yarn:
- I use Savor by Ice Yarns, a 100% acrylic yarn (200g skein, 330 meters).
- It’s a size 4 (worsted weight), which is perfect for a sturdy, textured square.
- You can find the same yarn and color in my Berry Biscuit Yarn Selection.
- Estimate 65–70 grams per square, so one skein will yield around three squares.
Tools:
- 6 mm crochet hook (even though the label suggests a 5 mm needle, a bit larger hook gives a plusher finish).
- Four stitch markers, which help keep spaces and patterns neat.
- Darning needle for weaving in ends.
- Pair of sharp scissors.
Get these tools ready, and you’ll be set up for success right from the start.

Preparing Your Workspace
Before jumping in, I always clear enough space for my supplies and pick a well-lit spot. Since you'll want to keep an eye on stitch markers (and keep those extra small tools handy), a tray or small basket keeps everything tidy. Comfy seating makes it easy to settle in, and bright lighting ensures you don't miss a stitch. My favorite way to begin is with a cup of tea by my side, ready for a relaxed crochet session.
Starting the Berry Biscuit Square - Making the Slip Knot and Foundation Chain
Let’s get our square started with a solid, neat edge:
- Make a Slip Knot: Leave a long tail (helpful for sewing later). Make the slip knot, tighten it, and slide it onto your hook.
- Chain 40: Yarn over, pull through the loop again and again until you have 40 chains. Take your time and count each one.
- Add One More Chain: This makes a total of 41. This last chain helps us keep a tidy edge as we begin row one.
- Check Your Tension: Try to keep your chains loose and even; this will help with smooth edges later.
If you prefer to follow a step-by-step written pattern, the Berry Biscuit Square Part 1 has all the details you need.
![]()
Working into the Back Loops of the Chain
Crocheting into the “camel bumps” (the little bumps found at the back of your foundation chain) isn’t just for show—it creates a clean, professional look and a straight edge.
- Turn the chain over: Instead of working into the top loops, flip the chain and find those raised bumps on the backside.
- Count Your Bumps: Each bump stands for one chain. Work into the fourth bump for your first double crochet.
- Optional: You can use the front loops, but for a smoother finish, the camel bump is where I always start. Picture a zipper—those ridges are the camel bumps you want to slip your hook under.
This method makes for a tidier start, especially if you’re planning to join squares later.
Row 1: Building Sets of Seven Double Crochets
Now you get into the rhythm of the main stitch pattern—groups of seven double crochets separated by spaces.
- Work into the 4th Chain from Your Hook: This counts as your first double crochet, with the turning chain as your first stitch.
- Double Crochet into the Next Five Chains: This gives you a set of seven stitches.
- Chain 1, Skip the Next Chain: Move into the following chain.
- Repeat Sets of 7 Double Crochets: Chain 1, skip the next camel bump, and start your next group of seven.
- Keep the Camel Bumps Facing Up: This keeps stitches even and easy to work into.
- Finish the Row: Your last double crochet always lands in the final camel bump for a consistent edge.
Continue this chain one, skip one process until the end of the row.

Quick Tip: Adjusting Chain Tension for Better Edges
Tip: If your chain feels much tighter than your double crochets and your work is curling, try these two tricks:
- Use a larger hook (6.5 or 7 mm) for your starting chain for extra flexibility.
- If you don’t have a bigger hook, intentionally make your chains a bit looser than usual.
Lightly tug your foundation chain—if it draws tight and the row curls, loosen it up! This adjustment helps the finished square lay flat and look neat.
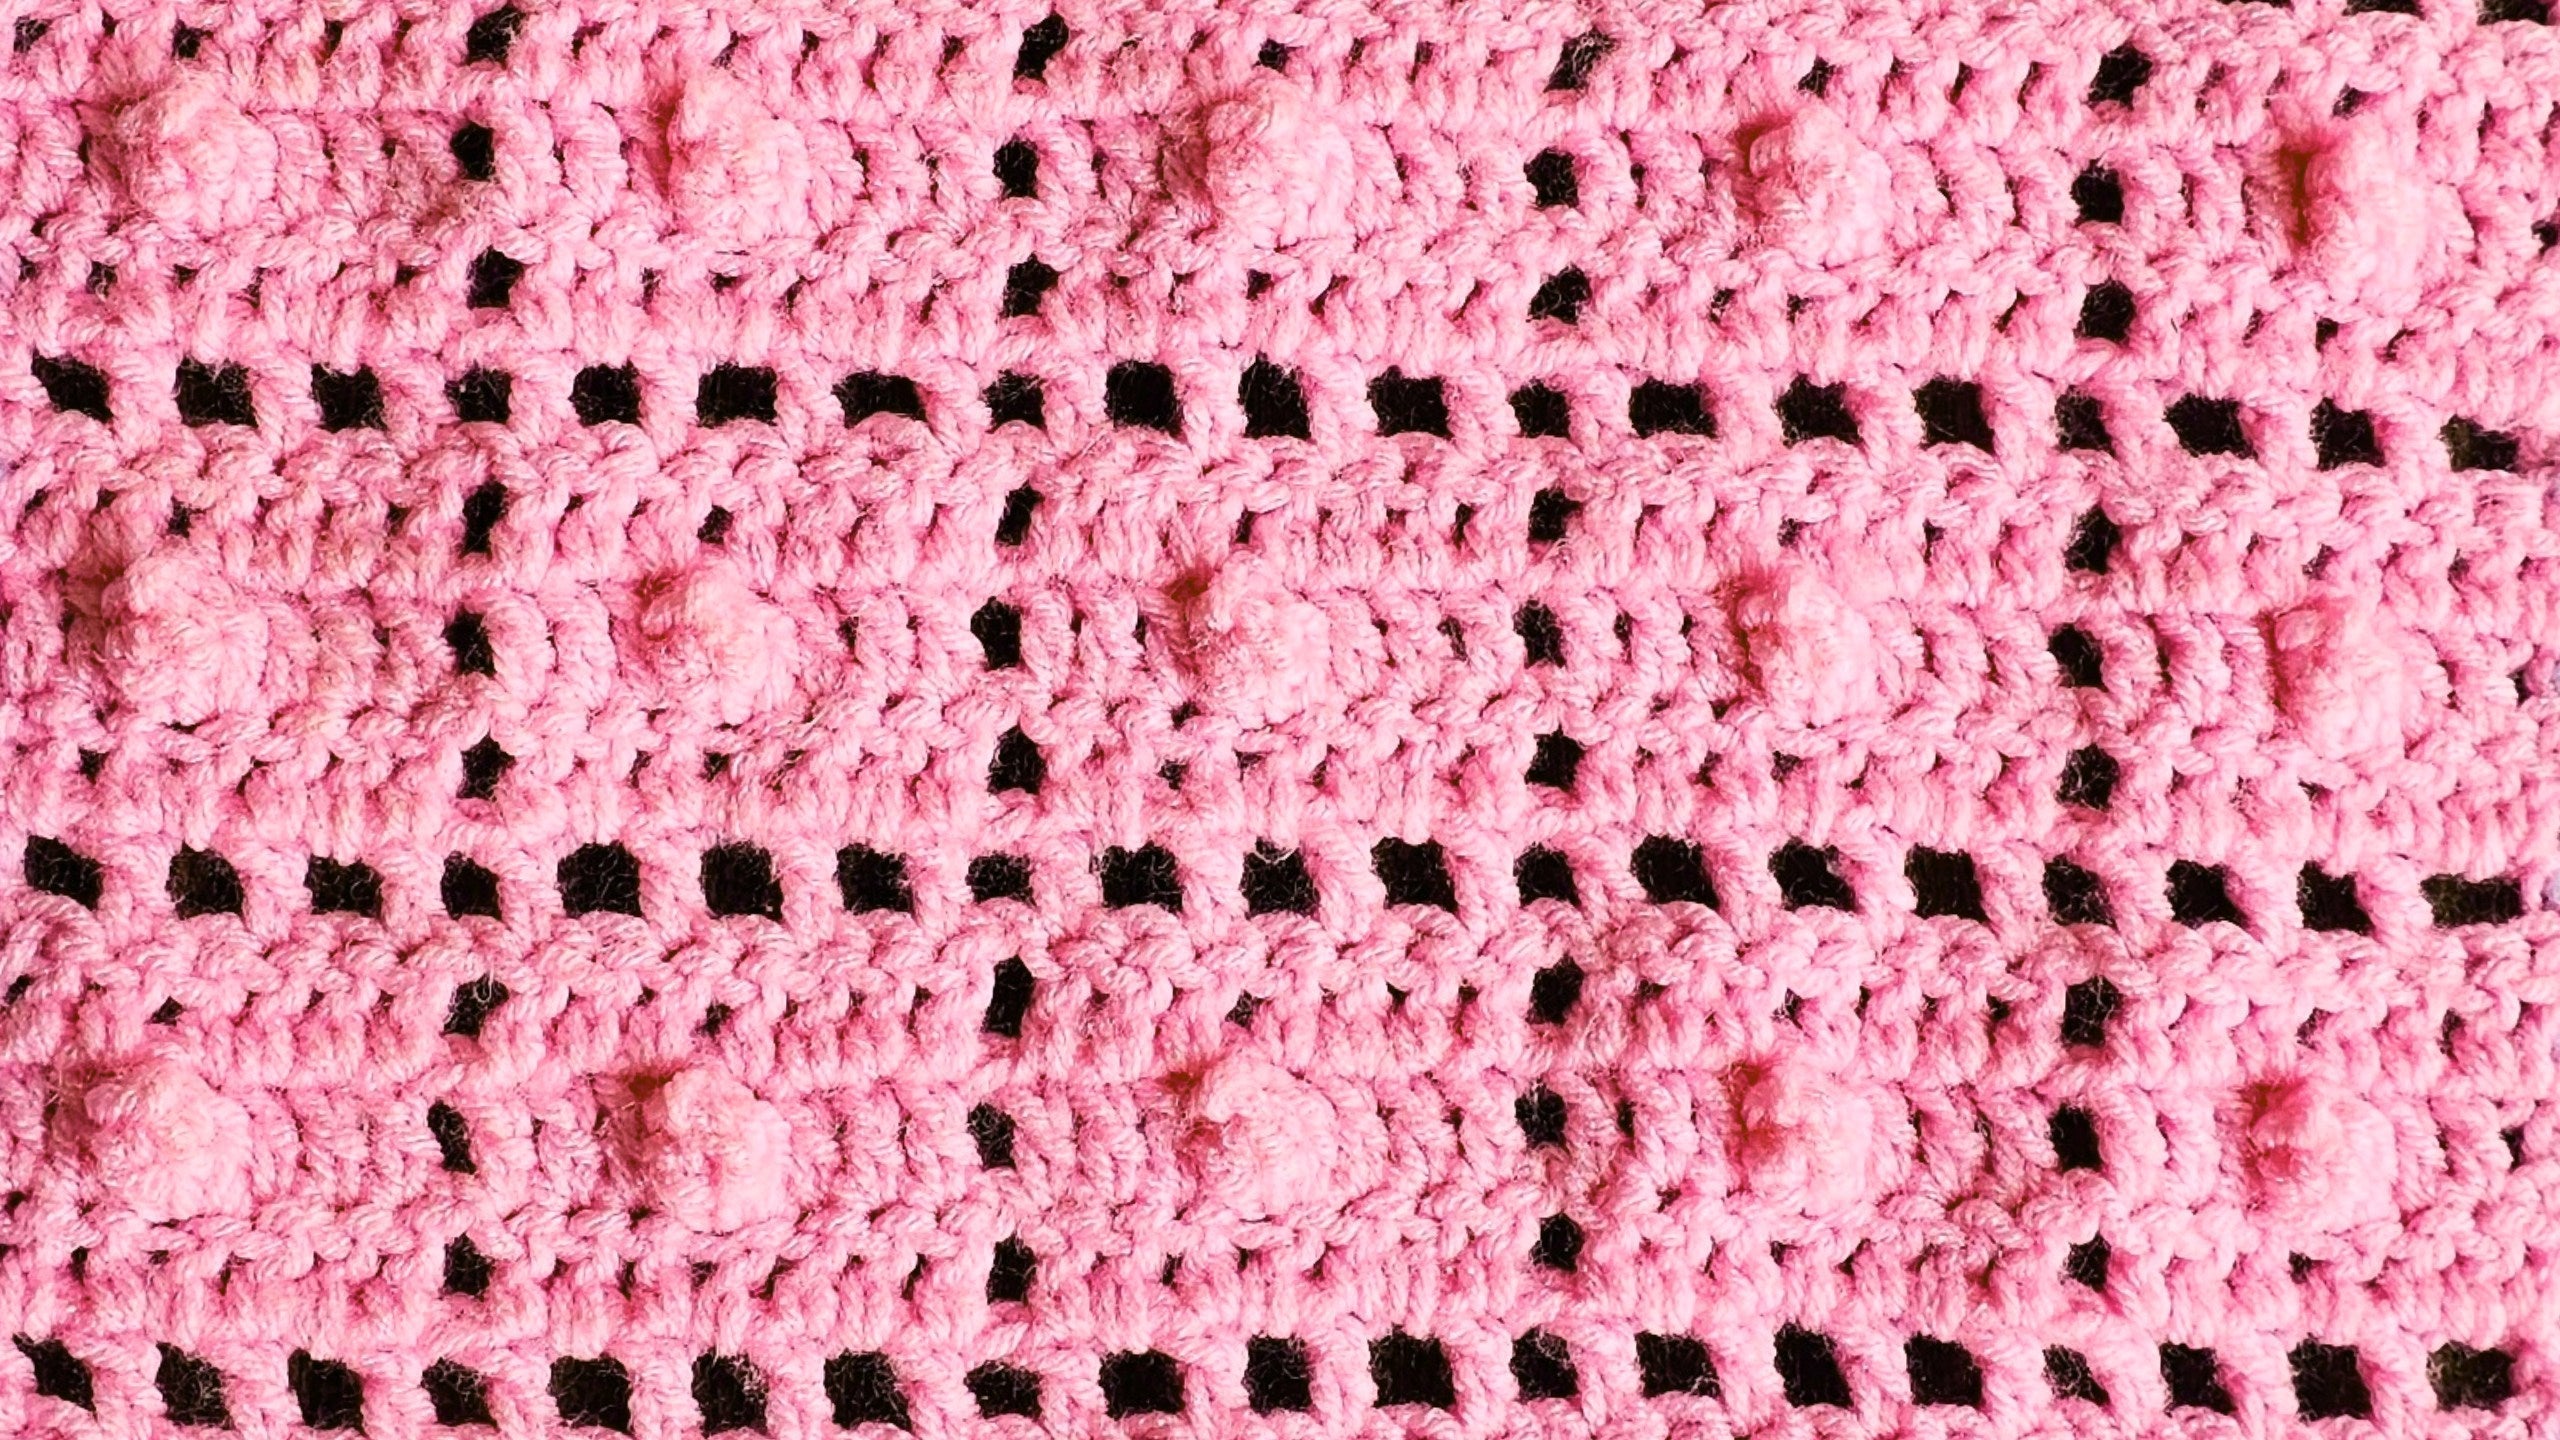
Row 2: Understanding the Biscuit Pattern and Popcorn Stitches
In row two, the Berry Biscuit Square gets its signature puffy “biscuit” texture thanks to popcorn stitches.
- Chain 2 to Turn: If you tend to crochet tightly, you can chain 3, but chain 2 produces a straighter edge for most.
- Double Crochet in Next Two Stitches: These plus the turning chain give you three double crochets at the start.
-
Popcorn Stitch:
- In the fourth stitch, make four double crochets (all into the same stitch).
- Pull up a big loop, remove your hook, reinsert it into the first of the four double crochets, grab the loose loop, pull it through, and chain one to seal the popcorn.
- Finish the Set: Double crochet in each of the next three stitches.
- Mark Your Space: Place a stitch marker into the space created after each block for easy counting as you go.
- Continue the Pattern: Chain 1, skip one, and start a new “biscuit” block—three double crochets, a popcorn stitch, and three more double crochets.
At the end of the row, don’t forget to make your last double crochets into the chain for a neat finish. Place your stitch markers in the spaces for quick reference.
![]()
Explanation of Stitch Markers and Their Importance
I find stitch markers save a ton of counting and headache, especially in rows with repeating patterns.
- Mark spaces, never individual stitches, to help when you need to “skip one” or build new blocks.
- Move markers up with each row so you’re always marking the newest space.
- Having extras means you won’t panic if one disappears under the couch! If you’re looking for good ones, I use these Amazon Stitch Markers.
Row 3: Returning to Sets of Seven with Double Crochets and Popcorns
Time to build those blocks back up:
- Chain 2 and Turn: Turning chain is your first stitch.
- Double Crochet twice more: Add stitches to start your set.
- Double Crochet into the Popcorn “Hole”: You’ll find a nice big space right at the top of each popcorn.
- Double Crochet in the Next Three Stitches: This brings you back to a set of seven.
- Chain 1, Skip the Marked Space: Continue your blocks.
- Repeat: Seven double crochets, chain 1, skip 1, start again.
- Finish into the Chain: Keep those edges firm and straight.
If you keep your chain 1 spaces and double crochet sets even, your Berry Biscuit Square will shape up nicely.

Row 4: Creating New Spaces and Realigning the Pattern
This is where the pattern gets its staggered look. Here’s how to create those offset rows:
- Chain 3 + Chain 1, then Turn: The initial chain counts as your first double crochet and a space.
- Skip the First Stitch: Work a double crochet into the second (this sets the new “space” location).
- Chain 1, Skip 1, Double Crochet in Next: Continue to skip one and double crochet across, landing right before each marked space.
- This Row Realigns the Pattern: You’re now setting up new spaces for the next repeat, adding interest and texture.
- End with a Double Crochet into the Turning Chain: Don’t work into the last stitch—jump to the chain to finish.
If you’re a visual learner, diagrams really help to see how the pattern steps up from each row.
Repeat Rows: How To Continue the Pattern
Once you reach row five, you’ll keep repeating previous row formats to build height:
- Start with row 1: work into spaces and stitches to create sets of seven double crochets between chain 1 spaces.
- Chain 1, skip 1 wherever a space appears—move your stitch markers up to keep your spot.
- Add popcorn stitches and chain 1 spaces just as you did before.
- After six rows, you’ll have a beautiful, bouncy block look with lots of texture.
- Finish on a solid row so your square holds its shape.
Keep an eye on your tension, especially at the edges. Steady stitch counts lead to a sharp-looking square.
![]()
Finishing the Berry Biscuit Square
When you’ve completed six biscuit rows (ending on the third row for a solid edge):
- Cut the Yarn: Leave a tail long enough for weaving in.
- Chain 1, Pull Up: This brings the yarn securely through and locks the last stitch.
- Snug the Yarn End: Make sure the last stitch doesn’t loosen.
- Weave in Ends: Use your darning needle to thread in loose tails for a tidy, polished square.
- If your square looks a bit wonky or uneven, steam block it lightly to even out the stitches and give it that pro finish.
Tips for Success While Working the Berry Biscuit Square
- Gauge Matters: Keep your tension even to guarantee the squares match up when joining.
- Use Stitch Markers: They’re the secret to easily navigating skipped stitches and spaces.
- Frogging is Ok: If your chain is too tight and the square curls, pull out the row and try again.
- Popcorn Patience: Popcorn stitches may slow you down at first, but their texture is always worth the extra minute.
- Practice Popcorn Separately: If this is your first try with popcorn stitches, make a practice swatch so you can get the hang of it before starting your square.
![]()
Using This Square in Larger Projects
Each skein of Savor by Ice Yarns will give you about three squares. You can join Berry Biscuit Squares for blankets, throws, or even pillows.
- Try making a Berry Biscuit Baby Blanket by joining blocks from the Berry Biscuit Collection for a coordinating look.
- You can also mix the Berry Biscuit Square with other blocks from the Secret Stitches CAL for variety.
- Experiment with color: the pattern is forgiving, and color changes between squares can create cheerful patchwork designs.
Where to Find the Written Pattern
Looking for a written version to keep close by? The complete Berry Biscuit Square Part 1 pattern is detailed and easy to follow. It’s helpful to have both video and written instructions handy, especially for challenging rows. I recommend bookmarking the pattern or printing it for those moments when you’d rather work from paper than a screen.
Additional Tutorial Resources
Everyone learns a little differently, so there are several resources to fit your style:
- Watch my right-handed video tutorial for a stitch-by-stitch walkthrough.
- Prefer left-handed guidance? The left-handed Berry Biscuit Square tutorial covers all the same ground, just mirrored for your comfort.
- These video links are great to pause, rewind, and reference while making your block.

Joining the Secret Stitches CAL Community
A Crochet-Along, or CAL, is a fantastic way to connect with other crocheters, learn techniques, and stay motivated on bigger projects. With each new square released over several weeks for the Secret Stitches CAL, everyone gets a chance to work together and share progress.
Use the hashtag #secretstitchescal on Instagram and social media so others can find your version of the Berry Biscuit Square. I love seeing your work as you go! For more crochet block patterns, updates, and a supportive community, subscribe to The Secret Yarnery on YouTube.
Recommended Crochet Accessories
Having quality tools on hand speeds things up and makes every crochet session smoother. My go-to accessories include:
- Stitch Markers (easy to close and bright colors keep them visible)
- Sharp Scissors for trimming yarn
- Blunt-tipped Darning Needle for weaving in ends
- Measuring tape to check the finished size
A few of these accessories are easy to find. I use these crochet must-haves from Amazon often, and they stand up to lots of projects.
Troubleshooting Common Issues
Even seasoned crocheters come across hiccups in new patterns. Keep these solutions handy:
- Edges Curling: Likely from a tight chain. Rework the beginning with a looser chain or upsize your hook.
- Missed Stitches or Spaces: Use stitch markers! Counting often helps, too.
- Tension Jumping: Try a “rest row” where you crochet a practice row to smooth out any weirdness in your tension.
- Unravel and Rework: Don’t hesitate to frog (rip out) a row if the stitch count goes off. It’s better than fighting with a block that doesn’t line up later.
How to Modify Yarn and Hook Size
You can use other worsted weight yarns if you prefer different colors, fibers, or brands. Just be sure your gauge remains consistent. If you use a bulkier or lighter yarn, adjust your hook size to match, and be aware that the finished size of your square will change. Do a quick gauge swatch if you’re mixing yarns to make sure everything fits together once the CAL is complete. Choosing the right yarn for your style makes your Berry Biscuit Square unique and personal.
Conclusion
The Berry Biscuit Square brings together texture, color, and fun for crocheters of all levels. From the hearty popcorn stitches to the easy double crochet runs, every row feels rewarding. Don't stress if your first attempt isn't perfect—each square is a step toward a colorful finished project, and the secret is in enjoying the process. Share your work and be part of the growing community around the Secret Stitches CAL 2021. You'll not only build your skills but also connect with fellow yarn lovers from across the globe.
For the full pattern, more color ideas, and to join the community, check out the Berry Biscuit Collection. Happy hooking!
Left Handed?
FAQs
1. Can I use a different yarn than Savor by Ice Yarns?
Yes, you can use any worsted weight (size 4) yarn. Just check your gauge to make sure your square turns out the right size, especially if you’re joining blocks for a blanket.
2. What if my square curls at the edges?
This usually means your foundation chain is too tight. Use a larger hook for the starting chain or loosen your tension when making that row.
3. Are popcorn stitches hard to do for beginners?
Popcorn stitches take some practice, but they’re simple once you get the hang of it. Try making a practice swatch first if you’re new to this stitch.
4. How big should my finished square be?
Your square should measure about 10x10 inches, but this can vary based on yarn and tension. Blocking your square will help even out the edges and reach the correct size.
5. Why do I need stitch markers?
Stitch markers help keep track of spaces and rows, making it easier to count and place your stitches correctly. They also speed up your progress and prevent mistakes.
6. Can I adjust the size of the square?
Yes. For a bigger or smaller square, add or subtract chains to your foundation (in multiples of the stitch pattern). Remember this will change your yarn usage and finished size.
7. How do I join the squares together?
You can use whip stitch, slip stitch, single crochet, or your favorite joining method. Make sure all squares are blocked to the same size for best results.
8. My popcorn stitches look flat. What can I do?
Make sure you pull the stitch tight when closing your popcorn, and use even tension throughout. Steaming your finished square can also help your popcorn stitches pop.
9. Can I make this pattern in multiple colors?
Yes! Change yarn color between rows or squares for a patchwork effect. Secure your yarn ends well and weave them in for a neat finish.
![]()
Christa Patel is the creator behind The Secret Yarnery. She is known for designing clear, creative crochet patterns that are easy to follow for both beginners and experienced makers. Christa’s friendly teaching style has helped thousands learn new stitches through her detailed video tutorials and written guides.
Her passion for color, texture, and accessible design shines in every project. Christa loves building a global crochet community where crafters can share tips, ask questions, and showcase their creations. When she isn’t crocheting, you’ll find her filming tutorials, testing new yarns, or chatting with fellow yarn lovers from around the world.
To see more of Christa's patterns, join her community on YouTube and visit The Secret Yarnery for inspiration, free guides, and crochet-alongs.
About the Author
With a passion for crafting easy, beginner-friendly tutorials and patterns, Christa inspires crafters of all skill levels to unleash their creativity worldwide. She encourages yarn lovers to connect, create, and crochet a world filled with beautiful handmade treasures!
Part 1 - Secret Stitches Easy Stitch Sampler Blanket Pattern