Quick & Easy Crochet Tutorial: Make a Mile-a-Minute Baby Blanket Today
Looking for a fast, easy, and super comfy crochet project? The Mile-a-Minute Baby Blanket might just be your next favorite creation. This blanket is squishy, cloud-soft, and works up incredibly fast, making it perfect for gifting or a cozy addition to your home. Best of all, the pattern is beginner-friendly, and you can customize it to any size. Whether you’re crafting it for a baby shower or a sofa throw, this blanket never fails to impress.
Materials and Tools Needed
Before we jump into the step-by-step instructions, let's gather everything you need.
Yarn Details
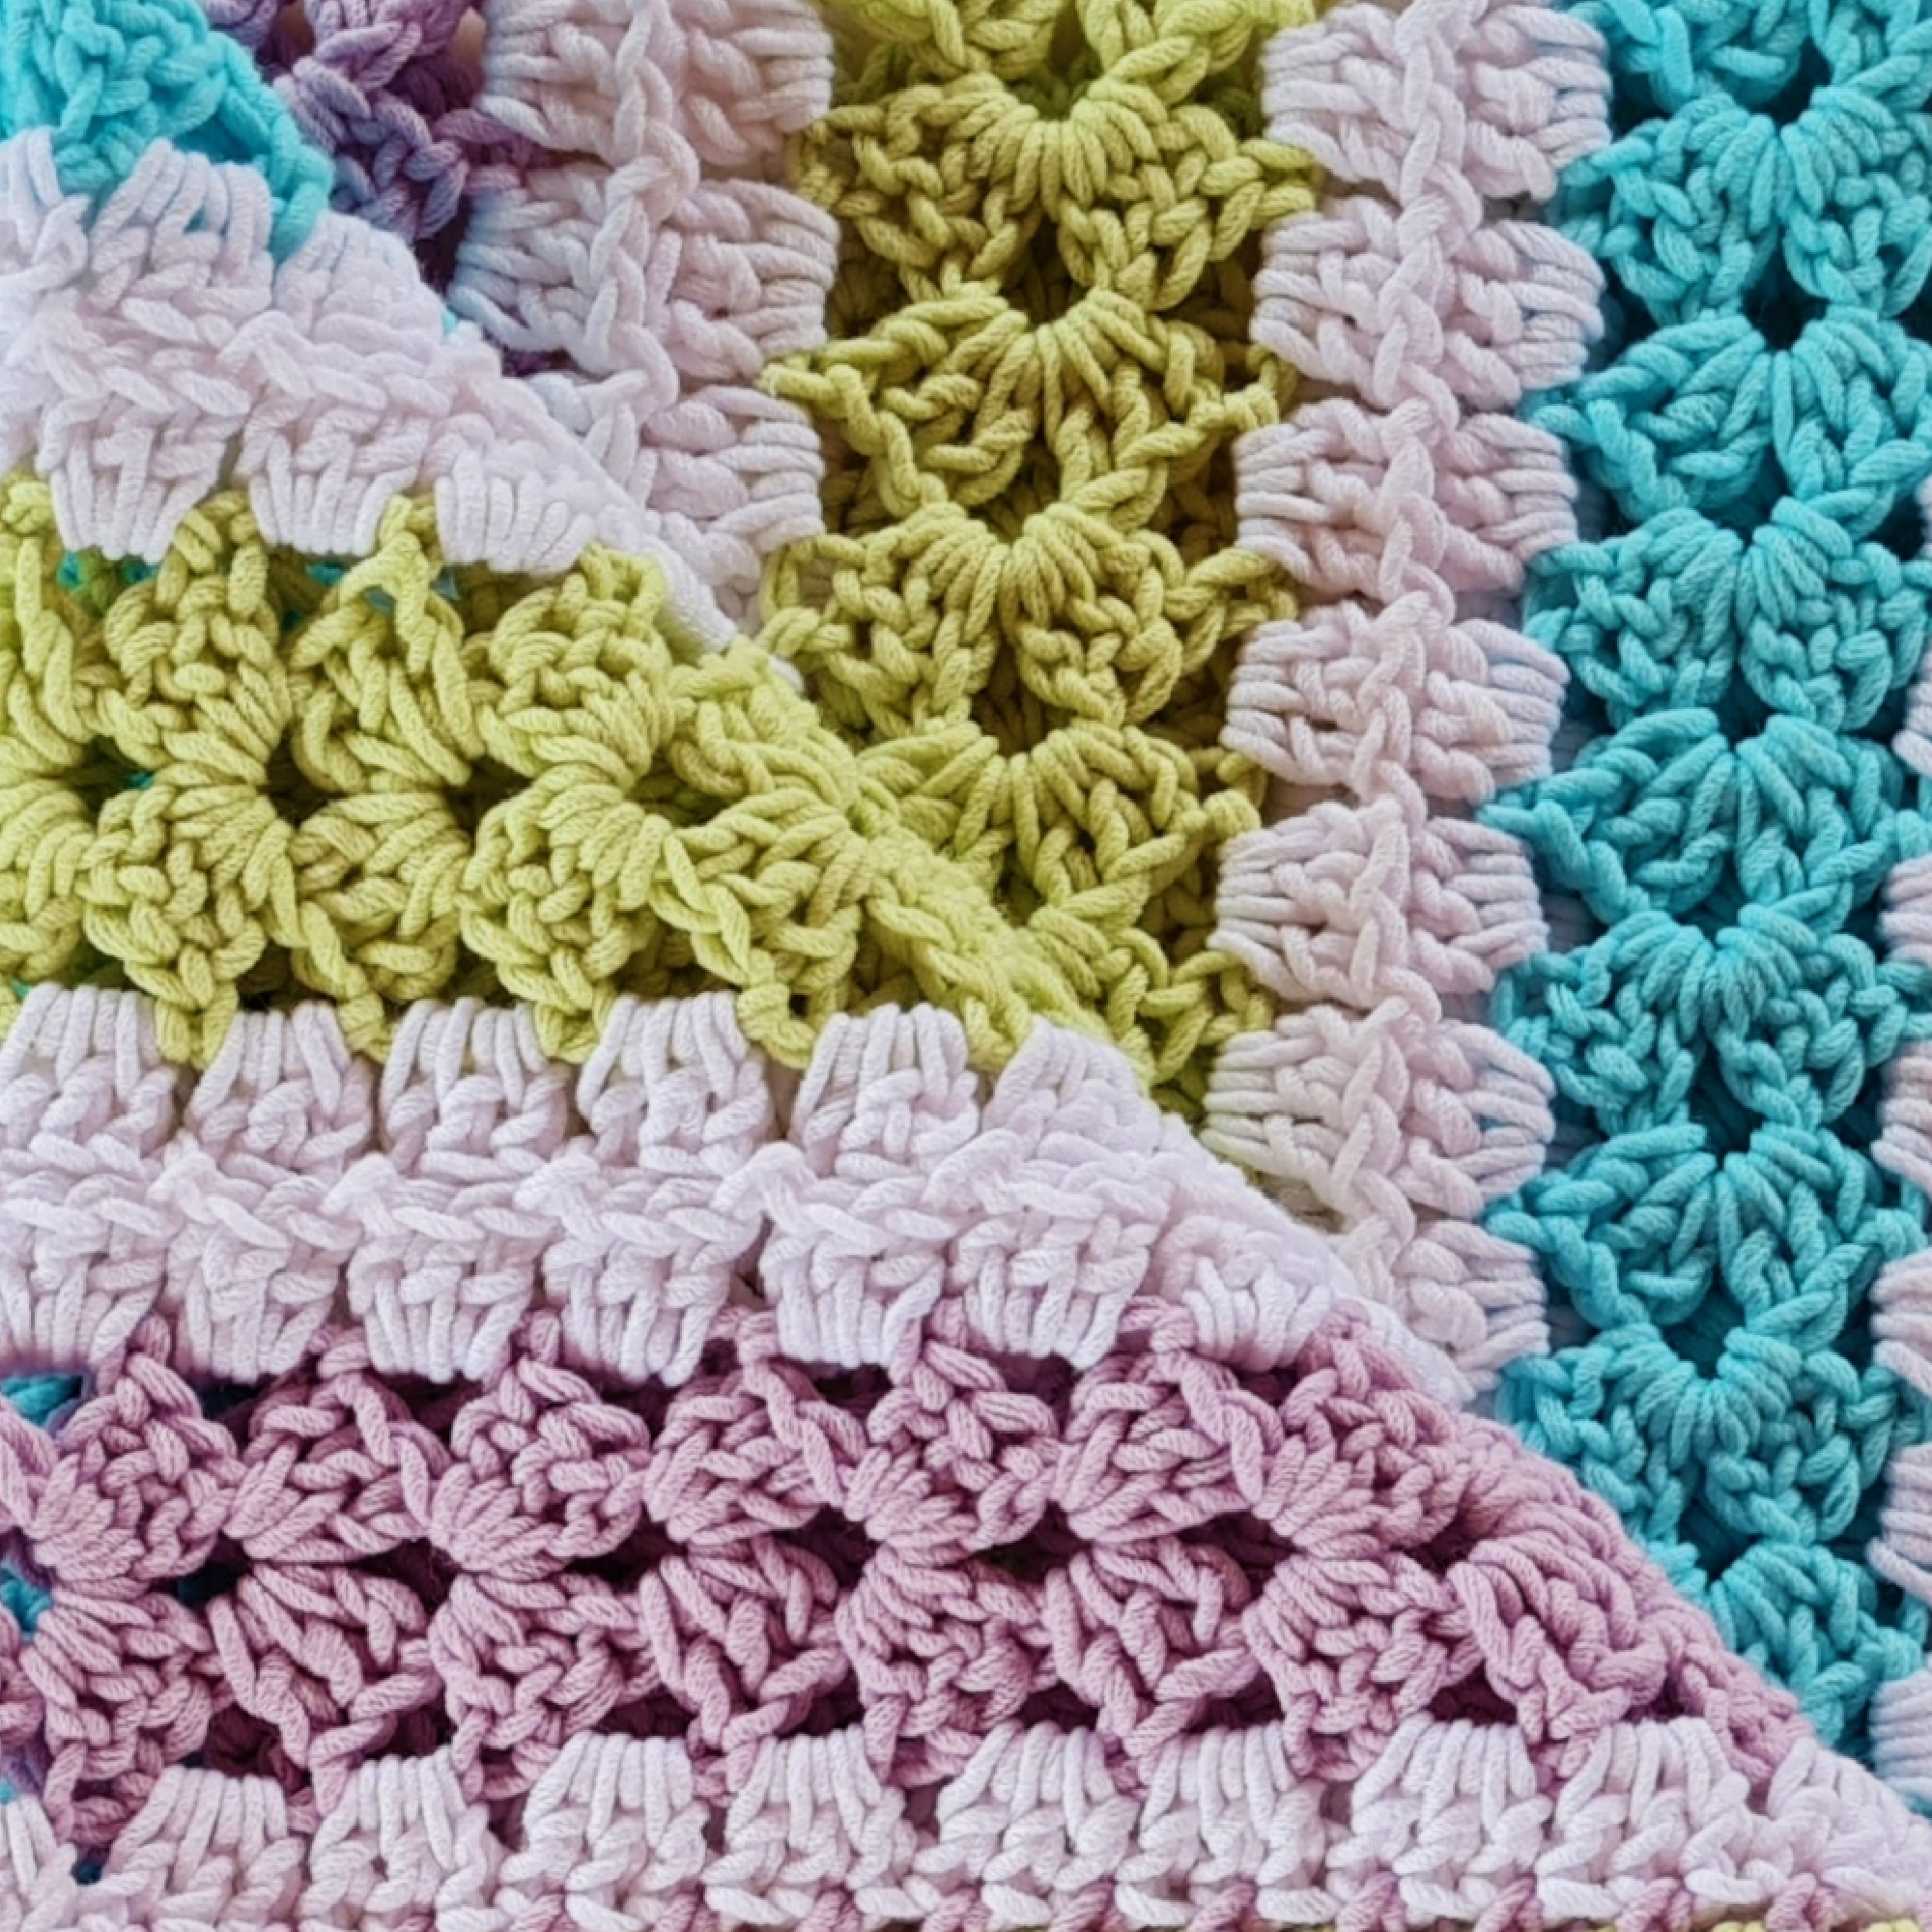
We used Lorena Print yarn for its softness, bulkiness, and ease of use. It's a worsted-weight yarn with a blend of 55% cotton and 45% acrylic. The yarn is springy, squishy, and very satisfying to work with. For this pattern, we used the following colors:
- White
- Light green
- Lilac
- Light turquoise
Quantity of Yarn Needed
For a 30" x 40" baby blanket:
- 3 balls of white
- 2 balls each of light green, lilac, and light turquoise
If you’re planning a different blanket size, you can adjust your yarn quantities accordingly.
Tools Required
- 7mm crochet hook: A larger hook speeds up the process and creates a soft, squishy texture.
- Darning needle: Essential for weaving in ends.
- Scissors: For cutting yarn.
-
Optional stitch markers: Helpful for counting repeats and keeping your work organized.

Blanket Dimensions and Customization
Size of the Blanket
The blanket size in this pattern is perfect for a baby at 30 inches wide by 40 inches tall. It’s wonderfully soft and cozy, ideal for little ones or as a snug lap blanket.
Adjusting the Blanket Size
You can customize the size by:
- Adding or reducing the number of stripes for width.
- Increasing or decreasing the repeat count (chiclets) in each stripe for length.
- Using stitch markers every 10 repeats to easily keep track of your length.
Feel free to experiment with these measurements to tailor the blanket to your specific needs.

Starting the First Stripe
The beauty of the Mile-a-Minute pattern is how straightforward yet fun it is. Here's how to start your first stripe.
Begin with a Slip Knot
Start by making a slip knot on your hook. Wrap your yarn over your non-dominant hand, twist it, and pull the bottom loop through to create your knot. Tighten it slightly then slide it onto your hook.
Crochet the Foundation Chain
Chain 7 stitches to begin. Remember:
- Don’t count the loop on your hook.
- Work slowly and evenly for a smoother foundation.
Be sure to pinch the third chain as you go—this will help you find the center later.
First Double Crochet Cluster
Work your first double crochet cluster into the fourth chain from the hook. This includes:
- 1 double crochet, then repeat into the same space to complete 4 double crochets in total (the chain counts as your first double crochet).
- Chain 2, then create 3 more double crochets into the same space.
This sets up the “corner” of your stripe.

Building the Stripe
Now that the first corner is complete, let’s grow the stripe.
Continuing the Granny-Style Pattern
-
Turn your work, chain 2, and into the space, make:
- 3 double crochets, chain 2, and 3 more double crochets.
- At the end of the row, work one final double crochet into the third chain of the previous row.
- Repeat this sequence: corner, wall, corner, wall.
Measuring the Length
Count the repeats (chiclets) to ensure the length matches your plan. For a baby blanket, the pattern uses 40 repeats per stripe, but you can adjust this to your desired length.
Use a stitch marker every 10 chiclets to make counting easier.
Joining the Stripes
Once your first stripe is complete, it’s time to add the next one.
Preparing the Next Stripe
Create your second stripe following the same steps. When you reach the corner, you'll begin joining it to the first completed stripe.
Joining with Slip Stitches
Lay the second stripe underneath the completed one. Insert your hook into the spaces between the clusters in the finished stripe and:
- Slip stitch to join.
- Continue working 3 double crochets into the active stripe, joining every space as you progress.
Repeating for All Stripes
Repeat the joining process for each new stripe until all 9 stripes are attached. Take your time to align the chiclets evenly for a polished look.
Adding the Border
Borders aren’t just decorative—they give your blanket a polished, professional finish.
First Border Round
- Start at any corner. Join your border color with a slip stitch.
- Work a simple alternating pattern:
- Chain 1, skip a stitch, single crochet into the next stitch.
- For valleys, work 2 single crochets together to ease the edges. Peaks get an extra stitch with a chain 1 for definition.
Second Round
Turn your blanket to work on the reverse side. Repeat the single crochet pattern, working into spaces and stitches alternately for consistency.
Third Round with Popcorn Stitches
Add texture and charm by placing popcorn stitches at each peak. To make a popcorn:
- Crochet 5 double crochets into the same space.
- Slip the last loop into the first double crochet and secure it.
For valleys, continue with 2 single crochet decreases. This keeps the border smooth and prevents ruffling.

Final Touches
Weaving in Ends
Use a darning needle to weave in all loose ends. Alternatively, crochet over them as you work if you prefer.
Blocking the Blanket
To achieve sharp edges and a flawless finish, wash your blanket gently and block it. Lay it flat, shaping and pinning the edges as desired.
Tips and Troubleshooting
Common Mistakes
- Skipping or misaligning stripes during joining.
- Uneven tension leading to wobbly edges.
Solutions
- Double-check your stitch counts.
- Lay your work flat frequently to ensure alignment.
A Blanket for Every Occasion
This crochet baby blanket isn’t just for babies—it’s incredibly versatile. Use it as:
- A thoughtful baby shower gift.
- A cozy living room throw.
- A soft lap blanket for chilly evenings.
Explore more crochet blanket ideas here. The Secret Yarnery offers a variety of patterns to spark your creativity and keep your hooks busy.
Happy crocheting! Share your creations and let us know how this pattern worked for you!
Left Handed?
Frequently Asked Questions
1. What is a Mile-a-Minute Baby Blanket?
A Mile-a-Minute Baby Blanket is a crochet technique where you create narrow stripes and join them together as you go. This method speeds up the process and creates a soft, squishy, and seamless design.
2. Is this pattern beginner-friendly?
Yes! The pattern is perfect for beginners. It uses basic crochet stitches such as a chain, double crochet, and slip stitch. The step-by-step instructions make it easy to follow.
3. Can I customize the size of the blanket?
Absolutely! You can adjust the width by adding or reducing the number of stripes and modify the length by increasing or decreasing the repeats in each stripe.
4. What type of yarn works best for this project?
Worsted-weight or medium-weight yarn (like Lorena Print) works best. Look for soft and bulkier yarns made of cotton or cotton blends for a cozy and squishy texture.
5. Can I use a different crochet hook size?
Yes, but the recommended 7mm hook provides the right balance for speed and texture. Using a smaller hook will make the stitches tighter, and a larger hook will create a looser, more open texture.
6. How long does it take to finish this blanket?
It depends on your crocheting speed and the blanket size. Generally, the Mile-a-Minute method allows you to complete the project much faster than traditional patterns.
7. Do I need to block the blanket?
Blocking is optional but highly recommended. It helps even out the stitches and gives the blanket a neat, polished look.
8. What should I do if my stripes don’t align during joining?
Double-check your stitch counts and use stitch markers to ensure even alignment. Lay the work flat frequently to verify that the chiclets are evenly spaced.
9. Can I use this pattern for other types of blankets or projects?
Yes, you can! This design is versatile. You can create sofa throws, lap blankets, or even bedspreads using the same technique with adjustments to size and colors.
10. How can I add a personal touch to this blanket?
You can customize it by:
- Choosing different color combinations.
- Adding embellishments like appliques or pompoms.
- Using a decorative border to enhance the overall design.
![]()
Christa Patel is a passionate crochet enthusiast and crafting expert with over 10 years of experience. She specializes in creating beginner-friendly crochet patterns that inspire confidence and creativity. Her work focuses on blending practicality with style, ensuring her designs are accessible for all skill levels.
Christa’s love for crochet began as a childhood hobby that blossomed into a fulfilling creative career. Through her blog and tutorials, she has helped thousands of crafters transform yarn into beautiful, handmade treasures. Known for her clear instructions and approachable teaching style, Christa believes anyone can learn to crochet with the right guidance.
When she’s not crocheting, Christa enjoys exploring new yarns, sipping on chai lattes, and spending time with her family. You can find more of Christa’s patterns, tips, and tutorials on her website or watch her engaging video tutorials on YouTube.
About the Author
With a passion for crafting easy, beginner-friendly tutorials and patterns, Christa inspires crafters of all skill levels to unleash their creativity worldwide. She encourages yarn lovers to connect, create, and crochet a world filled with beautiful handmade treasures!
Quick & Easy Crochet Tutorial: Make a Mile-a-Minute Baby Blanket Today