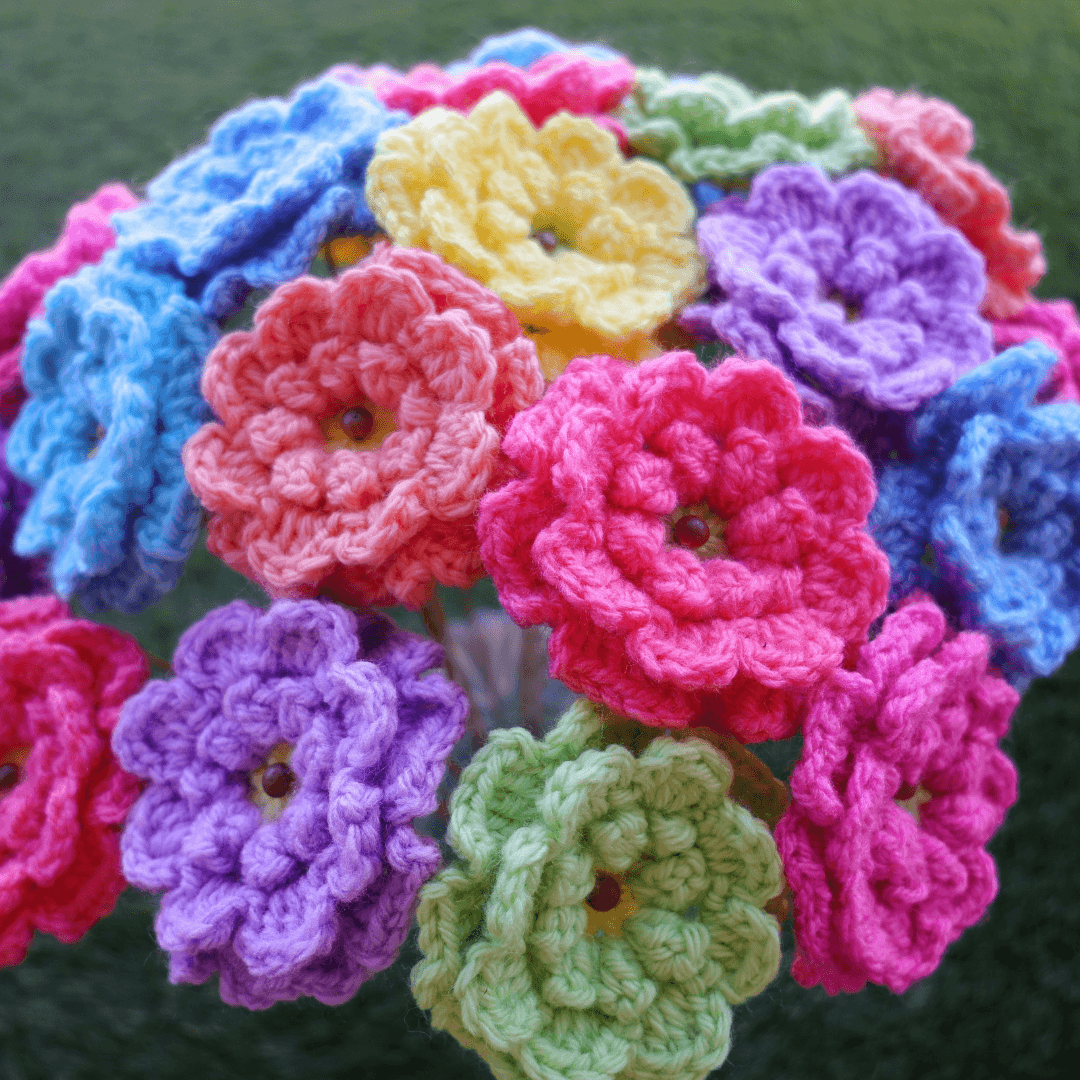
Crochet a Stunning Zinnia Flower Bouquet – Easy Beginner Friendly Guide
Have you ever wanted to create something beautiful and lasting with your own two hands? Imagine a burst of color that never fades, a handcrafted touch that brightens any room. I'm Christa, and I'm excited to guide you through making your own Single Zinnia Crochet Flower Bouquet! This project is perfect for beginners, and my instructions are written in plain English, just like I'm sitting right beside you, guiding you every step of the way. Get ready to add a splash of color and handmade charm to your decor! If you prefer a written pattern to follow along, you can find it on my website at Secret Yarnery.
Table of contents
Gathering Your Supplies: What You'll Need
The best part about this project is that it's incredibly yarn-stash friendly! Here's what you'll need to create your own crochet flower bouquet:
- Scraps of yarn in various colors. Feel free to get creative and use different colors for the flower centers.
-
A 5 mm crochet hook.
-
Scissors.
-
Knitting needles or barbecue skewers for the stems. If using skewers, you'll also need buttons, beads, or any small decorative item to glue to the top to hold the flower in place.
You can also find other "CROCHET MUST HAVES" on my website such as:
Step-by-Step Crochet Zinnia Tutorial
Alright, let's get started! Here's how to crochet your own beautiful zinnia.
Creating the Magic Ring
To begin, we'll make a magic ring. If you're not a fan of the magic ring, you can chain three and form a ring instead. Just remember to leave a long tail, so you can sew the center closed later. To create a magic ring, lay the tail of your yarn over your non-dominant hand and hold it down with your ring finger. Wrap it around your two fingers, making an "X," and hold it underneath your thumb. Turn your hand over, and you'll have a short strand and a long strand. Take your crochet hook, side facing down, and slide it underneath that short strand, grabbing the long strand. Bring it under, pointing the hook towards yourself, and release your thumb a little bit, so the long loop can slide. Pinch right underneath your hook and bring that yarn through the loop on your hook. There's your magic ring! For a visual guide, check out the video at [1:25].
Round One: Building the Flower's Center
Now, let's build the center of our zinnia. First, chain three. This counts as our first double crochet. We want to work into the center of our ring, and over our tail. Wrap your yarn and work seven double crochets into the center of your ring. So, that's one, two, three, four, five, six, and seven. Remember, the initial chain three counts as a double crochet, so we have a total of eight double crochets. Now, gently close your ring. We don't need to make it super tight just yet; we can leave it a little bit open. Finally, slip stitch to the top of that chain three to join. Pop your hook into two strands of that stitch at the top, and slip stitch to join. Chain one to secure your yarn, cut your yarn leaving a long enough tail, pull your hook up, and pull your yarn through, and snug it down to secure. That finishes the center of our flower.

Round Two: Forming the First Layer of Petals
For round two, insert your hook into any space between the stitches—we're working in between the posts, not into the stitch itself. Slide your hook in, loop the yarn on your hook, bring it through, and slip stitch with both strands to join. Drop your tail, holding it along the side of your work, and chain two, one and two. This counts as our first double crochet, and into that very same space, we're going to do four double crochets. One, two, three, and four. To form the petal, pull your hook up just to give yourself a bigger loop, and insert your hook into the top of that chain two to join—just the top of that chain, with two strands on the top of your hook. Put that loop back on your hook, hold the top of your hook with your finger, shrink it down, and bring it through. Chain two, one and two. Now, into the next space after that next stitch, we are going to do five double crochets. One, two, three, four, and five. Pull your hook up and take your hook out. Now, we want to look for our very first double crochet of that set. If you just slide your hook along, it is that stitch right there. Put your loop back on your hook, shrink it down, and bring it through. Chain two, one and two. Repeat this process all the way around.
Round Three: Adding the Second Layer of Petals
Ready for the next layer? Let's do it. Chain two, one and two, and into that same space right there, we're going to do three double crochets. One, two, and three. Chain two, one and two, and slip stitch into that same space to finish off that petal. Slip stitch. Now, jump over to the next space and slip stitch again, just like that. Chain two, one and two, three double crochets into that same space. One, two, and three. Chain two, one and two, and slip stitch into that same space. Slip stitch. Slip stitch into the next space to start our next petal, and chain two, one and two. Each petal starts with a slip stitch, a chain two, then three double crochets, a chain two, and a slip stitch. You can pause the video and keep working along. Each space gets a slip stitch, chain two, three double crochets, chain two, and slip stitch. We're going to do that into each space all the way around.

Round Four: Creating the Base for the Final Petals
When you reach back to where we began, I've done my slip stitch to finish off that petal, chain two, one and two, and turn your work, so we're going to be working into the back of our flower. Look for that single crochet or stitch. We're going to do a front post slip stitch around that stitch. Go down before the stitch and come out right after it, and slip stitch. Chain four, one, two, three, and four. Now, we're going to look for the next one, going underneath this petal and up under the center of the next petal. Tighten your yarn a little bit, give it a pull, and slip stitch. Chain four, one, two, three, and four. Find the next one, going in under the petal and out under the next petal, just like that, and slip stitch. So, front post slip stitch, and chain four, one, two, three, and four. In under the next petal and out under the petal after that, and do our front post slip stitch just there. Slip stitch and chain four, one, two, three, and four. Pause the video and keep working around doing a front post slip stitch around each post of the row down under, and a chain four, one, two, three, and four all the way around your flower.
Round Five: Adding the Final Petals
When you get back to where we started, we are just going to slip stitch to join. Go right into that little stitch. That is where we're going to slip stitch. Slide your hook in just into that little stitch, and slip stitch to join. Chain two, one and two. Now, turn your work, and slip stitch right into this first space. One slip stitch. We want to be right in the middle of that space. Chain three, one, two, and three. Into the same space, two double crochets, one and two. Into the next space, two double crochets, one and two. Chain three, one, two, three, and slip stitch into that same space just to finish off our petal. One slip stitch, chain three to start your next petal, and two double crochets into that same space. One and two. Into the next space, two double crochets, one and two, and chain three, one, two, three, and slip stitch. Our petals are being spread out over two of these spaces down below. Into that same space, chain three, one, two, three, and two double crochets.
Finishing the Flower
When we finish our last set of stitches into that last space, we are right back where we started, so into that space where we started, two double crochets, one and two, and chain two, one and two. Now, slip stitch into that space to join or to pin down that last petal. One slip stitch, and chain one to secure your yarn, cut your yarn, pull your hook up and your yarn through, and snug that down to secure. And there is your super cute flower!

Tying the Tails
Turn your work over. We want to deal with our tails. Really tug on that center one where a magic ring is. We want that to be nice and snug. That is what is going to hold our flower up on the stem. Pull that nice and snug and knot these two together, the ones that match in color. You are welcome to sew in your tails if you prefer to do that. The first knot I do a bit loose. I don't pull it really hard. The second one I snug down, but not really hard. The third one, this is the one I pull, because we have enough knots there where we're not going to pull our working yarn or the yarn from our flower off center, so that is really nice and secure. Of course, you can sew them in if you want, and then just cut your tails. For your outside tail, your petal color, you can use a needle and just sew it in to get it closer to your starting yarn if you feel like it. Then, just bring that outside yarn down and knot it near the center one.
Attaching the Stem
When all of your flowers are done and you have tied off all of your ends, grab your knitting needles or your barbecue skewers, whichever one you are using. We are ready to do the fun part, which is making our flowers! Grab a knitting needle or a barbecue skewer, grab a flower, and just pop it right down the center where we stitched it closed, that magic ring. It will be nice and snug. Just slide that knitting needle all the way through or that barbecue skewer. If your flower is a bit loose and doesn't stay up at the top of your knitting needle, you can use a rubber band, and just put the rubber band up at the end of your knitting needle. Attach the stems as shown at [20:38].
Tips and Tricks for Crochet Success
- Don't hesitate to pause and rewind the video as needed.
- Adjust the video speed to a pace that's comfortable for you.
- Always count your stitches to ensure accuracy.
- Do a swatch to make sure the hook is the correct size.

Customizing Your Crochet Zinnia Bouquet
I encourage you to experiment with yarn color combinations to create different zinnia varieties. You can also add leaves or other embellishments to your bouquet. For displaying your finished bouquet, consider using a vase, planter, or any container that complements your decor.
I have other videos that you can check out that will help you on your crochet journey. One in particular is Crochet Flowers for Beginners.
Conclusion
I hope you enjoyed this tutorial and are excited to create your own crochet flower bouquet! Remember to subscribe to my channel for more fun and easy crochet projects. Keep an eye on my new free crochet patterns – like, and hit the bell right now so you don't miss out on any more quick and easy fun tutorials just like this. I'm waiting for you in that video right there, and stay hooked!
Left Handed?
FAQs
1. What types of yarn work best for these flowers?
You can use any yarn you have, as this is a perfect stash-busting project. For best results, use a medium-weight yarn (like worsted). Experiment with different fibers and colors for unique effects.
2. What can I use as stems besides knitting needles or barbecue skewers?
You can also use floral wire, craft sticks, or any sturdy material that can hold the flower. Be creative and repurpose items you already have at home.
3. Can I make the flowers larger or smaller?
Yes! Adjust the size of your crochet hook and yarn. Larger hooks and thicker yarn will create bigger flowers, while smaller hooks and thinner yarn will yield smaller ones.
4. How do I keep the flower from sliding down the stem?
If your flower feels loose on the stem, secure it with a dab of glue or use items like rubber bands, buttons, or beads to hold it snugly in place.
5. How long does it take to make one flower?
On average, it takes 30-45 minutes to complete one zinnia, depending on your crochet speed and experience. It’s a great quick project for gifting or decorating!
6. Can I add leaves or other decorations?
Absolutely! Adding crocheted leaves, baby’s breath, or even ribbons can make your bouquet more elaborate and unique.![]()
![]()
The creative mind behind Secret Yarnery, inspiring crochet enthusiasts around the world with her vibrant, easy-to-follow tutorials and patterns. With years of crocheting experience, Christa's mission is to make crochet approachable, fun, and accessible for beginners and seasoned crafters alike.
Her love for yarn and creativity shines through her projects, which range from colorful flowers and blankets to practical crochet hacks. Whether you're diving into crochet for the first time or looking to elevate your skills, Christa's friendly teaching style and clear instructions make learning enjoyable.
Through her YouTube channel and website, Christa fosters a global crochet community where ideas, inspiration, and practical tips are shared. She’s known for turning simple stitches into stunning pieces that brighten homes and bring people together.
When she's not crocheting, Christa enjoys spending time with her family, sipping tea, and exploring new ways to combine artistry with practical living. Visit her website Secret Yarnery for more tutorials, patterns, must-have tools, and a treasure trove of crochet resources!
About the Author
With a passion for crafting easy, beginner-friendly tutorials and patterns, Christa inspires crafters of all skill levels to unleash their creativity worldwide. She encourages yarn lovers to connect, create, and crochet a world filled with beautiful handmade treasures!
Crochet a Stunning Zinnia Flower Bouquet – Easy Beginner Friendly Guide