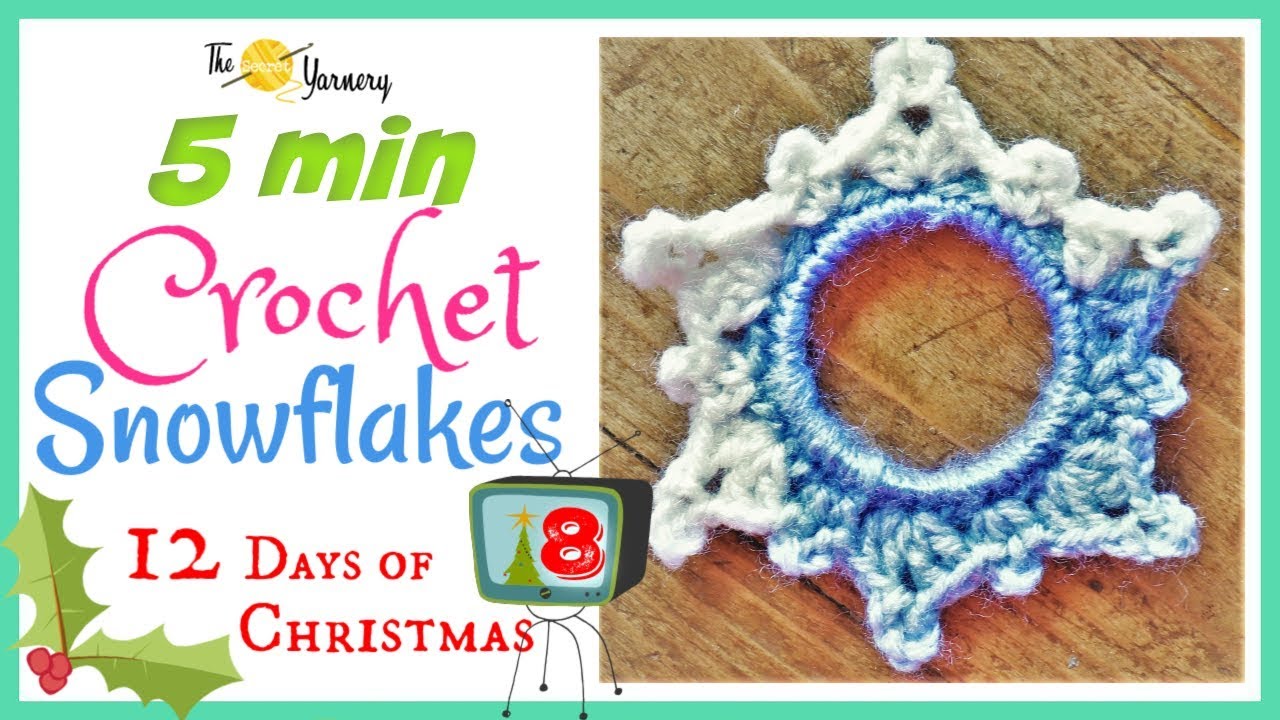
5 Minute Crochet Snowflake Pattern: Easy, No Starch, Eco-Friendly Ornaments
Nothing adds a cozy, handmade touch to the holidays like a flurry of crochet snowflakes. If you’re looking for a festive project that’s quick, beginner-friendly, and sustainable, you’re in the right place. With just 5 minutes, some yarn scraps, and a recycled milk jug ring, you’ll have unique snowflake ornaments that double as gift tags and cheerful decorations. This crochet snowflake works up fast, uses leftover yarn, and gives new life to materials you’d otherwise throw away. Let’s make holiday magic, one snowflake at a time.
Materials Needed for the Crochet Snowflake
Gather your tools and scraps and you’ll be ready to start. For each snowflake, you’ll need the following:
- Milk jug ring (the sturdy ring from under a milk jug lid)
- Yarn scraps—choose any color you like: blues, metallics, or variegated yarns make beautiful results
- Crochet hook (3.5 mm is ideal)
- Paper clip (preferably plastic-coated for hanging)
- Scissors (curved blades are helpful for trimming)
- Darning needle (for weaving in ends)
The centerpiece of my snowy collection is the “Gumball” Kenyan acrylic yarn. It’s 100 grams and 230 meters with tons of colors in each ball, though it can be tough to find online. Use any acrylic or favorite scrap yarn you have.
Explanation of Milk Jug Rings
That little ring you snap off when you open a new jug of milk works perfectly here. It’s round, lightweight, and gives the snowflake a sturdy base. This ring will support your stitches and keep your snowflake flat, so you don’t have to spend more time blocking and shaping after you crochet.
Yarn Types and Recommendations
You can make these snowflakes with any leftover yarn, whether you prefer classic white, wintry blues, metallic sparkles, or variegated colorways for more depth. I love how one ball of “Gumball” yarn gives me a handful of snowflakes in different shades. For a similar look, check out some inspiring holiday crochet projects. Any standard acrylic in DK or worsted weight works great and is easy to find. If you’re looking for new variegated or specialty yarns, see the video description for supplier links.
Crochet Hook Size: Why 3.5 mm?
I recommend a 3.5 mm hook for this pattern. It helps you achieve nice, even stitches that fit the size of the milk jug ring perfectly. A smaller hook might make your stitches tight and hard to work into; a larger one could make the snowflake too floppy. If you want a lacier or chunkier look, experiment and see what you like best.

Preparing to Crochet
Getting started is a breeze, especially if you follow a few essential steps:
- Make a slipknot: Start with a small slipknot, leaving a 1-2 inch tail.
- Secure the slipknot on your hook: Slide the knot onto your hook and shrink the loop so it fits snugly, but not too tight.
- Grab your milk jug ring: Hold the ring in your non-dominant hand.
- Position the tail: Lay the yarn tail along the ring so you can crochet over it (this hides it and saves on weaving in later).
- Get comfortable: Have your working yarn ready to go and your other tools nearby.
Taking a minute to prep pays off as you whip around the ring.
Starting the Snowflake Base: 36 Single Crochets Around the Ring
Begin by attaching your yarn to the ring with a slip stitch (yarn over, pull through). Then, chain one for a bit of height. Now it’s time to build your foundation:
- Insert the hook into the ring.
- Yarn over and pull up a loop (you now have two loops on your hook).
- Yarn over and pull through both loops to complete a single crochet.
- Repeat this process 36 times, spreading stitches evenly around the ring.
Dividing your stitches like this creates a full, fluffy snowflake and keeps the ring covered so no plastic peeks through. Use your thumb to hold the stitches in place as you work. Aim for consistent, medium tension—too tight and the ring puckers, too loose and it gaps.
When you reach 36 single crochets, check your count. Counting each stitch as you go saves headaches later. Leave the tail you crocheted over sticking out, then carefully snip it with curved scissors so you don’t accidentally cut your work.
Next, join with a slip stitch—not in the slipknot, but in the first visible “V” stitch atop your round. This anchors your circle and preps you for the next round. Now, chain 1 to get set for building texture.

Building the Snowflake Texture: Small and Large Bumps
The charm of this crochet snowflake comes from alternating between “small bumps” and “large bumps” around the edge. Here’s how I make them pop, step by step.
Creating the First Small Bump
In the very first stitch after your join:
- Chain 1.
- Single crochet into the same spot under the chain 1.
- Chain 4.
- Single crochet again in the same stitch.
This creates the snowflake’s distinctive small bump. Stitches pulled snug will create crisp, symmetrical “arms.”
Skipping Stitches and Working Double Crochets for Large Bumps
After your first bump, chain 1 for a bit of distance and skip two stitches. Work the next large bump into the third stitch:
- Wrap yarn over your hook.
- Insert the hook into the third stitch.
- Yarn over, pull up a loop (three loops on hook).
- Yarn over, pull through two loops.
- Yarn over, pull through the last two loops—this is a double crochet.
- Repeat to make a total of two double crochets in the same spot.
Two double crochets set up the wide “arms” of your snowflake.
Chain 5 Picot and Slip Stitch Techniques
To form the peak, chain 5. Slip stitch into the second chain you made (that is, chain 4 from your hook). Here’s how:
- Insert your hook into the second chain up.
- Yarn over, pull through and pull through the single loop on your hook.
This creates the pointed tip of your large snowflake bump.

Adding Two More Double Crochets After the Picot
After completing your chained peak, chain 1, yarn over, and work two more double crochets into the same stitch as before. This bulks out the bump and gives you a symmetrical shape, helping every snowflake “arm” match.
Continue alternating:
- Small bump: single crochet, chain 4, single crochet.
- Large bump: two double crochets, chain 5, slip stitch, chain 1, two double crochets.
Keep your spot by skipping two stitches before each bump and chaining 1 between each bump for even spacing.
Walking Through the Pattern Step By Step
Your rhythm should look like this:
- Make a small bump in one stitch.
- Chain 1, skip 2 stitches, work a large bump in the third.
- Chain 1, skip 2, small bump in the next.
- Repeat until you’ve moved all the way around your snowflake.
To keep everything neat, always count stitches and pay attention to how your snowflake lays flat. Your chain spaces keep the points even and the ring balanced.
Pattern Cheat Sheet Table:
| Bump Type | Stitch Placement | Steps |
|---|---|---|
| Small Bump | Into same stitch | Single crochet, chain 4, single crochet |
| Large Bump | Into third skipped stitch | Two double crochets, chain 5, slip stitch in 2nd chain, chain 1, two double crochets |
Tight, evenly spaced stitches are the secret to a snowflake that hangs beautifully without needing to be blocked.
Completing and Joining the Last Set of Stitches
As you reach the end, follow the same sequence until only a few stitches remain. If you finish on a large bump, make sure it's your last skip-two repeat.
To close, slip stitch to the side of your circle—not back to your original chain. This keeps the join tidy and invisible.
Immediately after the slip stitch, chain 1 to lock everything. Cut your yarn, pull it through the last loop, and tug gently to tighten the closing knot. All that’s left is weaving in your ends, then you’re ready for finishing touches.
Finishing Touches: Sewing in the Yarn Ends
Now it’s time to make your snowflake as polished and durable as it looks.
- Thread the leftover yarn tail into a darning needle.
- Weave it securely through the back of several stitches to hide it and anchor it.
- Clip any excess, making sure not to snip your stitches.
Doing this ensures your snowflake lasts through years of holidays and doesn’t unravel with use.

Adding a Hanging Loop with a Paper Clip
For a snowflake that’s ready for hanging—on the tree, a present, or in the window—grab a basic paper clip. Here’s how I do it:
- Choose a plastic-coated paper clip: These resist moisture and won’t rust onto your crochet.
- Open the paper clip carefully: Bend up the center so you create a small hook and a large loop.
- Attach using the small end: Slide the small loop into the center top picot (the little chain-5 point at the top of a large arm).
- Pinch to close: Squeeze the paper clip shut gently to hold it in place.
- Align for hanging: Turn the larger end so it faces sideways for a straight, balanced hang.
If you’re decorating a natural tree, use your crochet hook to open the hanging loop wider so it fits around thicker branches. Artificial trees usually fit the regular hook.
Quick Tips for Hanger Success:
- Avoid metal-only clips for damp conditions.
- Use color-matching clips if you want a seamless look.
- Adjust the loop so the ornament always hangs flat and wiggles freely.
Uses and Display Ideas for the Crochet Snowflakes
These crochet snowflakes are endlessly versatile:
- Hang as ornaments on your Christmas tree.
- Use as unique, reusable gift tags (just write a name with permanent marker on the back).
- Display in windows for a cozy snowy effect—use suction cups for flat glass.
- Join several on a long piece of yarn or ribbon for a beautiful festive garland.
- No need to block them, unless you want extra crisp edges; they look lovely “as is”.
For even more inspiration, see these seasonal crochet projects for unique handmade items in 2025.
The Secret Yarnery’s Holiday Giveaway Announcement
To make things even more fun, I host a “12 Days of Christmas” giveaway every year. This time, you could win a 3.5 mm Tulip crochet hook (my go-to tool) and a ball of special Kenyan acrylic yarn.
To enter, leave a comment answering: What’s your favorite holiday movie? It doesn’t have to be Christmas. Any film that brings you joy during your celebration qualifies. Winners are picked at random and announced on December 24th—right in time for the holidays.

Participating is easy and builds our community spirit. I love reading your favorites and seeing how many of us share traditions (and new movie ideas).
Additional Crochet Resources and Tutorials
Ready to take your crochet further, or want to see a live step-by-step demonstration? Here are some extra resources you’ll find helpful:
- Right-handed video tutorial: Watch the full right-handed tutorial
- Left-handed video tutorial: Left-handed version of the snowflake pattern
- Weekly updates: Subscribe and you’ll get new patterns, projects, and live chats every Friday—there’s always something fresh.
- Free cheat sheet: Download this free crochet cheat sheet for easy reference
- Join the community: Connect, ask questions, and join crochet-alongs for a fun, supportive group vibe.
For more ideas to get started, discover these beginner crochet projects to start today.
Tips for Beginners
Don’t worry if you’re new to crochet—this project is perfect for you. Here are a few tips that made my first snowflakes go smoothly:
- Practice the basics: Brush up on slipknots, single crochet, double crochet, chains, and slip stitches.
- Keep count: Number every round so you don’t miss or add extra bumps.
- Neat joins matter: Always join to the correct stitch for a seamless look.
- Use yarn scraps: Smaller pieces are easier to manage and control tension.
- Pause and rewind: Slow down the video, or pause to check your stitches as you learn.
- Try stitch markers: They help you keep your place, especially at the ring join.
Soon, you’ll develop a comfortable rhythm and be flying through each snowflake.
Eco-Friendly Crafting: Why Use Scraps and Recycled Materials?
One of the best parts of this crochet snowflake is using leftover yarn and old milk jug rings. It’s a simple way to keep plastic out of landfills and stretch your craft supplies further. Every snowflake you make with scraps is one less bit of waste and a few cents saved.
Give yourself a pat on the back for making festive, eco-friendly decor that’s both creative and sustainable. Plus, the unique colors in each snowflake make every one a bit different—no two alike.
For even more sustainable ideas, see why crochet is trending in 2025 and how you can add eco-conscious projects to your routine.
Troubleshooting Common Problems
Everybody runs into little snags. Here’s how I fix the most frequent snowflake issues:
- Stitches too tight/loose: Relax your hands and try to keep a gentle, steady tension.
- Losing your stitch count: Use a counter or place markers every 12 stitches.
- Cut the yarn tail too short: If you can’t sew it in, secure with extra stitches at the back.
- Snowflake won’t hang straight: Adjust the paper clip so the hook faces sideways, or widen the loop for thicker tree branches.
- Splitting yarn in double crochet: Always insert the hook in the center of the stitch, not between strands.
A bit of patience and some practice help every snowflake turn out better than the last.

Pattern Variations and Customizations
You don’t have to stick with the classic white or blue. Try switching things up:
- Use variegated or metallic yarn: Add shimmer or a spectrum of icy blues for a more dynamic look.
- Change the ring: Substitute a larger or smaller ring for different snowflake sizes.
- Embellish: Add beads, sequins, or glitter for extra sparkle.
- Go big: Work another round of bumps for a larger snowflake.
- Experiment with hook sizes: Larger hooks = looser, more lace-like snowflakes; smaller hooks = tighter, denser results.
If you’re looking for more fun holiday makes, these Christmas-in-July crochet projects for beginners are a playful way to get a head start.
Conclusion: Celebrate Creativity with Quick Crochet Snowflakes
Five minutes, a handful of scraps, and an eye for upcycling—you’ve now got all you need for beautiful, meaningful decorations. I hope this crochet snowflake brings a little extra cheer to your holidays, and inspires you to share your creations with friends and family. Every snowflake you make not only brightens your home but also keeps crochet traditions alive.
Remember to subscribe for weekly updates, new patterns, and lots of friendly advice. Share your snowflakes, your stories, and your favorite holiday movies with me in the comments or community groups. Let’s keep the joy—and the yarn—going, all season long.
FAQs
How long does one snowflake take to make?
About 5 minutes once you know the steps. Your first one might take 10 to 15 minutes as you learn the bumps and joining.
Do I need to starch these snowflakes?
No. The milk jug ring gives structure, so they hang flat without starch or blocking.
What size hook should I use?
A 3.5 mm hook is ideal. Go smaller for tighter, crisper edges; larger for a lacier look.
What yarn works best?
Acrylic DK or worsted weight works great. Variegated, metallic, or classic white all look beautiful.
Can I use something else instead of a milk jug ring?
Yes. Try curtain rings, plastic bottle rings, metal craft rings, or sturdy cardboard rings punched with a hole cutter.
How many stitches go around the ring?
36 single crochets. That covers the ring and sets you up for even bumps.
Why are my snowflakes curling or cupping?
Your stitches are too tight, or you added too few stitches around the ring. Aim for medium tension and recount the 36 singles.
How do I keep the ring from showing?
Add enough single crochets to cover the plastic fully, and slide stitches together as you go. If needed, add 2 to 4 more singles.
![]()
Christa Patel is the maker behind The Secret Yarnery, where she shares fast, fun, and beginner-friendly crochet projects that use what you already have. She loves quick wins, scrap-busting patterns, and eco-friendly ideas that help crafters make more with less.
About the Author
With a passion for crafting easy, beginner-friendly tutorials and patterns, Christa inspires crafters of all skill levels to unleash their creativity worldwide. She encourages yarn lovers to connect, create, and crochet a world filled with beautiful handmade treasures!
5 Minute Crochet Snowflake Pattern: Easy, No Starch, Eco-Friendly Ornaments