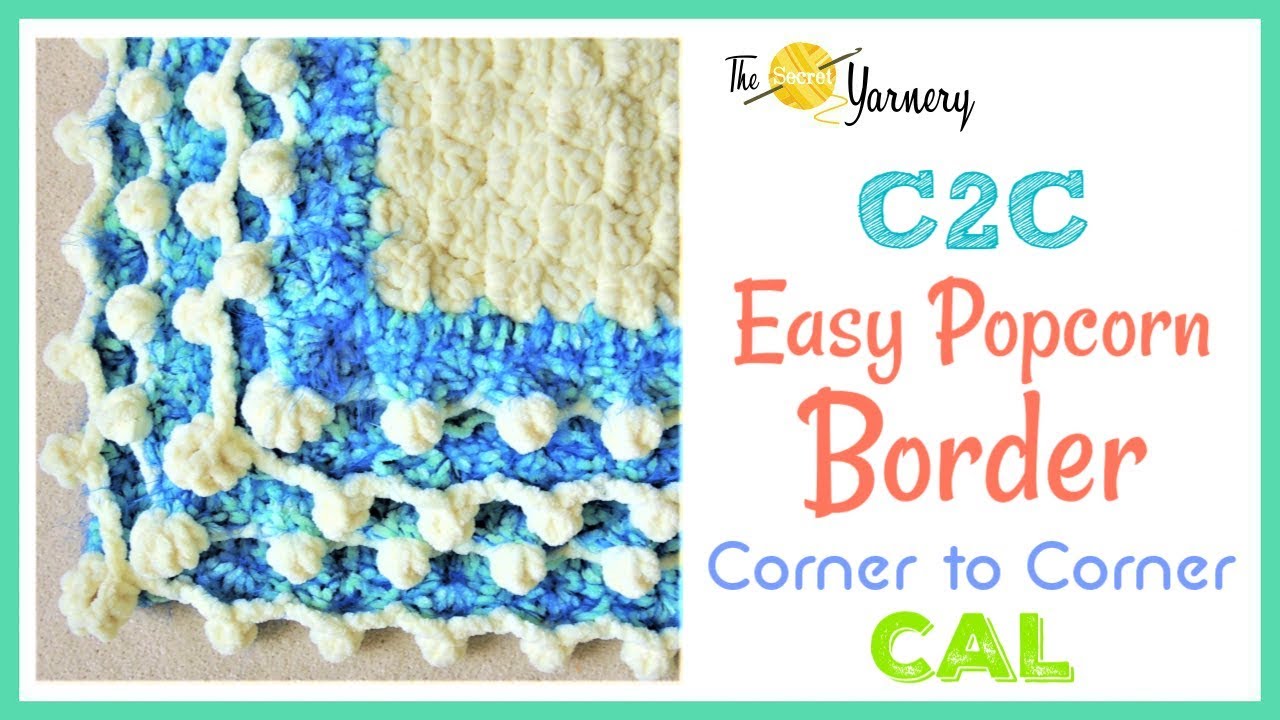
Easy Popcorn Stitch Border for a C2C Blanket: Step-by-Step Guide
If you've ever wanted to add a special finish to your corner-to-corner blanket, the crochet popcorn stitch border is the perfect touch. It’s fun, adds lovely texture, and gives any C2C masterpiece a polished edge. I’ll show you how I create this border using a 5 mm hook with my favorite yarn, yet the method works with any yarn and blanket combo. Whether you’re new to crochet or looking to level up your edge game, you’ll find these tips and a clear walk-through that’ll help you along the way.
Introduction to the Popcorn Stitch Border for a C2C Blanket
A border frames your blanket, enhancing the look and giving it a professional finish. When it comes to C2C (corner-to-corner) designs, a clean, bold edge creates a beautiful contrast that makes the blanket pop. The popcorn stitch border offers both visual interest and a satisfying squish that’s lovely to touch.
I use a 5 mm crochet hook for this pattern, the same one I used throughout my blanket. This keeps things simple and helps the border naturally blend in. However, you can pick a hook and yarn combo that matches your personal project. The main idea is that the border accentuates your hard work, making the C2C triangles and colors stand out even more.
Not only does the popcorn stitch border look impressive, but it also serves a practical purpose. It smooths the edges of your blanket, hides any unevenness from the blocks, and makes the finished project durable and ready for years of cozy snuggles.
For those still new to corner-to-corner projects, or if you’d like some extra guidance with stitch methods, I recommend checking out helpful tutorials like this photo & video guide to popcorn edging. These resources can give you a great background before you tackle the more decorative border techniques.

Tools and Materials Needed
To get started, make sure you have the following crochet essentials on hand:
- 5 mm crochet hook (or size to match your blanket yarn)
- Scissors
- Large darning needle (especially if you’re using chunky yarns)
- Yarn of your choice (can match or contrast with the blanket base)
If you need recommendations, I love the ergonomic and reliable crochet hooks from Amazon, and having blunt-tip darning needles makes weaving in ends so much easier. Adapt your yarn size to your project—it doesn’t matter as long as it fits the look you want.
Tip: If you use chenille or another bulky yarn, be sure your needle is large enough for easy threading.
Preparing Your Blanket for the Border
First, get your blanket ready by picking a starting point along any edge, though I like to begin a bit away from the corner for a cleaner join. Put your hook down into the space between two blocks—not into the blocks themselves. This keeps the border even and bold, giving the stitches a place to anchor without distorting the original blocks.
Join your yarn by pulling a loop through the space and slip stitching with both yarn strands. Once joined, drop the starting tail. You’ll hide this with the needle when you weave in the ends later.
Always remember: place your hook down into the second space after every corner to help the border lay flat and prevent bunching.
Visualizing the difference between blocks and spaces helps even if you’ve never done a popcorn border before. The spaces are those small gaps between block clusters—they’re the perfect anchor points for your new stitches.

Foundation Round: Single Crochet and Chain Spaces
The first round builds a solid base for the popcorns to rest on. Here’s how I go about it, step by step:
- Single crochet into each space between the C2C blocks.
- Chain two to move to the next space.
- Repeat: single crochet, chain two, for every space along the edge.
- At corners, after your last edge stitch, make a single crochet, chain three, and another single crochet into the corner space. This forms a strong anchor and room for the next stitches.
- Continue along the next side: single crochet in every space, chain two between.
- At each new corner, repeat steps for the corner: single crochet, chain three, single crochet.
Pro tip: Don’t crochet over your yarn tail unless you like a little extra bulk in your border—save tails for needlework at the end.
This pattern keeps the edges tidy and prevents the border from curling or puckering. By working only into the spaces and not the blocks, you keep a smooth line all around, no matter which side of the blanket you’re working.
If you’re unsure about which are “spaces” and which are “blocks,” take a moment to look closely at the fabric—the creases between the clusters are the spaces you want.
Joining the Foundation Round
At the end of the round, you’ll come back to where you started. Here’s what to do:
- Complete your last single crochet and chain two.
- Insert your hook into the top of the first stitch you made.
- Slip stitch, chain 2, and you’re ready to begin the next step.
This little join makes sure your border is continuous, giving a seamless look. It also sets the height for your following rows, so your stitch count and edge look uniform. Don’t forget: consistency is key here.
Working the Second Round: Creating the Base for Popcorn Stitches
Next, it’s time to lay the foundation for those puffy popcorns. This round builds up the border’s structure and keeps your counts even for neat popcorn placement.
- Double crochet twice into every chain 2 space from the previous round.
- Double crochet once into every single crochet from the last round. This converts your “ticks” from the previous round into a dense border row.
- At corners (the chain 3 spaces), work two double crochets, chain one, two double crochets into the corner. This extra fullness keeps the edge turning naturally.
Here’s a handy step sequence:
- 2 double crochets in chain 2 space
- 1 double crochet in the single crochet stitch
- Repeat for each side
- At corners, add the extra double crochets and chain
If you struggle to find stitch placement (especially with fuzzy yarn), count the posts or look for the Vs at the top of your stitches. This keeps your base firm and makes it easier to place popcorns in the next round.

Turning Your Work to Avoid Curling and Maintaining Flatness
Turn your work at this point, so you’re crocheting back in the opposite direction. This trick helps balance bulk and prevents your border from curling or twisting to one side. When you continue working without turning, sometimes bias happens, and you lose that crisp, flat look.
The chain one at the start of this round counts as your first single crochet. You’ll skip two stitches, then place your popcorn (shell) into the third. This method lines up your shells neatly across the edge. If you’re ever in doubt when finding the right stitch—especially with chunky or textured yarn—count by the posts or by the little “V” shapes at the top. Both are reliable.
Creating the Popcorn Shells
Now the real magic starts: creating the popcorn (shell) stitches that give this border its signature bumpy look.
Here’s how I form each shell:
- Skip two stitches along the border.
- In the third stitch, work five double crochets (or more for a chunkier shell, but always use an odd number for symmetry).
- Skip two more stitches, then either single crochet or slip stitch into the third as your anchor.
Shells made with five double crochets create soft waves, while seven or nine double crochets provide bigger, puffier popcorns. The center stitch in the shell helps you keep the design symmetrical for each repeat.
You can choose to single crochet or slip stitch between shells:
- Slip stitch pulls the shell down, making curves sharper.
- Single crochet gives the shell a little height, softening the curve.
Some prefer a pointed look, others like it rounder—experiment and adjust as you go.
Steps to create a popcorn shell:
- Skip 2 stitches
- 5 (or 7, 9) double crochets in the next
- Skip 2, single crochet (or slip stitch) in the next
- Repeat all the way around
If the numbers don’t line up perfectly at the end of a row, adjust by skipping one stitch instead of two, or by fudging shell placement—as long as the shells are spaced well and corners are crisp, it’ll still look professional.
If you’re a visual learner, I recommend checking out tutorials like this helpful step-by-step C2C popcorn stitch guide for extra clarity.
Handling Corners in the Popcorn Shell Round
Corners deserve a little extra attention for sturdy, smooth turns. This round is no exception.
At every corner space:
- Work two double crochets, chain one, two double crochets into the corner. This totals four double crochets and gives the curve and flex needed.
Be sure your corners match on all four blanket edges. This keeps your border crisp and prevents distorting the shape of your blanket.
Remember: Corners always get 4 stitches plus a chain, while side shells stick to 5 or more double crochets.
Finishing the Second Round and Joining
When you return to your starting point, finish off your round with a slip stitch into the first chain from the start. Sometimes, you might need to adjust the last spacing to keep the border even—this could mean skipping just one stitch instead of two as you close the loop.
- Complete your last shell.
- Slip stitch into starting single crochet.
- Chain 1 before cutting your yarn.
Always double-check your stitch count and look for any bunching or tight spots before moving on—that way, your edge stays smooth.
Adding Popcorn Stitch Borders: Step-by-Step Tutorial
With the base in place, it’s time for the real highlight: popcorn stitches along the shell tops.
Here’s how to do it:
- Start by joining new yarn (if you want to switch to an accent color) in one of the “valleys” between shells (top of the single crochet or slip stitch).
- Chain 2 (counts as first chain).
- Into the top of the shell (the center stitch from group of 5 or 7 double crochets), make five double crochets.
- Pull up a big loop, remove your hook, insert it into the first of those five double crochets, pick up your working loop, pull it through, and pop—that’s your popcorn stitch.
- Chain 3 (or 4 for looser yarn).
- Slip stitch into the next valley.
- Repeat: Chain 3, pop five double crochets into the next shell, chain 3, slip stitch to valley.
Sequence for each popcorn:
- Slip stitch or single crochet to join new yarn in a valley.
- Chain 2 (or 3, depending on yarn).
- Five double crochets into the center stitch at the top of the shell.
- Remove hook, insert into the first double crochet, pull the loop through.
- Chain 3 (or 4), slip stitch to next valley.
- Repeat around.
You might find different yarns behave differently: test whether chain 3 or 4 works better, and adjust as needed to keep your popcorns “standing up” but not dangling.
Quick Reference: Popcorn Border Steps
- Slip stitch or single crochet in a valley
- Chain 3
- Popcorn stitch on next shell top (five double crochets)
- Chain 3, slip stitch to next valley
- Continue around
As you progress, you’ll see the border puff up in soft, textured accents along every shell.
Managing Joins and Corrections When Stitch Counts Don’t Line Up
It happens to everyone: your stitch counts don’t come out even at the end of the round. Don’t worry—a little improvisation works wonders.
If you need five stitches but have six, skip only one stitch before your last shell. Remember, the best corrections are done just before the join, not at the join itself. This way, the adjustment blends in smoothly, leaving the join invisible.
What matters most is the shells remain neat, corners stay crisp, and the border sits flat.
Choosing Popcorn Size and Color Personalization
The look and feel of your border rest on two key elements: how many double crochets in each shell and which yarn or color you use.
- For chunkier popcorns, try seven or nine double crochets per shell.
- To keep things delicate, stick to five.
- If you want dramatic corners, go big with a “granddaddy popcorn.”
You can continue using your blanket’s main color or switch back to your favorite accent for a playful contrast. In my tutorial, I switch from a blue to a creamy white for the final popcorn round. The result? The popcorns stand out, framing the blanket in a bold, fun way.
How color choice impacts your border: High contrast (such as cream on blue) makes the popcorns pop; matching colors create a subtle, classic look.
You don’t have to stick with just one color, either. Try alternating for a stripe effect, or make each corner a new shade for something extra fun.
Final Popcorn Stitch with Popcorn Texture Detail
The popcorn stitch itself is a mini work of art. Here’s how to build that bouncy, tactile texture on your border:
- Work five double crochets into the top of a shell’s center stitch.
- Pull up a generous loop, slip your hook out, insert it into the first of those five double crochets.
- Grab the loop, tighten it, and pull through for the “popcorn effect.”
- Chain 3 (or 4 for looser, heavier yarns).
- Slip stitch to the valley—right into the single crochet or slip stitch from the previous round.
Tip: If your popcorns look loose or too “dangly,” shorten the chain to 3. If they’re too tight and pull inwards, try chain 4. Experiment on a sample first for best results.
When you’ve finished a round of popcorns, give them a quick rub or pinch—this makes sure every “pop” sticks out to the front, adding the right texture on both the top and bottom sides.
To compare styles, you can see excellent photos and texture breakdowns in guides like How to Crochet a Blanket Border with Popcorn Edging.
Working Popcorn Stitch Corners with Treble Crochet
Corners can be extra special. For maximum puff and softness, I use treble crochets in my popcorns at each corner:
- Work seven treble crochets into the corner space.
- Pull up a big loop, insert your hook into the first treble crochet, and pull loop through.
- Chain 4 (for extra height and to anchor the big popcorn).
- Slip stitch or single crochet into the next valley to hold it down.
Big corners help the blanket lay flat and look well-finished. Carefully space each treble stitch to the side so the popcorn doesn’t look messy.
This “granddaddy popcorn” on the corners gives the finished edge extra interest and softens those points, making folded blankets look extra plush.
Continuing Popcorn Stitch Border Around Blanket
Continue the sequence along every edge, repeating the popcorn and chain sets. Use this checklist to stay on track:
- Slip stitch or single crochet into the next valley
- Chain 3
- Popcorn stitch (five double crochets) on the next shell
- Chain 3
- Repeat as needed
- For corners, work seven treble crochets, chain 4, slip stitch
Be mindful of your stitch counts—the more consistent you are, the better the final look. Adjust and adapt for your own tension and yarn, because every project is a bit different.
Keeping a physical progress checklist helps if you do most of your crochet in sections or while multitasking.
Final Join and Securing Yarn Ends
To finish, slip stitch into the opposite side of your join point for a flat and smooth finish. Then:
- Chain one
- Cut your yarn, leaving a long tail (especially for slippery options like chenille)
- Pull the yarn loop up and out, then tug down to secure
- Plan time to weave in all ends with your darning needle, threading the yarn through the edge stitches for durability
I find that those finishing touches really pay off, especially when gifting your blanket or planning for lots of washes.
Remember: with fluffy or delicate yarns, longer tails help prevent unraveling over time.

Giving Your Popcorn Border Its Final Shape
This is a fun part—rub and “pop” each popcorn to make sure they stand up properly. Sometimes popcorns will stick to the back or twist in odd ways during crochet, so give each a quick pinch or roll to flip it frontwards.
Ensuring all the popcorns face the right side creates uniformity and maximizes the border’s tactile pop. Those soft, bobbly bumps are irresistible, especially for little hands or anyone who loves texture.
If you want to see the transformation, it’s inspiring to snap before-and-after photos of your border. The change from flat to popcorned edges is dramatic and satisfying.
Yarn Usage and Project Size Consideration
Popcorn borders use more yarn than you might expect, since each puff involves several stitches packed into small spaces. For my big blanket, I used approximately 16 balls of white chenille and 2.5 balls of blue. Your own project will vary depending on blanket dimensions and border thickness.
It’s always smart to have a little extra yarn set aside for borders, as it’s easy to underestimate how much gets used in the final rounds.
If you plan to mix colors or add multi-layered borders, plan ahead and keep color changes in mind.
Summary of the Easy Popcorn Stitch Border Technique
This crochet popcorn stitch border follows several foundation rounds, then uses clusters of double crochets for the shell, followed by beautiful, textured popcorn stitches and special corner popcorns. The end result: a soft, puffy edge bursting with character, perfect for all C2C blankets.
Experiment with shell size, popcorn count, and color combinations until you find your own favorite version for every project.
Encouragement to Like, Subscribe, and Share
If you loved this border or learned something new, feel free to share this tutorial with friends or on your favorite crochet forums. Your support makes it possible for me to keep sharing new ideas and patterns. Subscribe on YouTube for free crochet projects, pattern ideas, and weekly inspiration. As always—stay hooked and happy crocheting!
For even more creative border approaches, see these best crochet border techniques for perfect edges, or browse a step-by-step 3D popcorn crochet guide for even more inspiration.
Happy crocheting, and enjoy your new crochet popcorn stitch border!
FAQs: Crochet Popcorn Stitch Border for C2C Blankets
-
What yarn and hook size work best for this border?
- I use a 5 mm hook with medium-weight yarn. Adjust up for chenille or fuzzy yarns, and down for tighter stitch definition. Do a small swatch to see if your popcorns sit flat and “pop.”
-
Can I add this border to any C2C blanket?
- Yes. This border works on all C2C blankets. You’ll work into the spaces between C2C blocks, not into the blocks themselves, so the edge stays neat.
-
My border is curling. What did I do wrong?
- Turn your work at the end of each round. Chain the right amount in the corners (chain 3 on the foundation round). Check your tension. If your stitches are tight, go up a hook size.
-
How many stitches do I skip between shells and popcorns?
- Standard repeat: skip 2, work into the 3rd stitch. Near the join, adjust as needed. If your count is off, change one or two skips a few stitches before the join so it blends in.
-
Do I have to use 5 double crochets for each popcorn?
- No. Five gives a medium pop. Use 7 or 9 for chunkier pops. For corners, use treble crochet popcorns with a chain 4 to help them lay flat.
-
How do I handle corners so they don’t pucker?
- On the setup round: 2 dc, chain 1, 2 dc into the corner space. On the popcorn round: make a larger popcorn in the corner (7 trebles), then chain 4 to secure and slip stitch into the valley.
-
Should I single crochet or slip stitch between popcorns?
- Single crochet gives a softer dip. Slip stitch gives a deeper curve. Try both on a small section and pick the look you like.
-
How do I join a new color cleanly?
- Cut your yarn and pull through. Join the new color in a valley (between shells) with a slip stitch. Keep tails long and weave in with a blunt needle for durability.
-
How much extra yarn will I need?
- Borders with popcorns use more yarn. Plan for 10 to 15 percent extra over a simple border. Chunkier popcorns and bigger blankets will need more. Swatch a short strip to estimate.
![]()
I’m Christa, the maker behind Secret Yarnery. I teach easy, joyful crochet you can follow step by step, even on your busiest days. My tutorials focus on practical stitches, clear visuals, and patterns that look polished without being fussy.
I share weekly videos on YouTube, plus tips, printable patterns, and border ideas on SecretYarnery.com. When I’m not filming or editing, you’ll find me testing new yarns, tweaking borders until they lay flat, and cheering on our crochet community.
What you can expect:
- Beginner-friendly guides with close-up demos
- Smart fixes when stitch counts don’t match
- Borders that sit flat and look great on both sides
- Color and yarn suggestions that actually work
Let’s crochet together. Subscribe for new tutorials, join the community, and stay hooked with fresh patterns and inspiration.
Find me here:
- YouTube: https://youtu.be/B5oDJ-4Ub9c
- Blog and patterns: secretyarnery.com
- Helpful reads: Best crochet border techniques, 3D popcorn guide
About the Author
With a passion for crafting easy, beginner-friendly tutorials and patterns, Christa inspires crafters of all skill levels to unleash their creativity worldwide. She encourages yarn lovers to connect, create, and crochet a world filled with beautiful handmade treasures!
Easy Crochet Popcorn Stitch Border for C2C Blanket: Step-by-Step!