Crochet Flower Coasters for Beginners: Tips to Brighten Your Home Decor
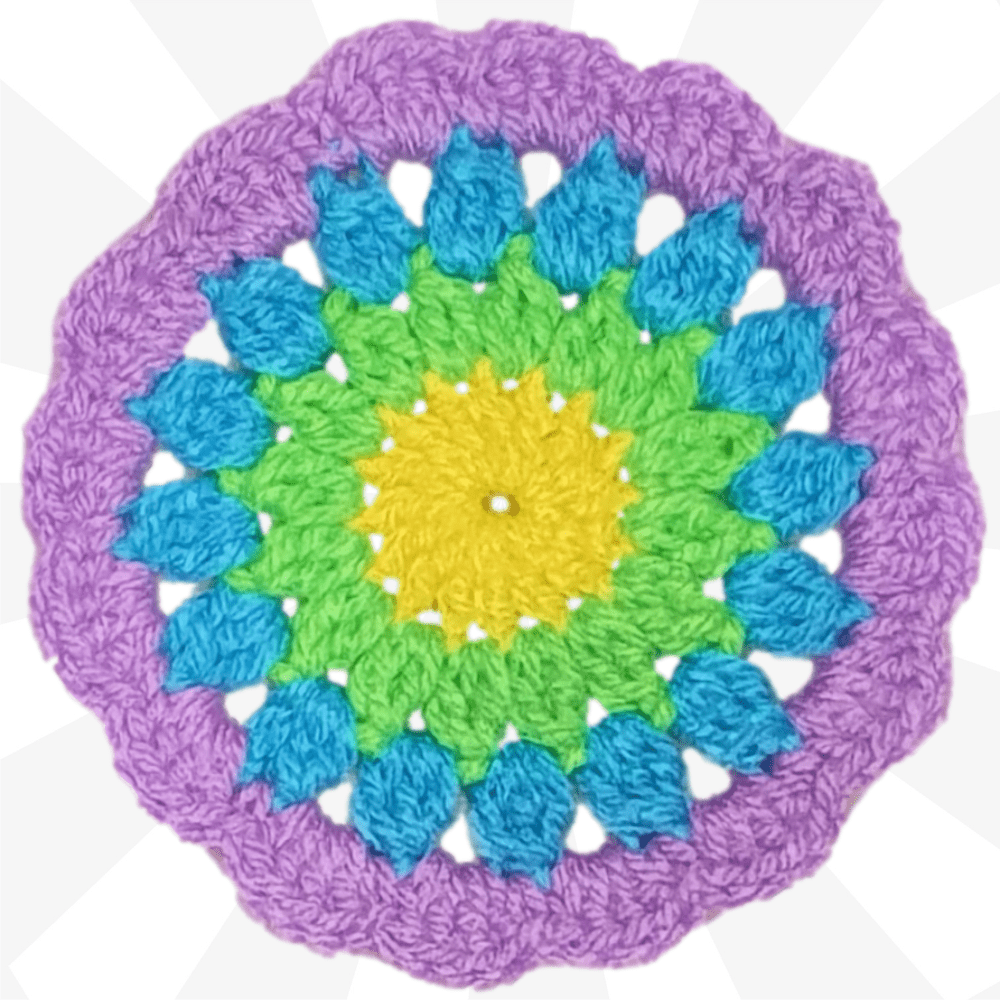
Do you want to add a handmade touch to your home decor? These crochet flower coasters are the perfect project for beginners and make a thoughtful gift for any occasion! Join Christa from The Secret Yarnery as I walk you through each step to create these charming coasters. Not only are they functional, protecting your furniture from coffee and tea stains, but they also add a pop of color and personality to any space. And with the holidays approaching fast, what better way to get your gifts done early? If you prefer to work from a written pattern, you can find it on my website. The pattern includes instructions for both the small coaster featured in this tutorial and a larger size if you want to make a matching set! Check out the written pattern here.
Before we start, if video tutorials are more your style, don't forget there are right and left handed tutorials for this project over at The Secret Yarnery YouTube channel.
Get Started with Crochet Flower Coasters
Materials Needed
To crochet these adorable flower coasters, you'll need a few basic supplies:
- Yarn: Worsted weight acrylic yarn (size 4) in four different colors. I love using my favorites from Icy Yarns.
- Crochet Hook: A 5 mm crochet hook. You can find a great selection of hooks here.
- Scissors: Any pair of scissors will do, but I recommend these scissors.
- Needle: A needle for sewing in your ends. I prefer using a sharp tip needle like these sharp tip needles to ensure the ends are secure.

Step-by-Step Crochet Instructions
Round 1: The Magic Ring
There are two ways to start this project: the magic ring or a chain three. I prefer the magic ring because it's super easy and creates a seamless center, but don't worry, all of the rounds are the same no matter which method you choose!
Here's how to make a magic ring:
- Lay the yarn tail over your non-dominant hand and hold it down with your ring finger.
- Wrap the yarn around your two fingers, making an "X," then bring it back underneath your ring finger and hold it with your thumb.
- Flip your hand over. You'll see a short strand and a long strand.
- Grab your crochet hook, side facing down, and slide it underneath the short loop, grabbing the long loop and bringing it through.
- Hook towards yourself and loosen the slack with your thumb.
- Go underneath the long strand so it's looped on your hook, turn your hook facing down, release your thumb a little bit so that yarn can slide, and bring it through that loop.
- Chain one (this counts as our first half double crochet). If you chain super tight, you can do a chain two.
If you're new to the magic ring, don't worry! It might take a few tries to get the hang of it. You can find more beginner crochet pattern ideas on my website.
Creating the Circle
Now, let's create the center of our coaster:
- Wrap your yarn into the center of the ring. We're going to do 13 half double crochets.
- Chain 1 counts as the first half double crochet.
- Continue until you have 14 half double crochets including your chain. If you'd like to check out my work or what I might be working on, check out my weekly podcast.
- To count your stitches, count in between the posts. The chain counts as your first stitch, and then each stitch after you can just slide them apart a little bit to count them, or you can look on the edge, and you can count your pretty little V's.
- Pull that tail. We want to shrink this circle up until it's closed. If you're using a natural fiber, make sure you don't break your yarn, but you do want to really shrink it shut.
- Slip stitch to join right into the top of the very first stitch.
- Chain one, cut your yarn, leaving a long enough tail to sew in with a needle later. Pull your hook up and your yarn through and snug that down to secure.

Securing the Tail
To make sure your magic ring stays secure, we need to sew in that tail:
- Thread your needle. I like to use a sharp tip needle for sewing in my ends just because it won't come out.
- Sew the tail in the opposite direction of where it came from, skipping a stitch.
- Go all the way around the ring, making sure your needle is not going onto the good side. Do all this on the bad side or the back side of the crochet.
- Once you're back to where you came from, go in the opposite direction, picking a different spot, and back a couple of stitches just a bit to hold it down.
- Cut off the excess tail.
Now that magic ring won't come undone! It's super strong, and that finishes round one with a magic loop to start.
Round 2: Adding Color
Time to add a pop of color!
- Grab your next color of yarn and insert your hook into the second stitch after your join.
- Loop your new color on your hook, leaving a long enough tail to sew in with a needle. Bring it through and slip stitch with both strands to join.
- Drop your tail, holding it along the back of your work, and chain one. This counts as our first single crochet.
- Single crochet and chain one into the next stitch. Repeat this pattern all the way around your work.
When you get closer to your join, count your stitches. You want to make sure you have 14 of these single crochets working all the way around.
To finish the round:
- Make your last stitch, picking up that front loop that's kind of hanging down low.
- Make your next one right underneath this knot, right underneath our chain one.
- Push your hook in, make your single crochet, and chain one.
- Pick up that straggling loop that one's sitting right down here in the front. Match it with its back loop.
- Push your hook towards the back, and that'll match those up for your last single crochet. Chain one.
- Slip stitch right into the first stitch.
- Chain one to secure your yarn, cut your yarn, leaving a long enough tail to sew in with a needle later, pull your hook up, and your yarn through, snug that down to secure, and that finishes round two.

Round 3: Creating the Texture
This round adds a beautiful textured element to our coaster:
- Go in between any of those stitches, any of those chain one spaces, working from the front side, the pretty side of our work.
- Pop your hook right down in between those stitches.
- Pop your hook in, loop of your new yarn on your hook, long enough tail to sew in with a needle, bring it through, and slip stitch with both strands to join.
- Drop your tail, just holding it along the side of your work, and chain one into the very same space.
- Wrap your yarn and make one double crochet chain one.
- In the next space, start one double crochet, leaving those two loops on your hook, wrap your yarn into the very same space, start your second double crochet, leaving those last loops on your hook. Now you have three loops.
- Wrap your yarn, turn your hook so it's facing towards you, bring it through all those loops, and chain one.
Repeat this cluster stitch into every space around.
To finish the round:
- We've done 14 of these pairs in between each of those stitches. Now we want to slip stitch into the top of that very first cluster we made.
- Slip stitch to join and chain one. Cut your yarn, leaving a long enough tail to sew in with the needle later, pull your hook up, and your yarn through, and snug that down to secure, and that finishes round three.
Round 4: Forming the Petals
This round gives our coaster its flower shape:
- Slide your hook in to any stitch that is on top of our cluster, but it can be any cluster. We just want to go into that first stitch that is on top of our cluster.
- Slide your hook in two strands of that stitch on the top of your hook. Loop of your new color on your hook, long enough tail to sew in with a needle, bring it through, and slip stitch with both strands to join.
- Drop your tail. You can hold it along the edge of your work. We can work over it a little bit and chain one. This counts as our first single crochet.
- Wrap your yarn and into the space after that cluster. We're going to do three double crochets all into the same space.
- Drop your tail and into this very next stitch, the first one of the cluster. We're going to do one single crochet.
- In the next space after that cluster, three double crochets all into the very same space. That's giving us our little pretty shells.
- In the first stitch of the cluster right beside our double crochets, that is where we want to do our single crochet. That pins down our cute little shell.
Repeat the shell stitch all the way around.
To finish the round:
- Make your last single crochet into that first stitch of the last cluster. One single crochet.
- Our last shell or our last three double crochets are going to go into this last space.
- Slip stitch right in between the legs of our very first stitch. We're just going to go in between the legs of that first stitch.
- Push your hook in and make one little slip stitch and chain one. Cut your yarn, leaving a long enough tail to sew in with a needle later, pull your hook up, and your yarn through, and snug that down to secure.

Finishing Touches
Weaving in the Ends
To finish your crochet flower coaster, weave in all the loose ends using your needle. This will secure your work and prevent it from unraveling. I can teach you easy crochet projects and so much more!
Final Thoughts & Encouragement
Congratulations on completing your crochet flower coaster! I hope you enjoyed this tutorial as much as I did. Crochet is a wonderful craft that can bring so much joy and creativity into your life. Don't be afraid to experiment with different colors and yarn weights to create unique and personalized coasters.

Where to Find More Crochet Resources
Secret Yarnery Links
- Website: https://secretyarnery.com
- Newsletter: https://bit.ly/3ssa0tn
- Left Handed Tutorials: https://bit.ly/3UWNmoJ
- Behind the Scenes: https://bit.ly/3V104kL
- Ko-fi: https://ko-fi.com/secretyarnery
- Join: https://bit.ly/44UC1bH
Recommended Crochet Tools
Here are some of my favorite crochet tools and supplies:
- Bags - Yarn Ball Storage: https://amzn.to/36cbr3A
- Bags - Large UFO Zipper Pouches: https://amzn.to/3uqgQ0n
- Bags - Regular UFO Zipper Pouches: https://amzn.to/3DYxvLB
- Ball Winder: https://amzn.to/3Jzd4Y0
- Baskets - WIPS: https://amzn.to/3tQK9te
- Color Wheel: https://amzn.to/3hJN3IG
- Crochet Hooks: https://amzn.to/2p5etkC
- Foot Warmer: https://amzn.to/3RaMtn0
- Measuring Tape: https://amzn.to/3JviyD8
- Neck Light: https://amzn.to/2UYNrW4
- Needle Threaders: https://amzn.to/3zdCK7S
- Needles - Blunt Tip: https://amzn.to/2MRffKP
- Needles - Sharp Tip: https://amzn.to/3qEGZWk
- Scissors: https://amzn.to/3EC1CHy
- Stitch Markers: https://amzn.to/3GdGCYg
- Tea - Kericho Gold: https://amzn.to/3zrTcB8
- Tins - Accessories: https://amzn.to/3EN6nxT
- Yarn: http://bit.ly/39EZwZX
Conclusion
I hope this helps you to create your very own crochet flower coaster! Stay hooked for more patterns and tutorials.
FAQs About Crochet Flower Coasters
1. Can I use different yarn weights for this project?
Yes, you can use different yarn weights, but the size of the coaster will vary. For this pattern, worsted weight acrylic yarn (size 4) is recommended. Adjust your hook size accordingly if using a different yarn weight.
2. What’s the best way to learn the magic ring technique for beginners?
The magic ring can feel tricky at first. Practice slowly by following video tutorials, such as those on The Secret Yarnery. Alternatively, you can use the chain-three method as a simpler option.
3. Can I machine wash the flower coasters?
It depends on the type of yarn you use. Most acrylic yarns are machine washable. Always check the label on your yarn for care instructions, or hand wash to maintain the coaster's shape and color.
4. Can I add more rounds to make larger coasters?
Absolutely! You can continue the same pattern of increasing stitches to make your coasters larger. The written pattern on The Secret Yarnery website includes instructions for a larger version.
5. What if my circle doesn’t lie flat?
If your coaster isn’t lying flat, your tension may be too tight. Try loosening your stitches or using a larger hook. Blocking your finished work can also help.
6. How long does it take to complete one coaster?
For beginners, it may take about 1–2 hours. With more experience, you can finish one in under an hour. This makes it perfect for quick, thoughtful gifts.
7. Are there specific tips for changing yarn colors?
When adding a new color, always leave a long enough tail to weave in securely. Work over the tail for a cleaner finish, and ensure your tension remains consistent to avoid gaps.
8. Can I sell these coasters?
Yes! You can sell items made from this pattern as long as you credit the pattern to The Secret Yarnery or provide a link to the original design if applicable. Always check the designer's policies for selling handmade items.
9. What are some creative ways to package these as gifts?
You can stack coasters and tie them with a ribbon, place them in a clear bag with a handmade tag, or combine them with a mug and tea bags for a cozy gift set.
10. Where can I find more beginner-friendly crochet projects?
Visit The Secret Yarnery’s Beginner Crochet Patterns or check out their video tutorials on YouTube for more inspiration and guidance.
![]()
Christa Patel, the creative force behind The Secret Yarnery, is a passionate crochet artist and teacher with years of crafting experience. Based in Nairobi, Kenya, she has built a global community of crochet enthusiasts through her vibrant YouTube channel and blog. Christa’s mission is to simplify crochet for beginners and inspire crafters to explore their creativity with confidence.
Her tutorials are clear, easy to follow, and packed with helpful tips to ensure even the most novice crocheter can complete stunning projects. Christa’s love for bright, cheerful colors and functional designs shines through in every piece, making her patterns not only practical but full of personality.
When she’s not crocheting or filming tutorials, Christa enjoys sharing glimpses of her life through her weekly podcasts, where she connects with her audience and offers behind-the-scenes tips about crafting, family, and running a creative business.
Be sure to check out Christa's full range of crochet tutorials, patterns, and resources on her website at The Secret Yarnery.
About the Author
With a passion for crafting easy, beginner-friendly tutorials and patterns, Christa inspires crafters of all skill levels to unleash their creativity worldwide. She encourages yarn lovers to connect, create, and crochet a world filled with beautiful handmade treasures!
Crochet Flower Coasters for Beginners: Tips to Brighten Your Home Decor