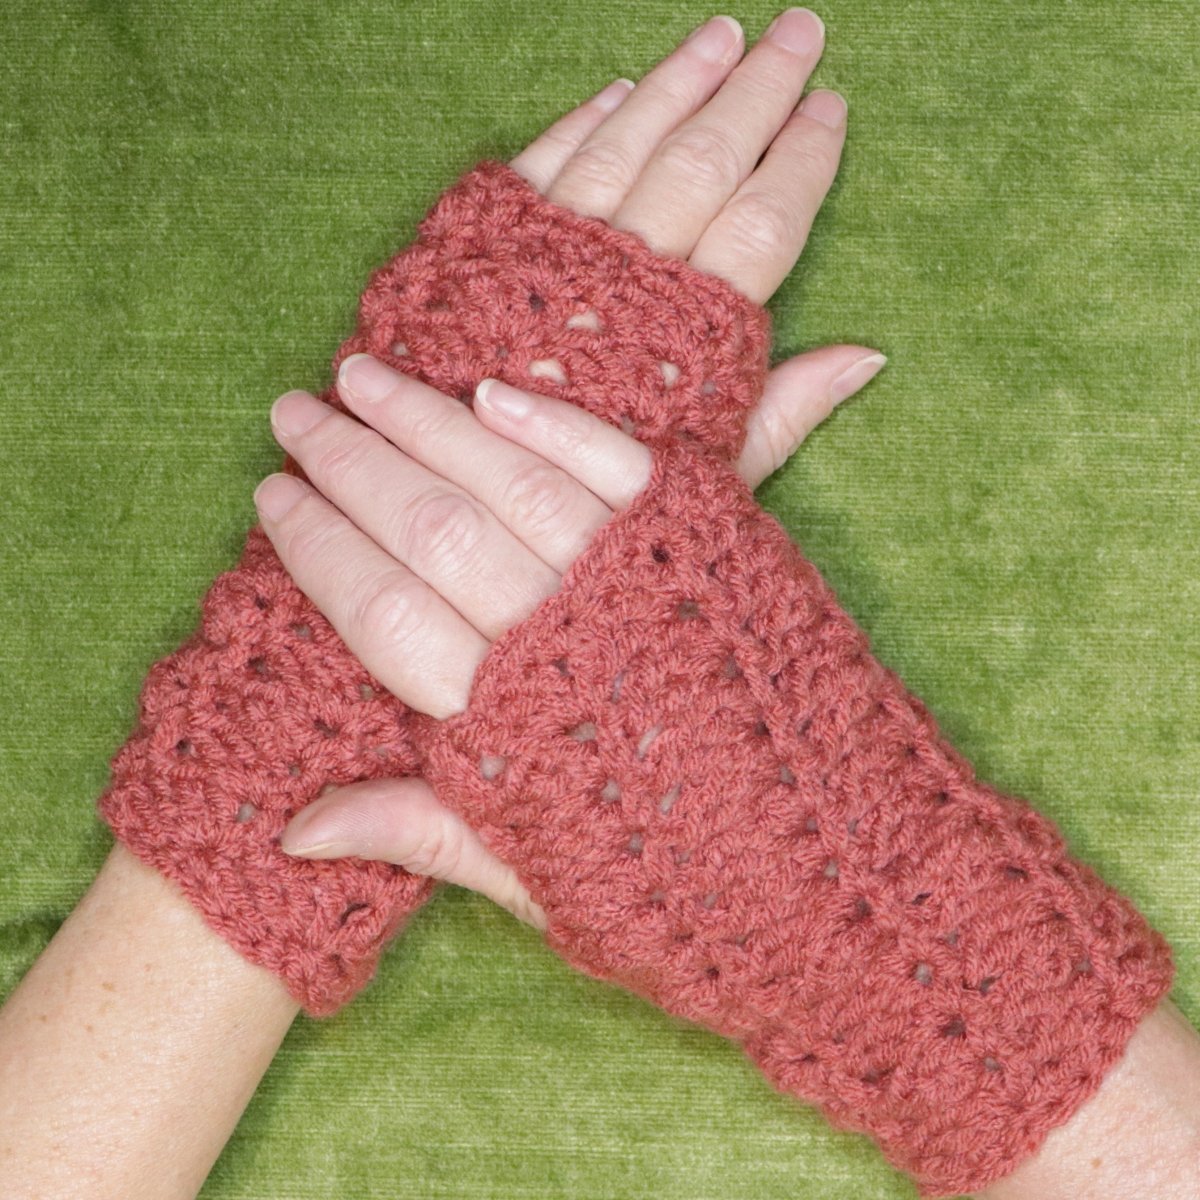
Crochet Your Own Sober Granny Spiral Fingerless Gloves!
Looking for a fun and rewarding crochet project? These "Sober Granny" spiral fingerless gloves are just the ticket! This pattern is perfect for beginners, works up super quickly, and adds a touch of handmade warmth to any outfit. Plus, with the written pattern available on secretyarnery.com, you'll have all the guidance you need. And don't miss the super quick invisible join technique I'll share at the end for a professional finish!
What You'll Need to Get Started
Before you begin, gather your supplies. Here's what you'll need to crochet these cozy fingerless gloves:
- Yarn: I recommend using a 4 weight yarn for this project. In the video, I use yarn saver from Ice Yarns in the color Terracotta. You can find the yarn I used at Ice Yarns. Feel free to experiment with different yarn weights and textures to achieve your desired look and feel. Just make sure to adjust your hook size accordingly!
- Crochet Hook: I used a 6 mm crochet hook with my yarn. You can find a similar crochet hook at Amazon. The right hook size is key for achieving the correct gauge and a beautiful finished product.
-
Essentials:
- Darning needle: For weaving in those pesky yarn ends.
- Stitch marker: To keep track of your spiral and mark your progress.
- Scissors: For snipping yarn.
For even more convenience, here are some optional crochet must-haves:
- Magnetic Yarn Holder: https://amzn.to/3X1hzTY
- N52 Magnets to MAX your Yarn Holder: https://amzn.to/3BiweC2
- Ball Winder: https://amzn.to/3Jzd4Y0
- Baskets - WIPS: https://amzn.to/3tQK9te
- Color Wheel: https://amzn.to/3hJN3IG
- Measuring Tape: https://amzn.to/3JviyD8
- Neck Light: https://amzn.to/2UYNrW4
- Needle Threaders: https://amzn.to/3zdCK7S
- Needles - Sharp Tip: https://amzn.to/3Rdq2ja
- Stitch Markers: https://amzn.to/3GdGCYg
And for those long crochet sessions, don't forget your coffee!
- Coffee: https://amzn.to/3BGDKH4 As an Amazon Associate I earn from qualifying purchases.

Getting Started: The Foundation Chain
Let's dive into the pattern! First, we'll create a slipknot, making sure to leave a long enough tail to sew in with a darning needle later. Next, we'll chain 24.
Once you have your chain of 24, lay it out flat on a surface or in your lap. You should see the pretty "v's" facing up. It's important to make sure there aren't any twists in the chain, so lay it into a bit of a circle to check. We want to look for our first stitch, our first chain. You will see your knot, so you want to go right into that very first chain, just underneath one loop. Just into that top loop, you want to slip stitch. Take your hook, making sure there are no twists, and poke that top loop, or that first loop, onto your hook and make a slip stitch. Chain one, and just kind of put your thumb on top of those sweet little v's, and just kind of hold it to the side.
The First Row: Single Crochet into Back Loops
We're going to be looking for our back loops, or our camel bumps. These are the little bumps along the back. "Camel bump" is more fun than "back loop", don't you think? We're going to be looking for our very first one. The one you can see here is actually our number two, the second stitch, so we're going to have to kind of look behind to find that first one. It's right there! That is our first back loop, underneath where we did our slip stitch in chain one. Into that back loop, we're going to do our first single crochet.
Poke it onto your hook and make one single crochet. Finding that sweet side of your v's again, it kind of twists around in the beginning, so take your time. There's our sweet v. Put your thumb on those v's and roll it to the side. Now we can go into that first one that we see, which is our second camel bump. We're going to make a single crochet into each one, so one, two, three, all the way along. We're going to make 24 single crochets, one into each back loop, or each camel bump.
If working into your back loops is difficult or frustrating, you can go ahead and work into the front of your chain instead. It doesn't matter too much, it just looks a little tidier on your cuff if you work into these back loops. Take your time and try the back loops for the best look.

Counting Your Stitches: Ensuring Accuracy
Once you've finished your first row, it's important to count your stitches to make sure you have 24. To count, I start at the beginning and look on the side. The first stitch that's up high is what you're looking for. Remember that our chain one down here doesn't really count as a stitch.
So, I start counting here. I like to pinch it with my fingers so if I lose count, I know which chain I'm on. So, there's 1, 2, 3, 4, 5... all the way to 24! If you've got 24, you're ready to start the main pattern. If you're off, don't worry! Just recount, or add/remove a stitch to get to 24. This ensures the pattern lines up correctly.
The "Sober Granny" Block: Row Two and Beyond
This is where the "Sober Granny" magic happens. We're going to work into that very first single crochet that we did. Push your hook straight in and make one single crochet, then chain two (one, two). Now, into the very same stitch where we did our single crochet, we're going to make three double crochets. So, wrap your yarn and make three double crochets, all into the same stitch.
Next, we're going to skip three stitches, so there's one, two, three. We're going to work into the fourth stitch over here. Into the fourth stitch, make one single crochet, chain two, and three double crochets. We're going to skip three stitches again, one, two, and three. We're going to work into the fourth stitch right here. Push your hook in, one single crochet, chain two, and three double crochets.
Repeat the block sequence: skip three stitches, and into the fourth, do the same block - one single crochet, chain two, and three double crochets, all into the same stitch.
We're just working into spaces, so no fiddly bits about finding your stitches! It works in a spiral, so you don't have to worry about joining, we just keep working around and around. If you like to follow along with a written pattern, it is available over on my website secretyarnery.com. There is even a spot in the pattern where you can write down how many rows you did before the thumb hole or after if you want to customize them.
Marking Your Progress: Joining and Spiraling
That's what it looks like so far. Push your hook into that next chain two space that we made of our first block, and make one single crochet, chain two, one, two, and three double crochets all into that space. Now we're going to mark that chain two that we just made, that is going to be our marker of where we joined. We're just joining with a regular block, and now we're working in a spiral.
All we're going to do now is put a block into each of these chain two spaces all the way around. Just hop into the next chain two space and make a block: one single crochet, chain two, and three double crochets. Just like that.

Building the Glove: Completing Seven Rows
Now you can keep working around until you have seven rows of your shells completed. Don't worry if you need to pause the video and catch up!
When I'm completing the seventh row of shells, which is the eighth row of the pattern, there is one, two, three, four, five, and six. This is my seventh block right here. So, we're going to finish it the same way we always have: single crochet, chain two.
Creating the Thumb Hole: Row Eight
Now we're going to put four double crochets into this space here, so we're going to start our eighth row of shells (or our ninth row of the pattern) with four double crochets into this space. Move your stitch marker up into that chain two space if you haven't already. Now keep going around, doing your regular shells, so single crochet, chain two, and three double crochets into each chain two space all the way along this row.
When you get back to your stitch marker, single crochet into that space. Just one single crochet and chain five (one, two, three, four, five). Now we're going to jump straight over and start our next block into the next chain two space. This is going to be the thumb hole of our fingerless glove, so into the next space, just a regular block: single crochet, chain two, and three double crochets into that same space. Now keep going around, making a block into every chain two space like we always have been until you get back to your stitch marker.
Working Around the Thumb Hole: Rows Nine, Ten, and Eleven
When you get back to your stitch marker, we just have this chain five space. So, we're going to do our block just into that chain five space. Jump straight over into that space and start your block: single crochet, chain two, and three double crochets just into that big space. Now just keep going like usual: a block into every chain two space!
When you get back around to your thumb hole, just go ahead and work right into that chain two space like usual, so single crochet, chain two, and three double crochets. Keep working your way around until you have three rows on top of your thumb hole.
I'm just starting my third row on top of my thumb holes. I'm going to move that stitch marker up so I know when I'm going to be finished making my blocks. Now we're on our last row, we want three rows on top of our thumb hole.

Finishing the Glove: Three Rows Above the Thumb Hole
There we are! I finished my last block, and we're ready to join in to finish off our row. We're going to join in the same way, one single crochet. Go ahead and take that stitch marker out. Now, into the next two stitches, we're going to make a single crochet into each. I’ve got a few additional crochet tutorials available if you want to improve your skills.
Joining and Ending the Spiral
So, one and two, we're going to make a single crochet into each, so one single crochet and another single crochet. I'm going to jump over into our chain two space of the next block and make one single crochet, and one single crochet into each of the next two stitches, so one single crochet and our second single crochet. Jump over into the chain two space, one single crochet, and one single crochet into each of the next two stitches.
We're just going to keep doing this all the way along, jumping into the chain two space, making one single crochet, and one single crochet into each of the next two stitches. You can pause the video, and I will see you when you get back to where we started. There we are, right back where we started! Here is our first single crochet right here. If you're new to crochet, you can just go ahead and slip stitch into that first single crochet, chain one, cut your yarn, pull your hook up and your yarn through, and sew in your tail.
The Invisible Join: A Professional Finish
Before we have done any joining, just have your last single crochet on your hook. Go ahead and cut your yarn and pull it through that stitch. We haven't joined, we just pulled our yarn up through that stitch right there, and thread your needle. Now we're going to look for where our first single crochet is, and we're just going to put our needle straight through right where we would be putting in our hook. Bring your yarn through and keep an eye on where it's coming from, from the center of this hole or center of that stitch. Pull it over, but keep an eye on where it's coming from.
Then just bring it down into that same stitch where it came from, and it doesn't matter, you just want to inch through the top and see how that makes a nice stitch along the top. You can't really see where you have joined, so that's an invisible join! Now you just sew in your tail like you normally would.
Weaving in the Ends: Securing Your Work
Sew in the tail for your joining yarn where you started at the bottom. Go ahead and repeat that for a second glove, and you're finished! Securing your yarn is essential to keep your gloves looking good. If you’d like to try another easy pattern after this, there are many crochet patterns to choose from!
Making the Second Glove: A Repeat Performance
Now, simply repeat all the steps above to create your second fingerless glove. Making the second glove right away will ensure your tension is consistent, and that both gloves are the same size.
Personalizing Your Gloves: Creative Variations
Once you've mastered the basic pattern, why not get creative and personalize your gloves? Here are a few ideas:
- Use different colors of yarn for a unique look.
- Experiment with different yarn textures (e.g., fluffy, sparkly).
- Add embellishments like buttons, beads, or embroidery.
- Adjust the length of the gloves to suit your personal preference.
- Create a different stitch pattern for the cuff of the glove.
Sharing Your Creations: Connecting with the Community
I'd love to see your finished "Sober Granny" fingerless gloves! Share your creations on social media and tag me on Instagram @secretyarnery or on Facebook at The Secret Yarnery. Also, be sure to join our Facebook group, The Secret Yarnery Crochet Community, a great place to ask questions and connect with other fellow hookers!
Getting More from The Secret Yarnery
- https://bit.ly/3VvXdCd
- https://ko-fi.com/secretyarnery
- https://bit.ly/44UC1bH
- https://secretyarnery.com
- https://bit.ly/3ssa0tn
- https://bit.ly/3UWNmoJ
- https://bit.ly/3V104kL
Explore Other Tutorials From Christa
- Right handed tutorial 🍊 https://youtu.be/Kwu1kGXO_5c
- Left handed tutorial 🍋 https://youtu.be/9NJH1IAa0WE
- Left Handed❔ Don’t stress! 🔎 Find all my left handed tutorials here: ▶️ https://www.youtube.com/@lefthandedcrochettutorials
I hope you enjoyed this tutorial! These easy crochet, fingerless gloves are a wonderful way to learn new skills and create something beautiful. Happy crocheting, and stay hooked!
FAQs
1. What skill level is required to make these gloves?
This project is beginner-friendly. If you’re new to crochet, you might find the first few rows challenging, but the detailed instructions and video tutorials will guide you through.
2. Can I use a different type of yarn?
Yes! Feel free to experiment with different yarn weights and textures. Just ensure you adjust your hook size accordingly if your yarn is thicker or thinner.
3. What if my foundation chain twists when joining?
Lay the chain flat on a surface or in your lap before joining to ensure it isn’t twisted. If it twists, undo the join and double-check alignment before starting again.
4. How do I know which stitch to work into?
When working in the spiral pattern, keep an eye on your stitch markers and chain spaces. The written instructions and the video linked above can help clarify any confusion.
5. Can I make the gloves longer or shorter?
Absolutely! You can customize the gloves by adding or reducing rows before the thumb hole or after it. Adjust to your preference.
6. What is the purpose of the invisible join?
The invisible join provides a seamless, professional finish to your project, ensuring no visible knots or bumps.
7. Can these gloves be made larger or smaller?
Yes! To adjust the size, vary the initial chain length, keeping it in multiples of 4 for the pattern to work. Add more rows for a looser or longer fit.
8. How long does it take to complete one glove?
The time varies by skill level, but most crafters can finish a single glove in a few hours.
9. What’s the best way to weave in yarn ends?
Use a darning needle to thread the yarn ends securely into several stitches. This will prevent unraveling.
![]()
Christa Patel is the creative force behind The Secret Yarnery, a vibrant community dedicated to all things crochet. With years of experience and a passion for spreading the joy of crafting, Christa has built a platform for beginners and seasoned crocheters alike. Through her easy-to-follow tutorials, innovative patterns, and helpful tips, she inspires creatives worldwide to pick up their hooks and create something beautiful.
Christa specializes in approachable patterns, focusing on practical and stylish designs like warm hats, cozy gloves, and charming home decor. She believes that crochet isn’t just a hobby—it’s a way to relax, connect with others, and express creativity.
Apart from designing patterns, Christa offers in-depth video tutorials on her YouTube Channel, covering both right-handed and left-handed methods. Her warm teaching style and knack for breaking down complex techniques have made her a trusted name in the crochet community.
When she's not crocheting, Krista loves drinking coffee, spending time with her family, and exploring ways to bring color and fun into everyday life. Join her journey at The Secret Yarnery, where you’ll find a wealth of creative resources, patterns, and an inclusive crochet community.
Connect with Christa to discover more:
- YouTube (Right & Left-Handed Tutorials): The Secret Yarnery
- Facebook Group: The Secret Yarnery Crochet Community
- Instagram: @secretyarnery
- Website: secretyarnery.com
Get inspired, learn new techniques, and fall in love with crochet all over again!
About the Author
With a passion for crafting easy, beginner-friendly tutorials and patterns, Christa inspires crafters of all skill levels to unleash their creativity worldwide. She encourages yarn lovers to connect, create, and crochet a world filled with beautiful handmade treasures!
Simple DIY Fingerless Crochet Gloves Pattern