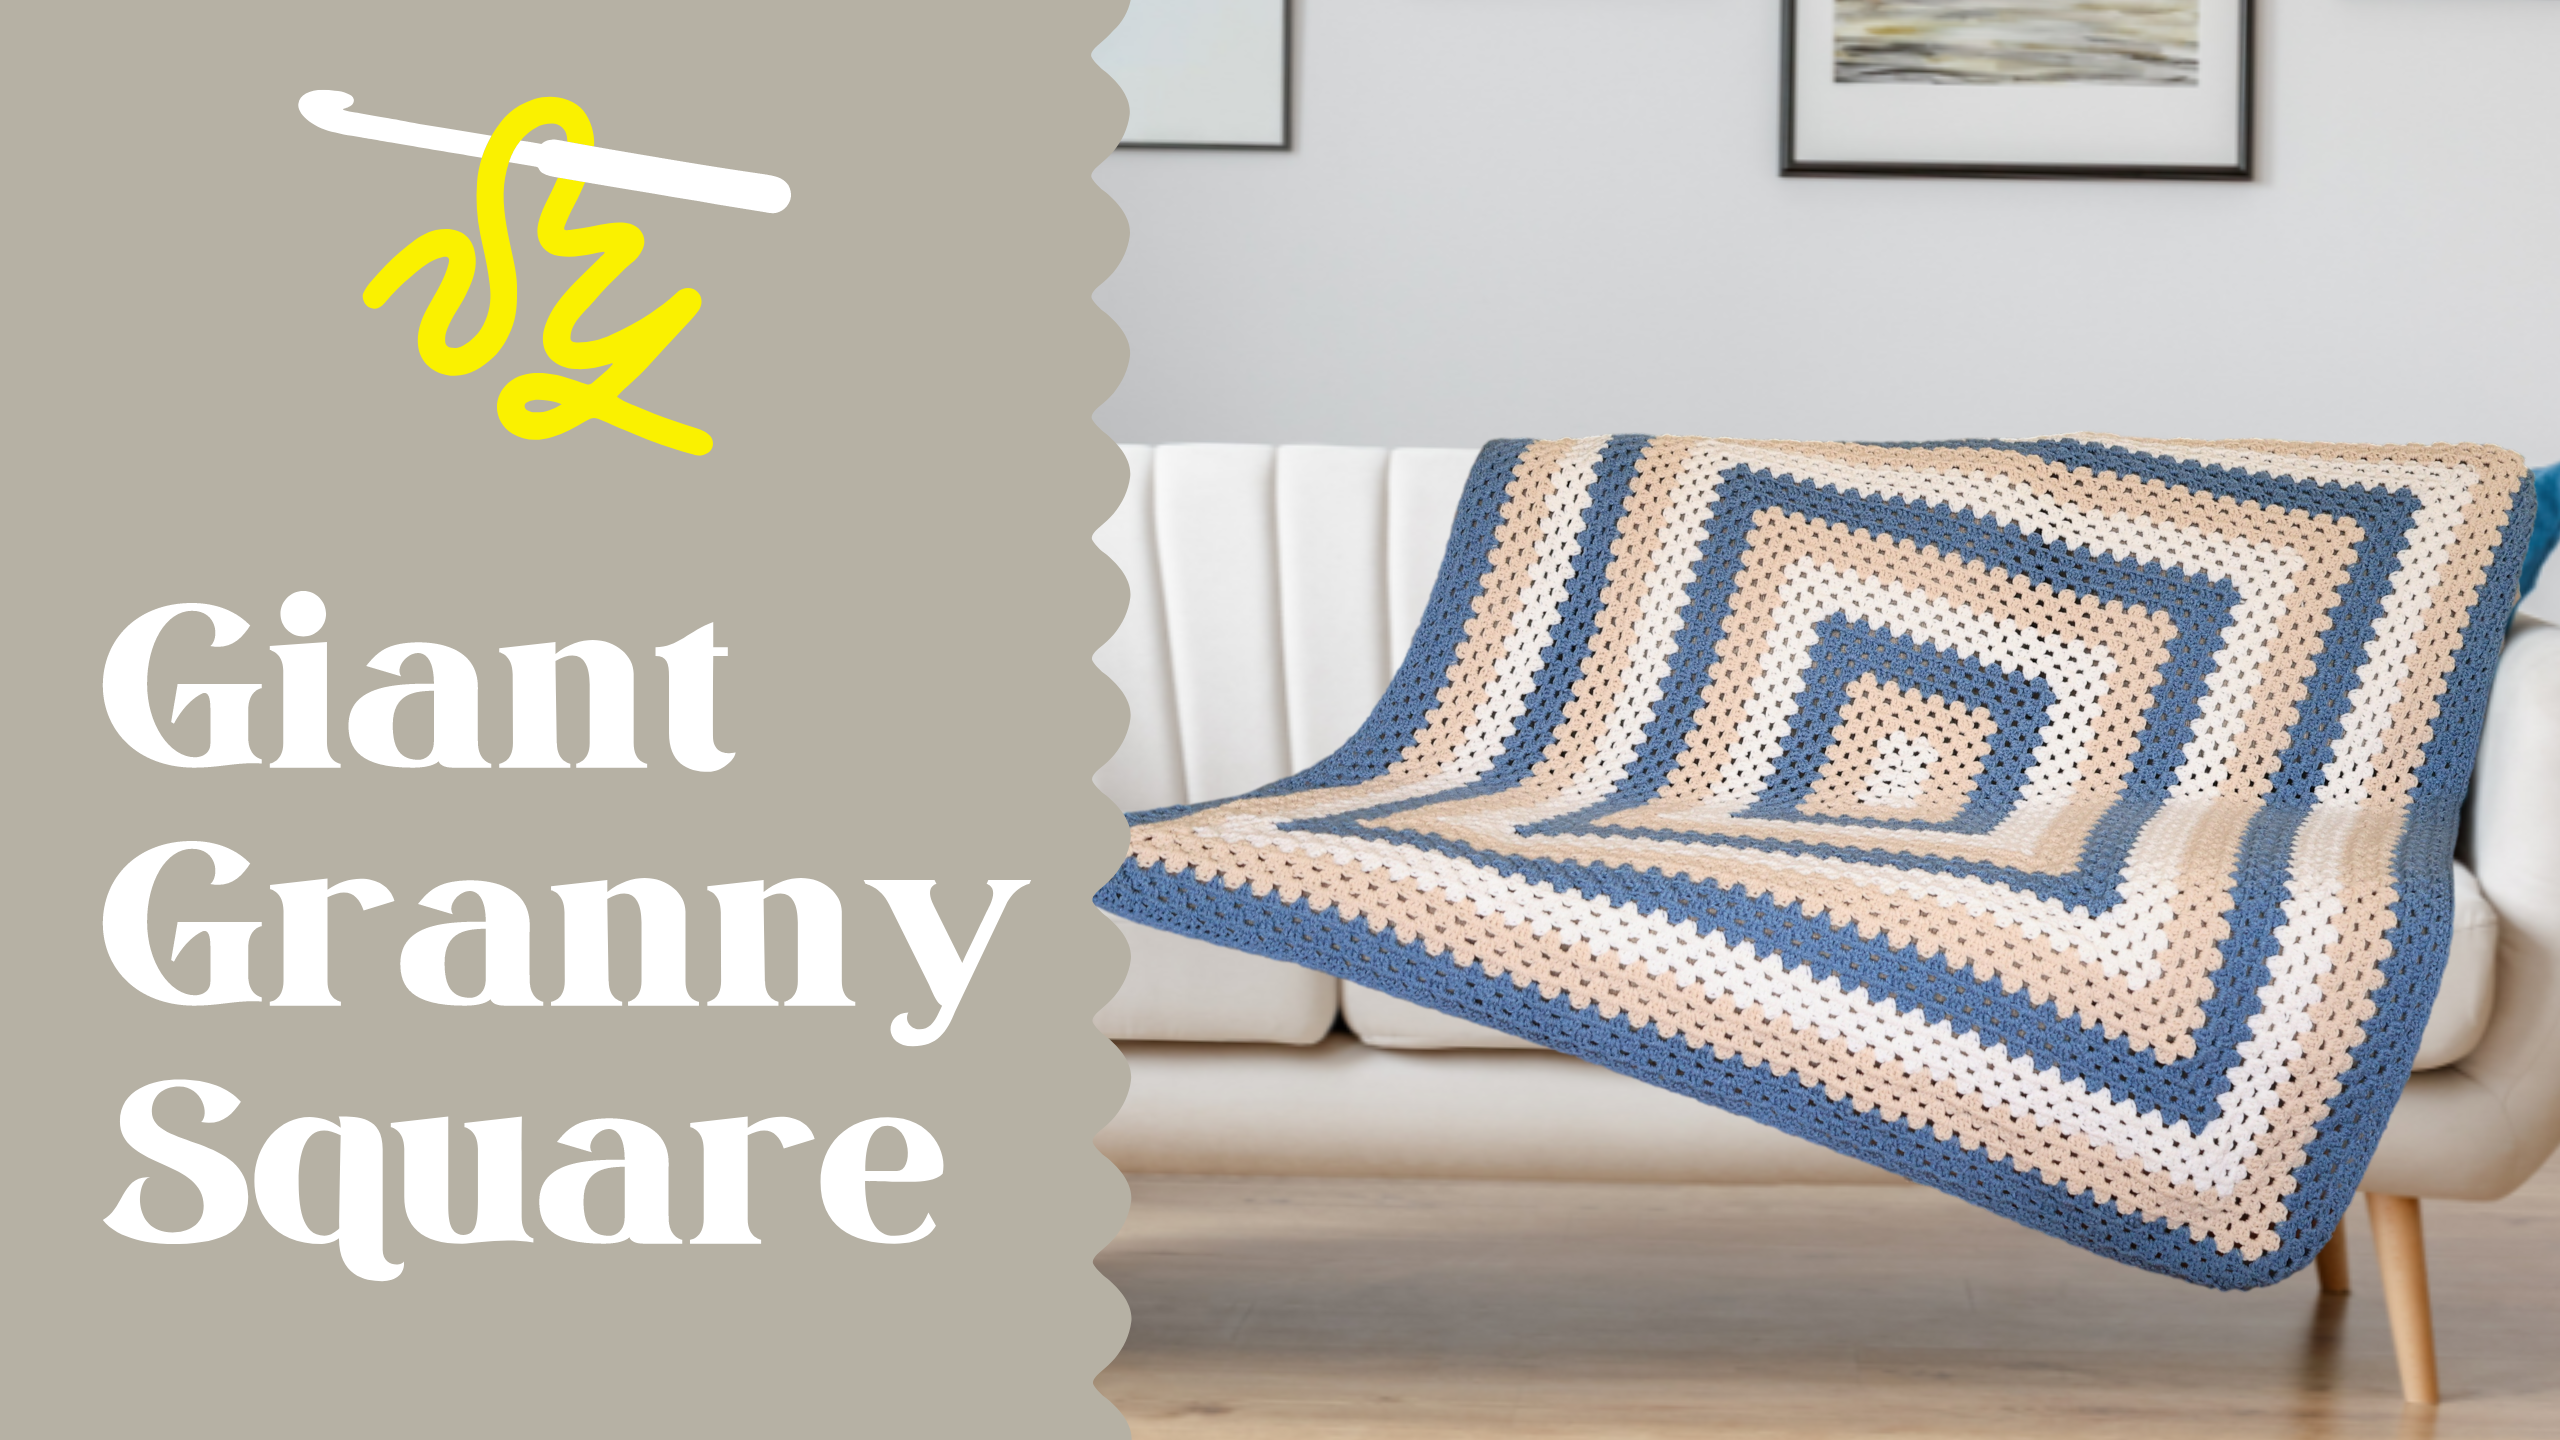
Granny Square Blanket: A Cozy Project for All Skill Levels
If you've ever wanted to create a beautiful, cozy blanket but weren't sure where to start, you're in the right place. I'm Christa from The Secret Yarnery, and today I'm sharing an easy-to-follow tutorial for making a Gorgeous Giant Granny Square Blanket. Whether you're a beginner or an experienced crocheter, this project is simple, fun, and practical. Plus, I'll show you tips to avoid stretching and how to turn your square into a handy rectangle for daily use.
A Practical and Stunning Project
Granny square blankets are timeless. They're practical, beautiful, and easy to customize with your favorite colors. This tutorial ensures your blanket not only looks great but is built to last. With a strong starting foundation and techniques that prevent stretching, you'll love how your blanket turns out.
Materials You'll Need
Yarn Details
For this blanket, I used Saver from Ice Yarns. It's a four-weight worsted acrylic yarn that's 100% Dre lawn, giving it a soft texture and premium quality that's perfect for blankets.
Measurements
The finished blanket measures approximately 50 inches by 58 inches (127 cm by 147 cm). You'll need about six and a half skeins, which is the equivalent of 2145 meters of yarn. The generous size makes it perfect for cuddling on chilly evenings.
Tools
Here's a list of all the tools you'll need:
- 7mm crochet hook: Perfect for this yarn weight.
- Stitch markers: Essential to keep track of your corners and pattern repeats.
- Needle: For sewing in those loose ends.
- Scissors: A sharp pair will ensure clean cuts.
For crochet beginners, check out these top tips for starting crochet projects to set yourself up for success.

Understanding Key Crochet Terms
If you're new to crochet, you'll need to understand a few basic terms before diving in:
- Slip Knot: This is how you begin your project—it forms the first loop on your hook.
- Chain: The foundation of every project. You'll be chaining 14 stitches to start this blanket.
- Double Crochet: A common crochet stitch that's taller than single crochet, creating an open, textured pattern.
- Single Crochet: A simple, short stitch that’s great for edging your blanket.
Stitch markers will also help you identify corners and keep your pattern consistent.
Step-by-Step Instructions
Tail Preparation
Start by leaving a 12-inch tail of yarn. This extra length ensures secure stitching and a neat finish for your work. Create a slip knot and place it on your hook, tightening it snugly—but not too tight!
Creating the Base Chain
Now, chain 14 stitches to form the base of your granny square. These stitches will look like little "V"s—count them carefully. The accuracy here is essential for a strong, even foundation.

Understanding "V" Stitches and Counting
As you count the "V" shapes in your chain, remember you'll be working into the third chain from your hook. This sets the stage for the pattern without distorting the foundation row.
Starting Double Crochets
Wrap the yarn around your hook (this is called "yarn over") and insert it into the third chain. Work two double crochets into that chain. You'll notice the pattern start to take shape with these groups of stitches.
Adding Chain Two Spacers
After double crochets, work a chain two. This spacer is key for keeping the "shell" pattern uniform throughout your blanket.
Repeating the Pattern
Continue working groups of three double crochets in every third chain across the row, placing chain two spaces between each group. Don't forget to place stitch markers in your chain two spaces at each corner—this makes it easy to identify them later.
![]()
Moving Into Rounds
Completing the First Row
Once you've reached the end of your base chain, you'll mirror the double crochets on the opposite side, creating symmetry. After finishing the round, join with a chain one and a single crochet in the top of your starting chain three.
Turning the Work
To ensure the blanket doesn’t curl or have a "right" and "wrong" side, turn your work after each round. This keeps both sides smooth and even.
Building More Rounds
For each round, you'll now work in the spaces between the shell stitches from the previous round. Every corner gets a corner (three double crochets, chain two, three double crochets), and you'll continue creating groups of three double crochets along the sides.

Customizing Your Blanket
Choosing Colors
I alternated colors after every two rows initially, then switched to changing colors every four rows. However, you can get creative! Add as much variety and color as you like—it’s your blanket.
Making It Giant
There's no limit to the size of your granny square blanket. Keep working rounds until it's as large as you'd like. A bigger blanket just means more to love!
For more inspiration and patterns, explore these beginner-friendly crochet patterns.
Adding the Final Edge
To finish, we're adding a single crochet edge to keep the blanket sturdy and prevent stretching:
- Work one single crochet into each of the first two stitches.
- Chain one and skip to the next stitch group.
- Repeat this around the entire blanket.
In every corner, work one single crochet, chain two, and another single crochet to give the edges a clean, polished look.
Tips for Beginners
- Stitch Markers Are Your Friend: Use them liberally, especially in corners, to keep track.
- Don’t Rush: Crocheting should be relaxing. If a section feels tricky, take a deep breath and try again.
- Practice Makes Progress: If you’re new to double crochets, practice on scrap yarn first.
For more expert advice, read Crochet 101: A Beginner's Guide.
Final Thoughts
There’s nothing quite like wrapping up in something you’ve made with your own hands. This Granny Square Blanket tutorial is designed to help you create something beautiful and functional. With clear instructions, helpful tools, and a little patience, you’ll have a blanket to be proud of. So grab your yarn, cozy up, and crochet your way to comfort!
To dive deeper into granny square techniques, check out the Granny Squares & Shapes section for more ideas and inspiration.
Stay hooked!
Left Handed?
FAQs
1. What is a Granny Square Blanket?
A Granny Square Blanket is a classic crochet project made by stitching together square or rectangular patterns. It's a versatile and beginner-friendly design that can be easily customized in size and color.
2. How much yarn do I need for this blanket?
For the Gorgeous Giant Granny Square Blanket, you'll need approximately 6.5 skeins, which equals 2145 meters of worsted-weight yarn. The finished size is around 50 inches by 58 inches.
3. Can I use a different type of yarn?
Yes! While the tutorial uses worsted weight acrylic yarn (Saver by Ice Yarns), you can experiment with other yarns. Just make sure the yarn weight matches your hook size.
4. What size crochet hook should I use?
For this project, use a 7 mm crochet hook. If you're substituting yarn, check the recommended hook size on your yarn label.
5. How long does it take to make this blanket?
The time varies based on your skill level and how much time you dedicate daily. Beginners may take 2-3 weeks, while advanced crocheters could finish in a week.
6. What do I do if the square stretches or curls?
To prevent stretching, follow the tutorial's technique of turning your work after every round. For curling, ensure your tension is consistent and not too tight.
7. Can I adjust the size of the blanket?
Yes! To make it larger, continue adding rounds until you reach your desired dimensions. To make it smaller, simply stop earlier.
8. Can I use multiple colors in my blanket?
Absolutely! The tutorial suggests alternating colors every 2-4 rows, but you can switch it up depending on your personal style.
9. As a beginner, is this project suitable for me?
Yes, this project is beginner-friendly! It’s designed with simple stitches like chains, double crochets, and single crochets. Plus, the video tutorial guides you step by step.
10. How do I finish off my blanket neatly?
The tutorial recommends adding a single crochet edge to stabilize your work and keep the pattern neat. This will also prevent it from stretching over time.
11. Are there alternatives to slip knots and chains for starting?
Yes, some crocheters prefer starting with a magic ring instead of a slip knot. You can experiment and find what works best for you.
12. Where can I learn more beginner crochet techniques?
Visit the Crochet 101 Guide for easy tips and tricks to get started.
![]()
Christa Patel is the creative mind behind The Secret Yarnery, a popular destination for crochet enthusiasts of all skill levels. As an expert crocheter and teacher, Christa specializes in crafting beginner-friendly tutorials, detailed step-by-step guides, and inspiring crochet patterns.
Her passion for crochet began over a decade ago as a way to unwind and express her creativity. Over the years, she developed a knack for simplifying even the most intricate designs, making crochet accessible and enjoyable for everyone. Whether you're a complete beginner or an experienced crochet artist, Christa’s approachable teaching style will guide you with patience and clarity.
Through The Secret Yarnery, Christa shares her love for crochet with a global community of makers. She believes in the power of handmade crafts to bring comfort, joy, and a sense of accomplishment. From cozy blankets to stylish accessories, Christa's designs inspire crocheters to create their own treasures.
When Christa isn’t crocheting, she’s exploring new yarns, experimenting with colors, or spending time with her family in her home studio. Be sure to check out her blog and YouTube channel for helpful tutorials, fun patterns, and crochet tips!
Follow Christa Patel on her crochet journey:
- Website: The Secret Yarnery
- YouTube Channel: The Secret Yarnery YouTube
- Instagram: @TheSecretYarnery
Happy crocheting with Christa!
About the Author
With a passion for crafting easy, beginner-friendly tutorials and patterns, Christa inspires crafters of all skill levels to unleash their creativity worldwide. She encourages yarn lovers to connect, create, and crochet a world filled with beautiful handmade treasures!
Granny Square Blanket: A Cozy Project for All Skill Levels