Global Shawl with Foxtrot Border: Easy Rectangular Crochet Scarf
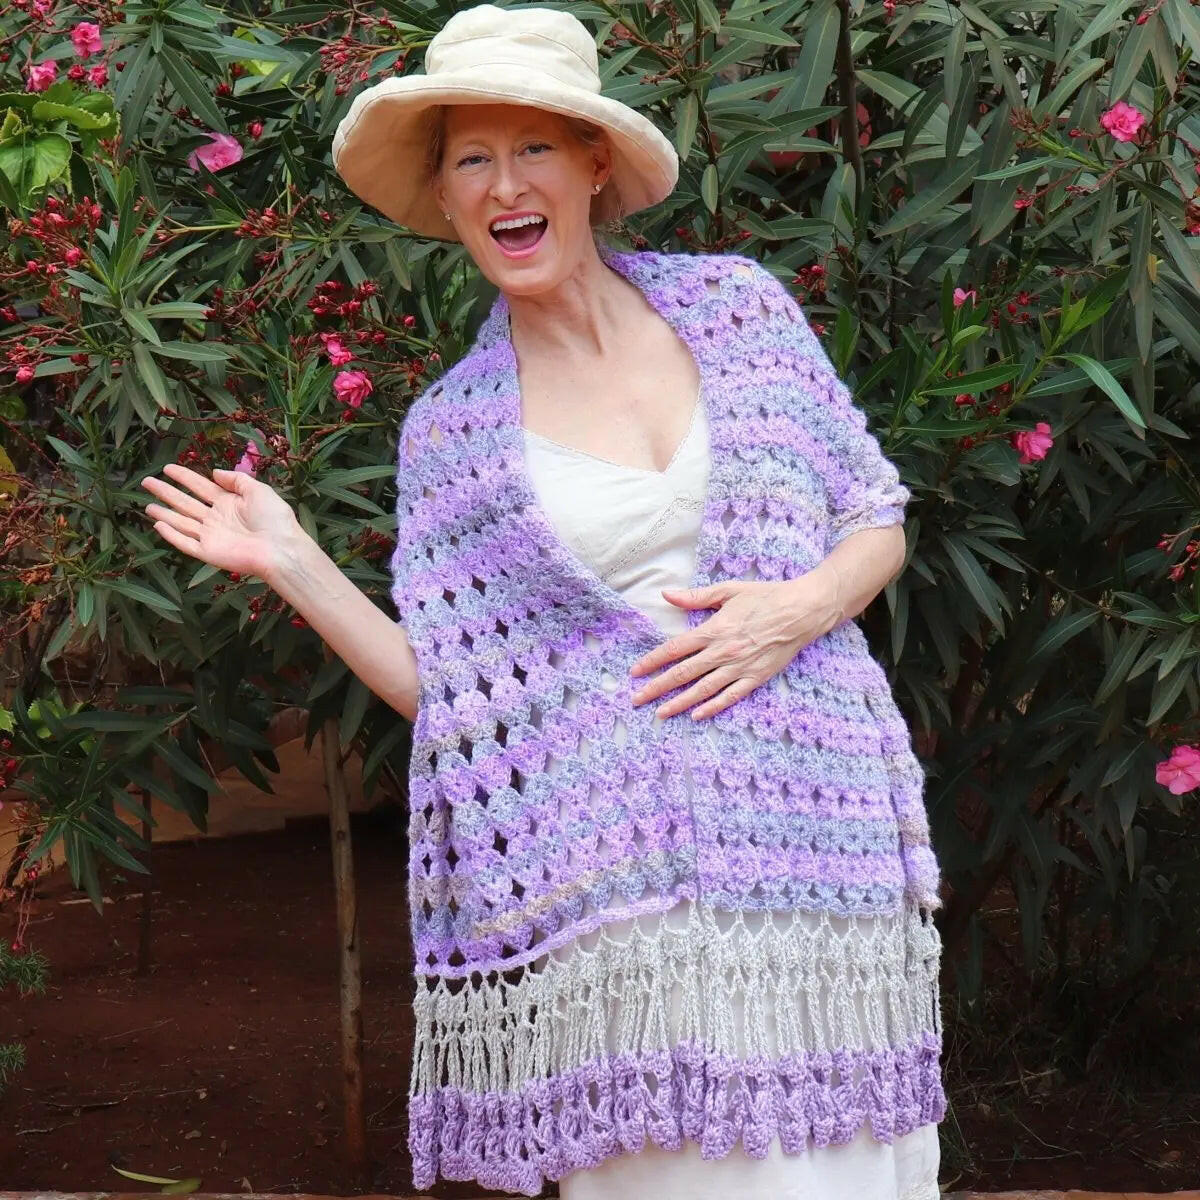
Have you ever felt the cozy embrace of a handmade shawl, the kind that whispers stories of dedication and love with every stitch? The Global Foxtrot Shawl captures that essence perfectly. This unique design features a mesmerizing globe-like stitch pattern, playfully accented by the flowing movement of the Foxtrot border.
Christa, from The Secret Yarnery, has a gift for crafting crochet designs that are both accessible and stunning. Her patterns empower crocheters of all skill levels to create beautiful, wearable art.
This blog post serves as your personal roadmap to crocheting the Global Foxtrot Shawl. We'll break down Christa's tutorial into manageable steps, offering guidance and tips along the way. Whether you're a crochet newbie or a seasoned pro, prepare to embark on a rewarding journey of creativity and skill. Learn all you need to know about crochet with tutorials, patterns, and motivation from The Secret Yarnery.
Ready to get started? You can find the original tutorial here:
Table of contents
Discovering the Design's Allure and Versatility
What makes the Global Foxtrot Shawl so special? Well, it's the stitch pattern! It cleverly disguises the direction in which you started. You can't easily tell if it was worked horizontally or vertically because of those adorable little "globes."
This is especially handy if you're working with a yarn that has a long color change. You can simply work the shawl lengthwise, creating skinny, vertical stripes. But the pattern also shines with shorter color changes, like the yarn Krista uses. And imagine it in a solid color! The possibilities are truly endless.
The Foxtrot border? It's the dance in the design! It adds a touch of elegance and playful movement to the shawl's edge. It gives it a little oomph!
The best part? This pattern is incredibly versatile. You can adapt it to different yarn weights and colors, making it your own unique project. Don't be afraid to dive into your yarn stash and experiment! As Krista herself says, "I love the pattern, I love the size of it!" I couldn't agree more!
Gathering Your Crochet Arsenal: Materials and Tools
Before we dive into the stitches, let's gather our supplies. Having everything on hand will make the process smoother and more enjoyable.
Yarn Selection: The Foundation of Your Shawl
The yarn you choose will significantly impact the look and feel of your finished shawl.
-
Rosetta Worsted from Ice Yarns: Krista uses Rosetta Worsted from Ice Yarns. This yarn is a blend of 30% wool and 70% acrylic, making it soft, warm, and easy to care for. It's a size 4 medium weight yarn, perfect for this project. Find similar great yarn on The Secret Yarnery website.
-
Alternative Yarn Suggestions: Don't have Rosetta Worsted on hand? No problem! Any worsted weight yarn will work. Consider these options:
-
Wool: For a warm and rustic feel.
-
Acrylic: For affordability and easy care.
-
Cotton: For a lightweight and breathable shawl, perfect for warmer weather.
-
Blends: Experiment with different fiber blends to achieve your desired texture and drape.
-
-
Border Yarn Options: For the border, Krista uses a combination of silk cotton and cotton bamboo light. These yarns add a touch of luxury and softness to the edge of the shawl. Look for similar yarns that complement your main yarn in color and texture.

Essential Tools for a Smooth Crochet Experience
Besides yarn, you'll need a few essential tools to bring this project to life:
- Crochet Hook: A 6 mm crochet hook is recommended for this pattern.
- Stitch Markers: Stitch markers are your best friends! They help you keep track of your stitch counts and ensure accurate pattern placement. I suggest these stitch markers from Amazon.
- Scissors: A sharp pair of scissors for clean yarn cuts.
-
Darning Needle: A darning needle helps you weave in loose ends, creating a polished and professional finish.
- Find great darning needles on Amazon.
Getting Started: The Foundation Chain
Alright, let's get our hands moving! The first step is creating the foundation chain, the base upon which our entire shawl will be built.
Creating the Slip Knot
Start by making a slip knot. There are many ways to make a slip knot, so use whichever method you're most comfortable with. Here's a quick refresher:
- Wrap the yarn around your fingers, creating a loop.
- Insert your hook into the loop and catch the yarn.
- Pull the yarn through the loop, creating a new loop on your hook.
- Tighten the knot by pulling on the yarn tail.
Chaining Two
Next, chain two. This will be the starting point for our foundation row. Remember not to count the slip knot or the loop on your hook when counting chains. Only count the "V's" or the loops in between.
Working into the First Chain
Now, this is where it gets a little tricky. We need to work into the very first chain we made. This can be a bit fiddly, but it's important for creating a solid foundation.
Try to get two loops of that stitch onto your hook. Go into kind of the bottom half and just kind of poke with your finger, ensuring you have two strands of yarn from that very first chain on the top of your hook.
Chain One
After pulling your strand of yarn up through the two loops from the first chain, chain one. Pinch that chain open; you want to have two loops behind your thumb and one loop in front.

The Chain List Single Crochet Foundation
Now, we're going to create a foundation row that combines chains and single crochets. This technique creates a stretchy and even edge, perfect for a shawl.
The Chain-Single Crochet Hybrid
Instead of a typical chain foundation, we're making a chain and then essentially crocheting it at the same time. This creates a super elastic and durable foundation. It might look a little strange at first, but trust the process!
Step-by-Step Instructions
Here's how it works:
- Separate the chain you just made, ensuring one loop is in front of your thumb and two loops are behind.
- Insert your hook back down right to where you're holding it open, sliding those two loops onto your hook.
- Grab your yarn and bring it back, pulling your hook up to get that loop a bit loose.
- Chain one.
- Wrap your yarn, take off two, and separate that chain that you just made. Keep one loop in front of your thumb.
- Wrap your yarn and take off two.
Tips for Success
- Keep track of your chains! It's easy to lose count, so pay attention.
- Make the chains a little loose by pulling up your hook. This will prevent the foundation row from being too tight.
Determining the Shawl's Width
Continue working this chain list single crochet foundation until your shawl reaches your desired width. For this tutorial, I'm making a narrow one to get you started.
Strategic Stitch Marker Placement: Ensuring Pattern Accuracy
Stitch markers are essential for keeping our stitch counts accurate and ensuring the shell pattern aligns correctly. Let's place them strategically along our foundation row.
Purpose of Stitch Markers
These little helpers will mark specific points in our pattern, ensuring that our shells are evenly spaced and that we don't accidentally add or subtract stitches. Trust me, they'll save you a lot of headaches later on!
Identifying the Right Side
Flip your work so the slip knot is closest to you and the "V's" are facing away. This will ensure that you're counting and marking the correct stitches.
Counting and Marking
Here's how to place your stitch markers:
- Starting from the slip knot end, count eight "V's" (posts) along the foundation row.
- Place a stitch marker in the eighth chain. I'm going to put it right after the eighth post.
- Count seven chains. Place a stitch marker in the seventh chain.
- Repeat this process, placing a stitch marker every seventh chain along the entire row.
- In the last section, you should have eight stitches, not counting the stitch marker.
Pinching Technique
To avoid accidentally counting the stitch marker as a stitch, use Krista's technique of pinching off the stitch marker. Just pinch off that stitch so you don't look at it.
Visual Confirmation
To double-check your stitch marker placement, count the loops on one side of the chain. You should have seven loops between each stitch marker.

Row 1: Laying the Groundwork for the Shell Pattern
Now we're ready to start building the shell pattern! This is where the shawl really starts to take shape.
Turning Chain
Chain three. This chain three counts as a double crochet and will serve as our turning chain at the beginning of each row.
Skipping the First Stitch
Skip the very first stitch after the turning chain. This is important for maintaining the correct stitch count and creating a consistent edge.
Creating the First Shell
In the second stitch from the hook, work three double crochets. To do this, wrap your yarn and make three double crochets into the second stitch. See a double crochet stitch tutorial if you don't know how.
Chain Two Space
Chain two. This chain two will create the space between our shells.
Skipping Six Stitches
Skip six stitches and work into the seventh stitch, where your stitch marker is located. Because we counted and put in our stitch markers, we don't have to worry about that. Now we can just wrap our yarn and go into where our stitch marker is, the same stitch, two loops of that stitch on your hook, two loops of the V.
Shell Stitch
In the seventh stitch (where the stitch marker is), create a shell stitch: three double crochets, chain one, and three double crochets all into the same stitch. This shell stitch will be consistent throughout the entire shawl.
Removing Stitch Markers
You can remove the stitch markers after completing the shell stitch.
Repeating the Pattern
Repeat the shell stitch, chain two, and skip six stitches pattern across the entire row.

Ending the Row
At the end of the row, work three double crochets into the second stitch back and one double crochet into the last stitch.
Row 2: Building Upon the Foundation
Row 2 is where the pattern starts to solidify. We'll be building upon the shells we created in Row 1, creating a beautiful, textured fabric.
Starting the Row
Chain three and turn your work. This is the same way we started Row 1, and we'll continue to start every row this way.
Working into the Second Stitch
Again, work into the second stitch from the hook.
Creating Shells in Chain Spaces
In the chain one space at the top of the shells from the previous row, create another shell stitch: three double crochets, chain one, and three double crochets.
Repeating the Pattern
Row 2 is essentially a repeat of Row 1, with shells worked into the chain spaces of the shells below.
Visual Cues
If you're having trouble identifying the correct stitch placement, try lining up your needle or tipping up the work to see the "V's".
Chain Two Spaces
Remember to chain two between the shells!
Ending the Row
At the end of the row, work three double crochets into the last real double crochet and one double crochet into the top of the turning chain.
Maintaining Straight Edges
The consistent starting and ending procedures help create nice, straight edges for the shawl. This attention to detail will elevate the look of your finished project.

Row 3: Introducing the "Globe" Stitch
Row 3 is where the magic happens! We'll be introducing the "globe" stitch, which gives the shawl its unique and eye-catching texture.
The Key Difference
The key difference in Row 3 is that instead of a chain two space, we'll be using a chain one, single crochet around both chains from the previous row, and chain one.
Chain One, Single Crochet, Chain One
To create the "globe" effect, we'll be single crocheting around the chain two space from the previous row.
- Chain one.
- Put your hook underneath both of those chains from the previous row, and grab your yarn to bring it back.
- Wrap your yarn and take off two (single crochet).
- Chain one.
Creating the "Egg" Shape
The single crochet will create a cute "egg" or "globe" shape. You can now go back and see that you've pinched it down into a cute little egg.
Repeating the Pattern
Repeat the shell stitch, chain one, single crochet around chains, and chain one pattern across the entire row.
Ending the Row
At the end of the row, work three double crochets into the last real double crochet and one double crochet into the top of the turning chain.
Pattern Repeat
From now on, you're simply repeating the rows.
Continuing the Pattern: Reaching Your Desired Size
Now you know the basic pattern! Keep repeating these rows, alternating between the shell rows and the globe rows, until your shawl reaches your desired size. Enjoy seeing the pattern grow!
Finishing the Shawl Body: The Final Row of Globes
When your shawl reaches your desired length, end with a row of the "globe" stitch pattern. This will create a cohesive and visually appealing finish.
Creating the First Border Row: Loops for the Foxtrot
Now it's time to add the Foxtrot border, the final flourish that will elevate your shawl to the next level!
Chain One and Turn
Chain one and turn your work to begin the border.
Single Crochet Edge
Single crochet into the very first stitch to create a clean and even edge.
Chain Six Loops
We'll now create a series of chain six loops along the top of the shawl. These loops will form the foundation for the Foxtrot border. To do this, chain six, and single crochet into the top of each globe.
Consistent Spacing
Maintain consistent spacing between the loops for a visually appealing border.
Ending the Row
At the end of the row, make two single crochets (into the top of the last double crochet and into the chain) to maintain a nice edge.
Cutting and Securing Yarn
Cut your yarn, pull your hook up, and pull your yarn through and snug that down to secure.

Building the Foundation: Single Crochet into Each Chain
We'll now reinforce and define the loops we created in the previous row.
Chain One and Turn
Chain one and turn your work.
Single Crochet Edge
Single crochet into each of these first two stitches.
Single Crochet into Each Chain
Single crochet into each chain of the loops we created in the previous row. If you just look on one side of your chain, you can do one single crochet into each chain going back to your next globe.
Single Crochet into Single Crochets
Also, single crochet into the single crochets that secured the loops.
Ending the Row
End with two single crochets in two stitches on this end to keep your edge nice and straight.
Cutting and Securing Yarn
Cut your yarn, pull your hook up, and pull your yarn through and snug that down to secure.
Introducing the Border Yarn: Joining and Creating Spaces
Now we'll switch to our border yarn, adding a touch of color and texture to the edge of the shawl.
Selecting a Complementary Yarn
Choose a border yarn that complements the main yarn in color and texture. Something that matches any of the colors in the yarn that you're using.
Joining the New Yarn
To join the new yarn, I'm going to go straight into that very first stitch, two loops on my hook like that. Put a loop of yarn on your hook, leaving a long enough tail to sew in with a needle later. Bring that yarn through and slip stitch with both strands to join.
Creating Spaces for Trebles
This row will create spaces for the treble crochets in the next row. Chain six, and skip over to where your next single crochet is that connects the globe underneath. Then, single crochet into the same stitch where we attached our globe down below.
Repeating the Pattern
Repeat the chain six and single crochet pattern across the entire row.
Treble Crochet Shells: Adding Texture and Elegance
Now it's time to create the treble crochet shells that will give the border its distinctive look!
Chain Four and Turn
Chain four and turn your work.
Treble Crochet Shells
In each of the spaces, create treble crochet shells. Remind readers to wrap the yarn twice for treble crochets. I'll create a shell consisting of four treble crochets, chain two, and four treble crochets into each space.
Jumping Between Shells
There is no chain or slip stitch between the shells; simply jump from one shell to the next.
Treble Crochet Edge
Make a treble crochet just to pin it down right at the very edge.

Creating the Finger Loops: A Delicate Touch
This row will create delicate "finger loops" along the edge of the shawl, adding a touch of whimsy and elegance.
Chain Six and Turn
Chain five (counts as a double crochet) and three chain for the space, then turn your work.
Double Crochet with Chain Fifteen
This row will create delicate "finger loops" along the edge of the shawl. Double crochet into the chain two spaces of the treble crochet shells. Then, chain 15, hold that chain on your hook, wrap your yarn and one more double crochet into the chain 2 space, and repeat.
Chain Three Spaces
Chain three into the space between the shells. Wrap your yarn and 1 double crochet into the center space.
Pattern Repetition
Repeat the double crochet and chain 15 pattern across the entire row.
Finalizing the Loops: Securing the Delicate Edge
We'll now secure the finger loops, creating a more defined and polished edge.
Chain Eleven and Turn
Chain eleven and turn your work.
Working into the Loops
This row will secure the finger loops and create a more defined edge.
Loop Types
Instruct readers to double crochet into the first chain 15 loop. Into the next chain 15 loop, wrap the yarn twice the way you do triple crochets.
Pattern Repetition
Repeat the three loops for each chain set.
Slip Stitch to Finish
Slip stitch into the third chain up, and chain one to secure.
Last Row: Joining the Yarn for the Final Border
For this border, we're going to join the yarn not into your first double crochet, but into the chain right before it. Then, loop the new yarn through, and chain 5.
Skip Doubles
Skip the doubles, and go right into the center of those triples and follow the instructions.
Three Shells Into Each Space: The Final Flourish
Here we'll be making three shells into each space.
Double Crochet into the Third Chain
Wrap your yarn and into the third chain up, make 1 double crochet just to finish off the shawl like that, and there's the edge.
Chain Six and Turn
Chain six, turn your work, and continue working as normal to finish the row following the previous instructions, and it should look amazing!
Finishing Touches: Weaving in Ends
Once you've completed all the crochet, you will want to clean up the edges by weaving in any loose ends.
Share Your Project: Inspiring Others
I'd love to see your finished Global Foxtrot Shawl! Share photos of your creation on social media using the hashtags #SecretYarnery, #GlobalFoxtrotShawl, and #CrochetShawl. I love seeing what you create! Find me on Facebook - The Secret Yarn or join our crochet community to show off your new shawl!
Conclusion: Embracing the Beauty of Handmade
Congratulations! You've successfully crocheted your own Global Foxtrot Shawl. This pattern is the perfect place to find new patterns, tips, and tricks. This Easy Rectangular Crochet Scarf offers a unique design that you can give as a gift or keep for yourself. I hope you enjoyed the process and are thrilled with the result. Keep exploring the wonderful world of crochet, and never stop creating!
FAQs
1. What skill level is required to crochet the Global Foxtrot Shawl?
This project is suitable for confident beginners to intermediate crocheters. If you're comfortable with basic stitches like chain, single crochet, and double crochet, you're ready to start. The step-by-step tutorial makes it easy to follow the pattern.
2. How long does it take to complete this shawl?
The time required depends on your crochet speed, chosen yarn, and the size of the shawl you create. On average, completing the Global Foxtrot Shawl may take anywhere from a few days to a couple of weeks when working consistently.
3. Can I use a different yarn weight or fiber for this shawl?
Absolutely! While the tutorial specifies a worsted-weight yarn, this pattern is highly versatile. You can use lighter yarns like DK or heavier ones like bulky for a different texture and drape. Just adjust your hook size accordingly.
4. What hook size should I use if I change the yarn weight?
Adjust the hook size based on your yarn label's recommendations. For lighter yarns like DK, you might use a 4-5 mm hook, and for bulky yarn, a 7-8 mm hook may be ideal. Always swatch beforehand to find the drape you prefer.
5. What is the best way to keep edges straight while crocheting?
Consistency is key. Always ensure you're working into the correct stitches at the beginning and end of rows. Checking your stitch count occasionally and using stitch markers can help maintain straight, even edges.
6. Can I customize the shawl size?
Yes! You can easily adjust the width by altering the length of the foundation chain or the overall length by adding or reducing rows. Keep the stitch pattern repeat in mind for symmetry.
7. How do I choose yarn colors for this project?
This pattern shines with all types of color options:
- Solid Colors: For a clean, classic look.
- Gradient or Ombre: To highlight the flow of the stitches.
- Self-Striping Yarn: Allows color changes without needing to switch yarns manually.
- Contrasting Yarn for Border: Adds a pop of interest to the edges.
8. What can I do if my foundation chain is too tight?
If your foundation chain feels too tight, try using a larger crochet hook for the foundation chain only, then switch back to the recommended hook size for the body of the shawl
The creative force behind The Secret Yarnery , is a passionate crochet designer and educator. With her approachable teaching style and innovative designs, she has become a celebrated name in the global crochet community.
Christa specializes in creating patterns that are accessible for beginners while inspiring seasoned crocheters to experiment and expand their skills. Her detailed YouTube tutorials and creative patterns, such as the Global Foxtrot Shawl, empower crafters to transform yarn into stunning handmade pieces.
Through her platform, Christa fosters a supportive and creative community of crochet enthusiasts worldwide. Her passion for crochet shines through in every tutorial, project, and pattern, encouraging others to explore the joy of making something by hand.
Discover more of Christa’s work and join her crochet community:
- YouTube:The Secret Yarnery
- Website & Patterns:The Secret Yarnery Patterns & Shop
- Facebook:The Secret Yarn
Let Christa inspire your next crochet adventure with her creative ideas, expert guidance, and passion for crafting!
About the Author
With a passion for crafting easy, beginner-friendly tutorials and patterns, Christa inspires crafters of all skill levels to unleash their creativity worldwide. She encourages yarn lovers to connect, create, and crochet a world filled with beautiful handmade treasures!
Global Shawl with Foxtrot Border: Easy Rectangular Crochet Scarf Guide