Dirty Granny Square | Secret Stitches Easy Stitch Sampler Blanket Pattern Part 11
If you're searching for your next go-to granny square, the Dirty Granny Square is it. This fun and simple pattern steps away from tradition with a twist: each row tells a playful story of martinis (the glasses) and olives (cute clusters of stitches). With an easy one-row repeat, I find myself crocheting this motif with barely a glance at the instructions. It’s so beginner-friendly, even those just starting their crochet journey will love it.
Ready to join me for Part 11 of the Secret Stitches Easy Stitches Sampler Blanket Pattern? Don’t worry if you missed any blocks; you can always catch up with the Secret Stitches Sampler Blanket Pattern playlist, or check out the written patterns available on Secret Yarnery's complete pattern collection.
Let’s break down the Dirty Granny Square so you can stitch up a batch of these cheerful blocks. Perfect for a big blanket, quick gifts, or anytime you’re craving something relaxing on your hook.
Overview of the Dirty Granny Square Pattern
The Dirty Granny Square stands out thanks to its clever one-row repeat, making it a dream for anyone who likes effortless projects you can work on while chatting, watching TV, or unwinding at the end of a long day. The motif is super easy to remember: just think of making martini glasses and olives—yes, literally! This quirky visual is what makes the pattern stick in your head and flow smoothly from your fingers.
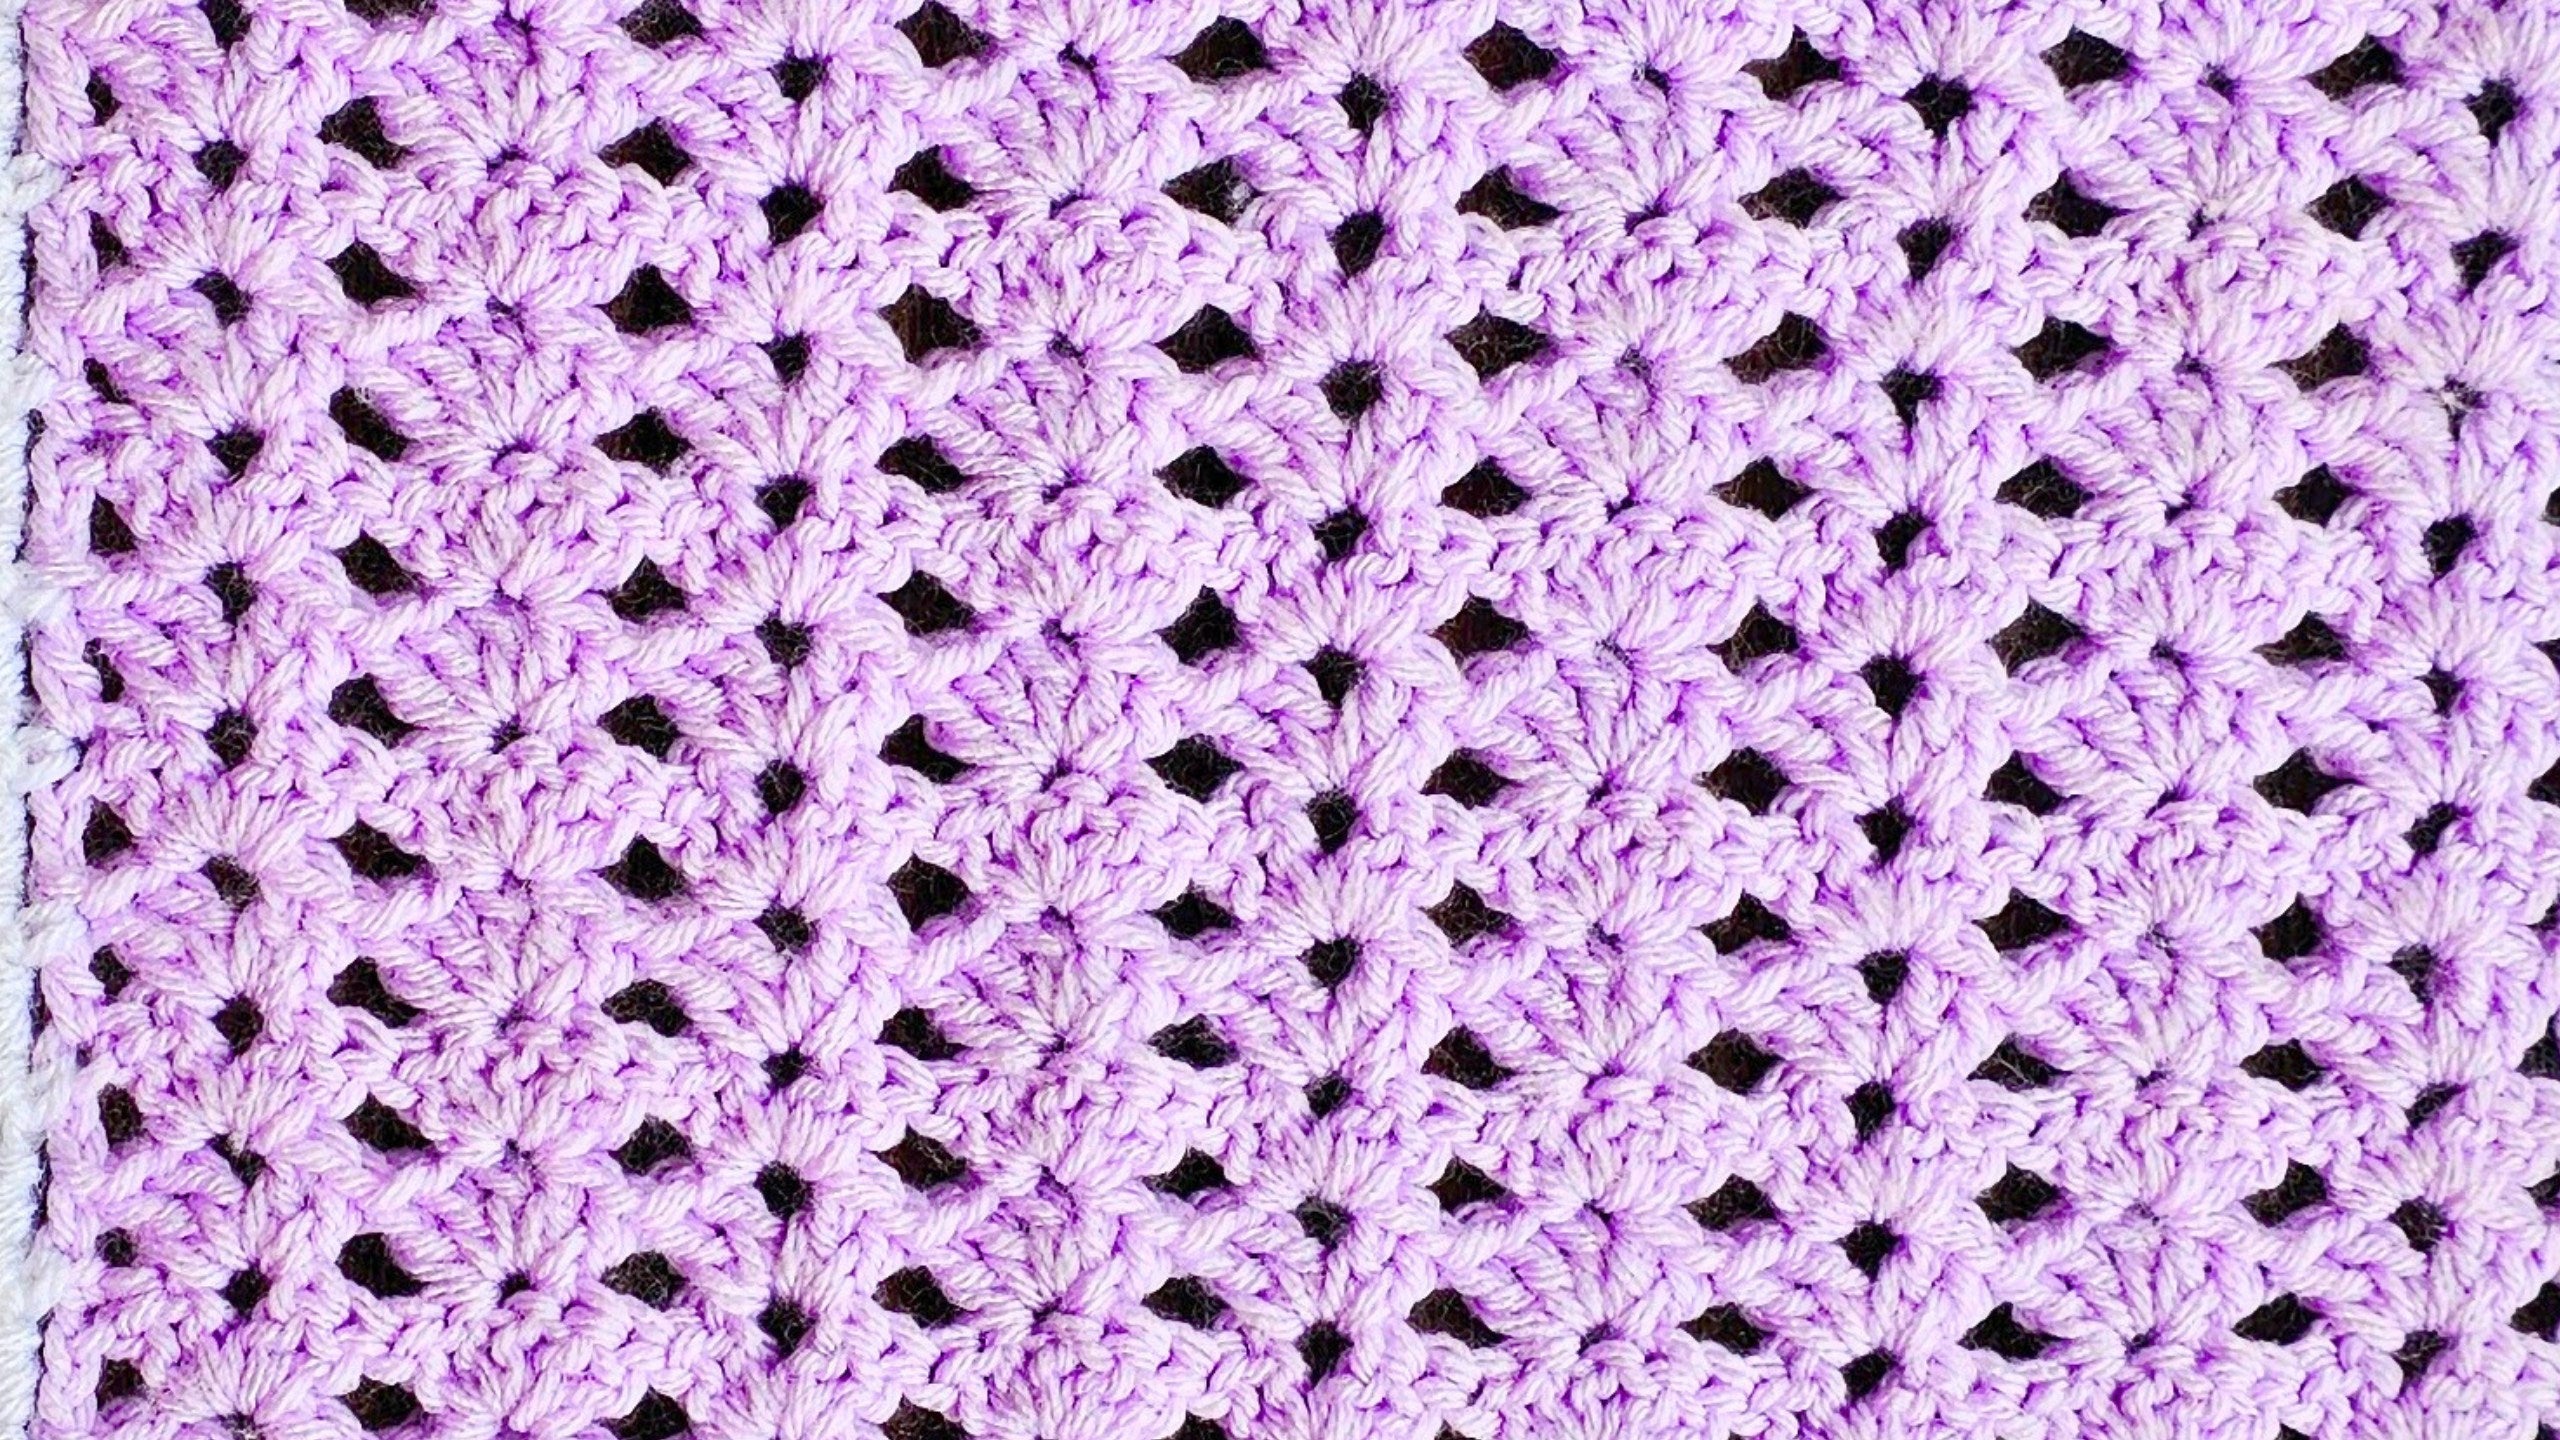
The pattern’s construction features alternating glasses (a cluster of double crochets with a space in the middle) and olives (a puff of five double crochets in one stitch). The effect is striking and repetitive, which means once you’ve got the hang of the first couple of rows, you’ll barely need to think about what comes next.
If you’re just joining or need a refresher, find support and inspiration from the Secret Yarnery Crochet Tutorials. You’ll discover video walk-throughs, step-by-step guides, and a lively community sharing their progress.

Materials Needed for the Dirty Granny Square
Before grabbing your yarn, let’s run through the essentials. It pays to be prepared (nobody likes hunting for a stitch marker mid-project). For the Dirty Granny Square, you’ll need:
- Yarn of your choice (make sure to match weight and fiber with your other blocks)
- 6 mm crochet hook (use a 7 mm one only for the foundation chain if you tend to chain tightly)
- Sharp scissors
- Darning needle (to sew in those tails)
- 5 stitch markers (life savers for keeping your place!)
If you like specific brands, I’m using Saver from Ice Yarns for my square, but any worsted weight or whatever you’ve chosen for your other CAL blocks will do just fine. Remember, color is up to you—one shade for a classic look, different hues to make it pop! The real trick is to keep yarn weight and fiber consistent so your squares join evenly later.
Check out my favorites for handy notions and great yarn deals in my Amazon Store for crochet must-haves. I always find it helps to have backup scissors or extra stitch markers in my toolkit.
Preparing to Start: Making the Slip Knot and First Chain
A neat starting chain is key. Here’s how I set mine up:
- Make a slip knot using your preferred method and pop it onto your hook.
- Chain loosely—tight chains make it tough to work the first row. If you tend to chain tight, swap to a larger hook (7 mm) just for this step.
- Begin by chaining 8 stitches for the base.
- Once your initial chain is set, roll your chain over on its side to find those useful back loops.
Crocheting into the back loops will give your finished square a polished, tidy edge, perfect for joining to other blocks.

Adding Stitch Markers Along the Chain
This is where those stitch markers come in handy. Roll the starting chain gently onto its side to reveal the back loops (also called camel bumps) running along the length.
- Insert a stitch marker into the back loop of the 8th chain.
- Chain another 8, add a marker to the 8th chain’s back loop.
- Repeat until you’ve chained 40 stitches and placed all 5 markers, evenly spaced along the chain.
Tip: Gently use your fingers to roll the chain and find each back loop. Don’t rush; this simple prep step saves a ton of time counting later on. Visualize a row of little flags running down your chain—each one tells you where to work your special motif stitches.
Finishing the Initial Chain Setup
Once you’ve chained 40 and placed all five markers, chain one more to round off the base. Now your work is ready. Roll the foundation chain onto its side again. Your stitch markers now serve as signposts for where to change up your stitches—so you won’t lose your place as you go.

Row One: Working Into the Back Loops
Time to start those glasses and olives!
- Locate the 6th back loop from your hook (the markers and careful rolling make this easy).
- Yarn over and make two double crochets into this loop.
- Chain two, then work two more double crochets in the same stitch—this forms your first glass.
Next:
- Skip three chains, then work into the fourth (where your next marker is).
- Here, you’ll put five double crochets—this makes the first olive.
Continue this rhythm across the row
- Skip three chains, work into the fourth with a glass (two dc, ch 2, two dc).
- Skip three, then olive (five dc into one chain).
- Alternate all the way to the end.
Each marker (or every 8th chain) signals where you work your motif, so you don’t have to keep recounting from scratch. If working in back loops feels fiddly, you can use the front, but trust me—back loops leave a crisp bottom edge everyone admires later.
Creating the Glass and Olive Motifs
Let’s get clear on what makes a glass and an olive:
- Glass: Two double crochets, chain two, two double crochets—all into the same stitch or space.
- Olive: Five double crochets all into the exact same stitch.
On row one, work a glass, skip three, then an olive, skip three, then a glass, and so on. Your row will finish with a glass motif. Picture this as a row of little martini glasses, each paired with its own olive—easy to remember and quick to hook.
If you like learning by visuals, a stitch diagram or symbol chart can really help cement the pattern in your mind—check out the Crochet Stitches Basics guide for a quick refresher on reading them.

Skipping Chains and Stitch Marker Use
Between each motif, skip three chains to create the right spacing. Those stitch markers shine here! They help you quickly find the fourth chain to work into.
Sometimes, a marker might get caught up or feel annoying. If that happens, just take it out—once you’ve made the stitch, you’re safe to remove it. Still, during setup, they’re a huge help for keeping motifs evenly spaced.
Tip: Place stitch markers as you go, not after, to keep your place and rhythm.
Counting and Staying on Track During Row One
A common challenge is that the chain behind an olive can get pulled tighter by all those stitches. To avoid accidentally skipping or squeezing your next glass, count back loops carefully before every motif.
Pro tip: After every olive, stretch out your work a little, then use your hook or nails to find the first proper back loop. This keeps motifs lining up straight and your row looking smooth.
If you make a mistake, it’s easy to frog back. Don’t rush—steady counting leads to perfect squares!
Ending Row One With a Double Crochet
The last step on row one is simple: when you reach the end, you’ll see three chains left.
- Make one double crochet in the last chain, right on top of the knot.
- This finishes row one and keeps the pattern tidy, with glasses at both start and finish.
Once you’re done, remove the stitch markers if you like—it’s smooth sailing from here.

Beginning Row Two: Chain Three and Turning Work
To begin row two:
- Chain three to bring your yarn up to row height.
- Turn your work so the chain faces you and is ready for easy access.
- To turn: slide your hand under the working yarn, grab your work, and swing it around so the chain is at the front.
This step keeps your stitches in the right position and ensures your glasses and olives stack up neatly.
Row Two: Placing Glasses and Olives into Their Centers
For row two, the pattern is even easier:
- Into the center space (the chain two) of each glass, put a glass.
- Into the third stitch of each olive, put an olive.
Repeat this to the end.
Here’s a step-by-step for the row:
- Yarn over, work two double crochets into the chain two space of the glass.
- Chain two, then add two more double crochets in the same spot.
- Next, count over to the third stitch (center) of the olive. Place five double crochets in this same stitch.
Continue this rhythm: glass in glass, olive in olive.
If you want to see how seamlessly this comes together, the video tutorial gives a close-up on hand placement and counting. Sometimes it’s the movement of the hook that makes it all click.

Counting Stitches for Row Two
Finding the true center of an olive keeps the pattern tidy. To do it:
- Use your thumb or index finger to lightly open up the “olive.”
- Count the stitches: one, two, three—the third is always the middle.
- Insert your hook, making sure you pick up both strands to avoid snagging.
Tips:
- Keep your tension even; don’t pull too hard.
- Double-check counts before committing to the next motif.
- If you’re unsure, use your fingers to “fan out” the olive cluster.
A little patience here saves you from having to unravel later.
Continuing Row Two: Repeat Pattern Along the Row
Keep the pattern going by always working a glass to glass and olive to olive. Consistency is key.
Pause and count your motifs after every couple of repeats. If you’re working along with the video, take a moment to compare your stitches with what you see onscreen—accuracy now leads to a beautiful result later.
Friendly reminder: It’s easy to lose track if you set your work aside between rows. Jot down how many motifs you’ve worked or take a picture if you’re pausing for later.

Finishing Row Two: Double Crochet into Chain
To finish row two:
- Make a double crochet into the top of the chain three from your turning row.
- Make sure two strands of the chain rest on your hook. This keeps the edge sturdy and square.
Neat finishes make for easier joining later and a blanket that looks polished from tip to tip.
Starting Row Three: Chain Three and Repeat
At the start of row three:
- Chain three and turn your work.
- Your job now is to repeat the pattern—glass in glass, olive in olive—across each new row.
This is where the Dirty Granny Square gets addictive. Once you’re in the groove, you can hook square after square without even thinking. If you want to track your progress, snap a photo between rows and watch your block grow.
A mini photo gallery (even if it’s just for yourself) helps spot tangles or missed stitches early.
Row Three: Step-by-Step Motif Placement
Let’s walk through row three together:
- In the center space of the glass below, make two double crochets, chain two, and two more double crochets—there’s your glass.
- Find the third stitch in the olive, work five double crochets into it—your olive is set.
- Repeat this pattern until you reach the end of the row.
Consistency in placing and tension will give you a square that’s neat and uniform—always a satisfying result. Pause the video tutorial if you need to watch the motif placement a few more times.

Continuing Pattern Until Desired Square Height
Keep repeating row three until your square reaches the desired square height. For some, that’s about 19 rows, but feel free to adjust. It’s better to lay your block flat and compare it with your other squares rather than blindly following row count.
Measuring with a ruler or laying blocks side by side guarantees a seamless join later. Perfection is more about matching up your blocks than hitting a number to the dot.
Beginning the Last Row: Chain One and Turn
Once your square matches your other blocks, it’s time for the finishing edge.
- Chain one and turn your work. This simple step makes your edge neat and ready for joining.
Double-check that your turning chain isn’t too tight—a loose, relaxed turn makes the last row easier to stitch.
Last Row: Single Crochet and Chain Three Edging Pattern
The last row brings it all together with a tidy, lacy edge:
- Single crochet in the first stitch.
- Chain two and single crochet in the center of the first glass.
- Chain three and single crochet in the middle (third stitch) of the first olive.
- Continue: chain three, single crochet in the next glass center, then chain three and single crochet in the next olive center, all the way across.
- After your last single crochet in a glass, chain two and single crochet into the top of the starting chain three.
This border is quick, airy, and makes future joining a breeze. If you want to see the exact stitch placement, jump to 14:34 in the video tutorial for a close-up look.

Finishing Off: Last Single Crochet, Chain One, and Cut Yarn
To fasten off:
- After the last single crochet in the top of the chain three, chain one.
- Snip your yarn with a sharp pair of scissors.
- Pull the hook up and your yarn through all the way.
- Snug the knot down tight to secure your yarn—no one likes a square coming undone!
Next, grab your darning needle and sew in those pesky tails. Hide them well; this gives your square a clean, pro finish.
Extra Tips for Dirty Granny Square Success
- Always match yarn weight and fiber throughout blocks for even joins.
- If you want easy-care blankets, pick machine-washable yarns.
- Use stitch markers as needed until you’re comfortable tracking motifs by eye.
- For a full list of new and fun patterns try browsing the Secret Yarnery Frontpage Collection—there’s lots to spark fresh inspiration.
- Explorers looking for seasonal blocks or ideas will find tons on the Fun Crochet Projects for 2025 page.
Conclusion
The Dirty Granny Square truly lives up to its promise—a beginner-friendly, relaxing, and stylish addition to any crochet project. That easy one-row repeat makes it a favorite for blankets, pillow covers, or any creative purpose you can dream up. As you finish each square, take pride in how the playful glasses and olives grow in neat rows.
If you’d like more ideas or want to broaden your skills, don’t miss the Crochet How To for Beginners: Start Your First ...—a helpful walk-through for anyone building a solid foundation.
Share your finished blocks and progress photos in the Secret Yarnery Facebook group or on Instagram with #SecretYarnery—I love seeing your makes! For even more inspiration, tutorials, and yarn talk, join me for weekly crochet chats.
Thanks for hooking along with me. Now, go create your own Dirty Granny Square with confidence and joy. Let’s stay hooked and keep those stitches flying!
Left Handed?
FAQs
Q: Is the Dirty Granny Square beginner-friendly?
Yes, this pattern is designed with beginners in mind. The simple one-row repeat makes it easy to follow and quick to memorize.
Q: What yarn should I use for this square?
Any worsted weight yarn works well, but make sure the yarn matches the weight and fiber type of your other blocks for consistent results.
Q: Can I use a different hook size?
You can adjust the hook size if you crochet tightly or loosely. A 6 mm hook is recommended, but using a 7 mm hook for the foundation chain can help if you tend to chain tightly.
Q: Why do I need stitch markers?
Stitch markers help you find key spots along your starting chain and keep motif spacing even, which helps your square turn out neat.
Q: Can I make my square larger or smaller?
Yes. Continue or reduce the number of row repeats according to the size you want. Lay your square next to others for the best match.
Q: How do I avoid my squares curling or becoming uneven?
Keep your tension even and count stitches carefully. Working into the back loop of the starting chain and using stitch markers helps keep edges straight.
Q: How do I join finished squares?
Finish off following the pattern’s edging, then use your preferred joining method, such as whip stitch, slip stitch, or single crochet, to connect your blocks.
![]()
Christa Patel is the creative mind behind Secret Yarnery, known for her clear, friendly crochet tutorials and inspiring pattern collections. With years of crochet experience, Christa specializes in making beginner-friendly designs that are fun to follow and rewarding to finish. Her passion is helping others feel confident with their hooks, one cheerful project at a time.
Connect with Christa on YouTube, Instagram, or through the Secret Yarnery community to find more patterns, tips, and crochet support.
About the Author
With a passion for crafting easy, beginner-friendly tutorials and patterns, Christa inspires crafters of all skill levels to unleash their creativity worldwide. She encourages yarn lovers to connect, create, and crochet a world filled with beautiful handmade treasures!
Part 11 - Secret Stitches Easy Stitch Sampler Blanket Pattern