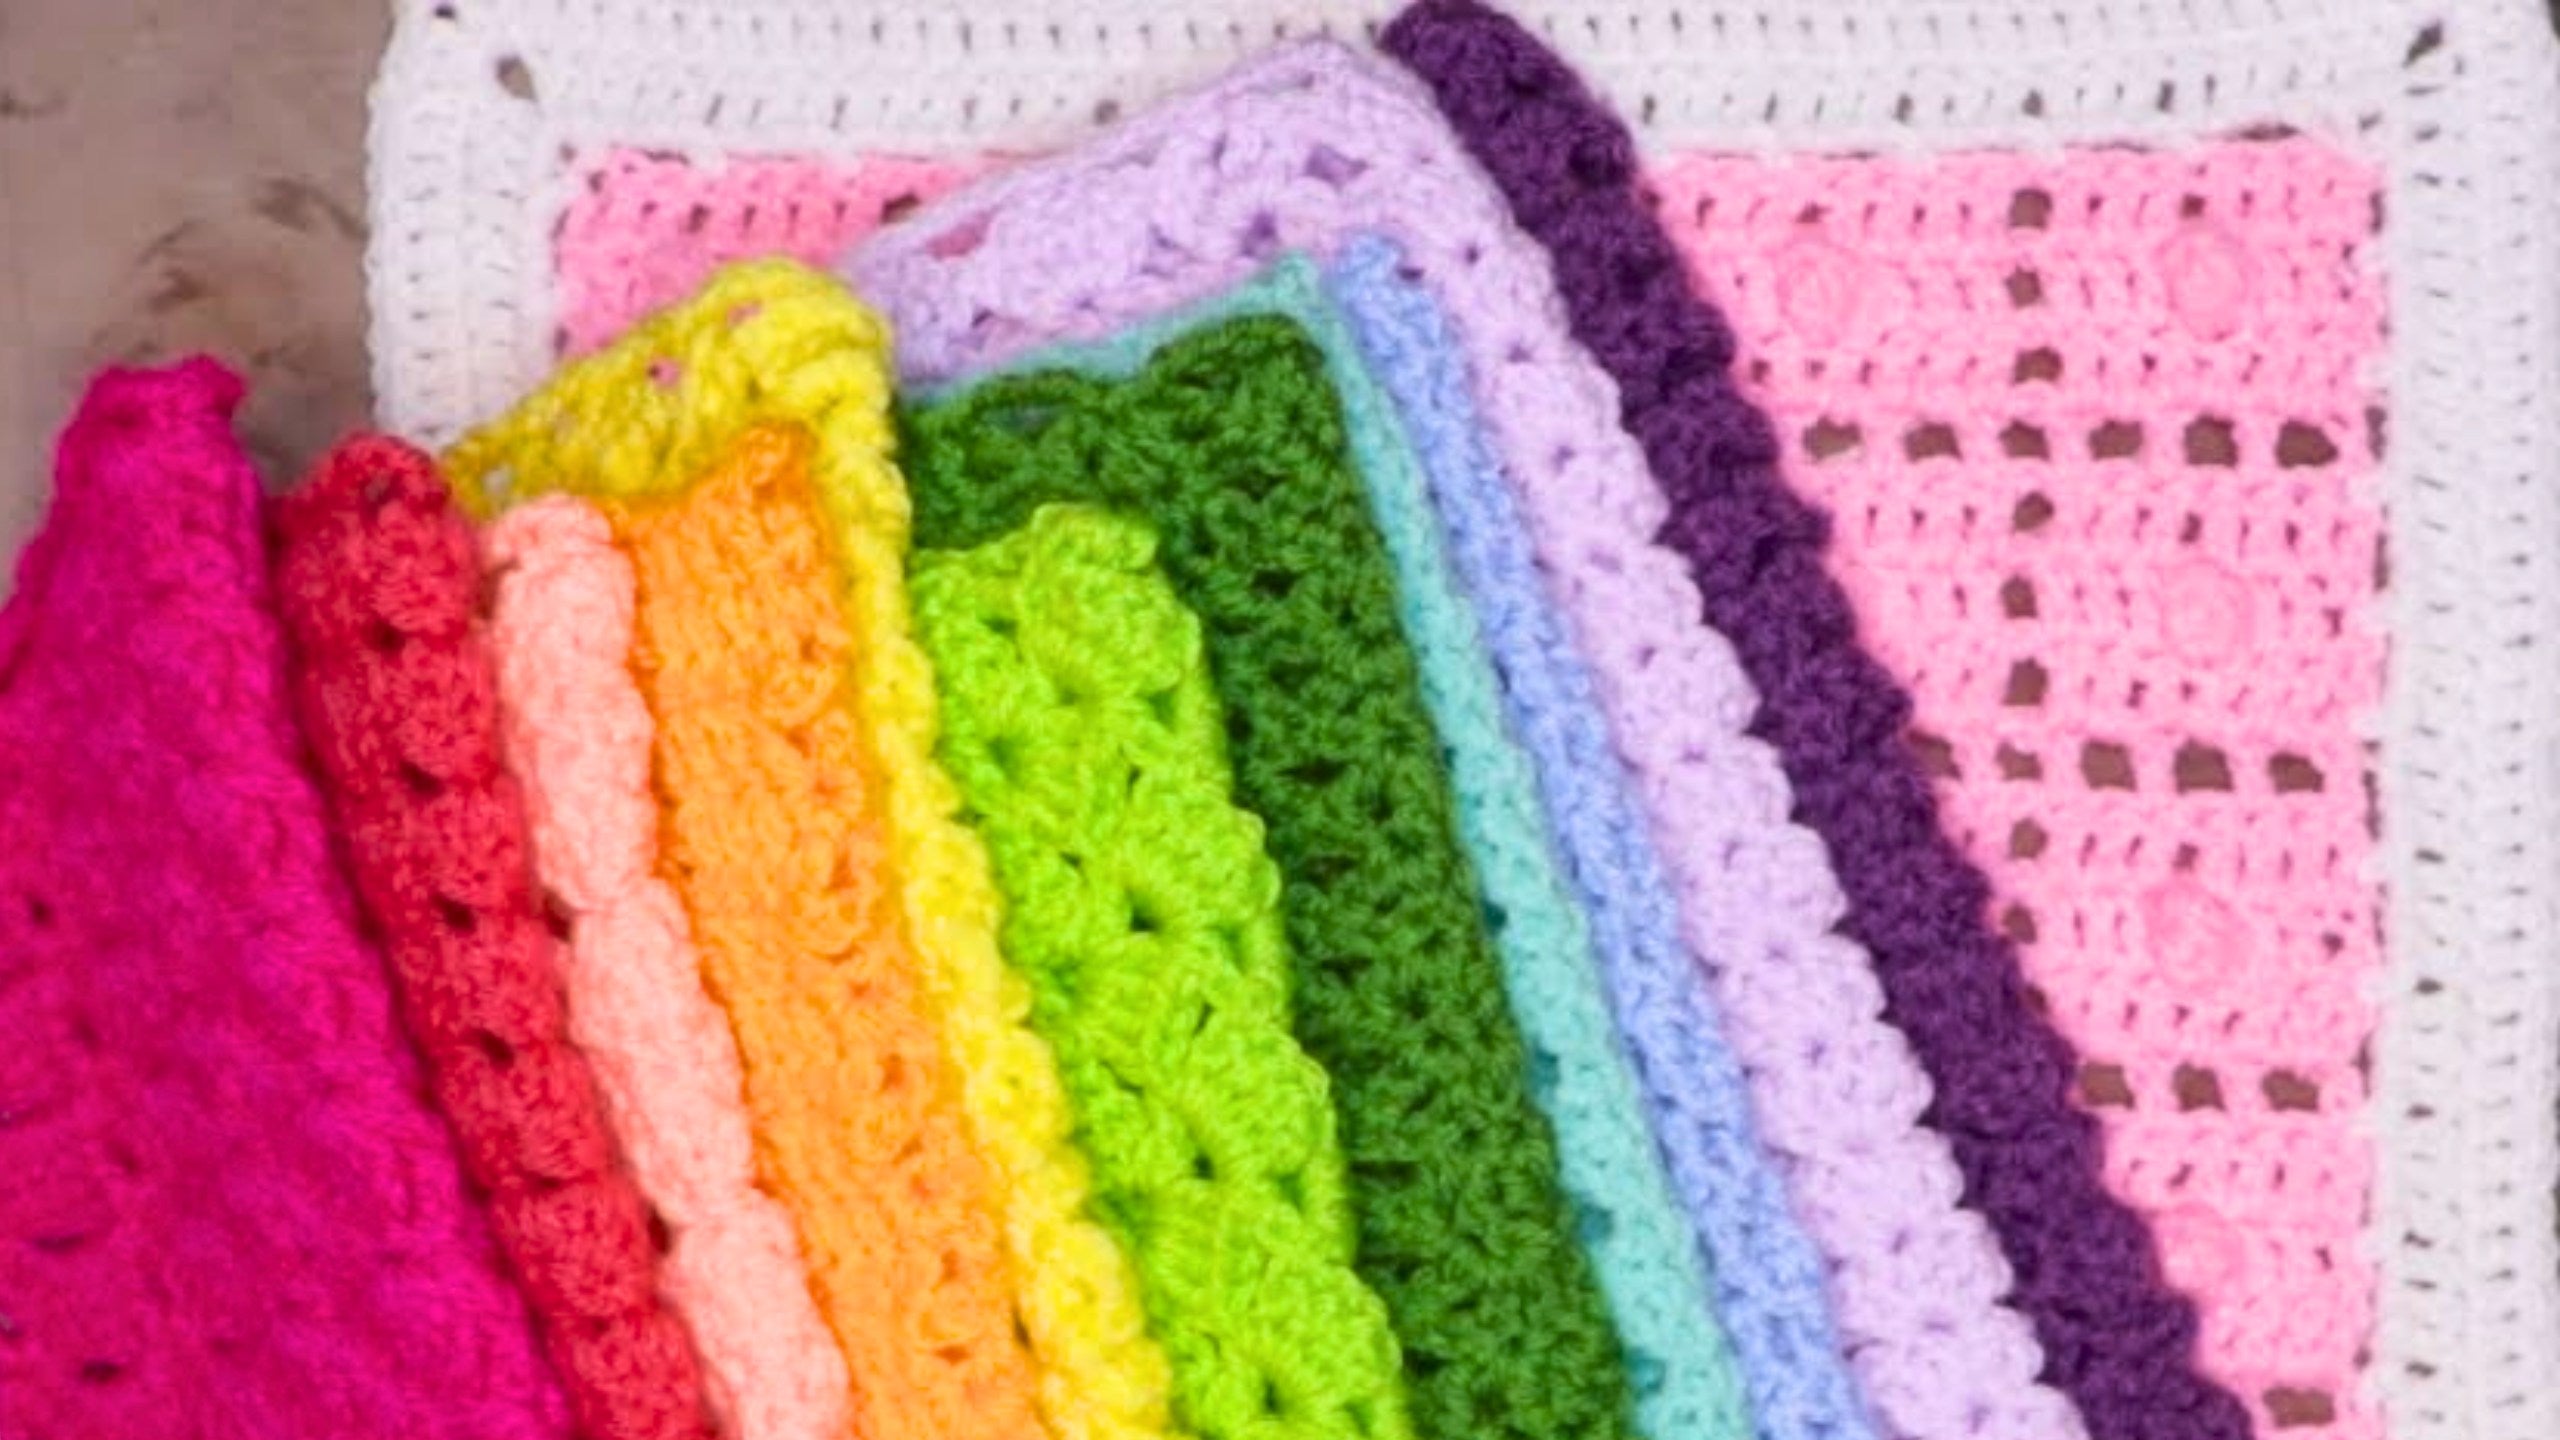
Edging Crochet Squares for Secret Stitches, Easy Stitch Sampler Blanket
Adding a beautiful edge to your crochet squares is about more than just finishing touches. The right border makes your blanket look great, helps every square lay flat, and keeps stitch counts consistent. This makes it easier to join squares later and even adds a bit of extra size.
If you’re working through the Secret Stitches Easy Crochet Stitch Sampler Blanket, this step-by-step guide will get your squares prepped and perfect, ready for joining. I'll walk you through each step with instructions and plenty of troubleshooting tips so that every square looks its best.
Before getting started, you might want to browse the full blanket playlist for all related tutorials and download the free pattern if you don’t have it yet.
Why Edging Matters for Your Crochet Squares
When you edge your squares, you’re doing more than just tidying up the sides. The main benefits include:
- Making each square lay flat—so your blanket won’t bunch or ripple.
- Getting a proper stitch count for each side—vital for that snug, straight join.
- Ensuring all squares are easy to join together later.
- Adding a little extra size for a fuller, more balanced blanket.
Edging gives your project a polished look and makes the joining stage go smoothly. Whether you’re new to crochet or a seasoned hooker, having every square prepped right takes your finished blanket to the next level.

Supplies Needed for Edging Your Crochet Squares
What Yarn Should I Use?
Stick with the 4-weight worsted acrylic yarn you used for your squares. For my Secret Stitches Easy Crochet Stitch Sampler Blanket, I used Savor from Ice Yarns and needed about 400 grams to edge all my squares. If you want a similar feel, try finding Savor yarn on Amazon or check your local yarn shop for any soft, durable worsted weight.
Stitch Markers and Their Alternatives
Here’s the guideline for what you’ll need:
- 12 stitch markers of one color (for top/bottom edges)
- 14 stitch markers of another color (for the side edges)
- 3 stitch markers of a third color (for the corners)
Don’t have that many stitch markers? Try these easy substitutes:
- Paper clips
- Bobby pins
- Scraps of yarn
The goal is to have consistent placement and avoid confusion as you mark each side.
Which Hook and Notions?
I use the same size hook I used to make the squares. For most, that’s a 6mm hook. Find a reliable crochet hook online if you need an upgrade. You’ll also want:
- Darning needle (for weaving in ends)
- Scissors (for cutting yarn cleanly)
Having the right tools handy makes edging far more enjoyable and saves time.

Preparing Your Square for Edging
Where Do I Put Corner Stitch Markers?
Start by identifying the four corners on your first square. Insert a corner marker (use a color distinct from the sides) into each one to mark where you’ll work your corner stitches. This keeps your foundation balanced and the corners sharp.
How to Space Stitch Markers Along the Sides and Edges
- Place 12 stitch markers evenly spaced across the top and bottom of your square.
- Place 14 stitch markers evenly along each side edge.
Don’t stress about exact numbers of rows or stitches between markers. Markers just need to be spaced out so each side feels even to the eye—think of this as a rough sketch, not a blueprint.
Spacing tips:
- Lay out your markers on a tabletop next to your square before inserting them.
- Try “eyeballing” the spacing, then adjust if needed. The end result will even out.
- Use color coding—for example, blue markers for top/bottom, purple for the sides—so you don’t mix them up.
This gets the setup right for a flawless border, no matter the square or stitch pattern inside.

Starting the Edging Yarn and Joining
Attaching Your Border Yarn
Begin in any corner where you inserted a corner stitch marker. Follow these steps:
- Insert your hook into the exact corner stitch (where your marker is).
- Slip stitch with your border color yarn to join.
- Drop the starting tail towards the back.
- Chain three. This chain 3 counts as your first single crochet plus a chain 2 for spacing.
Once you’ve made your initial join, remove the corner stitch marker—its job is done.
The First Round: Single Crochet and Chain Twos
The Single Crochet, Chain 2 Border: The Foundation
The main edge round uses a simple repeat. Here’s the exact pattern:
- In every spot with a stitch marker, work:
- One single crochet
- Chain two
- One single crochet in the next stitch marker spot
- Make sure to have two strands of the stitch on your hook to keep edges neat.
Step-by-Step for One Side:
- Insert hook into the marked stitch.
- Single crochet.
- Chain two.
- Single crochet into next marker stitch.
- Repeat steps 2-4 until you reach your next corner marker.
How to Handle Curling Edges or Tightness
If your edging looks like it’s curling or feels tight—no worries! This is perfectly normal at this stage. The chain-2 spaces will settle and help the border relax after a few rows or once the blanket is blocked.
My advice: focus on consistency, not perfection. If the border puckers a little, you’re on the right track.

Turning the Corners Right
At each corner marker:
- Single crochet into the corner stitch marked.
- Chain two.
- Rotate your work so you’re ready to head down the next side.
- Single crochet again into the very same corner stitch.
This pattern shapes crisp, defined corners that stay neat when you join squares later.
Here’s a recap in list form:
- Single crochet in corner.
- Chain two.
- Rotate and single crochet in the same place.
- Carry on down the next edge.
How to Handle Stitch Markers While Working the Edge
As you move along and reach a stitch marker, pull it out right before you crochet into that stitch. This prevents the marker from getting in your way or interfering with tension.
After you finish an edge (say, the top), take the markers and move them to the next edge (like the bottom), spacing them out the same way. Keeping color-coded markers for each direction (top/bottom vs. side) can help you track progress and not get off track.
If a marker snags or gets caught up, don’t stress—pull it out and keep going.

Completing the First Round
Once you’ve worked your way around all four sides, repeat the pattern everywhere a stitch is marked. Each side ends with a corner, and you’ll want to be sure corners use the same single crochet, chain 2, single crochet approach as at the start.
When all sides are edged, join the round by working a single crochet into the spot where your initial chain three began (top of the stitch). This places you neatly in the middle of the corner and keeps your join nearly invisible.
Focus on even tension so you don’t get a bulge or gap at the join—it makes a huge difference in the final look!
Beginning the Second Round: Transitioning to Double Crochet
Joining for Round Two
With round one complete, chain three to get started again—this chain always counts as your first double crochet.
Now, work into the same corner space (the chain-2 gap created in round one):
- Yarn over and double crochet into the corner.
- Double crochet into the next stitch along the edge.
- For every chain-2 space along the sides, work two double crochets.
Round Two Corner Formula
At every corner chain-2 space:
- Two double crochets.
- Chain two.
- Two more double crochets in the same space.
This corner creates a flexible pivot point and prevents the edging from pulling inward or going wavy.
Double Crochet Distribution Along Each Side
Along each straight edge:
- Double crochet into every stitch.
- Two double crochets in each chain-2 space from the previous round.
You’ll see your border start to expand and smooth out as you add the double crochets—especially by the second or third edge.

Continuing Round Two Around the Square
Working into Corners with Section-by-Section Clarity
At the end of an edge, as you approach the corner, double crochet into the final stitch (which is usually a single crochet). Then, use the corner formula: two double crochets, chain two, and two more double crochets all in the corner space.
Rotate your work as you finish each edge and start the next so the stitches sit comfortably without tugging.
Tips for Avoiding Border Mistakes
- Make sure you’re not working into the spaces between stitches unless the pattern states to do so—stick to stitches or chain spaces as directed.
- Always pick up two loops from the edge of the stitch for maximum stability.
- Double-check corners to keep stitch count correct. Missing or skipping one corner stitch can throw off future rows or your ability to join squares smoothly.
A Note on Stitch Markers This Round
Once you’re comfortable, you might find you don’t need stitch markers for round two. At this point, you’re working into clearly defined stitches and spaces, so most crocheters find the flow easier. If you want extra help for the corners, though, put a marker in each chain-2 corner space before you start this round.
Finishing Round Two and Securing the Border
How to End and Join Round Two
Once you reach the spot where you began the round:
- Double crochet into the stitch before the starting chain.
- In the final corner space, finish by working two double crochets.
- Chain two.
- Slip stitch through the top of your starting chain three.
Joining with a slip stitch at the top chain keeps your border even. Avoid pulling too tight as you join, so there’s no bunching.

Cutting Yarn and Weaving in Ends
- Chain one, cut yarn, and pull through to secure the end.
- Use your darning needle to carefully weave the tails back into the stitches. Go back and forth a few times for maximum hold.
- Make sure the ends are invisible from both sides for a professional finish.
It’s a good habit to weave in as you go, especially if you’re finishing many squares at once.
Visual and Textual Cues to Watch For
Sometimes as you work, you’ll notice edges curling or bunching up. Don’t panic—this is common and expected after the first couple of rounds. The weight of joining and the blanket itself will help set everything flat later.
Corners should remain defined, each with a neat “notch” thanks to the chain-2 spaces. If you see any bulges by the corners, recheck your stitch distribution there for balance.
Smooth, consistent stitches throughout the border mean you’re set for joining your blocks with ease.
For close-up visuals on how each step should look, reference the embedded video or find specific timestamps in the YouTube description.
Preparing All Squares for Joining
Once you finish edging one square, repeat the exact process for every other square in your Secret Stitches, Easy Crochet Stitch Sampler Blanket. This helps each one match in size and shape, and makes joining so much easier.
The edging adds size to your squares, which means the blanket comes out a bit larger overall—always a bonus for coziness.
If you’re ready to join, check out resources on techniques like the join-as-you-go method or classic seaming for more inspiration.

Community and Sharing Your Progress
Crochet is better together! If you want to celebrate your progress, tag @SecretYarnery on Instagram and share photos of your finished and edged squares. The Secret Yarnery Crochet Community on Facebook is also a great spot to upload pictures, find support, and swap tips. I love seeing what everyone makes and sharing ideas—all skill levels welcome.
Bonus Tips and Troubleshooting
How to Fix Curling, Tightness, or Uneven Edges
If your squares still curl after the edging, relax your stitch tension or try a slightly larger hook for the border. Stretching your square gently and pinning it down (blocking) before joining can also work wonders.
Creative Stitch Marker Solutions
Don’t let missing tools slow you down. I’ve used safety pins, twist ties, even contrasting strands of yarn as stitch markers. The important part is keeping your spacing consistent and being able to identify each corner.
Working With Hard-to-See Stitches
If you’re a beginner, distinguishing between stitch loops (front, back, both) takes practice. Hold your work under bright light and don’t hesitate to count in smaller sections. If you goof, gently pull back to the last correct marker and start again—everyone frogs sometimes!
For more detailed block patterns and creative square ideas, look through the Granny Squares Collection.

Helpful Links and Resources for This Tutorial
- Left-handed Edging Tutorial on YouTube
- Full Secret Stitches Easy Crochet Stitch Sampler Blanket Playlist
- Easy Stitch Sampler Cowl Crochet Pattern
- Granny Squares Collection
- Yarn on Amazon
- Crochet Hook on Amazon
- Sharp Tip Needles on Amazon
Bookmark these for easy reference as you work through the edging and joining process.
What’s Next?
Edging each square isn’t just an extra chore. It makes joining easier and gives your Secret Stitches Easy Crochet Stitch Sampler Blanket a professional look. Practice edging on one square if you’re nervous. Take your time, enjoy each step, and know that every piece is a building block towards a cozy, beautiful finish.
Stay tuned for more tutorials on joining your squares. If you want more inspiration or hands-on help with new projects, don’t forget to subscribe to the Secret Yarnery YouTube channel and ring the bell so you’ll never miss another blanket tutorial.
Thanks for hooking along with me. I can’t wait to see your finished projects—share, learn, and stay hooked!
Left Handed?
FAQs
Do I need to block my squares before edging them?
Blocking is optional, but it does help your squares lay flat and gives a cleaner edge. If your squares are curling or uneven, gently pin them and mist with water to shape before adding the border.
Can I use a different yarn for the edging?
For the best results, use the same weight and fiber content as your original squares. This keeps the texture and stretch consistent throughout your blanket.
What if I don’t have enough stitch markers?
You can substitute with bobby pins, paper clips, or scraps of yarn. The key is to keep each side evenly spaced for a balanced border.
My edges are curling after the border—what should I do?
Mild curling is normal and usually settles after joining all your squares or after a light blocking. Adjust your tension or try a slightly larger hook if the border feels too tight.
How do I join the squares after edging?
Once each square is edged, you can use join-as-you-go, whipstitch, or any preferred joining method. Check out my joining tutorials for easy, step-by-step instructions.
Can left-handed crocheters follow this edging tutorial?
Yes! There’s a left-handed edging tutorial available to make sure everyone can follow along with confidence.
Is this edging suitable for other crochet projects?
Absolutely. This technique works well for any crochet square projects, not just the Secret Stitches blanket. It adds stability and makes joining simple.
![]()
I’m Christa Patel, the creator behind Secret Yarnery. I love designing easy-to-follow crochet patterns and sharing step-by-step tutorials that help crafters of all skill levels succeed. Through my YouTube channel and online community, I aim to make crochet fun, stress-free, and creative.
Whether you’re a beginner or have years of experience, you’ll find tips, inspiration, and support to make every project a success. Happy hooking!
About the Author
With a passion for crafting easy, beginner-friendly tutorials and patterns, Christa inspires crafters of all skill levels to unleash their creativity worldwide. She encourages yarn lovers to connect, create, and crochet a world filled with beautiful handmade treasures!
Part 13 - Secret Stitches Easy Stitch Sampler Blanket Pattern