Coronation Square Crochet | Secret Stitches Easy Stitch Sampler Blanket Pattern Part 9
Ever wanted to make a crochet square that looks elegant yet is relaxing to stitch? The Coronation Square is the perfect balance of beauty and simplicity. As Part 9 in the Secret Stitches Stitch Sampler Blanket Pattern, this square stands out thanks to its easy 2-row repeat that alternates between heads and crowns. Whether you're following along with the entire crochet-along or just want a fun motif for your next project, you'll find this square fast, pretty, and enjoyable. You can work each square in its own color for contrast or stick to a single hue for a uniform, textured finish. If you prefer having a written guide, grab the Coronation Square Secret Stitches Sampler Blanket Pattern Part 9 pattern to follow along.
Overview of the Coronation Square
The Coronation Square brings a bit of royal flair to any blanket or project. Its 2-row repeat uses a heads and crowns approach: you alternate rows of double crochet clusters with rows of single crochet clusters separated by chain spaces. This rhythmic switch creates a raised texture, making the process meditative and satisfying.
Unlike some crochet squares that use plenty of stitch changes and colorwork, the Coronation Square has a consistent flow. This makes it easy to remember after just a few repeats. You can stick with one yarn color for a classic, cohesive look or try different shades in each square to make your finished Stitch Sampler blanket pop.
If written instructions are your thing, you can find patterns for this square—and all the others in the series—right on the Coronation Square Secret Stitches CAL Part 9 page. That way, you’ll have all the support you need as you crochet along.

Materials Needed for the Coronation Square
Before jumping into your stitches, make sure your supplies are ready. I used:
- Ice Yarns Saver (worsted weight acrylic), but any comparable yarn will do
- 6 mm crochet hook
- Yarn needle for weaving in ends
- Sharp scissors
- At least 4 stitch markers for tracking chains and pattern repeats
Feel free to swap in any similar worsted yarn you have on hand. The pattern is forgiving, and as long as your squares match in size, you’re good to go. If you want to use the same yarn as shown in the video, you can check out more details about the yarn used in this tutorial.
Preparing to Start – Basic Setup
Getting your foundation right sets the tone for a neat square. Here’s how I start:
- Make a slip knot in your usual way. Slip it onto your hook and tighten just enough that it glides easily.
- Chain 39 stitches. Each chain will become a base for your first row, so make sure they’re neither too tight nor too loose.
- Turn your chain so the little “V” shapes face sideways. This exposes the back loops (also known as “camel bumps”), which we’ll use for a smoother edge.
Tip: Rolling your chains so the back bumps are visible makes it much easier to insert your hook and keeps your starting edge tidy.

Working the First Row: Heads Base Setup
The first row is about making the foundation “heads”—those small bumps that will support the crowns on the next row. Here’s the flow I use:
- Find the second back loop from your hook and single crochet (SC) into it.
- Chain 1, skip 1 chain, and SC into the following back loop.
- Chain 2, SC into the same chain just used, and chain 2 again. This combo creates a bump—it’s the base of the head.
- Repeat: Skip two chains, then work (SC, ch 2, SC, ch 2) into the third chain along.
Keep repeating these steps:
- Skip two chains
- Into the third chain, work: SC, chain 2, SC
- Chain 2
As you go, your work may want to curl or twist. Don’t worry if things look wonky; it’ll smooth out as you add rows.
Continue repeating the step sequence above until you reach two stitches at the end. To finish off, chain 1, skip one, and SC into the very last chain. That neat finishing single crochet ensures your edge is level.
Tips for Identifying Stitches and Loops
When I first learned crochet, finding that sneaky back loop gave me fits. The “camel bumps” (those ridges on the backside) are the easiest place to insert your hook for a clean edge.
Tip: If you prefer, you can work into the front of the chain instead—it may be easier if you’re just starting out, though the edge won’t be quite as even.
If you roll your chain and look beneath the “V”s, you should see a row of raised bumps. Insert your hook just under them for each single crochet.

Starting Row Two: The Head Row
This next row sets up the heads, or double crochet clusters, on your base row of bumps.
- Chain 3 (this counts as your first double crochet).
- Flip your work so you can work back along the row.
- Locate the center of the first bump (the chain 2 space from the previous row).
- Into that space, work 3 double crochets.
Repeat for the rest of the row:
- Into each bump’s center (chain 2 space), work 3 double crochets.
- No need to chain between clusters; just stack neat little heads, one after another.
Near the end, after your final cluster, find the edge single crochet from the row below and double crochet into it. This locks the last cluster in neatly.
Step-by-step for Row Two:
- Chain 3, turn.
- 3 DC in the center of each bump along the row.
- 1 DC in the edge stitch at the end.
The row should look full and even—all clusters and no big gaps.
Introduction to the Crown Row Concept
The crown row is where things start looking regal. Each “crown” is a single crochet, chain 2, single crochet worked into the center of a cluster from the row below.
For the start of each crown row:
- Chain 1 to begin.
- Single crochet into the first stitch.
- Chain 1 again (this step helps keep the side edge straight).
Each crown sits on a head (that’s the 3 DC cluster), building height and texture as you go.
Remember: “head” means your DC cluster, and “crown” means an SC-chain2-SC cluster in one spot.

Detailed Crown Row Instructions
This row has a satisfying rhythm, and once you’ve got it, you’ll settle into a nice stitching groove.
Here’s the repeat sequence:
- Skip one stitch.
- Find the center stitch in your 3 DC cluster (that’s the “head”).
- Into that stitch, work:
- Single crochet
- Chain 2
- Single crochet (that’s your crown).
- Chain 2, then jump—skip two stitches—and insert your hook into the center of the next head (cluster).
- Work another crown (SC, ch 2, SC).
- Repeat this all the way across.
Near the end, after your final crown, chain 1 and single crochet into the top of the starting chain 3 from the row below. This lines up the edge so your square doesn’t pull.
Common challenges to watch for:
- It’s easy to forget to work the crown (both single crochets in the same stitch). The “chain 2 and jump” reminder really helps keep you on track.
- Count your stitches so none of your heads are left lonely without a crown.
Step-by-step for the Crown Row:
- Start: Chain 1, SC, chain 1.
- Crown: (SC, chain 2, SC) in center of each head along row.
- Chain 2, skip two stitches between each crown.
- Finish with chain 1, SC into top of starting chain.
Tip: Double-check each row to make sure you’ve crowned every head!

Remembering the Crown Pattern: Mnemonic Tips
The best trick I use is saying “chain two and jump” as I reach the space between heads. It makes it almost impossible to miss a skip or forget the next crown.
I focus on two rules:
- Always work both single crochets for each crown into the same center stitch.
- Always chain 2 and skip two stitches between crowns.
Chain two and jump! This simple phrase brings each crown row together, row after row.
Repeating the Pattern: Alternating Heads and Crowns
Once you get the hang of how these rows stack, it’s just a matter of alternating:
Heads Row:
- Chain 3, turn.
- 3 double crochets in each crown’s center (the chain 2 space), across the row.
- End with 1 double crochet in the final stitch.
Crown Row:
- Chain 1, SC, chain 1.
- (SC, chain 2, SC) in center stitch of each 3 DC cluster (head).
- Chain 2 and jump over two stitches between.
You repeat these two rows until you reach the height you want. This alternating rhythm builds up the square, with bumps (heads) and arching crowns creating layers of texture.
Here’s a visual comparison for the pattern:
| Row Type | Start | Main Stitch | Finish |
|---|---|---|---|
| Heads Row | ch 3, turn | 3 DC in each crown | 1 DC in last SC |
| Crown Row | ch 1, SC, ch 1 | Crown in each head | ch 1, SC in ch 3 |
Once you get in the flow, the pattern feels almost meditative.

Working the Final Rows to Complete the Square
For a standard Coronation Square, I aim for 12 rows of heads or 25 rows total (when including crowns).
To finish:
- On the last row, chain 1, turn, and single crochet into the first stitch.
- Work a single crochet into each crown’s center, with a chain 2 between.
- At the end, after your last single crochet in the crown, chain 2, then single crochet into the very edge stitch.
Snip your yarn, pull the tail through, and weave in your ends neatly with a needle.
Tip: Taking time to check your first and last stitches of each row keeps your square neat and prevents misshapen edges.
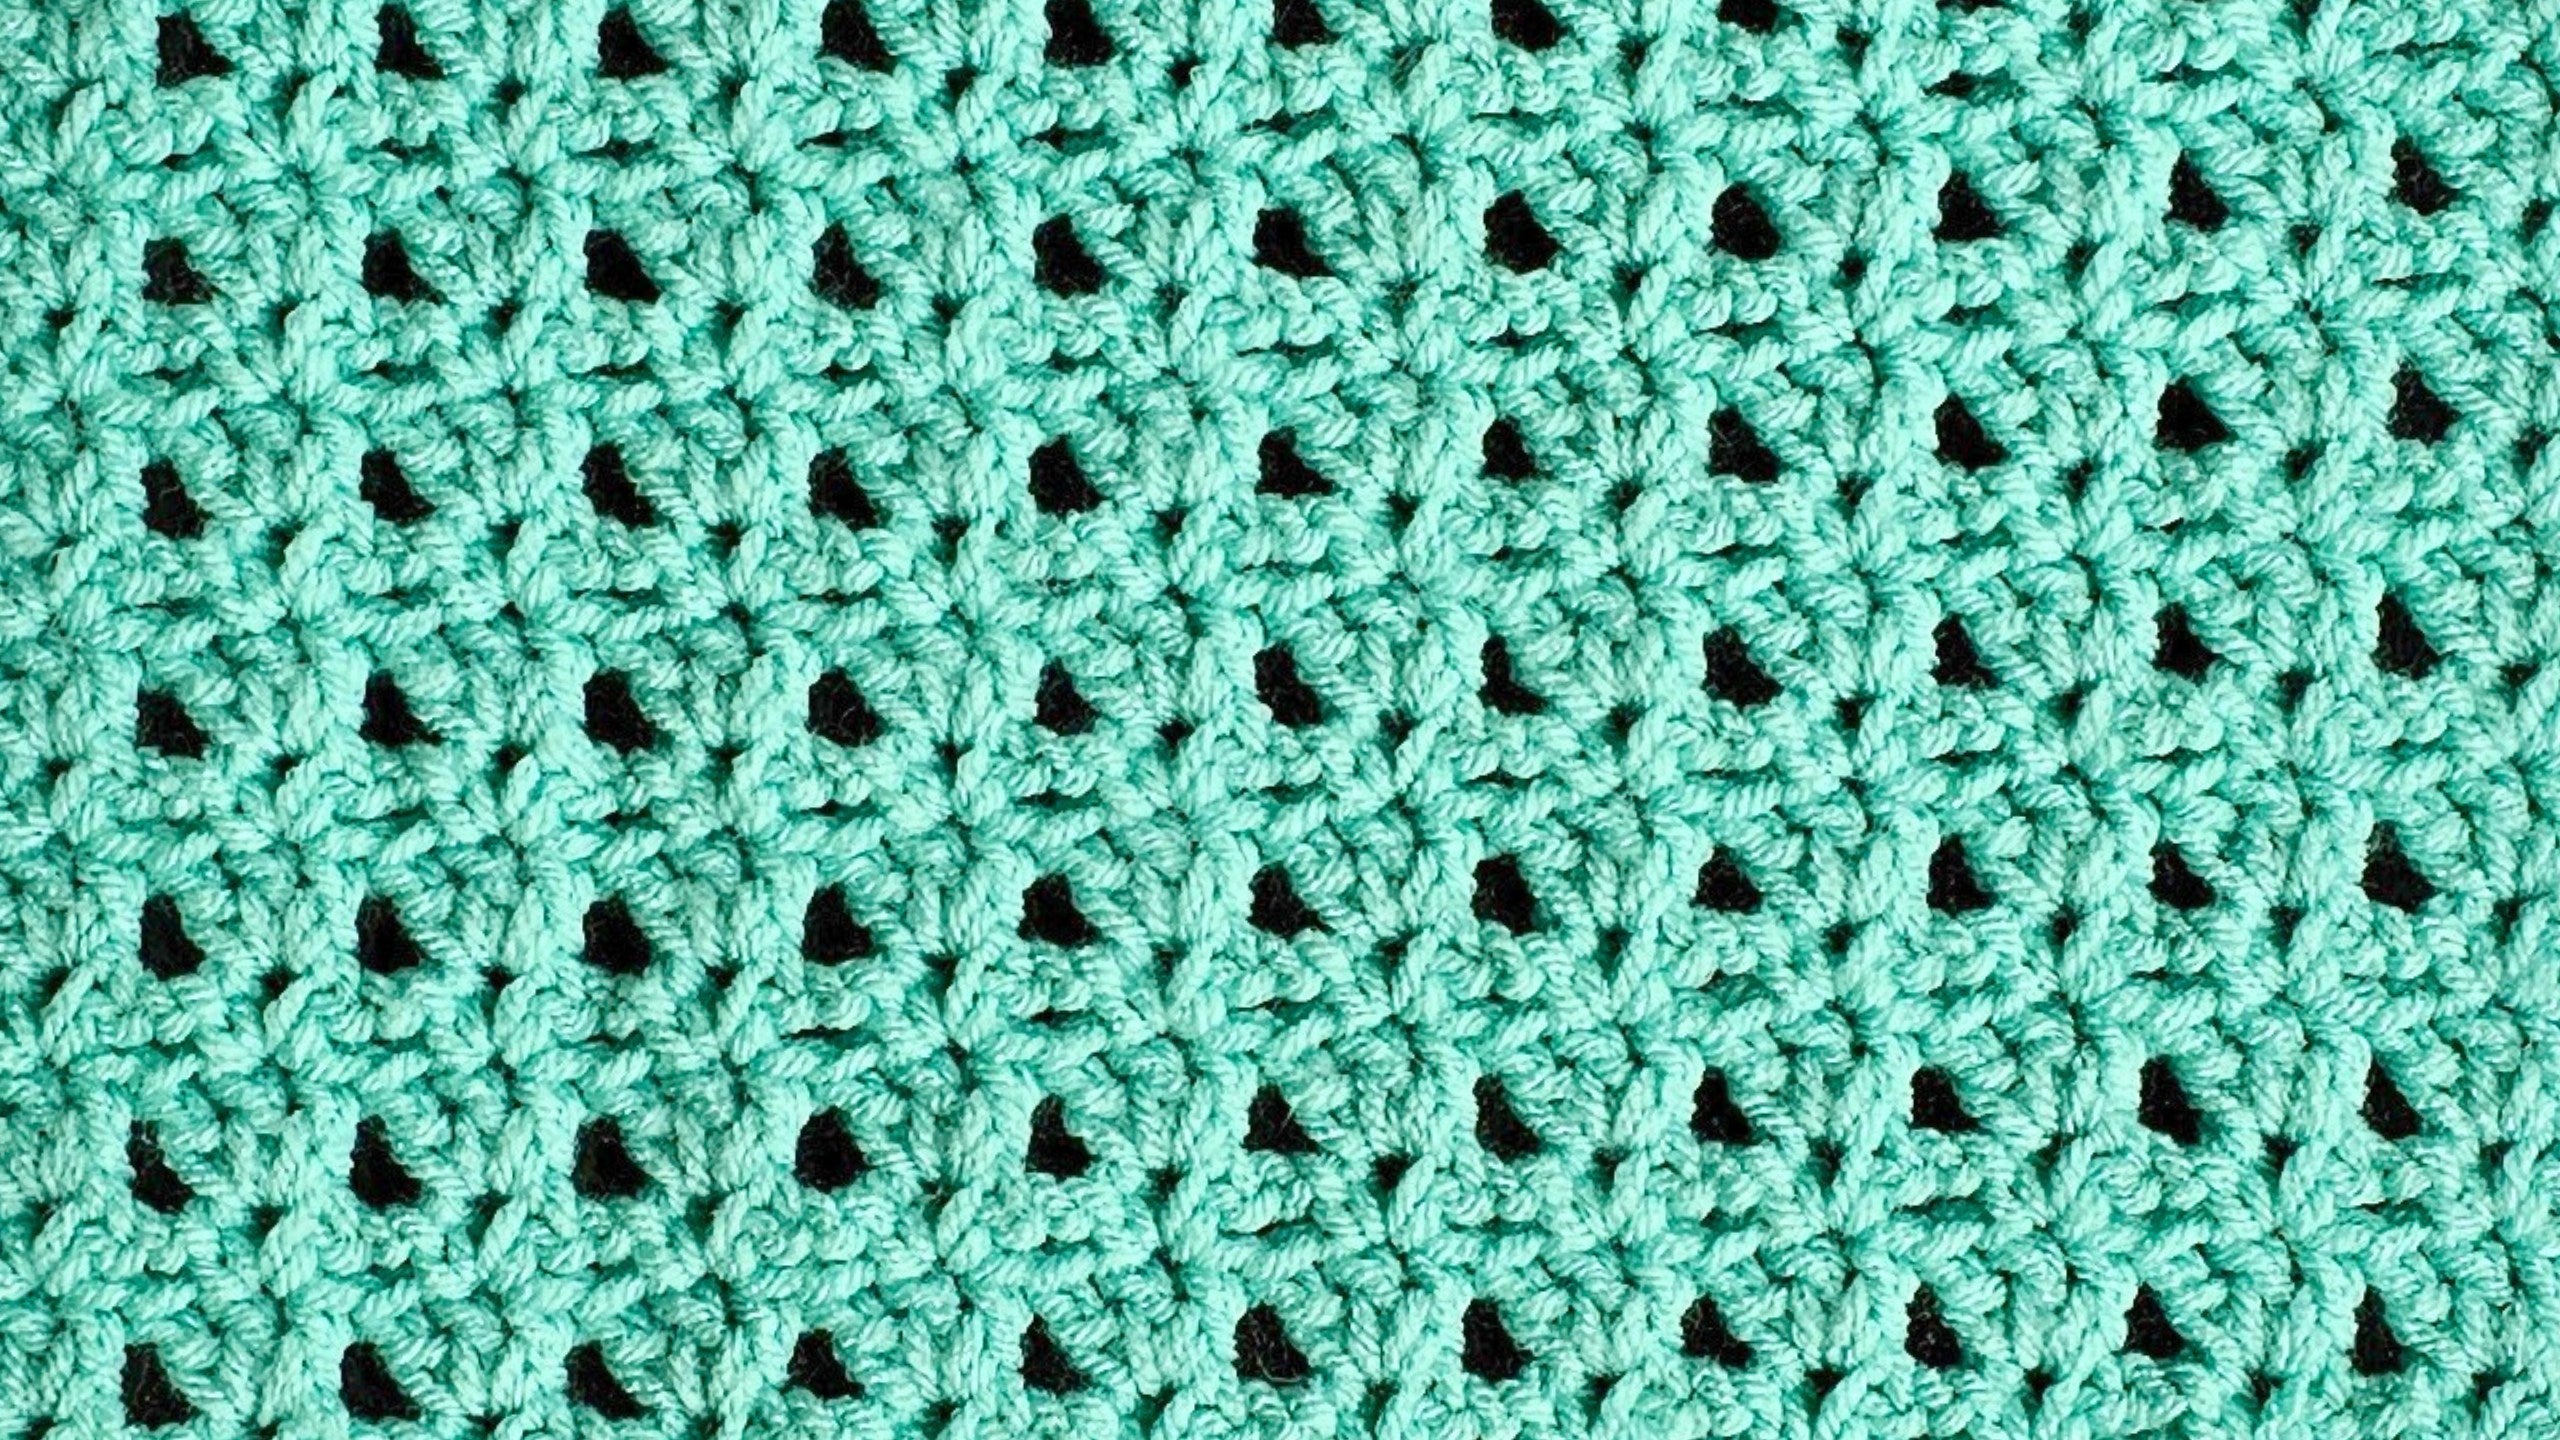
Visual and Texture Characteristics of the Coronation Square
What makes the Coronation Square special are its dimensional bumps and arches. The heads look like little puffy hills, while the crowns form loops above them, giving each square a plush and textured feel.
Working in a solid color creates a classy, uniform block with subtle shadows from the raised pattern. Mixing different colors brings out the stitch definition and highlights each motif. Both styles look great in a finished blanket.
To really see the detail, I recommend studying your stitches as you go. The difference between the dense heads and open crowns will become even more pronounced as your square grows.

Tips for Troubleshooting Common Issues
Like any pattern, there are a few hiccups you might hit. If your work curls after row one or two, don’t panic—it tends to flatten with more rows.
If you find your counts off or crowns don’t line up, pause and check:
- Did you skip the correct number of stitches between each bump or crown?
- Are all crowns worked into the same center stitch?
- Are the chain counts consistent between repeats?
Tip: Stitch markers work wonders. Place them every few repeats when learning to help keep your place—especially helpful when you pause and pick up again later.
If you miss a crown or head, it’s easy to frog back a row or two—these stitches unravel without snagging.
Stitch Markers and Tools: Maximizing Efficiency
Stitch markers are more than just optional—they really boost efficiency and accuracy. I like to set markers every repeat in the starting chain to mark each “head” position. During later rows, moving the marker up to the center of each bump or crown helps visually track progress.
Having scissors and a darning needle within reach lets you finish off any loose ends immediately so nothing unravels as you work on other squares.
Here’s how I use my tools:
- Stitch markers to mark chain spaces or the centers of bumps/crowns
- Small scissors for quick yarn cuts
- Tapestry needle for weaving in ends right after finishing
Yarn Choices and Hook Selection Tips
The original square was made with Ice Yarns Saver, a reliable worsted weight acrylic. I love it for its soft touch, bold colors, and easy care. But don’t let that limit you—any worsted acrylic or your preferred yarn will work, just check for consistency in thickness if you’re mixing brands.
A 6 mm crochet hook is recommended for a soft, flexible result. Switch up your hook size if you crochet tightly or loosely—bigger hooks for more drape, smaller for firmer squares.
If you want to try the exact yarn used, take a look at the yarn featured in the video.
For beginners, worsted acrylic is forgiving and shows off stitches clearly, so mistakes are simple to spot (and fix).

Encouragement for Beginners and Learning Tips
If you’re new to crochet or squares, the Coronation Square is a confidence booster. With just single and double crochets and easy chain spaces, there are no tricky stitches.
Tip: Practice on a short chain before committing to the full square to learn how the pattern flows. Once you’re comfortable, the heads and crowns become second nature.
If visual learning is your thing, check the video tutorial linked at the top. Following the right-handed video tutorial side by side with your project is extremely helpful—you’ll see hand placement, yarn loops, and how to turn your work at each row.
Patience is key. If your first square isn’t perfect, that’s okay—every project builds skill.
Where to Find Written Patterns and Additional Squares
A big help in these projects is having the pattern by your side. You can find the written pattern for this block, as well as all parts of the CAL, at the Coronation Square Secret Stitches CAL Part 9 page.
Written patterns can be a lifesaver when you need to double-check repeats or confirm a chain count. Plus, you can collect the full series so you don’t miss a square. For visual learners or those who want extra help, the Secret Stitches CAL playlist covers each square in step-by-step detail.
Joining the Crochet Community
Crocheting can feel solitary, but it doesn’t have to be. I love seeing the different versions others create!
Join the Secret Yarnery Crochet Community on Facebook to share your photos, ask questions, and connect with supportive crocheters. You’ll find me on Instagram and Facebook at @secretyarnery, where we post progress pics, pattern updates, and inspiration.
Sharing your work is half the fun—there’s always someone who’s excited to see your color combos or square layout.

Subscription and Notifications Reminder
If you enjoy tutorials like this, don’t forget to subscribe to the Secret Yarnery YouTube channel. New crochet patterns, stitch walkthroughs, and tips drop regularly. Tap the notification bell so you never miss a new release. Here’s a handy subscription link to make sure you’re in the loop.
Final Encouragement and Next Steps
I hope creating the Coronation Square is as enjoyable for you as it is for me. Taking time for each row, watching the pattern bloom, and then sharing your square is a source of pride. Keep practicing, and don’t hesitate to join our community for support and sharing.
There are more squares awaiting in the Secret Stitches CAL, so keep your yarn and hooks nearby. Happy stitching—and remember, each block brings you closer to a beautiful, unique blanket or project you can truly call your own!
Left Handed?
FAQs
1. What size should my completed Coronation Square be?
The finished size depends on your yarn and hook, but with worsted weight and a 6 mm hook, the square usually measures about 9 to 10 inches across. Adjust your hook or yarn to match the size with other CAL blocks.
2. Can I use a different yarn weight for this pattern?
Yes! You can use any yarn weight. Just use a suitable hook size for your chosen yarn, keep your tension even, and make sure all your squares match in size for assembly.
3. Do I need to block my square?
Blocking helps even out any curling or uneven edges, making your square lay flat and neat for joining. It’s optional but highly recommended, especially for blankets.
4. What if my edges look wavy or uneven?
Check your stitch count at the end of each row. Make sure you always add the first and last stitches as shown in the pattern. Blocking also helps smooth out the edges.
5. Can I make this square bigger or smaller?
Yes. To adjust the size, increase or decrease the number of starting chains (by the pattern’s repeat count) and add or subtract row repeats as desired.
6. How do I join my completed squares together?
Popular joining methods include whip stitch, single crochet, slip stitch, and the join-as-you-go technique. Pick your favorite based on the look you want for your blanket.
7. What should I do if I lose track of the row I’m on?
Use stitch markers on the first stitch of every new row, or keep a tally next to your workspace. This makes it easy to count rows and pick up where you left off.
![]()
Christa Patel is the creator behind Secret Yarnery. She has a passion for teaching crochet in clear, easy-to-follow steps. Christa specializes in designing patterns that help both beginners and seasoned crocheters grow their skills and confidence. Her warm, encouraging style and dedication to community support have helped thousands learn new techniques through video tutorials, online CALs, and community groups.
With years of experience and a love for vibrant color, Christa shares tips, projects, and encouragement across YouTube, Instagram, and Facebook. She is known for making even complex stitches feel simple and fun. If you want more of her patterns and crochet tips, connect with Christa via Secret Yarnery or her popular YouTube channel.
Her goal: to help you enjoy every stitch and find joy in the crochet journey.
About the Author
With a passion for crafting easy, beginner-friendly tutorials and patterns, Christa inspires crafters of all skill levels to unleash their creativity worldwide. She encourages yarn lovers to connect, create, and crochet a world filled with beautiful handmade treasures!
Part 9 - Secret Stitches Easy Stitch Sampler Blanket Pattern