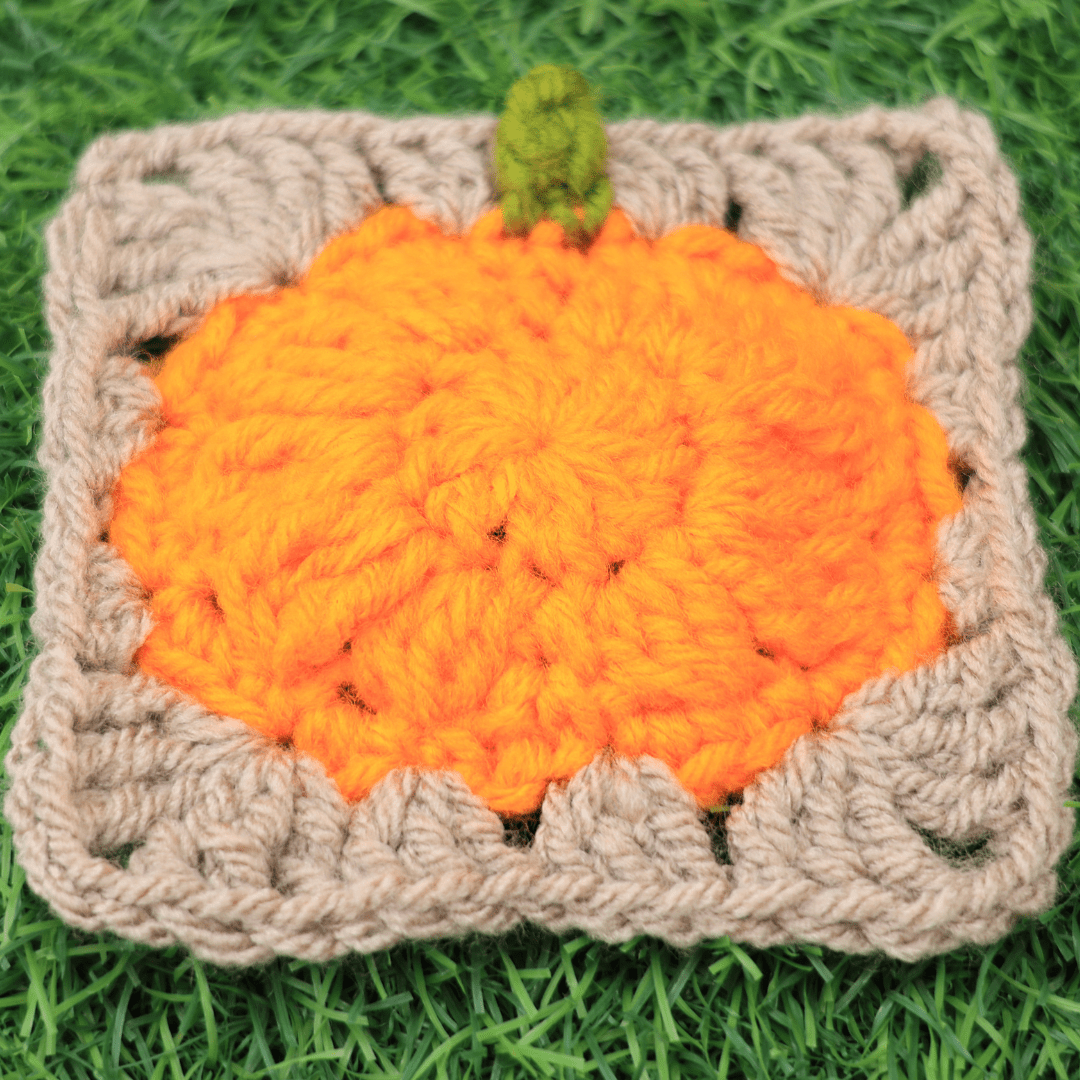
How to Crochet a Pumpkin Granny Square – Easy Step by Step Guide!
Fall is the perfect time to add a cozy, festive touch to your crochet projects! Whether you're a seasoned crocheter or just starting, this easy Pumpkin Granny Square is a fun, achievable project that brings a little pumpkin charm to any design. It’s versatile and can be used for blankets, pillows, or standalone decorations.
Ready to get started? Follow along this step-by-step guide to create your own pumpkin granny square. I’ve included an embedded video tutorial for extra clarity, so you can work at your own pace.
Materials You’ll Need
To crochet this adorable pumpkin granny square, gather the following materials:
-
Yarn in three colors: An orange yarn for the pumpkin, green for the stem, and another color for making the square border. Regular worsted weight yarn (medium #4) works great!
-
Crochet hook: A 6mm hook is recommended for this project.
-
Scissors: To cut your yarn cleanly.
-
Tapestry needle: For sewing in yarn ends and tightening stitches.
Once you’ve got your supplies, you’re ready to start!

Making the Pumpkin
The heart of this granny square is the pumpkin, which starts with a magic ring. Don’t let that intimidate you! It’s easier than it sounds:
-
Wrap your yarn around your non-dominant hand to form an X.
-
Insert your hook beneath the first strand, grab the second, and pull it through.
-
Chain one to secure, and start crocheting your stitches into the adjustable loop.
Stitches for the Pumpkin
- First round: Work 11 double crochets into the magic ring.
- Shaping the pumpkin: Switch to grouped stitches like clusters of double and triple crochets for texture. This gives the pumpkin its slightly raised but still flat profile.
If the raised texture isn't your style, you can add an extra chain between clusters for a flatter look.
Need help mastering magic rings or similar techniques? Check out the 21 Top Tips for Crochet Beginners, full of practical advice for smoother stitching.

Adding the Stem
What’s a pumpkin without its iconic stem? Use a small bit of green yarn to create the top:
- Attach the green yarn at the center top of the pumpkin.
- Work a few single crochets and chains to build the stem's shape.
- Shape it by stitching it neatly with a needle.
The stem adds personality to your pumpkin! You can make it short, long, wide—whatever fits your style.
Creating the Granny Square
To turn your pumpkin into a granny square, you’ll crochet a border using your chosen square color.

Steps to Square the Pumpkin
- Find the spaces around your pumpkin clusters. Use these as anchor points for your stitches.
- Work a set of triple crochets into each corner to form the square’s shape and give it structure.
- To finish the edges, space half-double and double crochets between the clusters. This balances the square's tension while keeping the pumpkin center nice and flat.
Wondering how to keep your edges even and stitches symmetrical? The Crochet 101: A Beginner's Guide to Mastering the Craft is a helpful resource.
Joining Granny Squares
If you plan to make multiple squares, joining them is straightforward. You can either:
- Join while crocheting: Chain into the adjacent square while working the granny square border.
- Finish the square first, then sew: Use a tapestry needle to attach your squares together neatly.
Experiment with different joining techniques to achieve the design you’re after.

Final Touches
Once your square is complete, sew in all loose ends using a tapestry needle. This is where you’ll finesse the tightness of your stitches and trim any stray tails.
If you’re looking to explore more easy crochet projects for beginners, take a peek at our Easy Crochet Projects for Beginners, filled with inspiration for your next crafting session.
Conclusion
There you have it—your very own Pumpkin Granny Square! Adding these festive squares to your projects is an easy way to bring some autumn vibes into your home. Perfect for blankets, pillows, or unique DIY home decor items, these crochet squares are as practical as they are charming.
Don’t forget, if you’re more of a visual learner, the video linked above walks through every step. And if you’re ready to expand your repertoire, explore more patterns and tips on The Secret Yarnery website. Happy crocheting! 🧶
Left Handed?
FAQs
What is a magic ring in crochet?
A magic ring (or magic circle) is a technique used to start crocheting in the round without leaving a hole in the center. It creates a tight, adjustable loop that forms the base for stitches. This is perfect for projects like the pumpkin granny square.
What type of yarn works best for this project?
Worsted weight yarn (4) is ideal for this project. Choose orange for the pumpkin, green for the stem, and any color of your choice for the square's border.
Can I use a different size crochet hook?
Yes, but it might affect the finished size and look. A 6mm hook is recommended, but you can adjust to match your preferred tension and yarn thickness.
Is this project suitable for beginners?
Absolutely! This tutorial is designed to be beginner-friendly, with clear instructions and a video to guide you. If you're new, you may find learning the magic ring or double crochet stitches most challenging, but they are explained step-by-step.
How can I make multiple squares the same size?
To keep your granny squares consistent in size:
- Use the same type and thickness of yarn.
- Stick with the same crochet hook size throughout.
- Count your stitches carefully to maintain symmetry.
Can I customize the pumpkin’s size?
Yes! To make a larger pumpkin, add more double crochets in the first round of the magic ring. You can also work extra rounds with similar stitch patterns for an enlarged pumpkin.
What are some creative ways to use these granny squares
You can use them for:
- Cozy fall blankets
- Decorative pillows
- Tote bags
- Mug rugs
- Wall hangings
- Table runners or placemats
How do I join multiple granny squares
You can join them by:
- Crocheting as you go: Connect squares while adding the border.
- Sewing them together: Use a tapestry needle and whip stitch or mattress stitch for a seamless look.
How do I make the square edges straighter
Focus on even tension while crocheting and ensure your triple crochets in the corners are spaced correctly. Blocking your squares after completion can also help straighten and even out the edges.
Can I add embellishments to the pumpkin
Definitely! You can embroider details like a small vine, leaf, or even a smiling face with a tapestry needle to give your pumpkin a unique personality.
![]()
Christa Patel is the creative mind behind the Secret Yarnery, a trusted resource for crochet enthusiasts worldwide. With years of experience, Christa specializes in designing beginner-friendly yet stunning crochet patterns that inspire creativity and confidence in crafters of all skill levels.
As a passionate crocheter, Christa is known for her clear and approachable teaching style, breaking down complex patterns into simple, easy-to-follow steps. Through her engaging video tutorials, written patterns, and helpful tips, she has cultivated a community where crocheters can connect, learn, and share their work.
Christa’s dedication to making crochet fun and accessible shines in every project she creates, from colorful blankets to intricate borders. Whether you’re a seasoned expert or just picking up a hook for the first time, Christa's guidance will help you craft something beautiful.
For more crochet patterns, tips, and inspiration, visit her website at The Secret Yarnery, or check out her YouTube channel filled with step-by-step tutorials.
About the Author
With a passion for crafting easy, beginner-friendly tutorials and patterns, Christa inspires crafters of all skill levels to unleash their creativity worldwide. She encourages yarn lovers to connect, create, and crochet a world filled with beautiful handmade treasures!
How to Crochet a Pumpkin Granny Square – Easy Step by Step Guide!