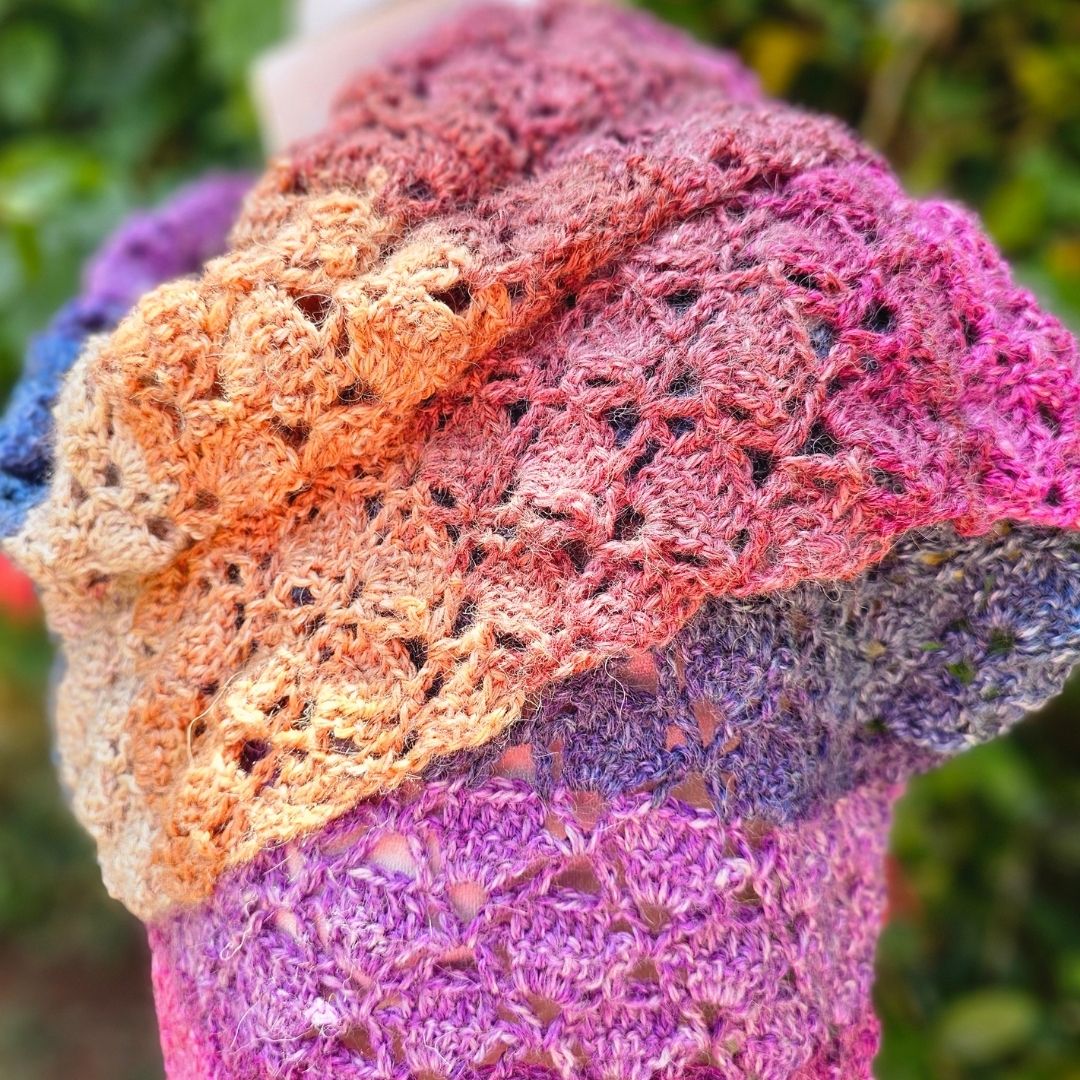
Drunken Granny Square

Drunken Granny Square Crochet Tutorial – Step-by-Step Guide!

Published on

|

Time to read 15 min

Drunken Granny Square Crochet Tutorial – Step-by-Step Guide!

Hey there, crochet lovers! Ever wanted to add a playful twist to a classic? Then you're in the right place. Today, I'm going to walk you through creating the "Drunken Granny Square," a delightful and slightly off-kilter take on the traditional granny square. This pattern is from Krista over at The Secret Yarnery, and it’s part of the Secret Stitches CAL 2021.

In this tutorial, you'll learn how to crochet this unique square using some simple techniques. I'll also share some tips and tricks to help you keep your stitch counts consistent and your edges looking neat.

Materials You'll Need

Before we dive in, let's gather our supplies. Having everything ready will make the process smoother and more enjoyable.

  • Yarn: You'll need some worsted weight acrylic yarn. Krista uses Saver from Ice Yarns, which is a great choice. Don't feel limited, though! You can really use any yarn you like. If you are interested in other yarns, check out yarn tutorials to get you started.
  • Crochet Hooks: A 6mm crochet hook and a 7mm crochet hook. The larger hook is used for the initial chain to keep it nice and loose. If you're having trouble finding a 7mm hook, you can find one on Amazon.
  • Stitch Markers: Eight stitch markers. These are super helpful for keeping track of your stitch counts, especially when working into the chain.
  • Yarn Needle: For weaving in those pesky ends later on.
  • Scissors: To cut your yarn, of course!

Having a picture of all your materials laid out can be really helpful. It's like a little visual checklist to make sure you're all set!

Getting Started: Creating the Initial Chain

Alright, let's get this party started! We're going to begin by creating the foundation chain.

  1. Grab your larger (7mm) crochet hook and make a slip knot. Leave a tail that's long enough to weave in later – you don't want it popping out!
  2. Now, we're going to chain in multiples of five. Why multiples of five? Because that's the magic number for this pattern! Chain five: one, two, three, four, and five.
  3. Take one of your stitch markers. If you roll your chain onto its side, you'll see little bumps along the back. These are called the back loops or "camel bumps." Place your stitch marker right into that last back loop, just under your working yarn.
  4. If you have a hard time working into the back loops, you can work into the front loop instead. However, working into the back loops makes it easier to keep track of your stitch count. There's only one back loop, while there are two loops on the front, and it can get confusing.
  5. Chain five again: one, two, three, four, and five. Place another stitch marker into that back loop.
  6. Keep working along like this, making sets of five chains and placing a stitch marker into the fifth chain, until you've used all eight stitch markers or chained a total of 40 stitches. You can find more crochet tutorials on my blog.

When you've chained your 40 stitches, it should look something like this: a nice, long chain with eight stitch markers evenly spaced.

Row 1: Building the First Blocks

Time to switch gears and create our first row of blocks!


  1. Put that 7mm hook far away – we don't want to grab it by accident. Pick up your 6mm hook.
  2. Chain four: one, two, three, and four.
  3. Wrap your yarn, and we're going to go right into that fifth stitch, skipping the four stitches we just made. In the fifth stitch, where our stitch marker is, we're going to put our hook in and make four double crochets: one, two, three, and four.
  4. Chain two, and then make one more double crochet into that same space, the same stitch.
  5. Now, we're going to jump straight over to the next stitch marker. Skip four stitches and, into the chain where the stitch marker is, make the same block. That's four double crochets, chain two, and one more double crochet, all into the same stitch.
  6. Repeat this process. Skip four chains and work into the fifth chain, where your stitch marker is. Make a block: four double crochets, chain two, and one more double crochet, all into that same chain.

Continue working your way along, making a block into every stitch that has a stitch marker, or every fifth stitch. When you reach the end of your chain, you'll have four chains left. We're going to make one double crochet right into that last chain.

Row 2: Continuing the Pattern

Now we're ready to start Row 2, which will really bring the pattern to life.

  1. Chain three: one, two, three. Turn your work.
  2. Here's a tip on how to turn your work so your stitches are always facing the right way when you're working into your chain: Reach underneath your yarn, grab your work, and flip it. This will keep your chain oriented correctly, making it easier to work into.
  3. Working into the very first space, we're going to work into these chain-two spaces all the way along. This is where things will really pick up speed!
  4. Into this chain-two space, make our block. Remember, blocks are four double crochets, a chain two, and one double crochet.
  5. Now, we're just going to jump along and into each of the next chain-two spaces. All the way along, we're going to be doing the same block: four double crochets, chain two, and one double crochet.
  6. Pause the video or take a break and keep working along your row, doing a block into each of these spaces, each of the chain-two spaces.

The Repeat: Rows 3-20

Now for the fun part: repeating the pattern! This is where you'll really get into the rhythm of the Drunken Granny Square.

  1. We always start our row with a chain three: one, two, three. Reach under your yarn, grab your work, and turn.
  2. Into every chain-two space, we're going to do a block of four double crochets, chain two, and one more double crochet into that same space.
  3. We are going to do that into each chain-two space all the way along our row.
  4. Remember that turning technique! It really does make a difference in how your stitches line up.
  5. Keep working until you have completed 20 rows.

To count your rows, just look at these little blocks and kind of go up on a zigzag. It's like a little visual staircase! Make sure you are using proper crochet tools to make things easier for you.

The Last Row: Creating the Scalloped Edge

We're almost there! The last row is what gives the Drunken Granny Square its unique scalloped edge.


  1. After your last double crochet on your last row, chain three: one, two, three. Turn your work.
  2. In the first chain-two space, make one single crochet, chain five: one, two, three, four, and five. Then, make one single crochet in the next chain-two space.
  3. Repeat this pattern across the row: chain five, one, two, three, four, five, and one single crochet into the next chain-two space.
  4. After your last single crochet into that last chain-two space, chain five: one, two, three, four, and five.
  5. Working into the top of our chain three, we're going to make one single crochet.
  6. Chain one, cut your yarn, leaving a long enough tail to sew in with a needle, pull your hook up, and your yarn through, and snug that down to secure.

That chain-five space is what is going to create your Scalloped Edge.

Finishing Touches: Weaving in the Ends

The final step is to weave in all those loose ends. Grab your yarn needle and weave those tails into the back of your work, making sure they're nice and secure. This will prevent them from unraveling later on.

Blocking Your Granny Square

Once you've finished crocheting your granny square, blocking is highly recommended!

What is blocking? Blocking is a process that helps to shape and set your finished crochet piece, ensuring that it lies flat and has even edges.

There are two main methods for blocking:


  • Wet Blocking: This involves soaking the crochet piece in water and then pinning it to shape while it dries.
  • Steam Blocking: This method uses the steam from an iron to relax the fibers of the yarn and set the shape.

Wet blocking is often recommended for acrylic yarns. For wet blocking, you'll need blocking mats and pins.

Here's how to wet block your granny square:


  1. Soak the square in cool water for about 20-30 minutes.
  2. Gently squeeze out the excess water – don't twist or wring it!
  3. Lay the square flat on a blocking mat and pin it to the desired shape, making sure the edges are straight and even.
  4. Let it dry completely. This may take several hours or even overnight.

Tips for Consistent Stitch Counts

Keeping your stitch counts consistent is key to creating a neat and even Drunken Granny Square. Here are a few tips to help you stay on track:


  • Use stitch markers to mark the beginning and end of each row.
  • Count your stitches after each row to make sure you have the correct number.
  • Pay close attention to the pattern instructions and visual aids.
  • If you make a mistake, don't be afraid to frog (rip out) your work and start again.
  • Practice makes perfect! The more you crochet, the more consistent your stitch counts will become.

Troubleshooting Common Issues

Even experienced crocheters run into snags sometimes. Here are a few common issues you might encounter and how to troubleshoot them:

  • Square is not square: This is usually due to inconsistent tension or stitch counts. Double-check your work and make sure you're following the pattern correctly.
  • Edges are wavy: This can also be caused by inconsistent tension. Try to maintain an even tension throughout your project.
  • Yarn is splitting: If your yarn is splitting, try using a different hook with a smoother finish.
  • Stitches are too tight: If your stitches are too tight, loosen your tension or use a larger hook.
  • Stitches are too loose: If your stitches are too loose, tighten your tension or use a smaller hook.

The Secret Yarnery Community

One of the best things about crochet is the community! I encourage you to connect with other crocheters online and share your creations.

You can find me on Instagram (@secretyarnery) and Facebook (The Secret Yarnery). Also, be sure to join The Secret Yarnery Crochet Community Facebook group! It's a great place to ask questions, share your projects, and get inspired.

More Secret Stitches CAL 2021 Patterns

This Drunken Granny Square is just one of the fun patterns in the Secret Stitches CAL 2021. Check out the full collection of patterns to find more squares to crochet!

Explore Other Crochet Projects

Ready to take your crochet skills to the next level? There are tons of other amazing crochet projects out there to try! Here are a few ideas, categorized by skill level:

  • Beginner: Simple scarves, hats, and dishcloths are great projects.
  • Intermediate: Try your hand at granny square blankets, sweaters, and amigurumi.
  • Advanced: Challenge yourself with intricate lace shawls, textured blankets, and complex garments.

Why Choose Acrylic Yarn?

Acrylic yarn is a popular choice for crochet projects, and for good reason! Here are some of the benefits of working with acrylic yarn:

  • Affordable: Acrylic yarn is one of the most budget-friendly options available.
  • Easy to Care For: It's machine washable and dryable, making it perfect for items that are used frequently.
  • Versatile: Acrylic yarn is great for a wide variety of projects, from garments to home decor.
  • Durable: It resists wear and tear, making it ideal for items that need to last.
  • Wide Range of Colors: Acrylic yarn is available in almost every color imaginable, providing lots of creative choices.

Meet Christa from The Secret Yarnery

Christa is the creative force behind The Secret Yarnery, and she's passionate about crochet and teaching others. With her expertise and dedication to creating easy-to-follow tutorials, she's helped countless crocheters learn new skills and create beautiful projects.

Expand Your Crochet Skills: Beyond the Basics

Ready to take your crochet skills even further? Here are a few ideas to help you expand your knowledge and creativity:

  • Learning New Stitches: Once you've mastered the basic stitches, try learning more complex stitches.
  • Experimenting with Color: Color is a powerful tool in crochet. Learn how to choose colors that complement each other and create stunning visual effects.
  • Reading Crochet Charts: Crochet charts are a visual way to represent patterns.
  • Designing Your Own Patterns: Once you're comfortable with the basics, try designing your own patterns!

Tools and Gadgets That Can Help With Crocheting

Having the right tools can make crocheting even more enjoyable. Here are a few tools and gadgets that can come in handy:

  • Ergonomic Crochet Hooks: If you crochet for long periods of time, ergonomic hooks can help reduce hand fatigue.
  • Yarn Bowls: Keep your yarn clean, tidy, and free from tangles with a yarn bowl.
  • Row Counters: Keep track of your rows with a row counter.
  • Needle Gauges: Measure the size of your needles and hooks with a needle gauge.
  • Blocking Boards and Pins: Shape and set your finished crochet pieces with blocking boards and pins.
  • Good Lighting: Good lighting is crucial for seeing your stitches clearly.

Crochet Abbreviations

Here's a handy list of common crochet abbreviations to help you decipher patterns:

  • ch - Chain
  • sl st - Slip stitch
  • sc - Single crochet
  • hdc - Half double crochet
  • dc - Double crochet
  • tr - Treble crochet
  • rep - Repeat
  • st - Stitch
  • sp - Space
  • tog - Together
  • inc - Increase
  • dec - Decrease

The History of Granny Squares

Granny squares have a rich and fascinating history. While their exact origins are difficult to pinpoint, they gained popularity in the late 19th and early 20th centuries as a way to use up leftover yarn scraps. The simple, repetitive nature of the granny square made it an ideal project for beginner crocheters, and their versatility allowed them to be used in a wide range of projects, from blankets and afghans to clothing and accessories.

Different Ways to Join Granny Squares

There are many different techniques for joining granny squares, each with its own unique look and feel. Here are a few of the most popular methods:


  • Whip Stitch: This is the most basic and common method, creating a simple, unobtrusive seam.
  • Single Crochet Join: This method creates a stronger and more decorative seam.
  • Flat Braid Join: This join creates a flat, decorative seam that adds a touch of elegance to your project.
  • Invisible Seam: For a nearly seamless look, try the invisible seam method.
  • Crochet-Join-As-You-Go: This technique involves joining the squares as they are made, eliminating the need for seaming altogether.

Creative Project Ideas Using Granny Squares

Granny squares are incredibly versatile and can be used to create a wide variety of projects. Here are a few ideas to get your creative juices flowing:

  • Blankets and Afghans: The classic granny square project!
  • Pillows and Cushions: Add a handmade touch to your home decor with granny square pillows and cushions.
  • Garments: Create stylish sweaters, vests, skirts, and cardigans using granny squares.
  • Accessories: Bags, hats, scarves, and shawls.
  • Home Decor: Table runners, placemats, and wall hangings.

Care Instructions for Crochet Projects

To keep your crochet projects looking their best, it's important to follow the proper care instructions. Here are a few tips:

  • Washing: Hand wash or machine wash on a gentle cycle.
  • Drying: Air dry to maintain shape.
  • Storing: Store your crochet projects in a cool, dry place, away from direct sunlight.

Yarn Weights and Choosing the Right One

Yarn comes in a variety of weights, each with its own unique properties and uses. Here's a quick guide to the different yarn weights:

  • Lace Weight: Very fine, used for delicate projects.
  • Fingering Weight: Lightweight, great for socks and baby items.
  • Sport Weight: Slightly heavier, good for garments and blankets.
  • DK Weight: Versatile, suitable for a wide range of projects.
  • Worsted Weight: Medium weight, ideal for beginners and most projects.
  • Bulky Weight: Thick, used for quick and cozy projects.
  • Super Bulky Weight: Very thick, for extra warm items.

Understanding Yarn Labels

Yarn labels contain a wealth of information about the yarn, including:

  • Yarn Weight: The thickness of the yarn.
  • Fiber Content: The materials the yarn is made from.
  • Yardage: The length of the yarn in the skein.
  • Care Instructions: How to wash and dry the yarn.
  • Dyed Lot Number: Ensures color consistency across skeins.
  • Hook/Needle Size: The recommended hook or needle size for the yarn.

Crochet for Relaxation and Mindfulness

Crocheting is more than just a hobby – it's a form of relaxation and mindfulness. The repetitive motions can help reduce stress, promote mindfulness, and foster creativity. Plus, there's a wonderful sense of accomplishment that comes from completing a handmade project. Don't forget that community can also be a part of your relaxation!

Tips to Keep Your Crochet Project Organized

Staying organized can make your crochet projects even more enjoyable. Here are a few tips:

  • Keep your yarn in a bag.
  • Store your needles and hooks safely.
  • Use a pattern keeper to ensure you don't lose your pattern.

Conclusion

And there you have it! You've now learned how to create the Drunken Granny Square. I hope you enjoyed this tutorial and that you're inspired to try this fun and unique pattern. Don't forget to share your creations with the Secret Yarnery community on social media. Thank you for following along, and be sure to explore other tutorials on The Secret Yarnery website for more crochet inspiration. And lastly be sure to watch more Drunken Granny Square Tutorial to see the process even more clearly. Subscribe to the YouTube channel and join the crochet community for even more fun!

Christa Patel

Christa Patel is the creative mind behind the Secret Yarnery, a trusted resource for crochet enthusiasts worldwide. With years of experience, Christa specializes in designing beginner-friendly yet stunning crochet patterns that inspire creativity and confidence in crafters of all skill levels.

As a passionate crocheter, Christa is known for her clear and approachable teaching style, breaking down complex patterns into simple, easy-to-follow steps. Through her engaging video tutorials, written patterns, and helpful tips, she has cultivated a community where crocheters can connect, learn, and share their work.

Christa’s dedication to making crochet fun and accessible shines in every project she creates, from colorful blankets to intricate borders. Whether you’re a seasoned expert or just picking up a hook for the first time, Christa's guidance will help you craft something beautiful.

For more crochet patterns, tips, and inspiration, visit her website at The Secret Yarnery, or check out her YouTube channel filled with step-by-step tutorials.

Easy crochet tutorial

Both right and left handed video tutorials

Downloadable PDF pattern is written in plain English - no abbreviations to decipher!

Perfect for beginners!