How to Crochet a Christmas Pickle: The Perfect Holiday Tradition
There's something magical about holiday traditions, and the Christmas pickle is one of my favorites. This charming ornament isn't just for decoration—it's part of a fun game where whoever finds it hidden in the tree receives good luck (or sometimes an extra present!). Today I'll walk you through making your own crocheted Christmas pickle from start to finish.
Table of contents
The Story Behind the Christmas Pickle
The Christmas pickle tradition likely originated in Germany, though some debate its exact origins. Families hide a pickle ornament deep in the branches of their Christmas tree on Christmas Eve. On Christmas morning, the first child to find the pickle gets a special gift or is said to have good fortune in the coming year.
What makes this tradition especially wonderful is how adaptable it is. At my house, we've put our own spin on it by hiding the pickle each day as part of our advent calendar tradition. It's become an alternative to Elf on the Shelf—just as fun but with less supervision required!
Gathering Your Materials
Before we start crocheting, let's gather everything we'll need:
- Yarn: I prefer acrylic yarn like Ice Yarns Saver in a vibrant green shade—it holds its shape well and comes in wonderful pickle-appropriate colors. About 50 yards should be plenty.
- Crochet hook: A 4.0mm to 6.0mm hook works great. The size will determine your pickle's final dimensions—smaller hooks make dainty pickles while larger hooks create more substantial ones.
- Basic tools: Scissors, yarn needle for weaving in ends, and stitch markers are essential.
- Stuffing: Hollow fiber stuffing gives the perfect firmness without being too dense.
- Optional eyes: Googly eyes add personality, but consider safety eyes if making these for young children.

Understanding the Stitches
This pattern uses standard crochet stitches, perfect for beginner and intermediate crafters alike. Here's a quick reference:
- sl st = slip stitch
- ch = chain
- sc = single crochet
- tr = treble crochet
- dec = single crochet decrease
We'll be working in continuous spirals without joining rounds, which is why the stitch marker is so important for tracking our progress. The spiral technique gives the pickle its smooth, seamless look.
Creating Your Christmas Pickle Step by Step
Starting the Pickle Base
Begin with a slip knot, leaving a long tail (about 6 inches) for later sewing. Chain three stitches. Working into the first chain (the one farthest from your hook), make a slip stitch to form a ring. Chain one to secure it.
Insert your hook into the center of the ring and work six single crochets. This forms the base of your pickle. Unlike some patterns, we won't be joining each round—instead, we'll work continuously in a spiral. That first round might look tiny, but trust the process.
Building the Pickle Body
For round two, increases transform our flat circle into a three-dimensional shape. Work two single crochets into the first stitch, then single crochet into the next. Repeat this pattern around—you'll end with nine stitches.
Place your stitch marker in the last stitch of the round—this will be your reference point moving forward. Before continuing, turn your work inside out. This seems counterintuitive, but it gives the pickle its proper shape with the seam on the inside.

Shaping the Pickle
Here's where the real fun begins. For the next few rounds, we'll alternate between:
-
Simple rounds of single crochet
-
Strategic slip stitches on one side to create a gentle curve
-
Occasional treble crochet "bumps" for texture
The slip stitches should always be made on the same general side (where your stitch marker is). Pull up slightly more yarn than usual when making these slip stitches—it helps maintain even tension and creates that perfect pickle bend.
For bumps: Wrap your yarn around the hook twice before inserting into a stitch (this makes a treble crochet). Sometimes these bumps try to hide on the inside—just gently push them out with your finger.
Stuffing Your Project
When your pickle reaches about four inches long, it's time to add stuffing. Use your crochet hook to poke stuffing down into the pointy end first. Add enough to give it structure but not so much that your stitches stretch—you should still see defined stitches with no gaps.
Closing the Pickle
Decrease stitches help taper the open end:
-
Single crochet decrease over two stitches (insert hook in first stitch, pull up loop, insert into next stitch, pull up loop, yarn over and pull through all three loops)
-
Single crochet in next stitch Repeat this pattern until the opening is small enough to close completely.
Cut your yarn, leaving a six-inch tail. Thread your yarn needle and sew the opening shut, weaving the end back through the pickle to secure it. Do the same with your starting tail—these invisible finishes keep your pickle looking polished.

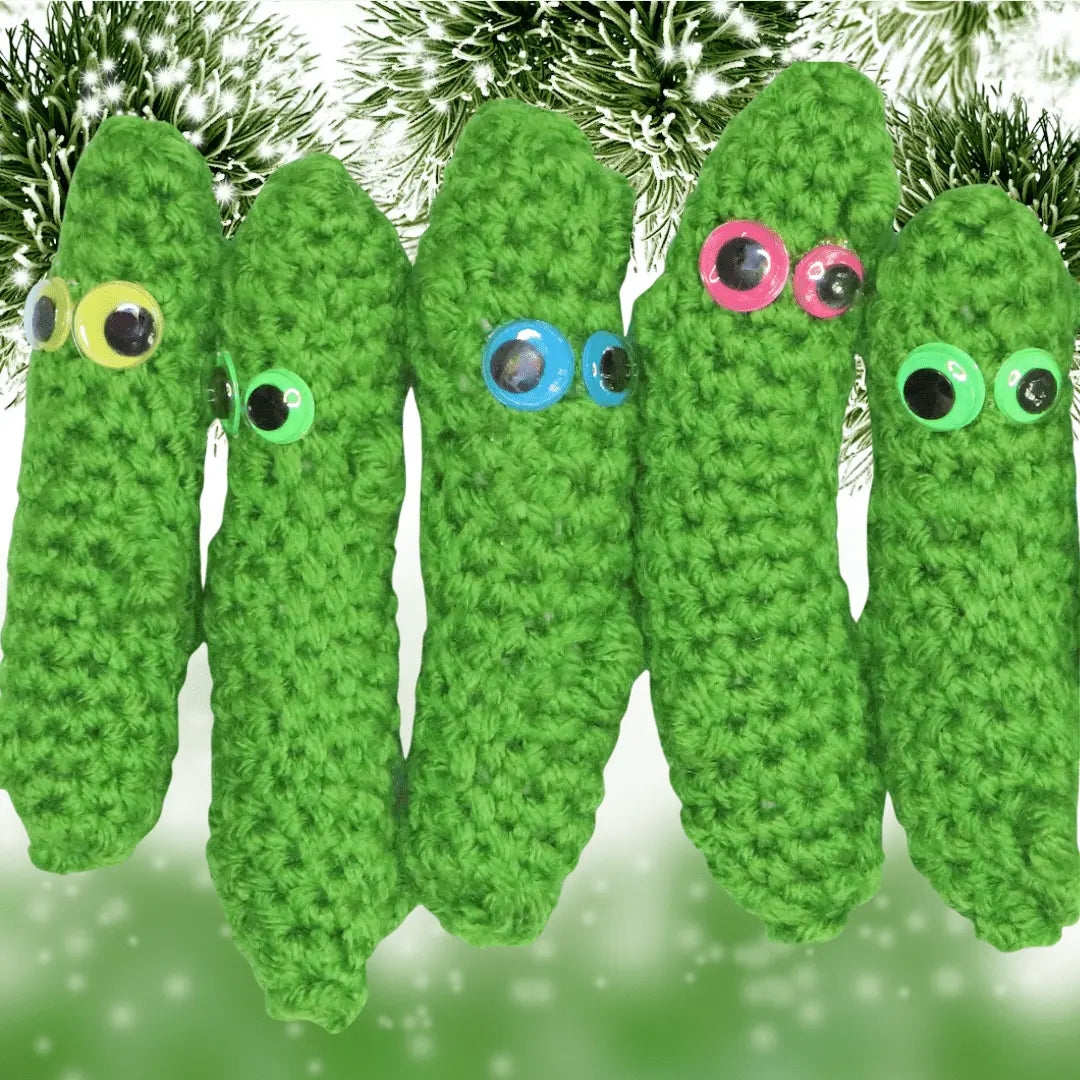
Adding Personality with Eyes
While optional, eyes truly bring your pickle to life. Position them about one-third of the way down from the stem end to create a face. For safety:
- Use proper safety eyes for toys given to children
- Sew on felt eyes for a no-choke hazard alternative
- Glue is fine for decorative items (let it dry completely before handling)
Creative Variations to Try
Once you've mastered the basic pattern, consider:
- Using variegated green yarn for a more organic look
- Making a family of pickles in different sizes
- Adding embroidered "prickles" with brown yarn
- Creating mini ornament versions with thinner yarn
For more holiday crochet inspiration, check out our collection of Creative Crochet Patterns that includes other festive projects.
Displaying Your Christmas Pickle
Beyond the traditional tree hiding, these crocheted pickles look wonderful:
- Hanging from cabinet knobs in the kitchen
- As whimsical package toppers
- Grouped in a clear jar as a table centerpiece
- Instead of bows on wreaths
If you're using yours for the hiding game, here's a pro tip: Make several in similar shades of green for an extra challenge!
FAQs
How long does it take to crochet a Christmas pickle?
It takes about 1-2 hours, depending on your crochet speed and experience.
Can I use a different type of yarn?
Yes! However, acrylic yarn is recommended for durability and shape retention. Cotton or wool can also work but may behave differently.
Can I make the pickle larger or smaller?
Absolutely. Adjust the hook size or use thicker/thinner yarn. For a tiny version, try lace-weight yarn and a smaller hook.
How do I attach a hanger for the tree?
Use a loop of yarn or ribbon. Sew it securely to the top of the pickle before closing it, or attach it after finishing.
Join Our Creative Community
I'd love to see your finished Christmas pickles! Share your creations on Instagram using #SecretYarnery or join our Crochet Tutorial Guides for more project ideas. Whether you make one perfect pickle or a whole jarful, this project brings handmade charm to your holiday traditions.
Happy crocheting, and may your Christmas pickle bring lots of luck and laughter!
Christa Patel is the creative mind behind the Secret Yarnery, a trusted resource for crochet enthusiasts worldwide. With years of experience, Christa specializes in designing beginner-friendly yet stunning crochet patterns that inspire creativity and confidence in crafters of all skill levels.
As a passionate crocheter, Christa is known for her clear and approachable teaching style, breaking down complex patterns into simple, easy-to-follow steps. Through her engaging video tutorials, written patterns, and helpful tips, she has cultivated a community where crocheters can connect, learn, and share their work.
Christa’s dedication to making crochet fun and accessible shines in every project she creates, from colorful blankets to intricate borders. Whether you’re a seasoned expert or just picking up a hook for the first time, Christa's guidance will help you craft something beautiful.
For more crochet patterns, tips, and inspiration, visit her website at The Secret Yarnery, or check out her YouTube channel filled with step-by-step tutorials.
About the Author
With a passion for crafting easy, beginner-friendly tutorials and patterns, Christa inspires crafters of all skill levels to unleash their creativity worldwide. She encourages yarn lovers to connect, create, and crochet a world filled with beautiful handmade treasures!
How to Crochet a Christmas Pickle: The Perfect Holiday Tradition